The Easiest Way to Learn Crochet (Start With a Granny Square)
So you want to learn how to crochet, and you don’t know where to start? If you’ve searched “how to crochet,” you’ve probably found tutorials telling you to memorize hook sizes, yarn weights, and a dozen stitches before you even make your first project.
And I know those crochet kits can come off like they are made for beginners, but sometimes they add an extra layer of difficulty that actually just makes you never want to see a ball of yarn again.
I learned how to crochet over 20 years ago, and over the years, I’ve made everything from blankets to wearables, and even designing my own patterns. Looking back, I’m convinced I stuck with crochet because I started with one simple project instead of trying to memorize everything first.
In this blog, I’m going to teach you exactly where I started with crochet, and why this starting point will actually keep you motivated and not discouraged. So, what’s the secret? Start with a granny square!
The Granny Square
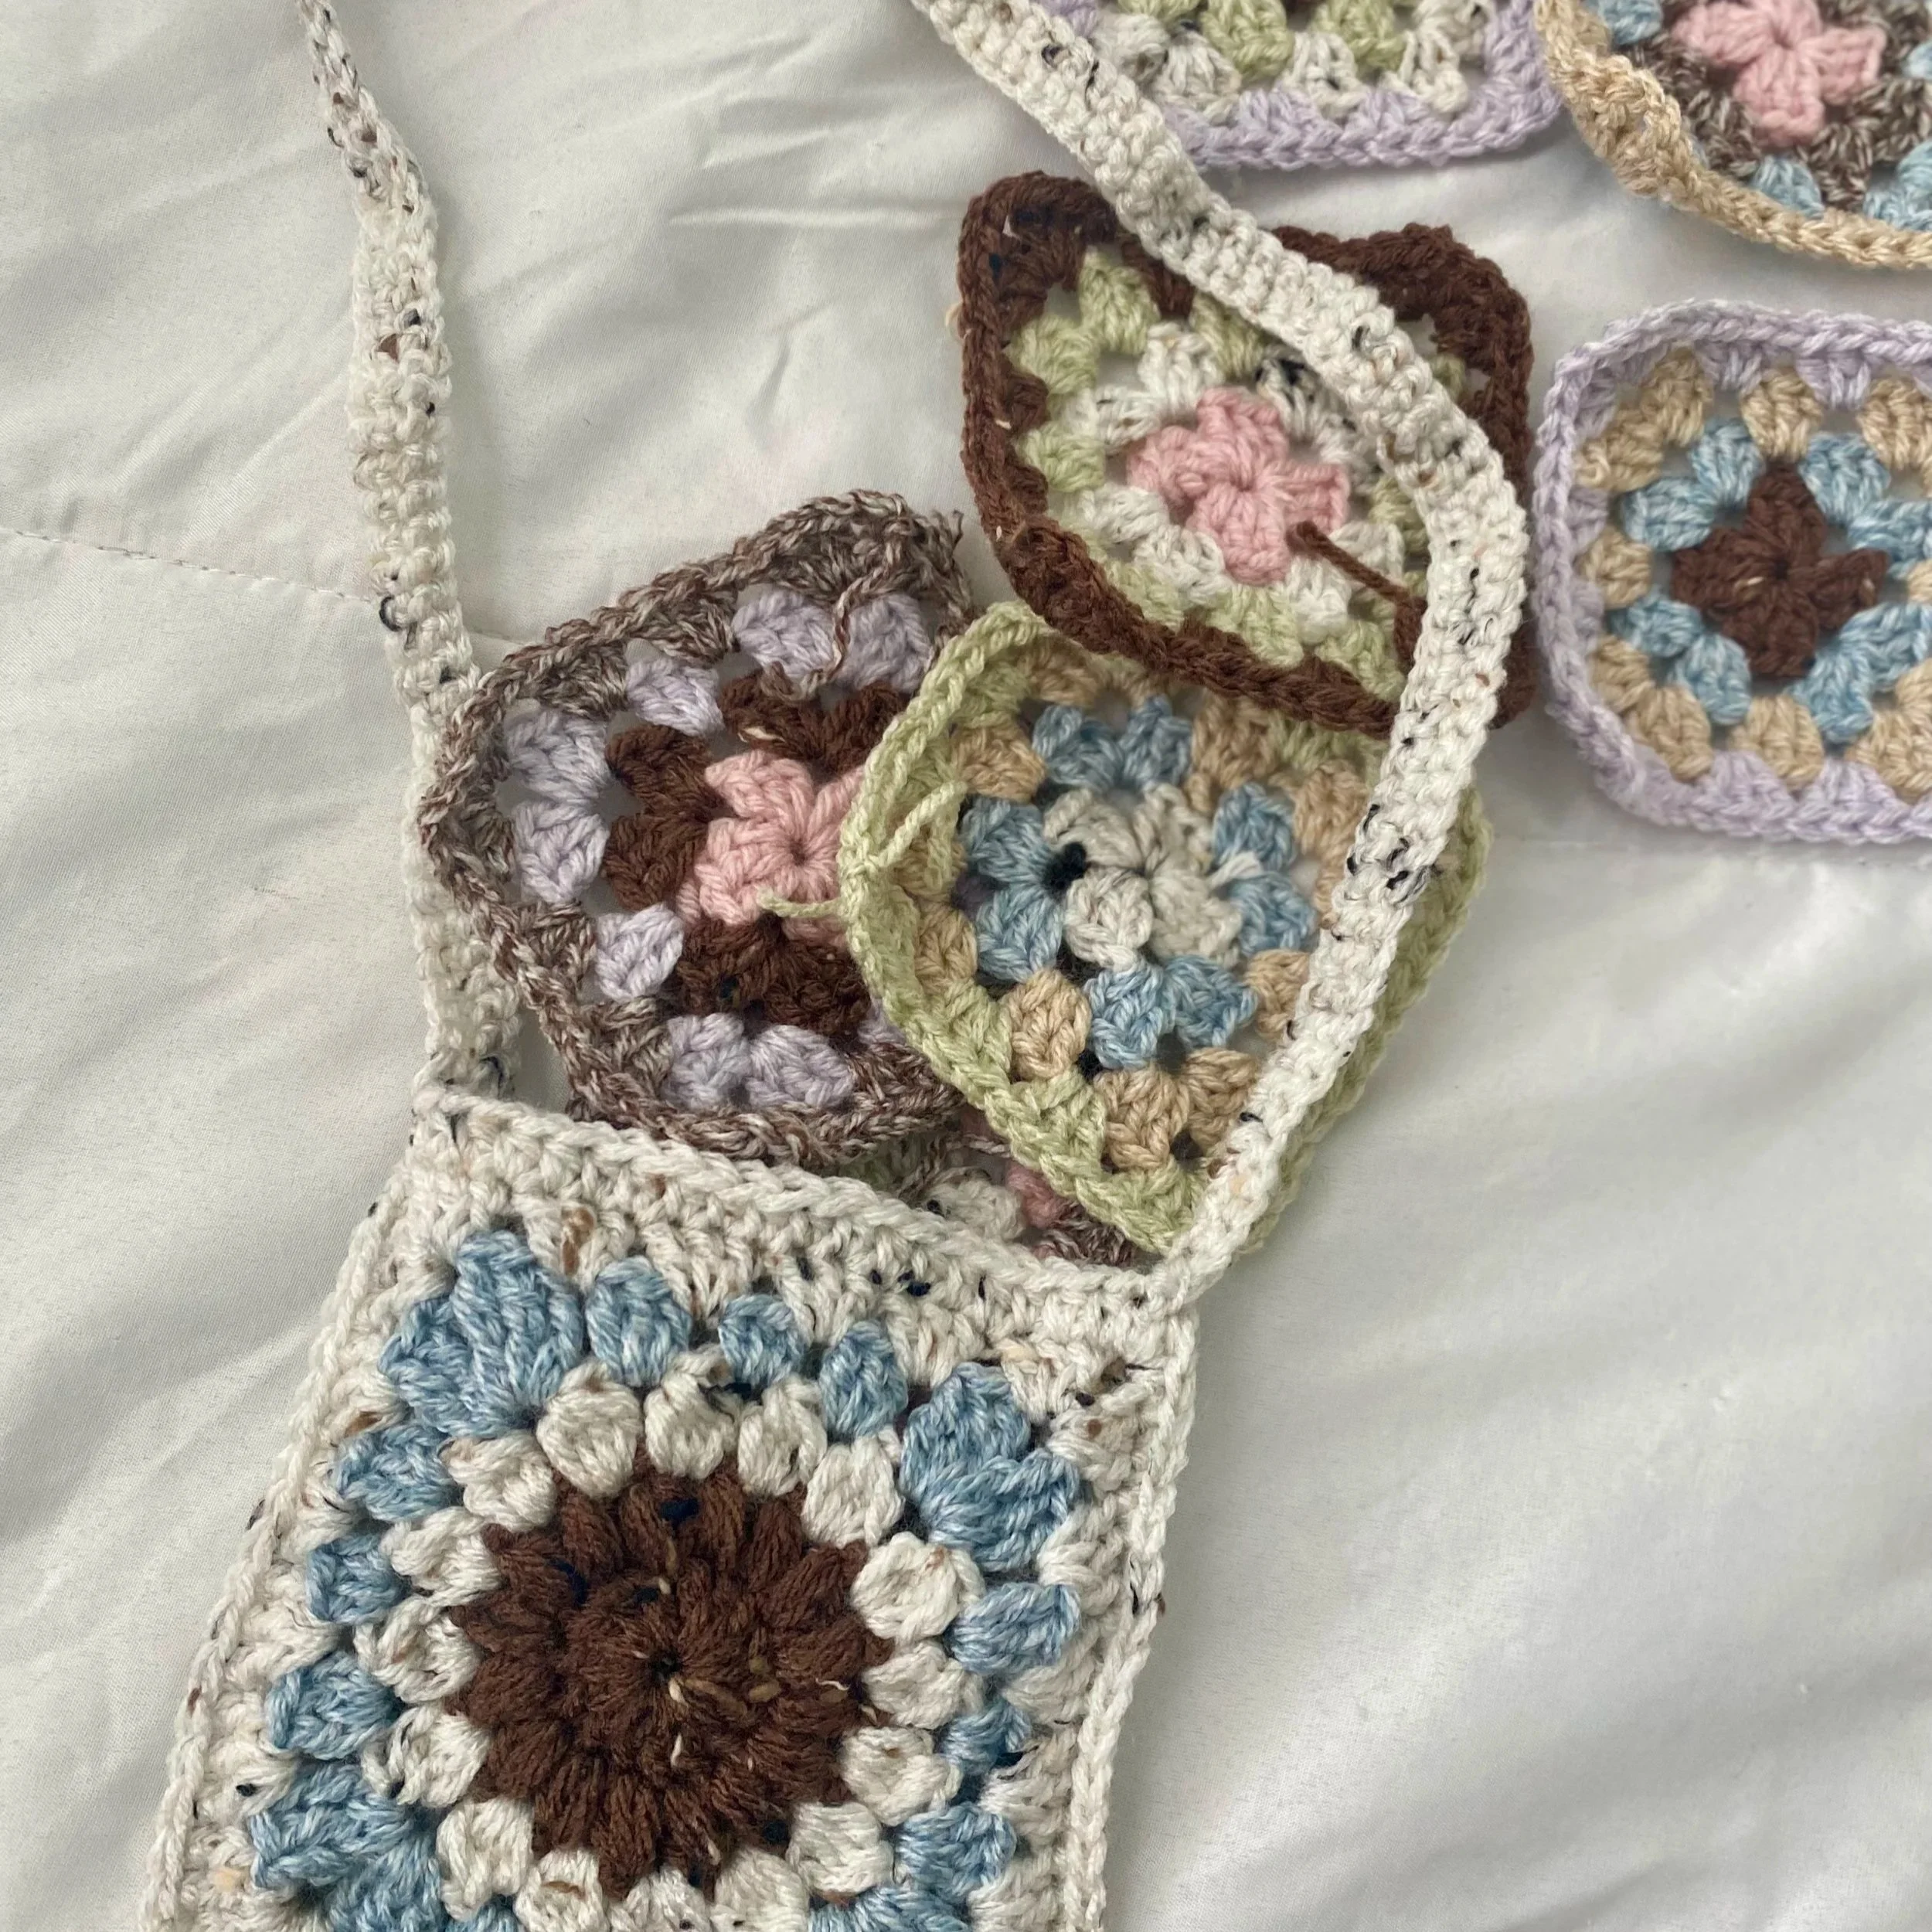
sunburst granny square bag with multicolored granny squares coming out of it
So, why start with a granny square? Here are the main reasons:
Granny squares are easy to make, and they are highly customizable.
The stitches are repetitive, which will help you build the skill set through muscle memory.
Each granny square can be its own project.
You can make so many things using just granny Squares!
Materials
So, how do you make a granny square? Now this is the part where most teachers might overwhelm you with hook sizes and yarn weights, but I’m just going to tell you exactly what to get up front. Here’s what I recommend:
Crochet hook size between 4.5 mm - 6.0 mm
This is the easiest size crochet hook to grip for a beginner. Just note, the smaller the hook, the tighter the stitches.
Some crochet hooks are sized using letters. The corresponding letters for these sizes are G (4.5 mm) H (5.0 mm), I (5.5 mm), and J (6.0 mm).
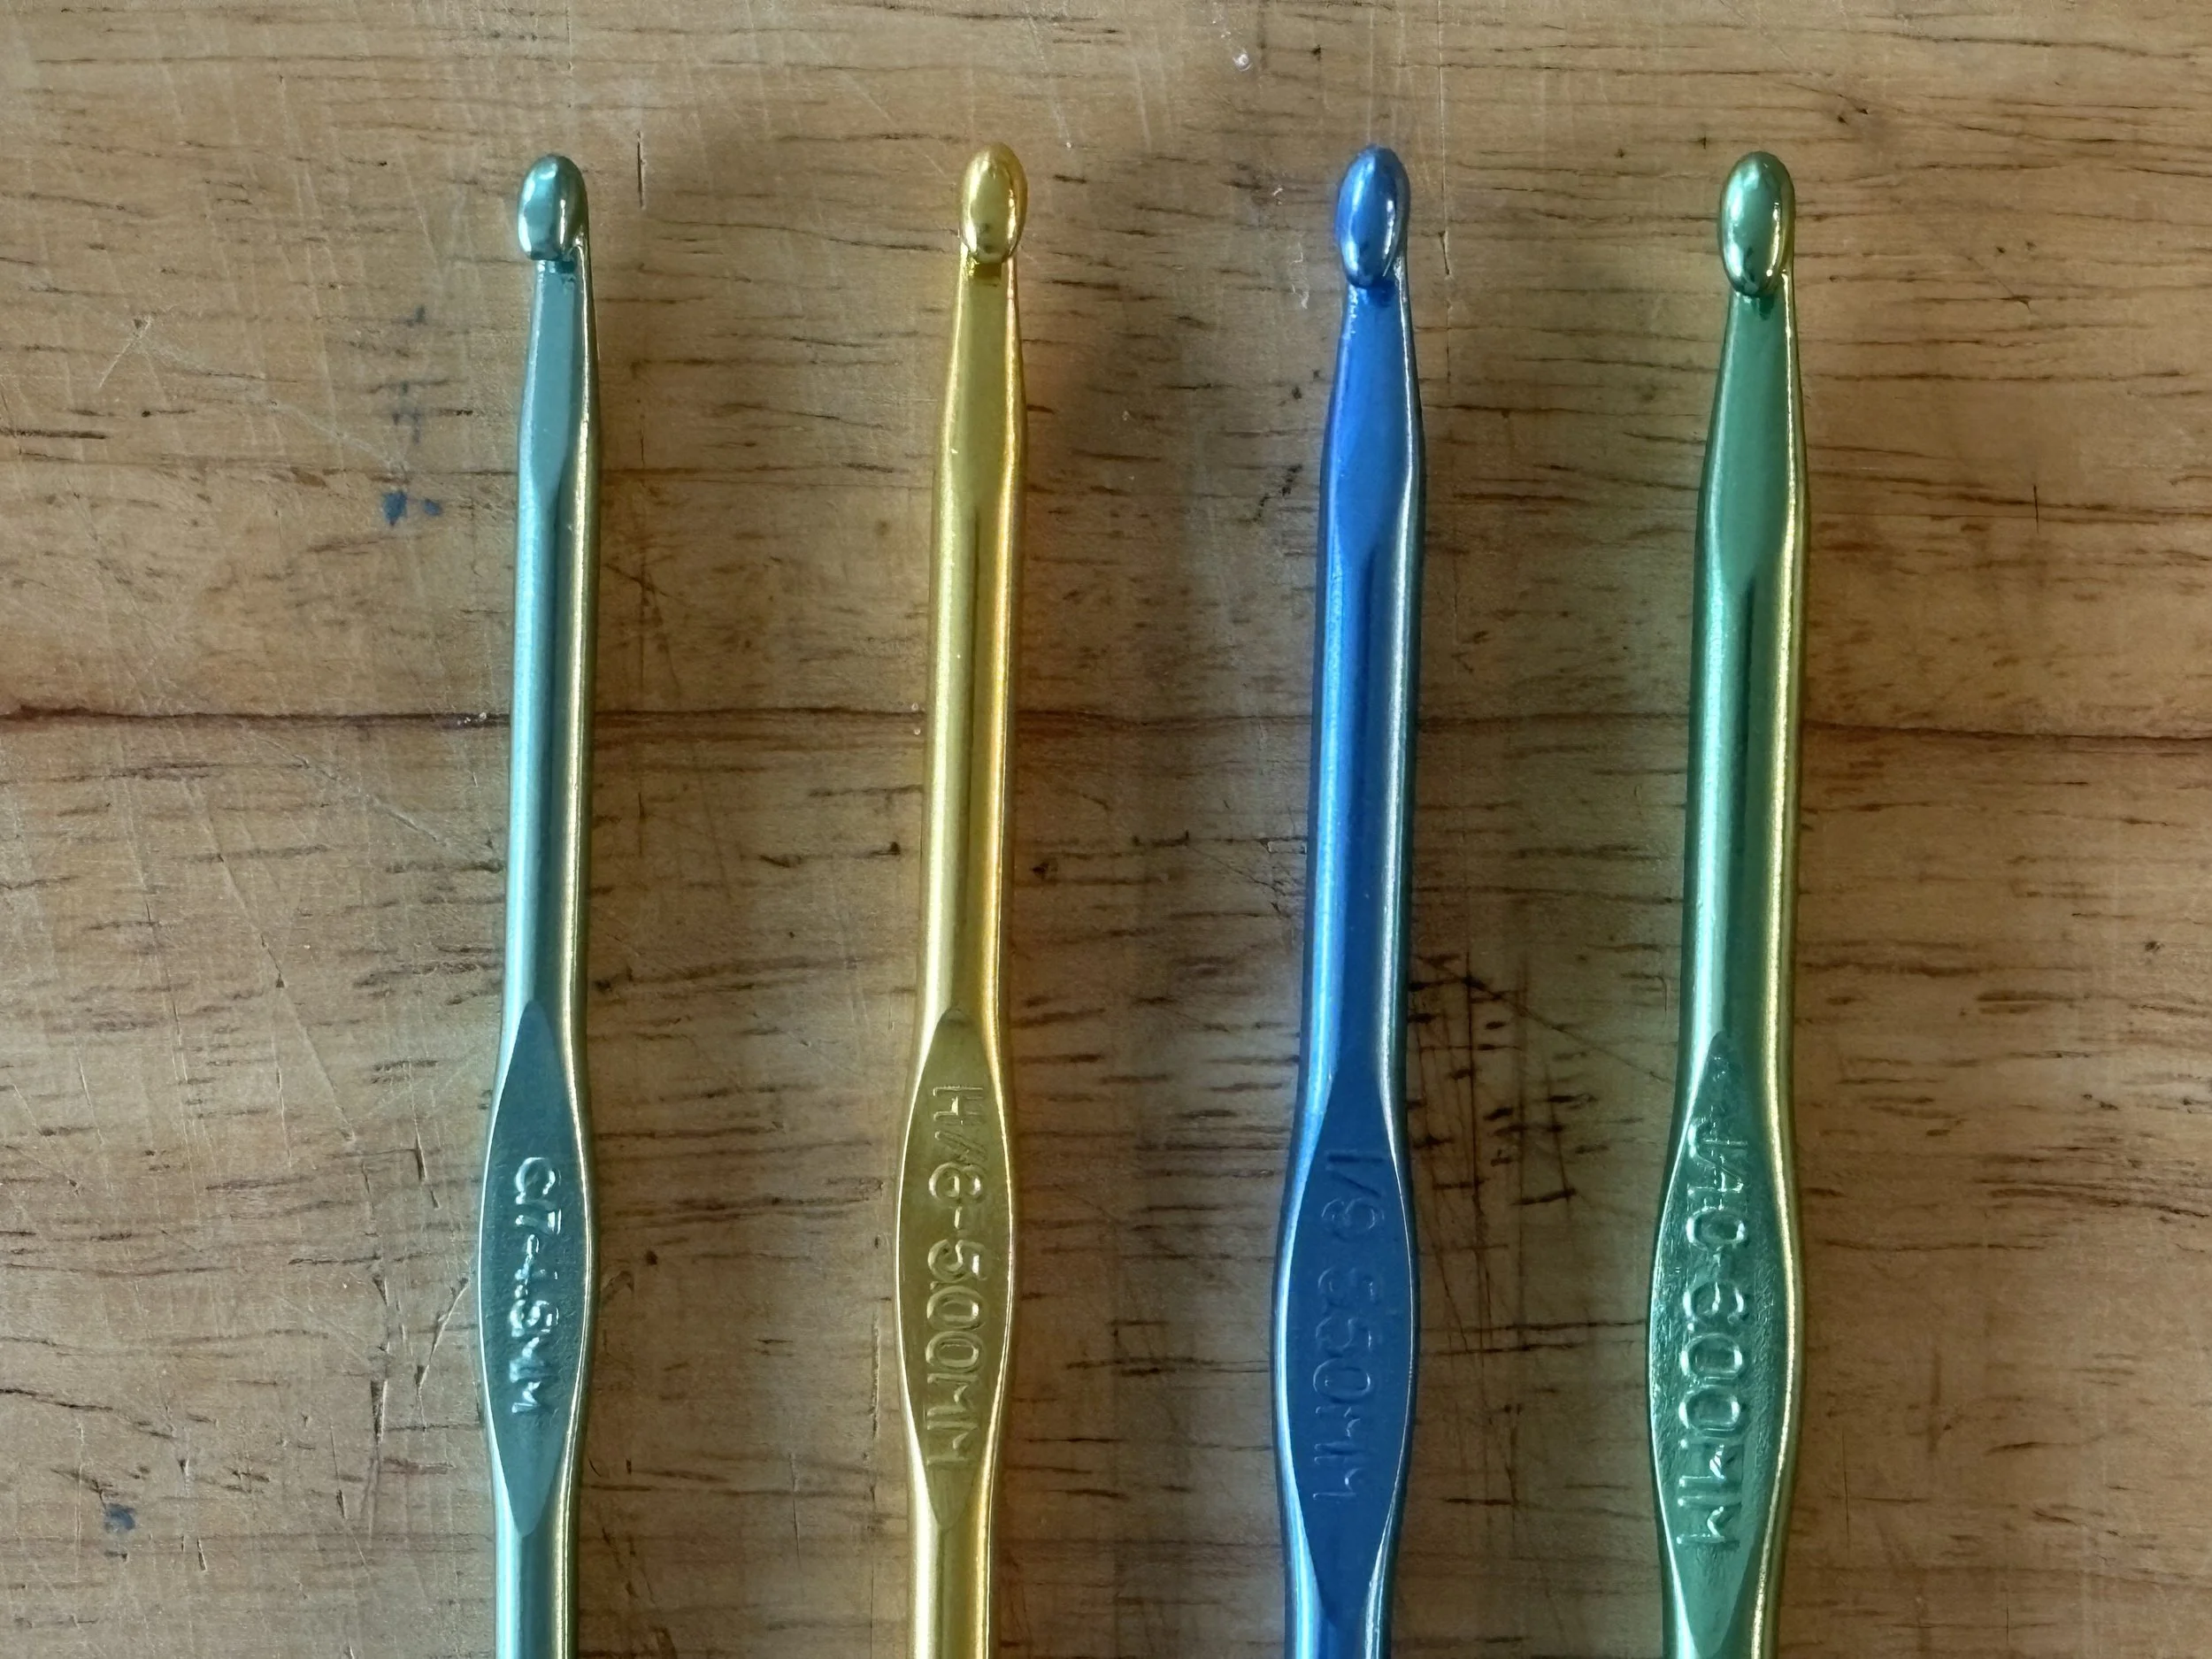
crochet hook sizes left to right: G - 4.5 mm, H - 5.0 mm, I - 5.5 mm, J- 6.0 mm
Yarn size 4, or “worsted weight”
This is the yarn size that best corresponds with the hook sizes 4.5 mm - 6.0 mm.
This is also the most commonly found size of yarn.
It comes in many different colors, and almost every yarn brand produces this size.
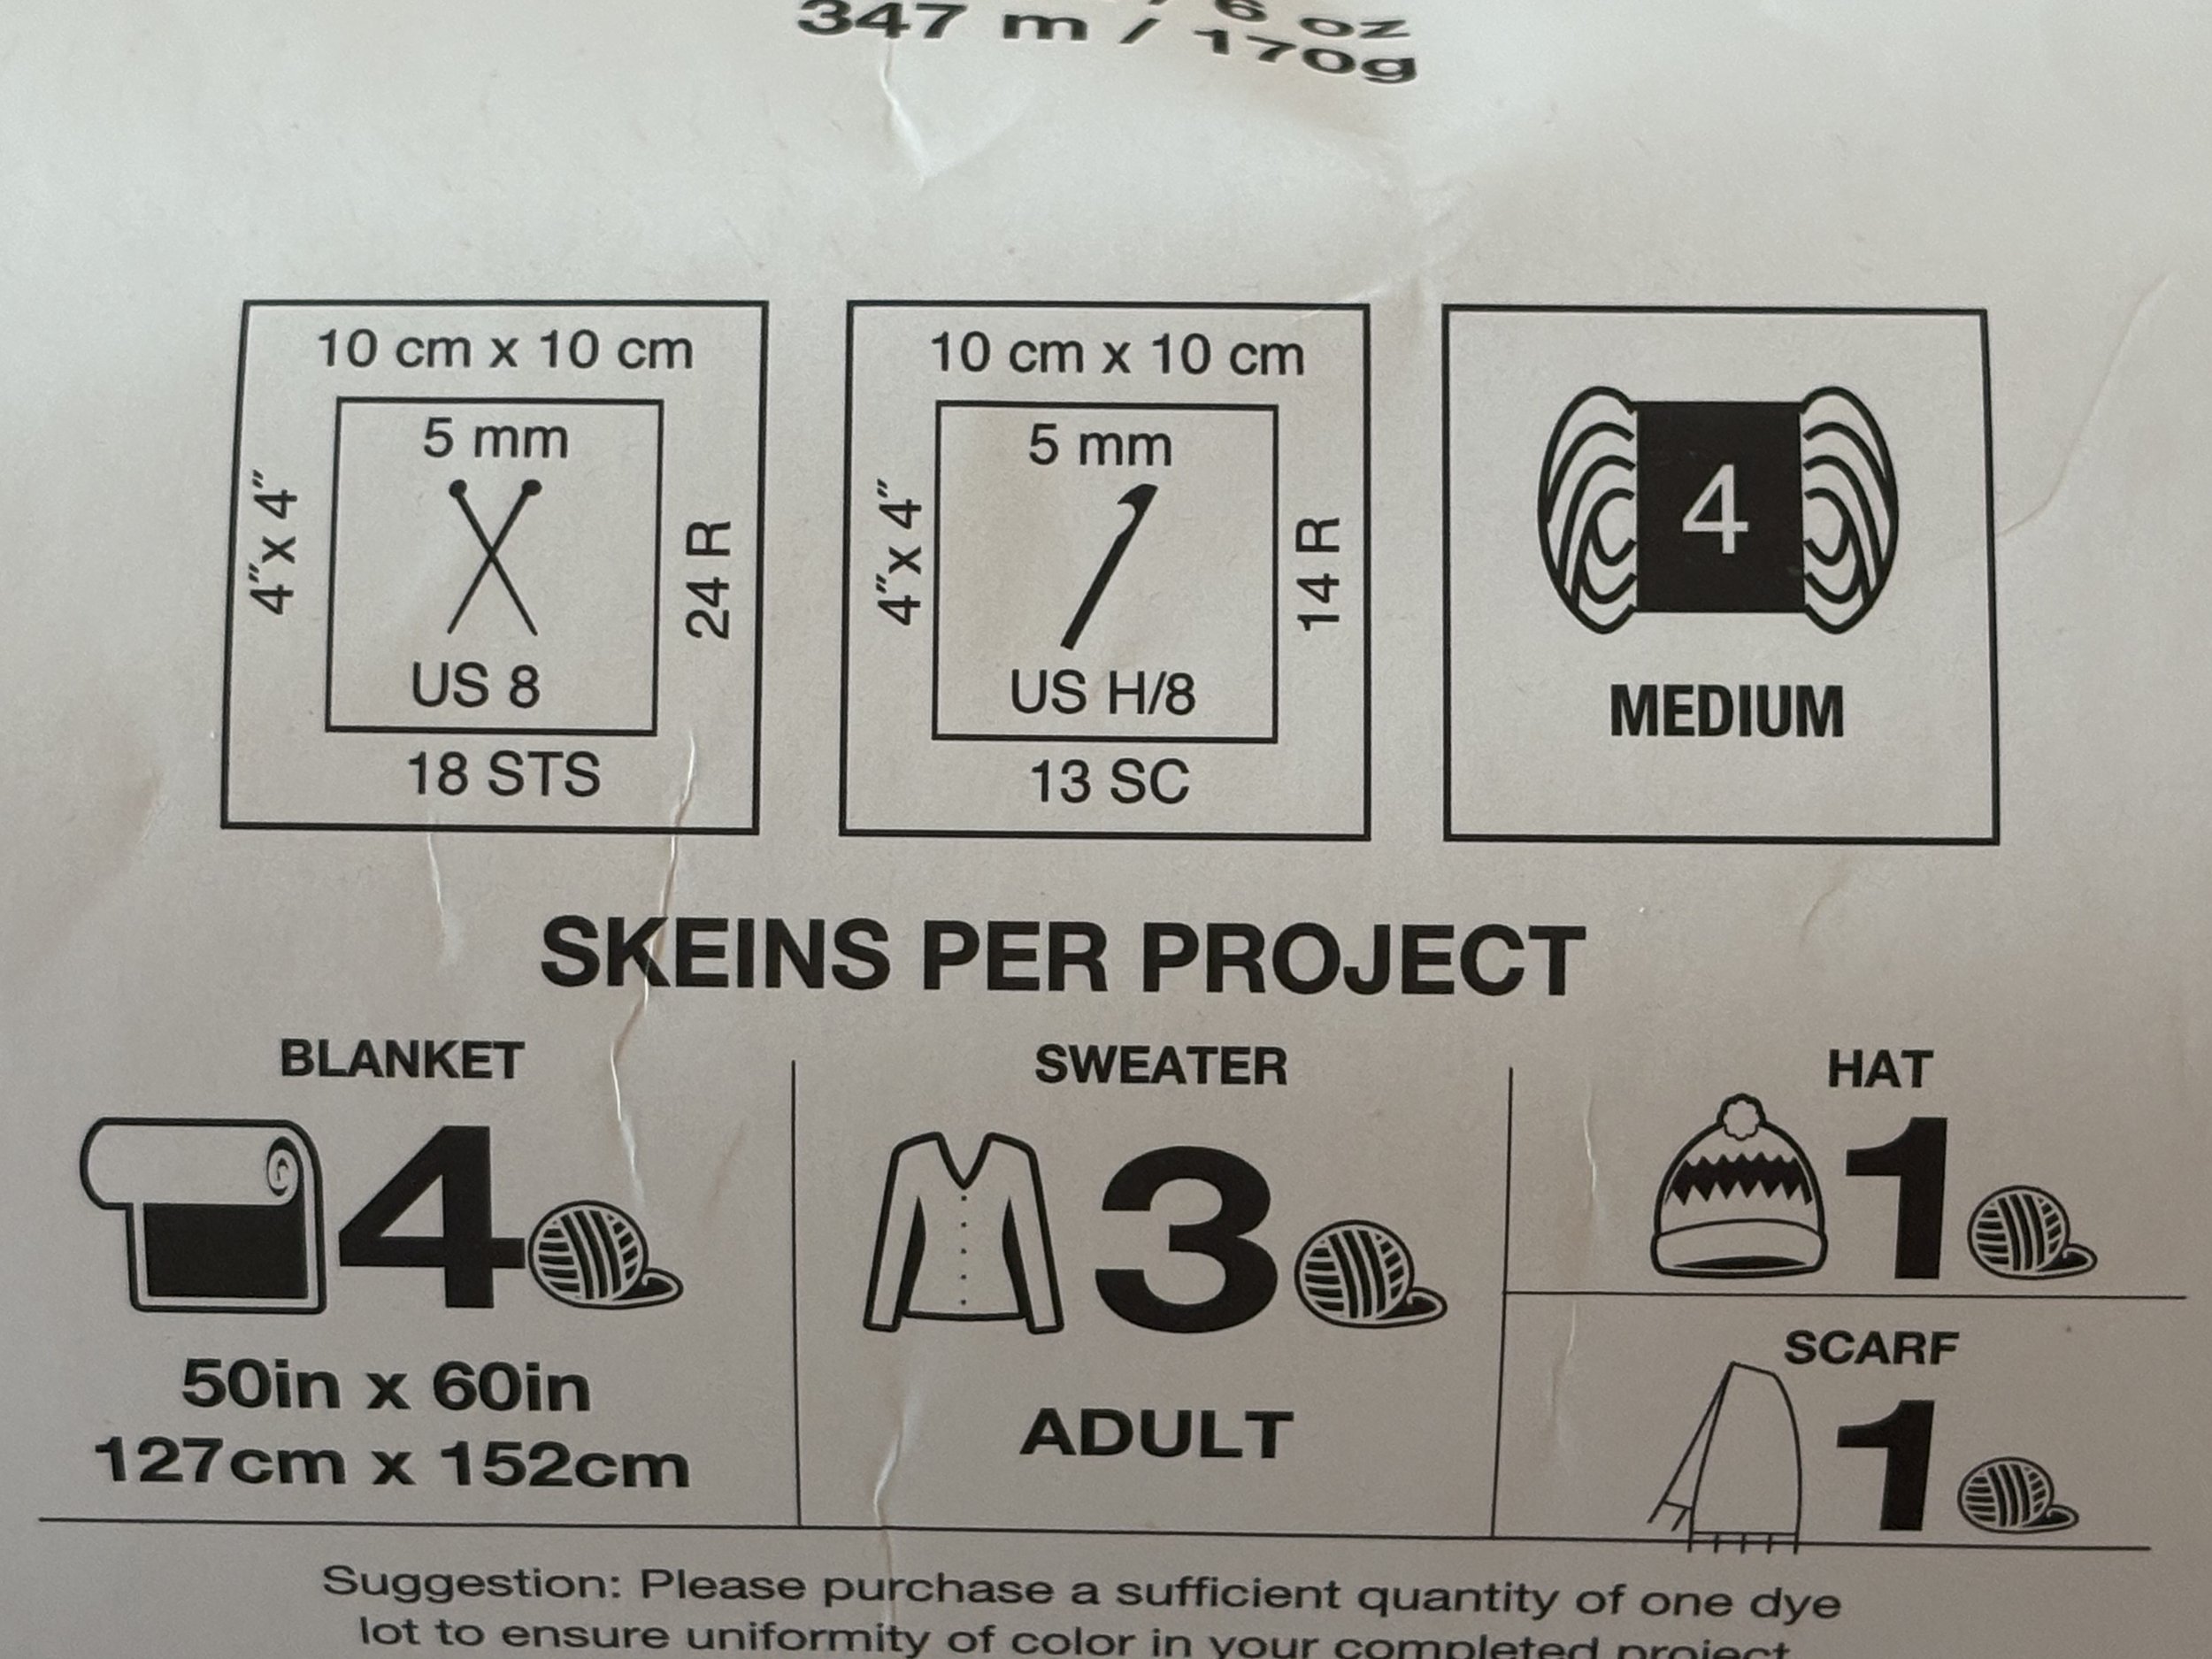
All yarn labels will list the “size” of the yarn. This yarn pictured is a size 4 or medium weight yarn. Every yarn will also have a recommended hook size to go along with the yarn, in this case 5 mm or H.
I would recommend that you pick a yarn color that you like, but stay away from the colors black or white, as those colors are a little more difficult to see when working with them.
The only other materials you will need are a pair of scissors. There are special scissors specifically for yarn, but any pair will do.
Now that you’ve gathered all your supplies, let’s start learning how to crochet your first granny square!
Overview
Skill level: Beginner
Time: 30-60 minutes (depending on final size)
Materials: Size H-J hook (4.5 mm - 6.0 mm), worsted weight yarn, scissors
Stitches used: Chain, Slip Stitch, Double Crochet
The Pattern
To start a granny square, you’re going to make a magic ring. There are many different ways to make a magic ring, but the easiest way is known as the “chain 4” method.
The Magic Ring
To start, make a slip knot [see images 1 - 4], and then place the slip knot on your hook.
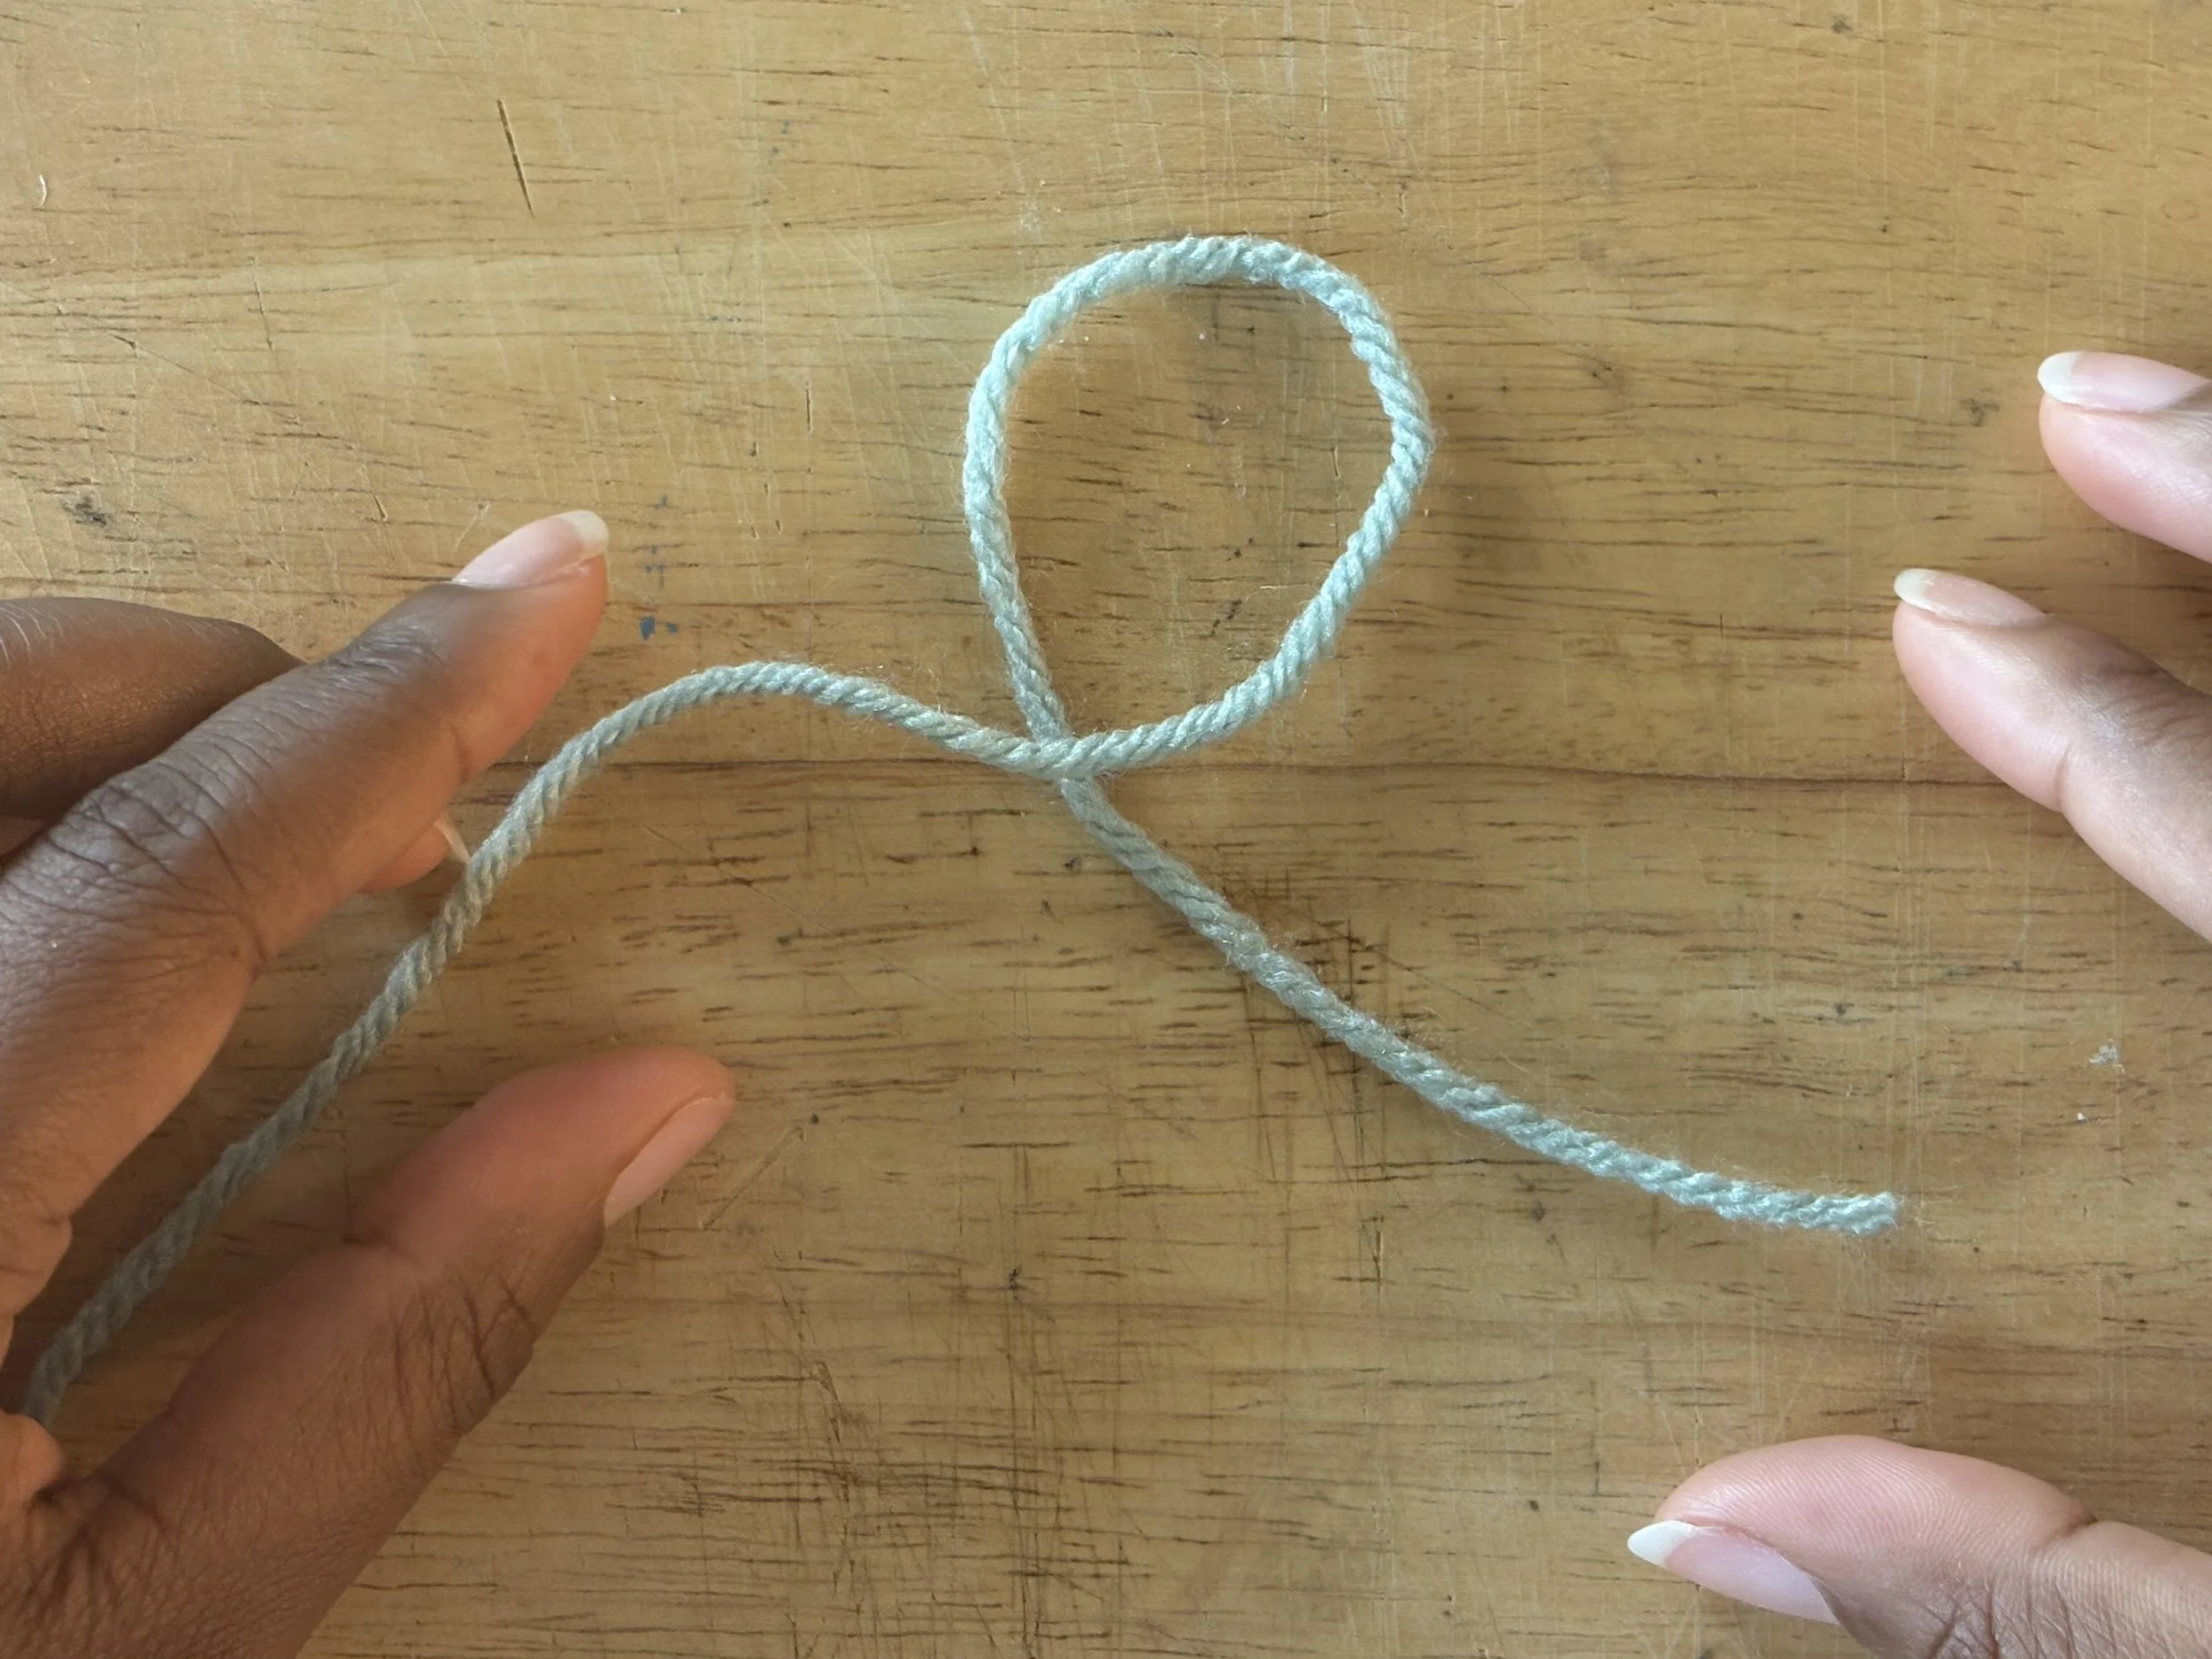
Image 1: Make a loop with your yarn, with the tail end under the working end.
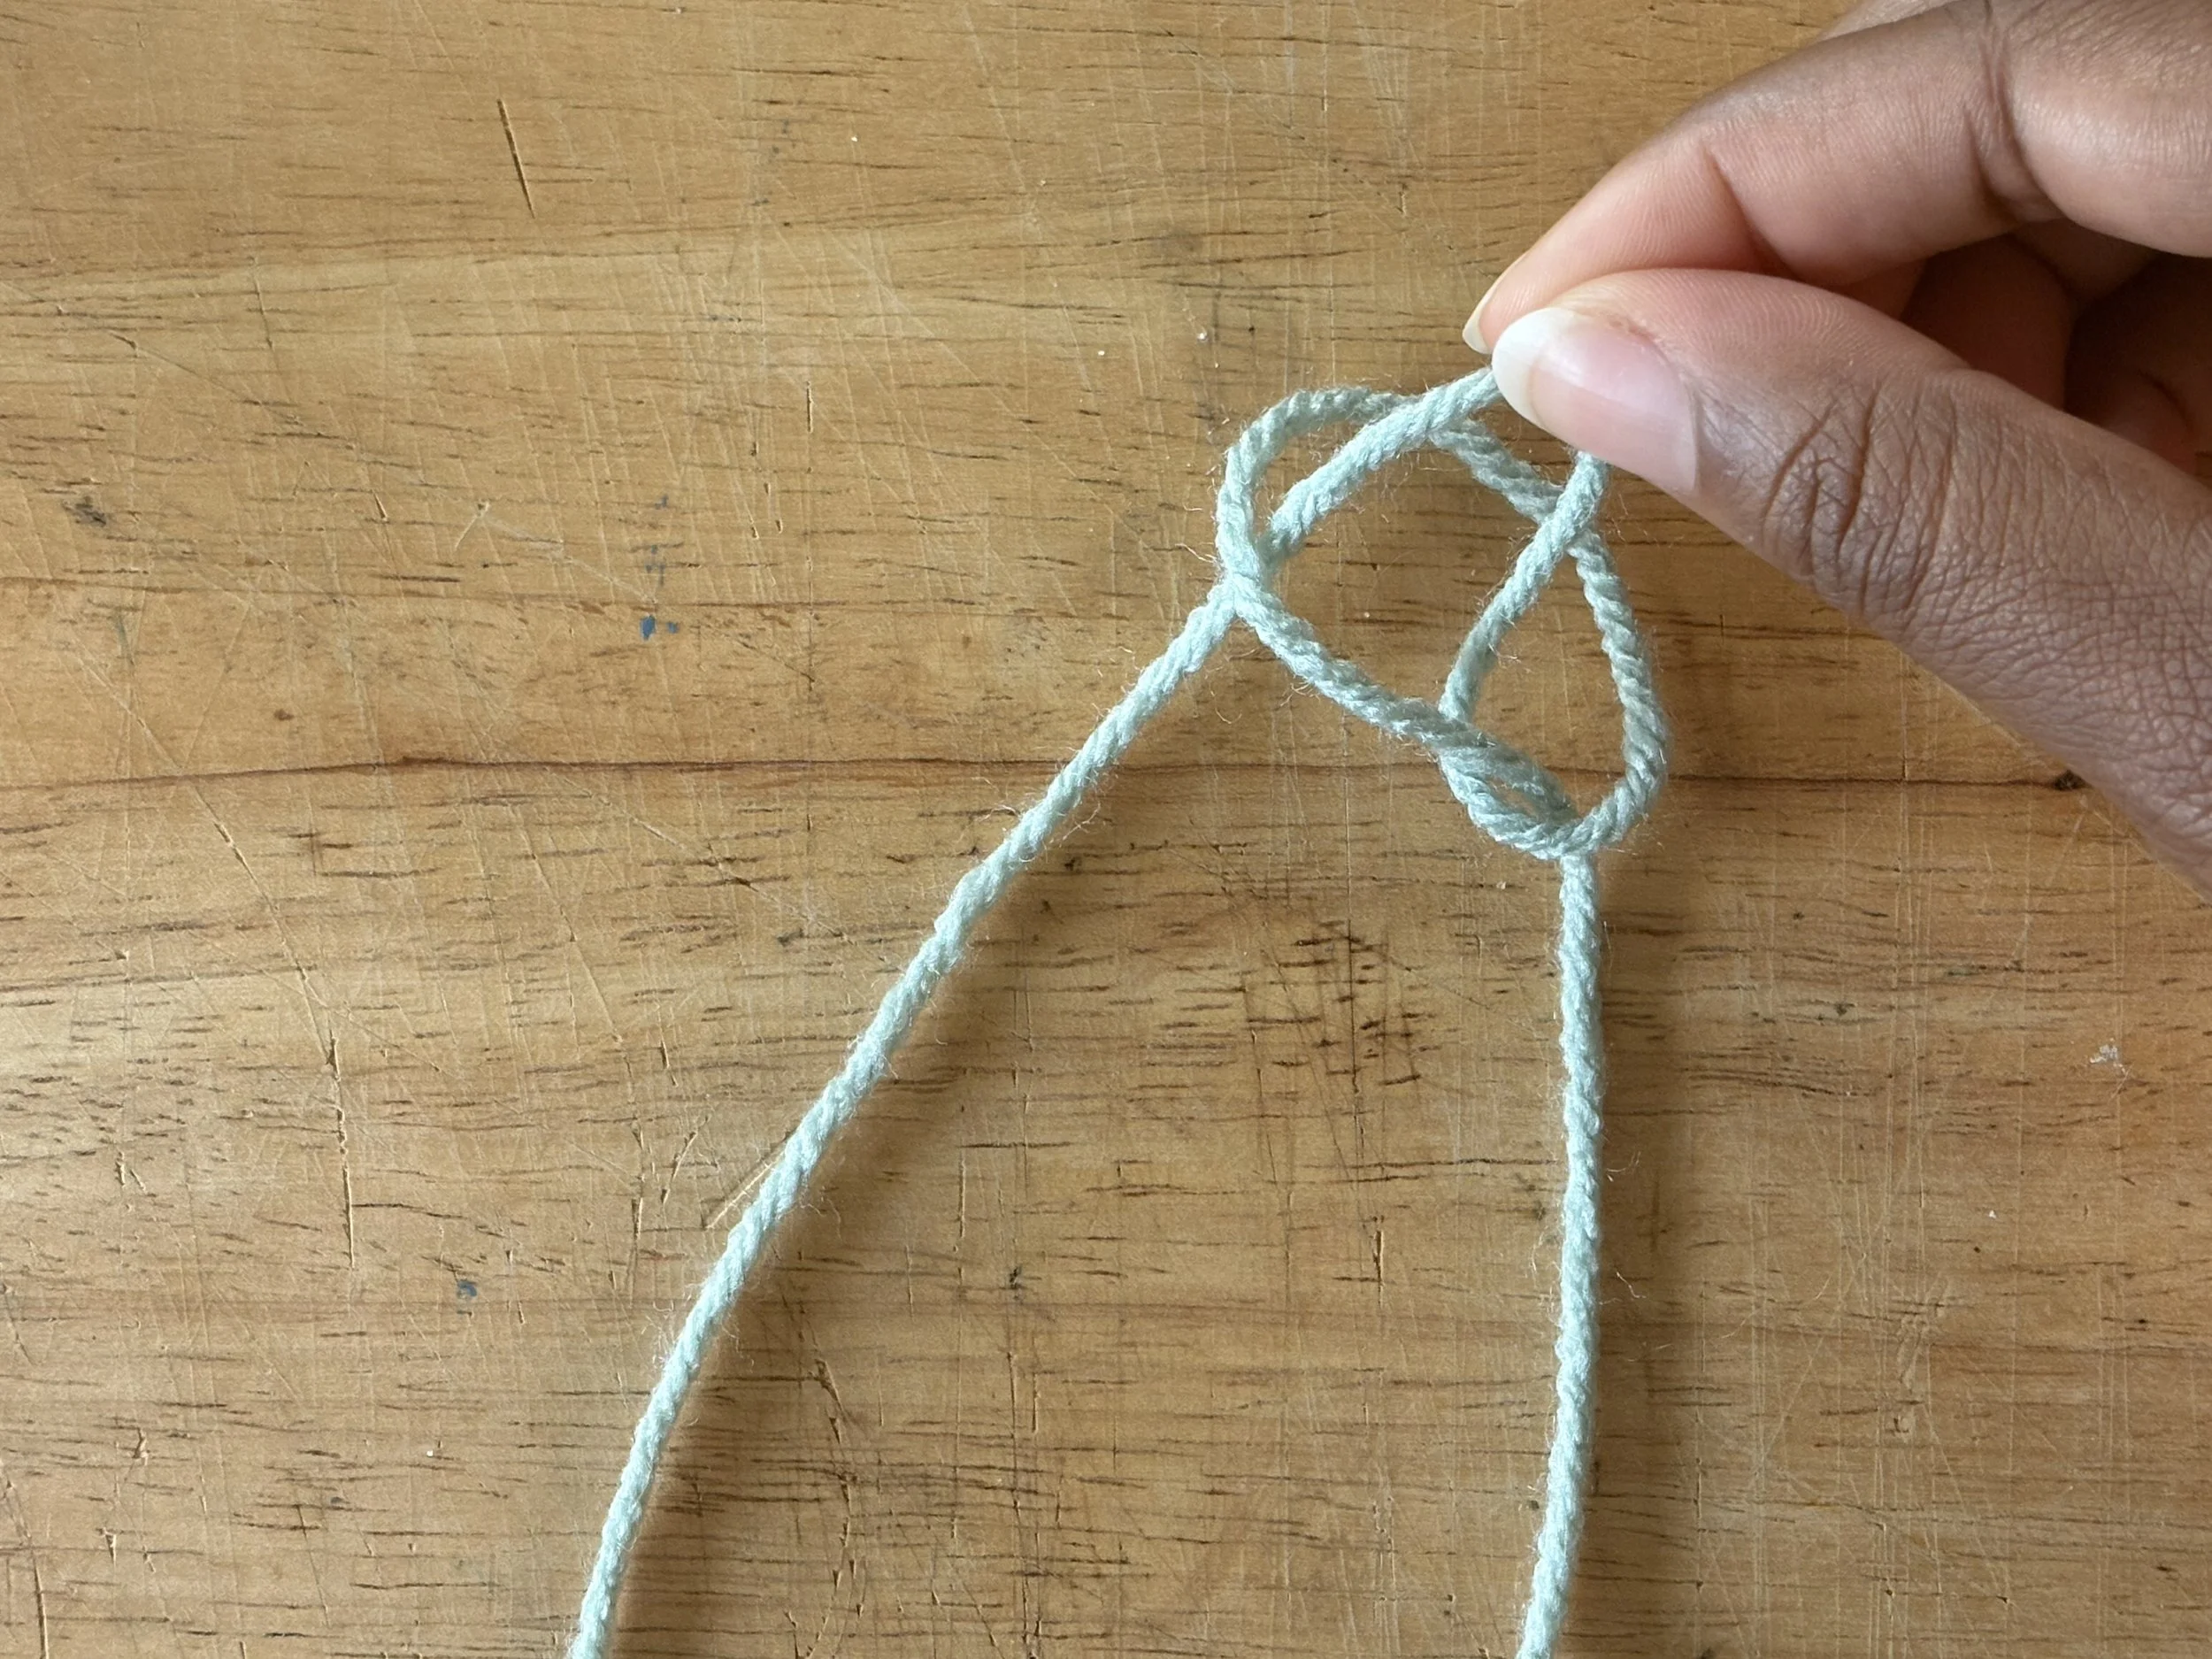
Image 2: Reach through your loop and pull up a loop from the working yarn.
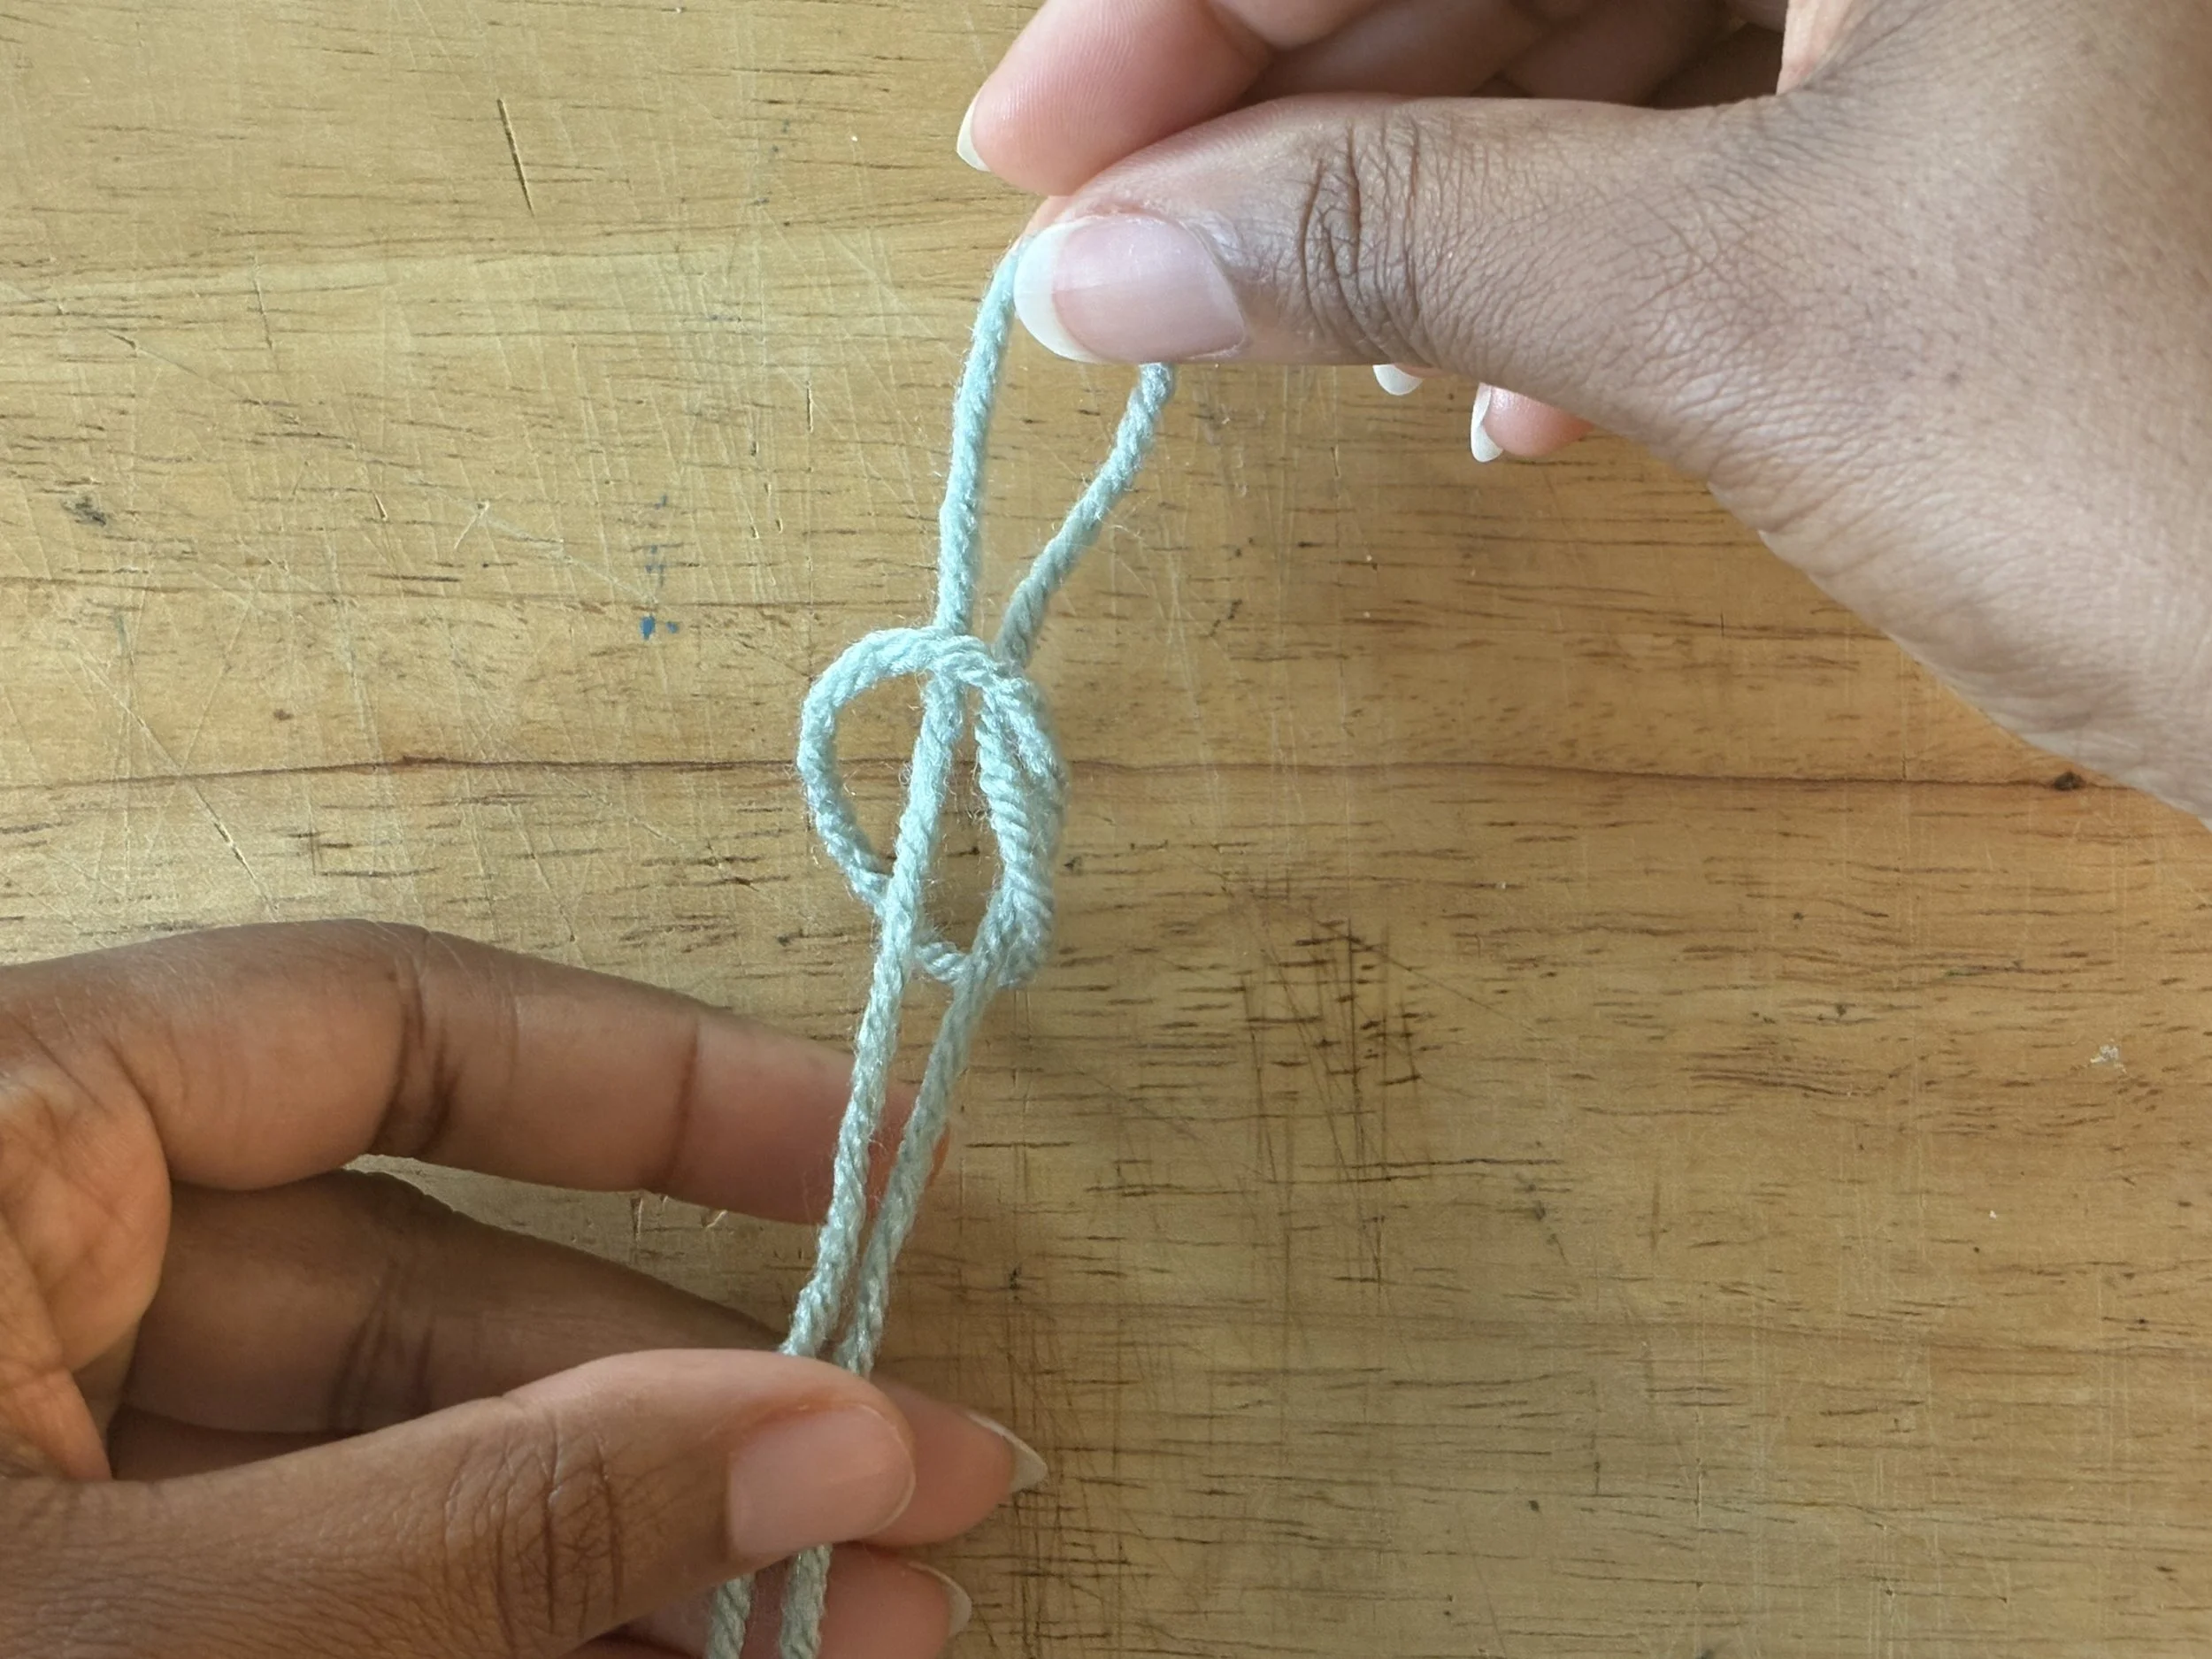
Image 3: Tighten the loop.
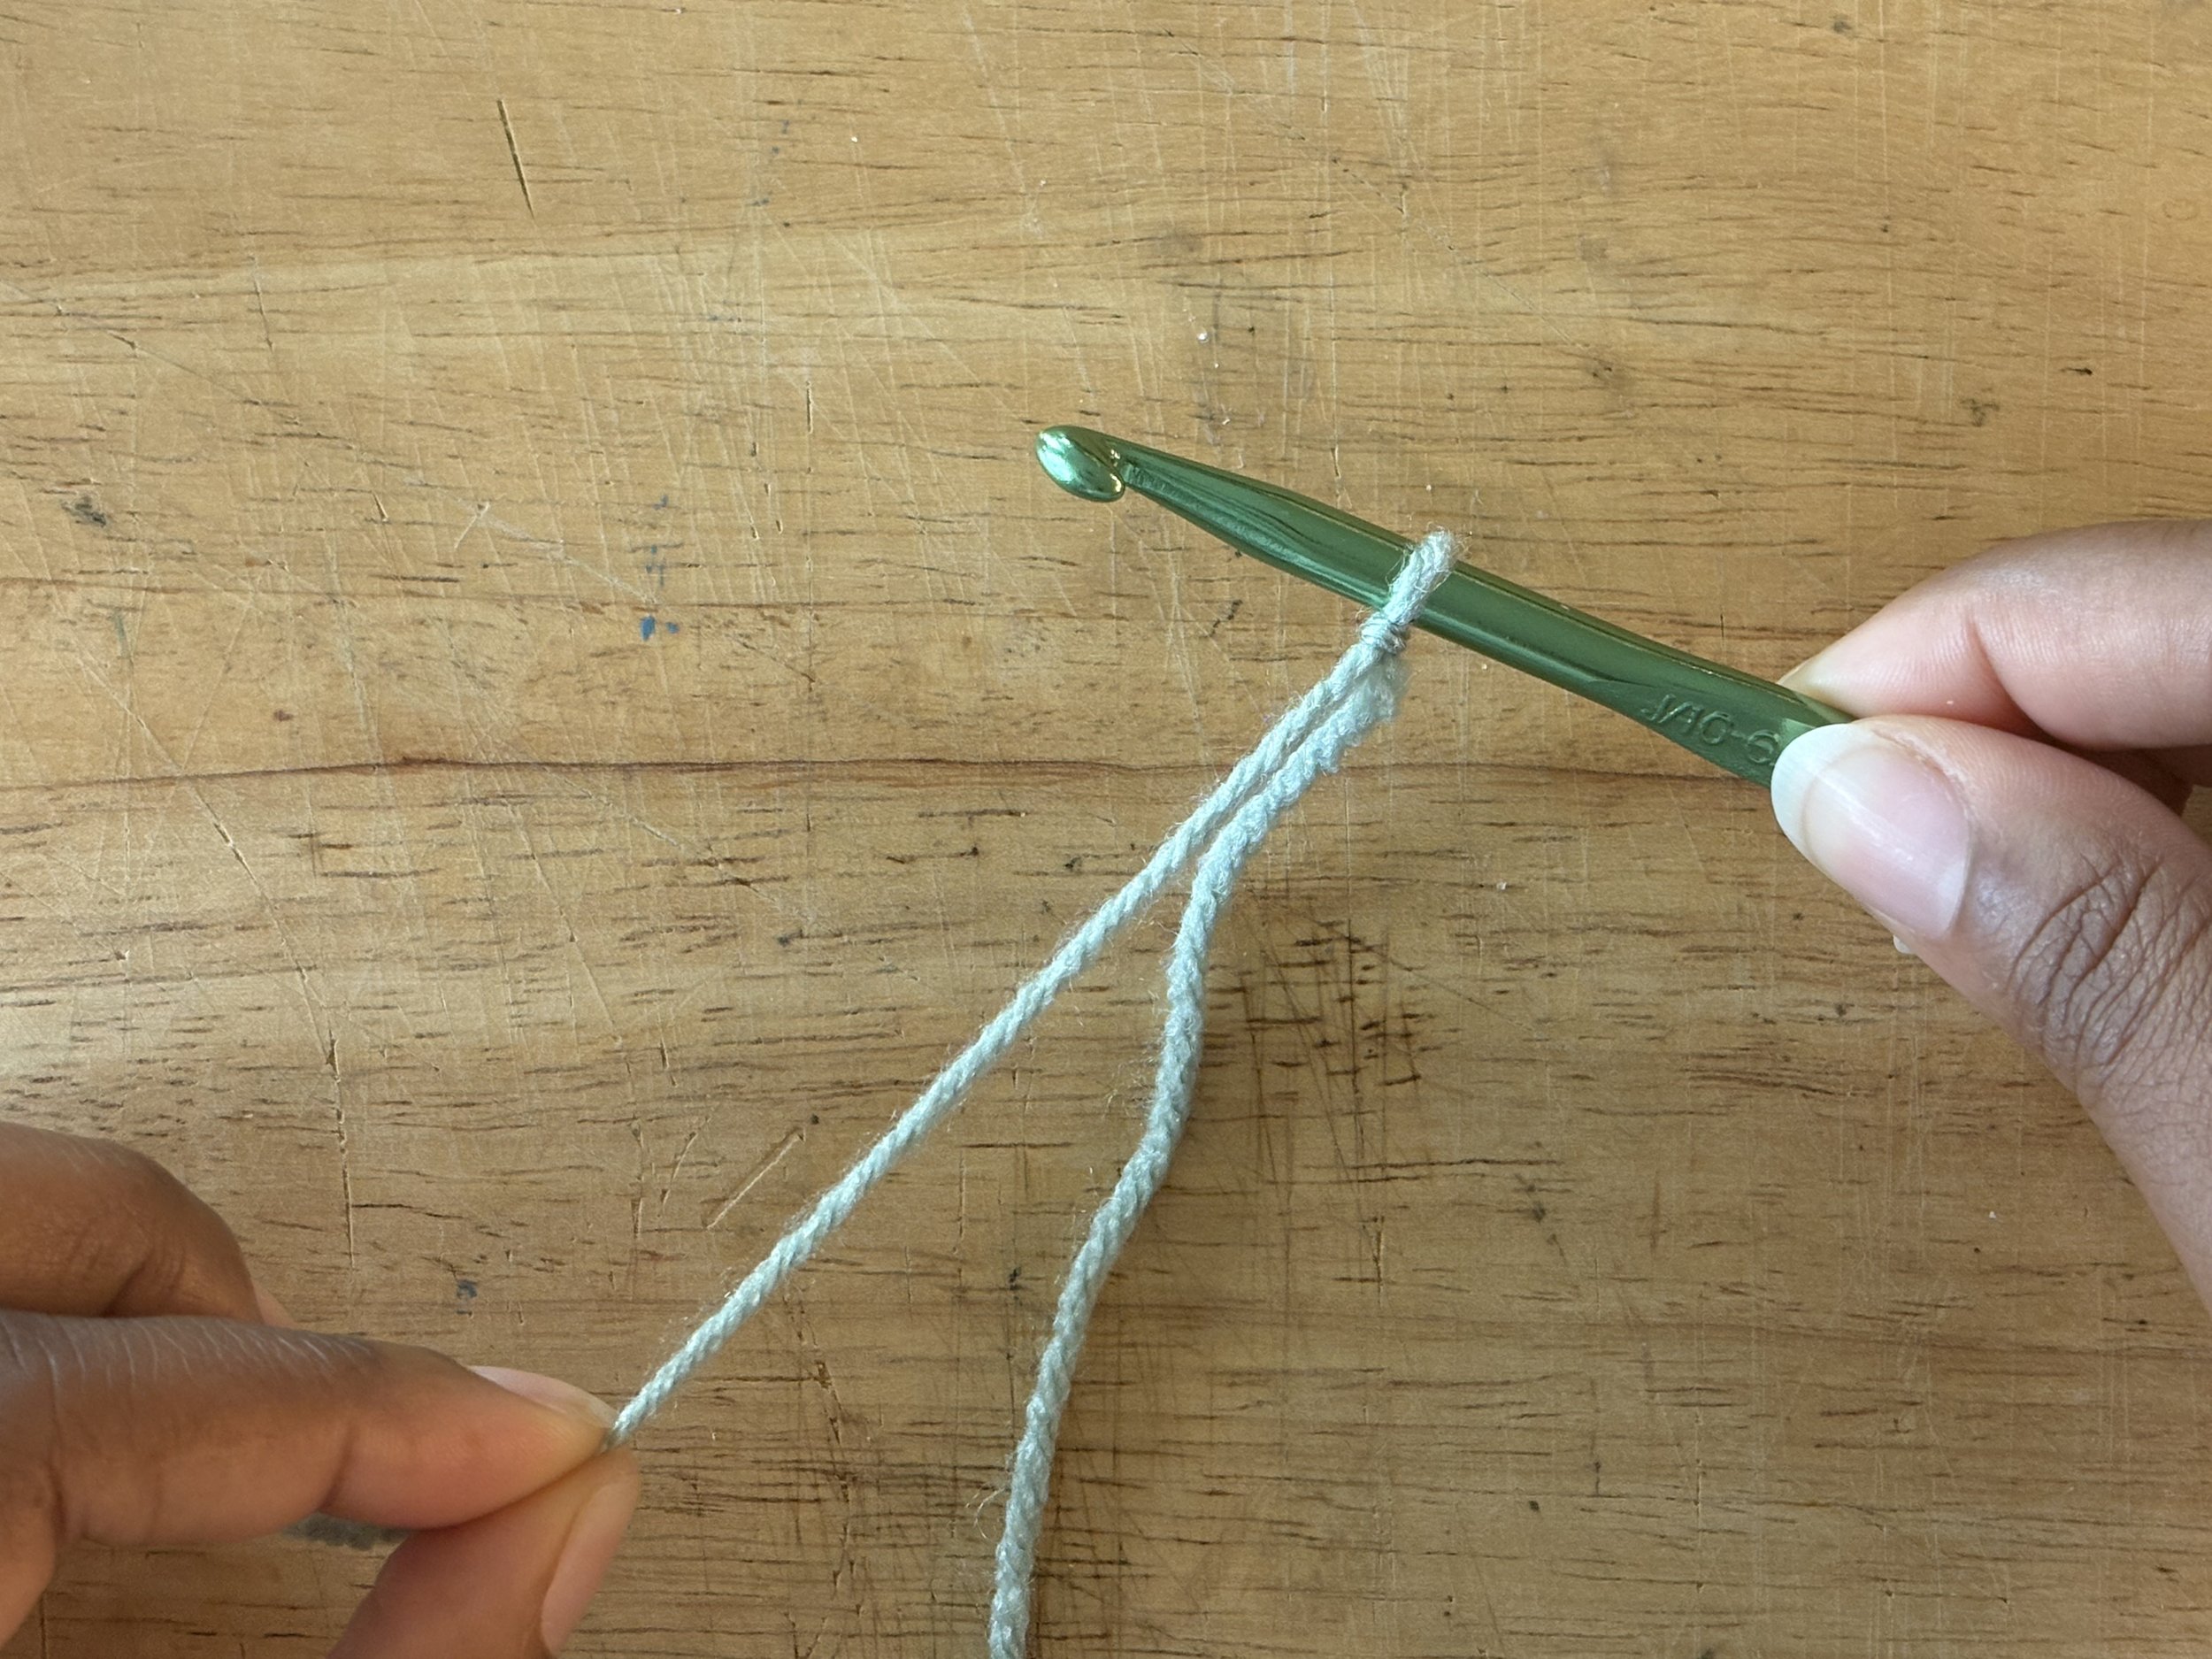
Image 4: Place the loop on your hook and tighten.
To make a chain stitch, you’re going to “yarn over (yo)”, which means to bring the yarn over the hook from back to front [see image 5-6]. Grab the yarn with the hook and pull it through the loop. This is your first “chain stitch (ch st)”! [see image 6-7].
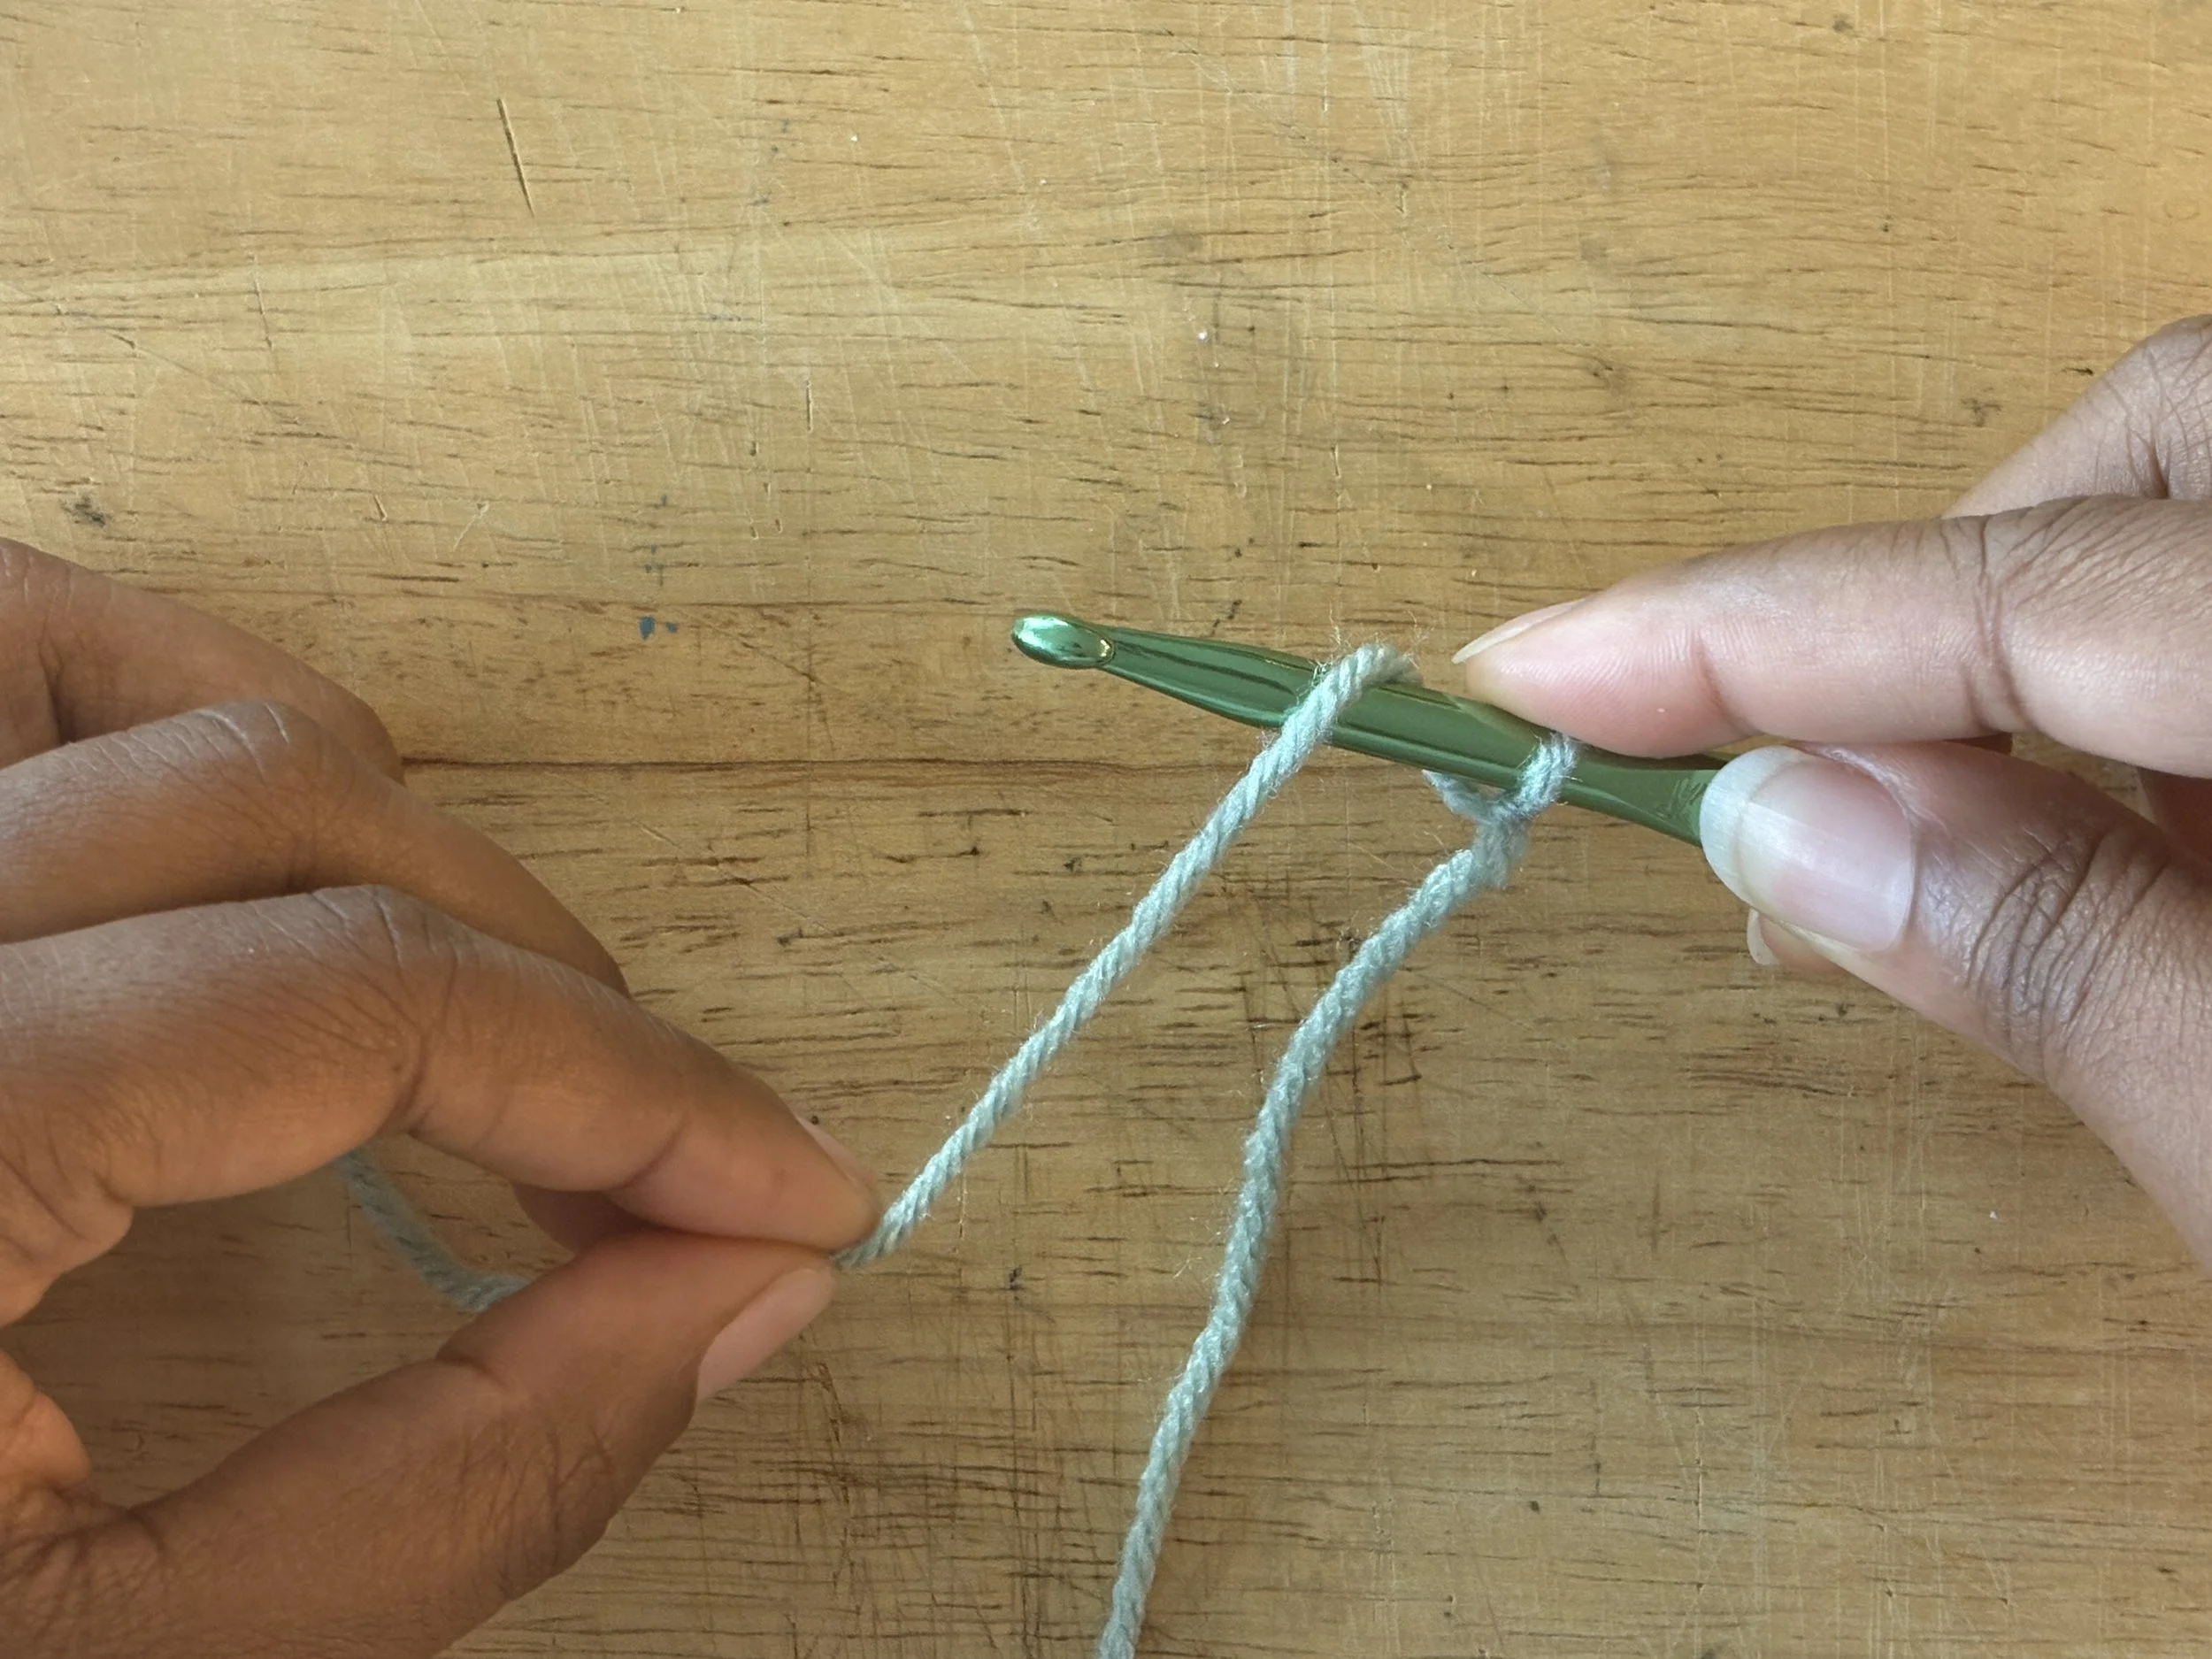
Image 5: Wrap the yarn around the hook towards you.
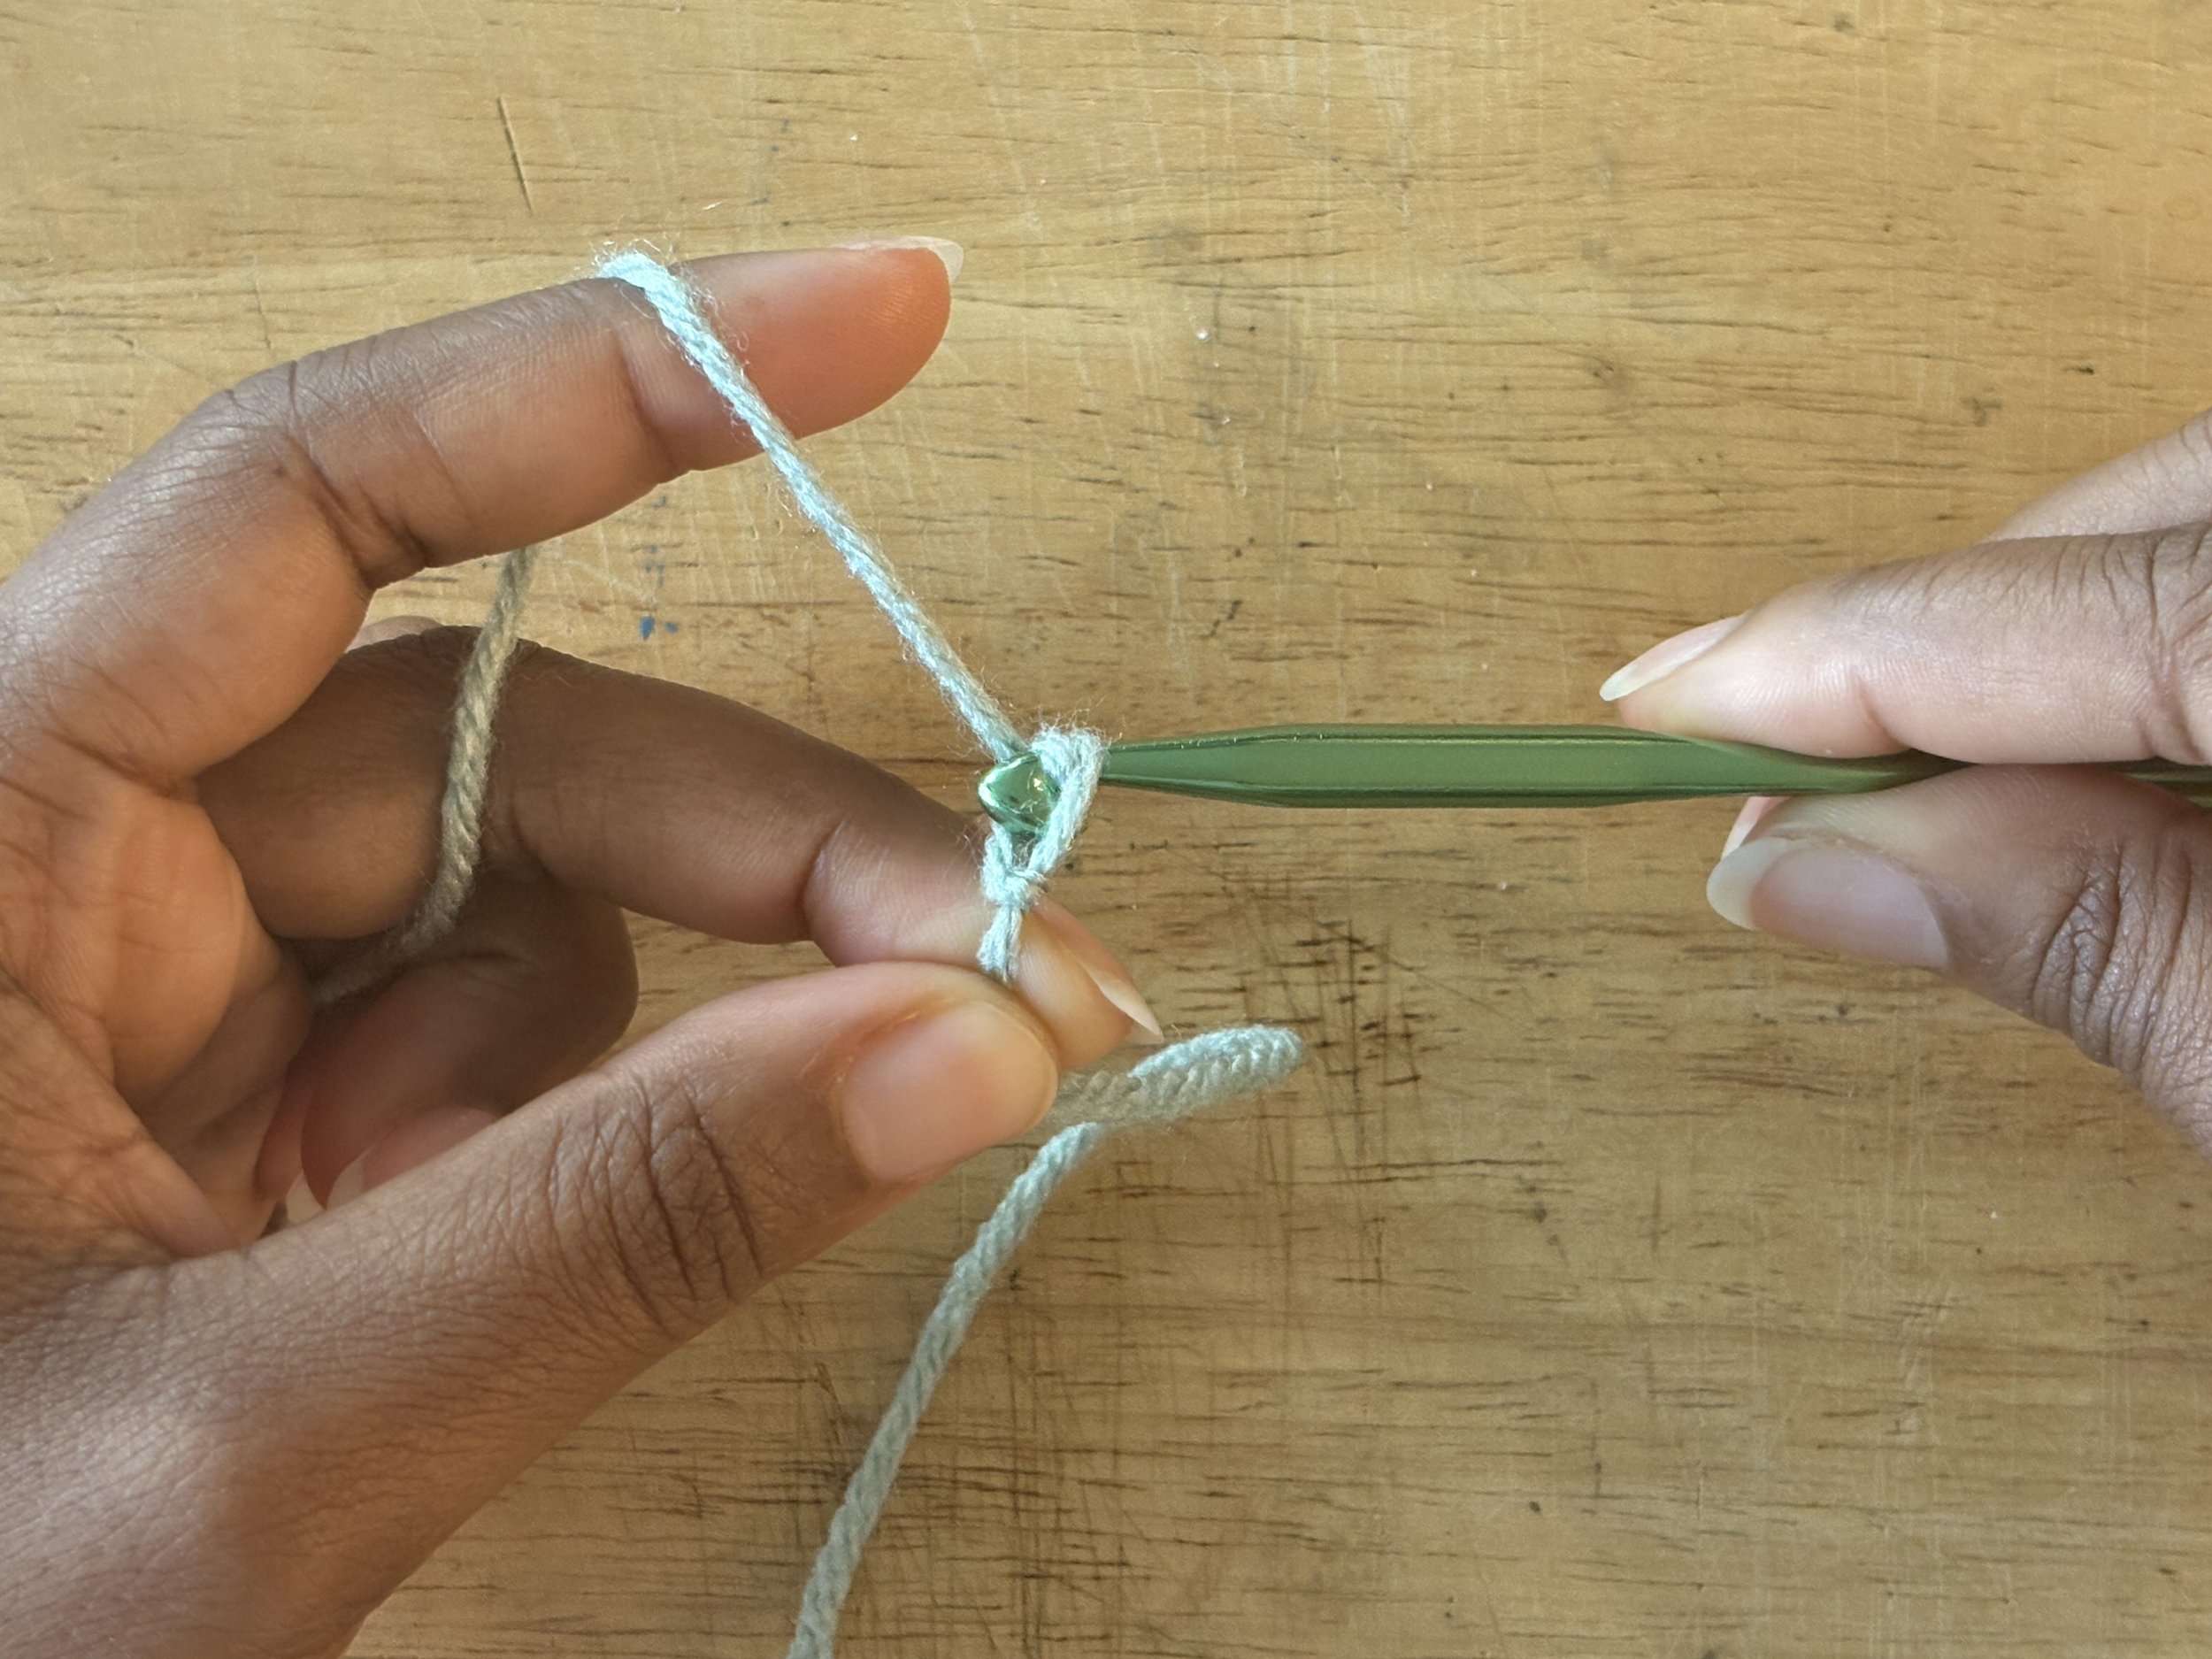
Image 6: Use the hook to pull the wrapped yarn through the loop that is on the hook.
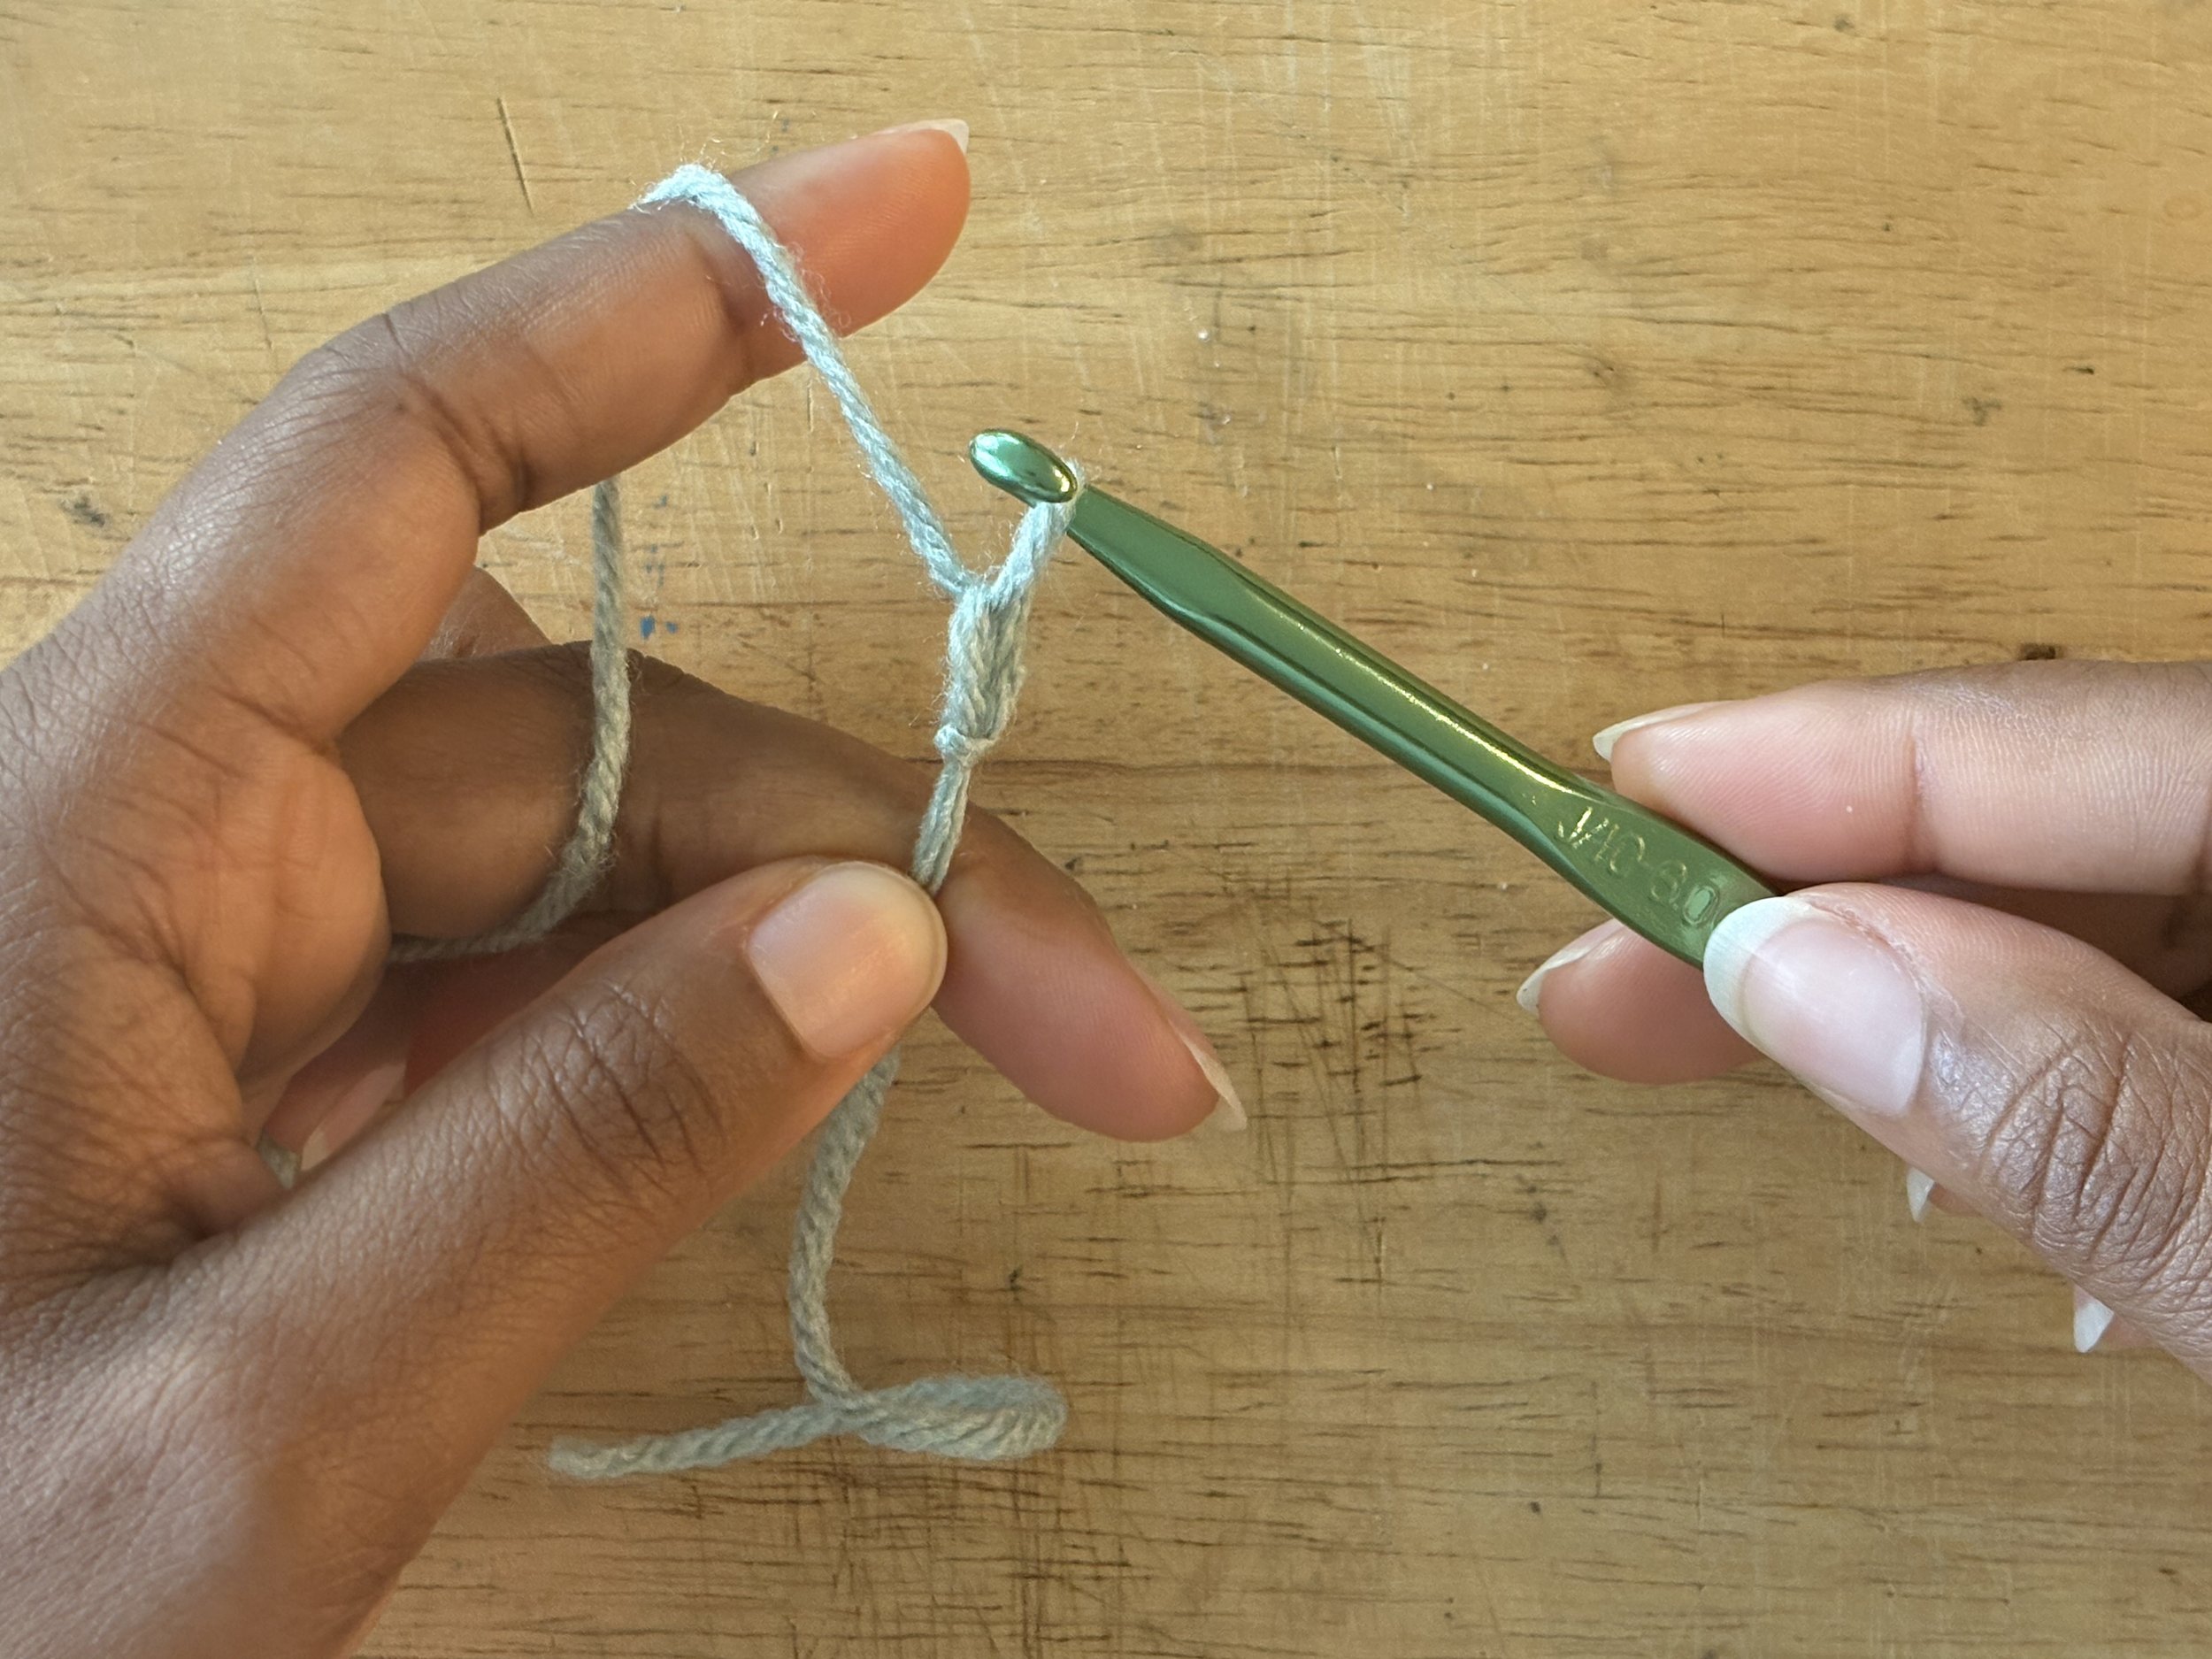
Image 7: Finished chain (ch) stitch.
Repeat the chain stitch 3 more times [see image 8].
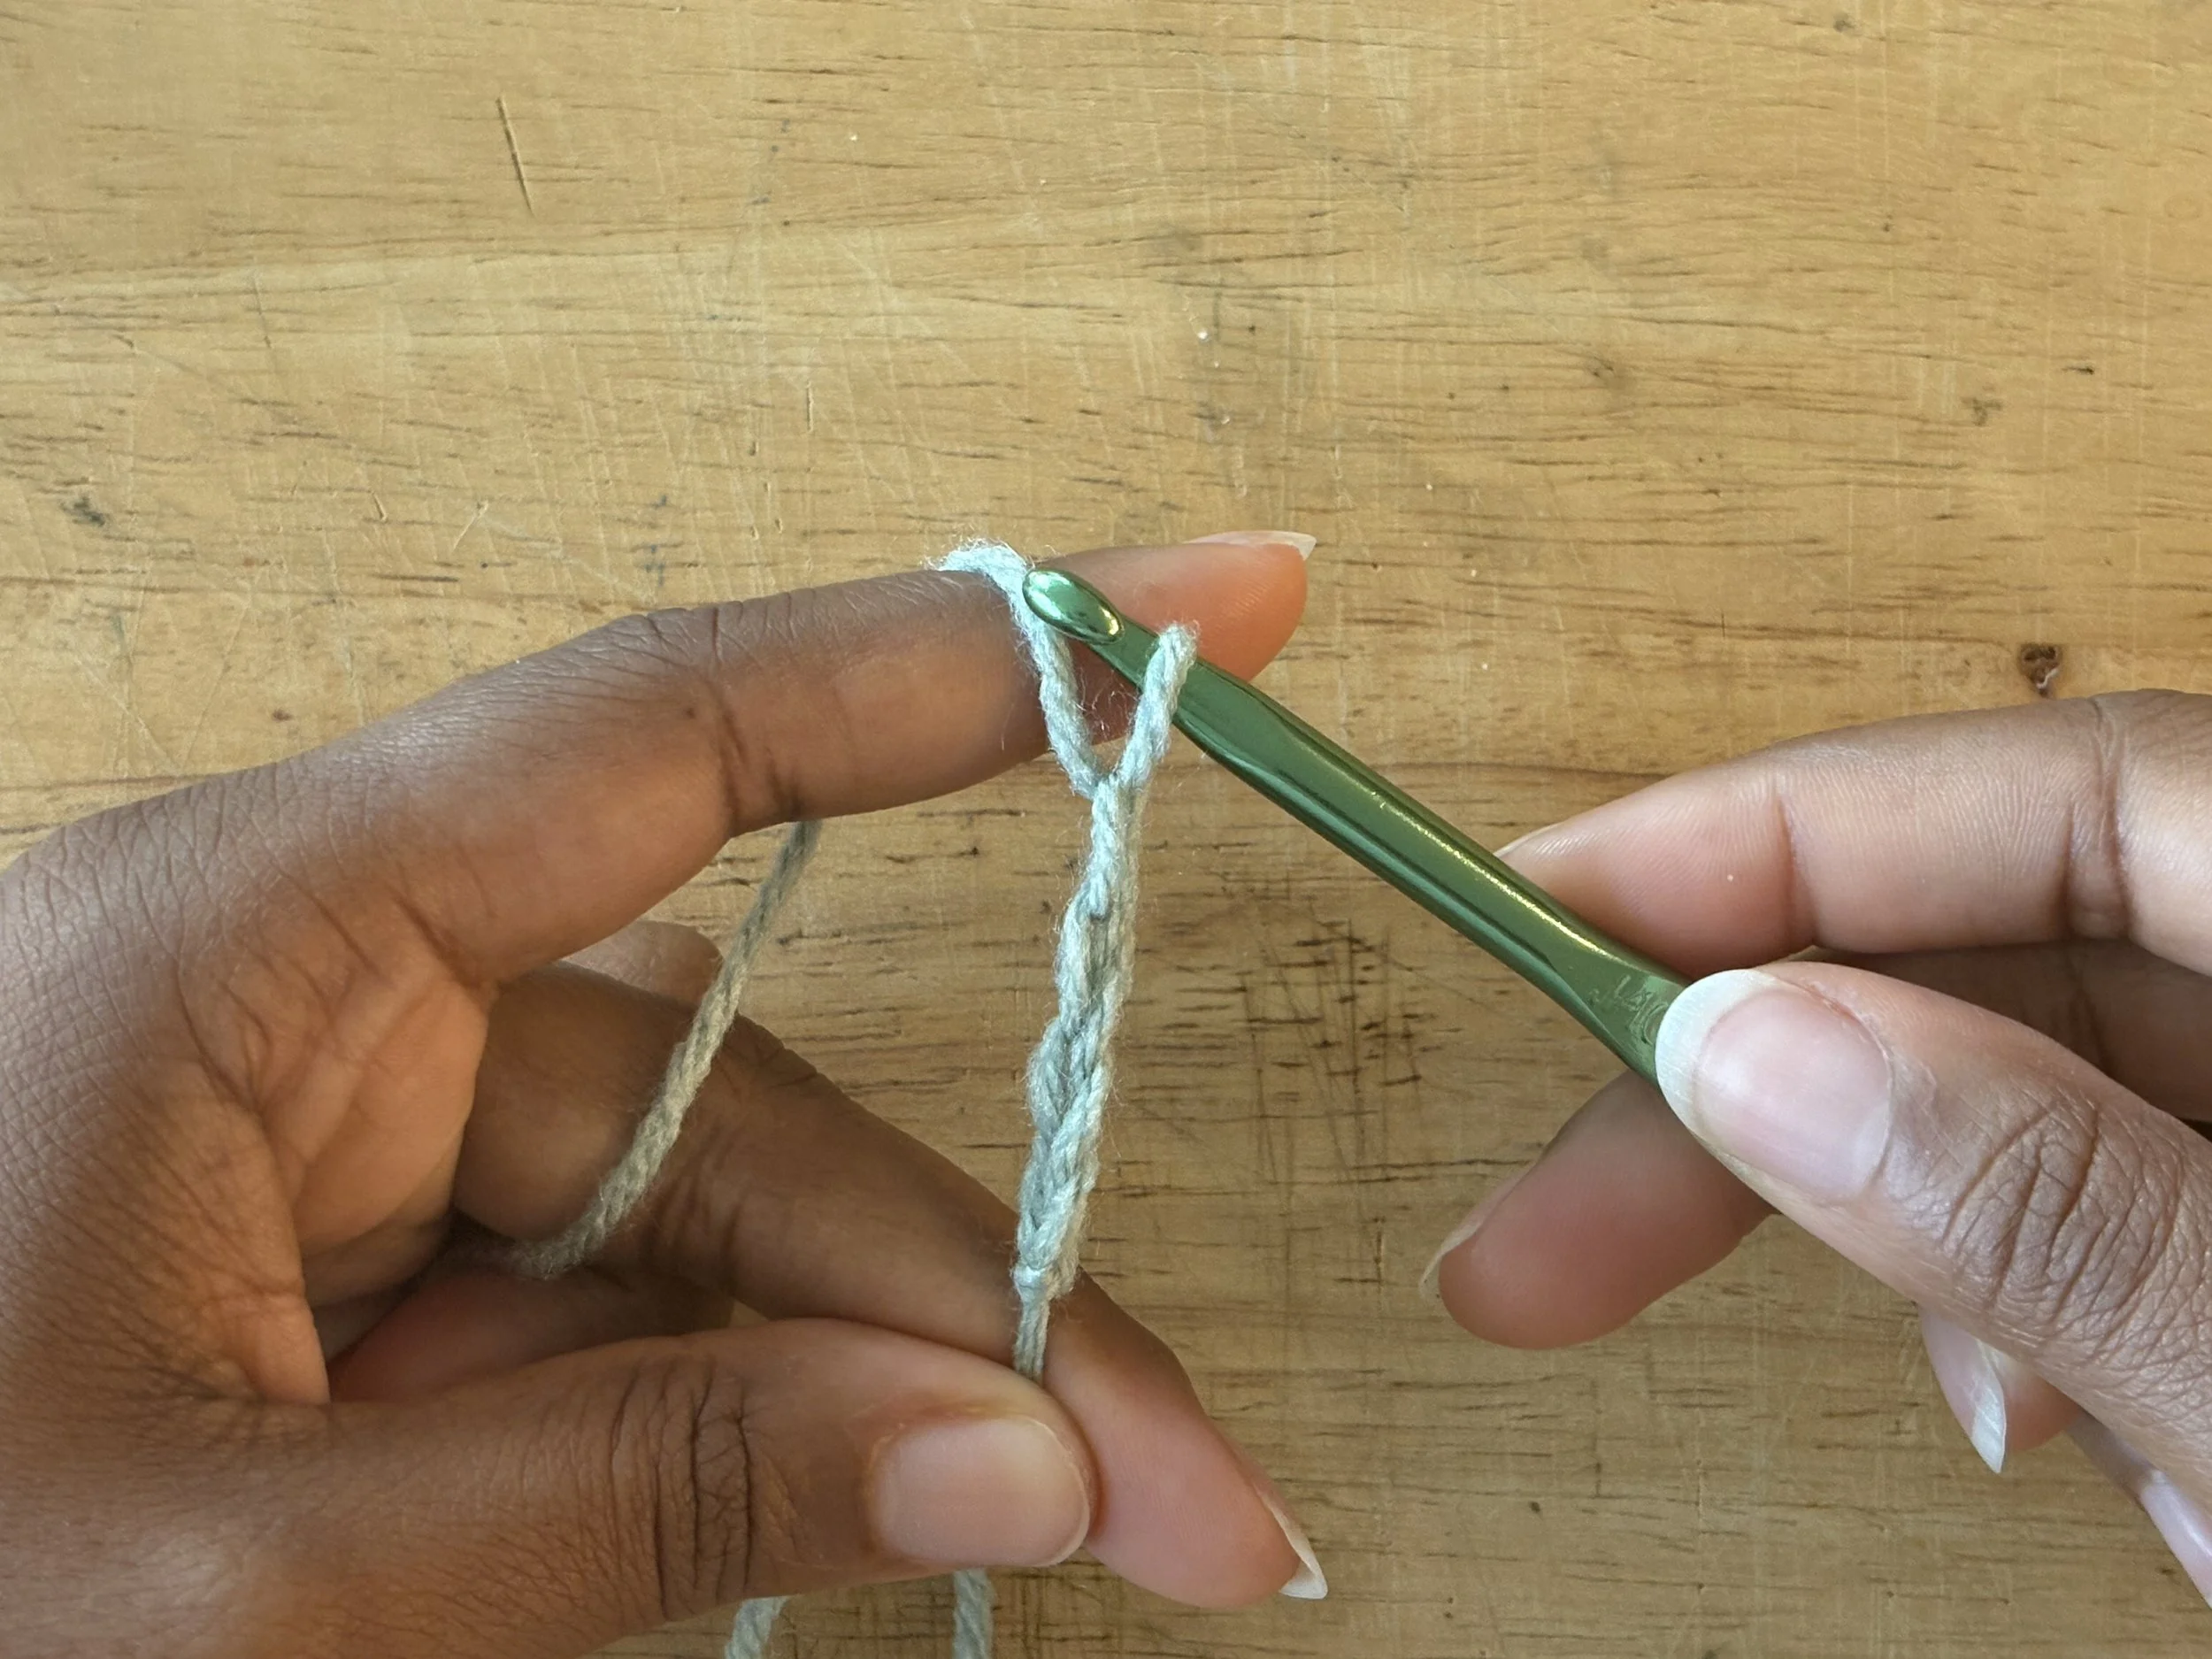
Image 8: Completed chain 4.
To complete the ring, “slip stitch (slst)” into the first chain. To slip stitch, insert the hook into the first chain, between the “V” of the chain, yarn over, and pull that loop all the way through every loop on the hook [see image 9-11].
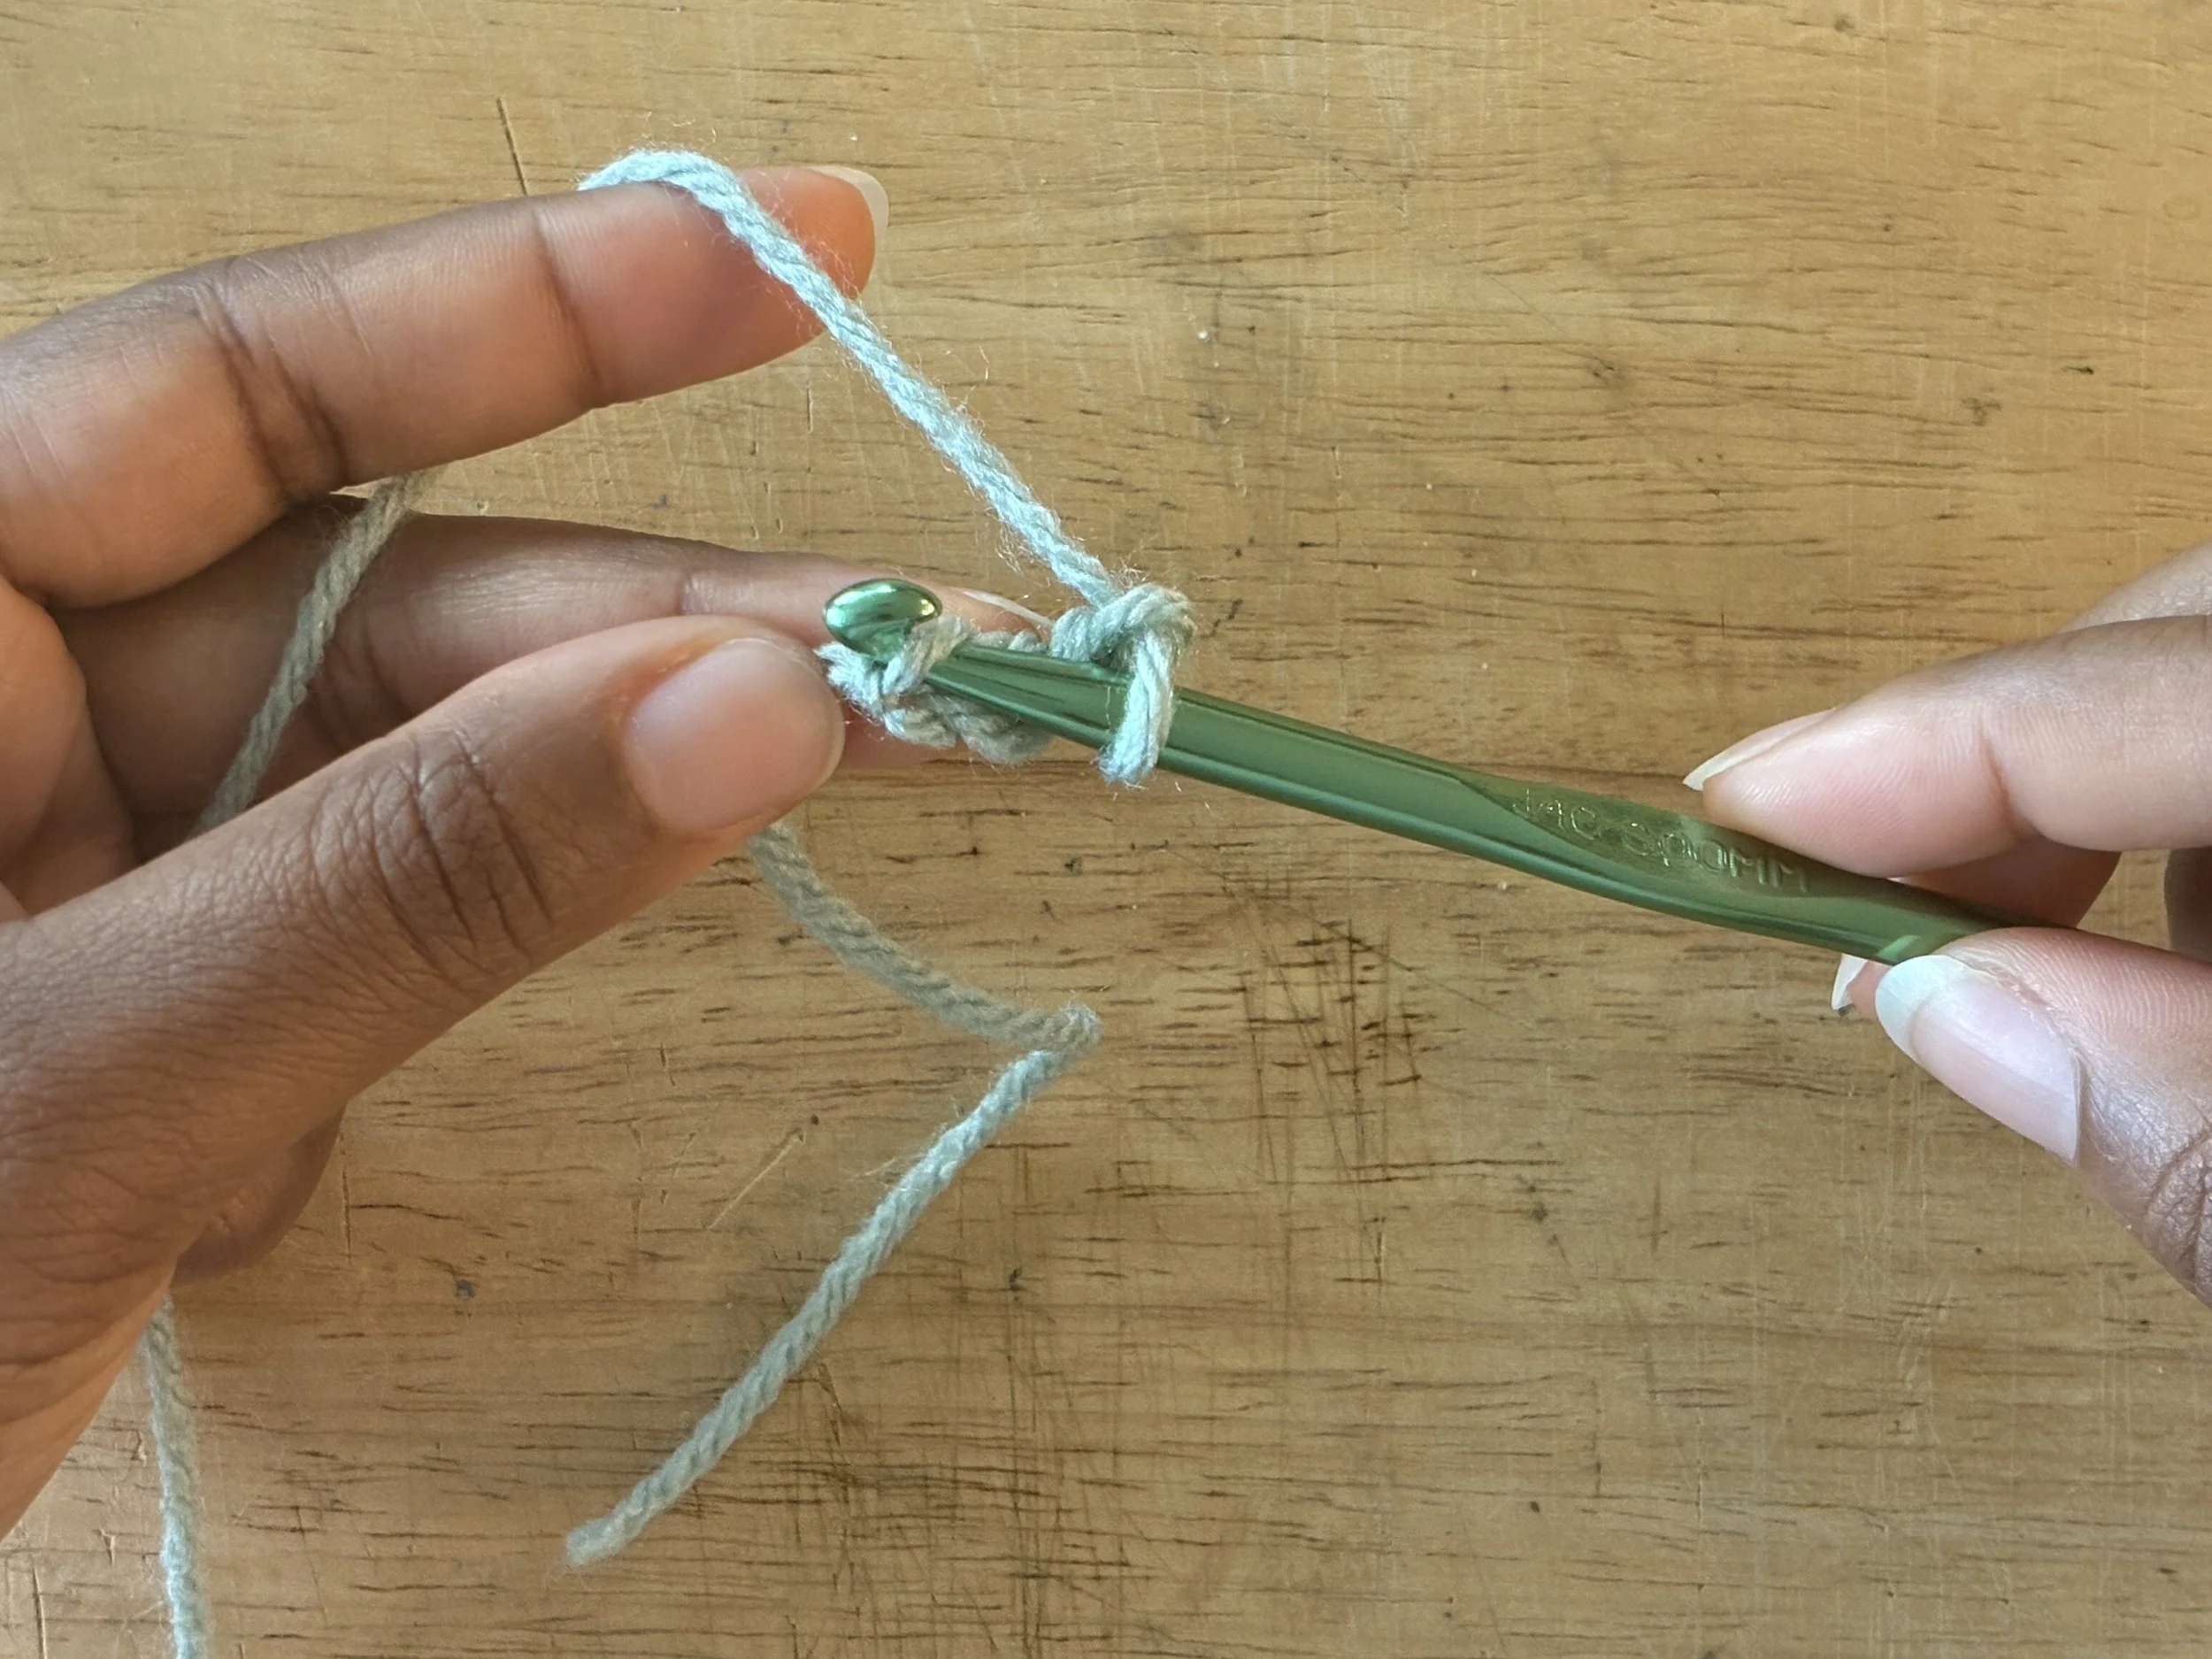
Image 9: Slip stitch (sl st) into the first chain.
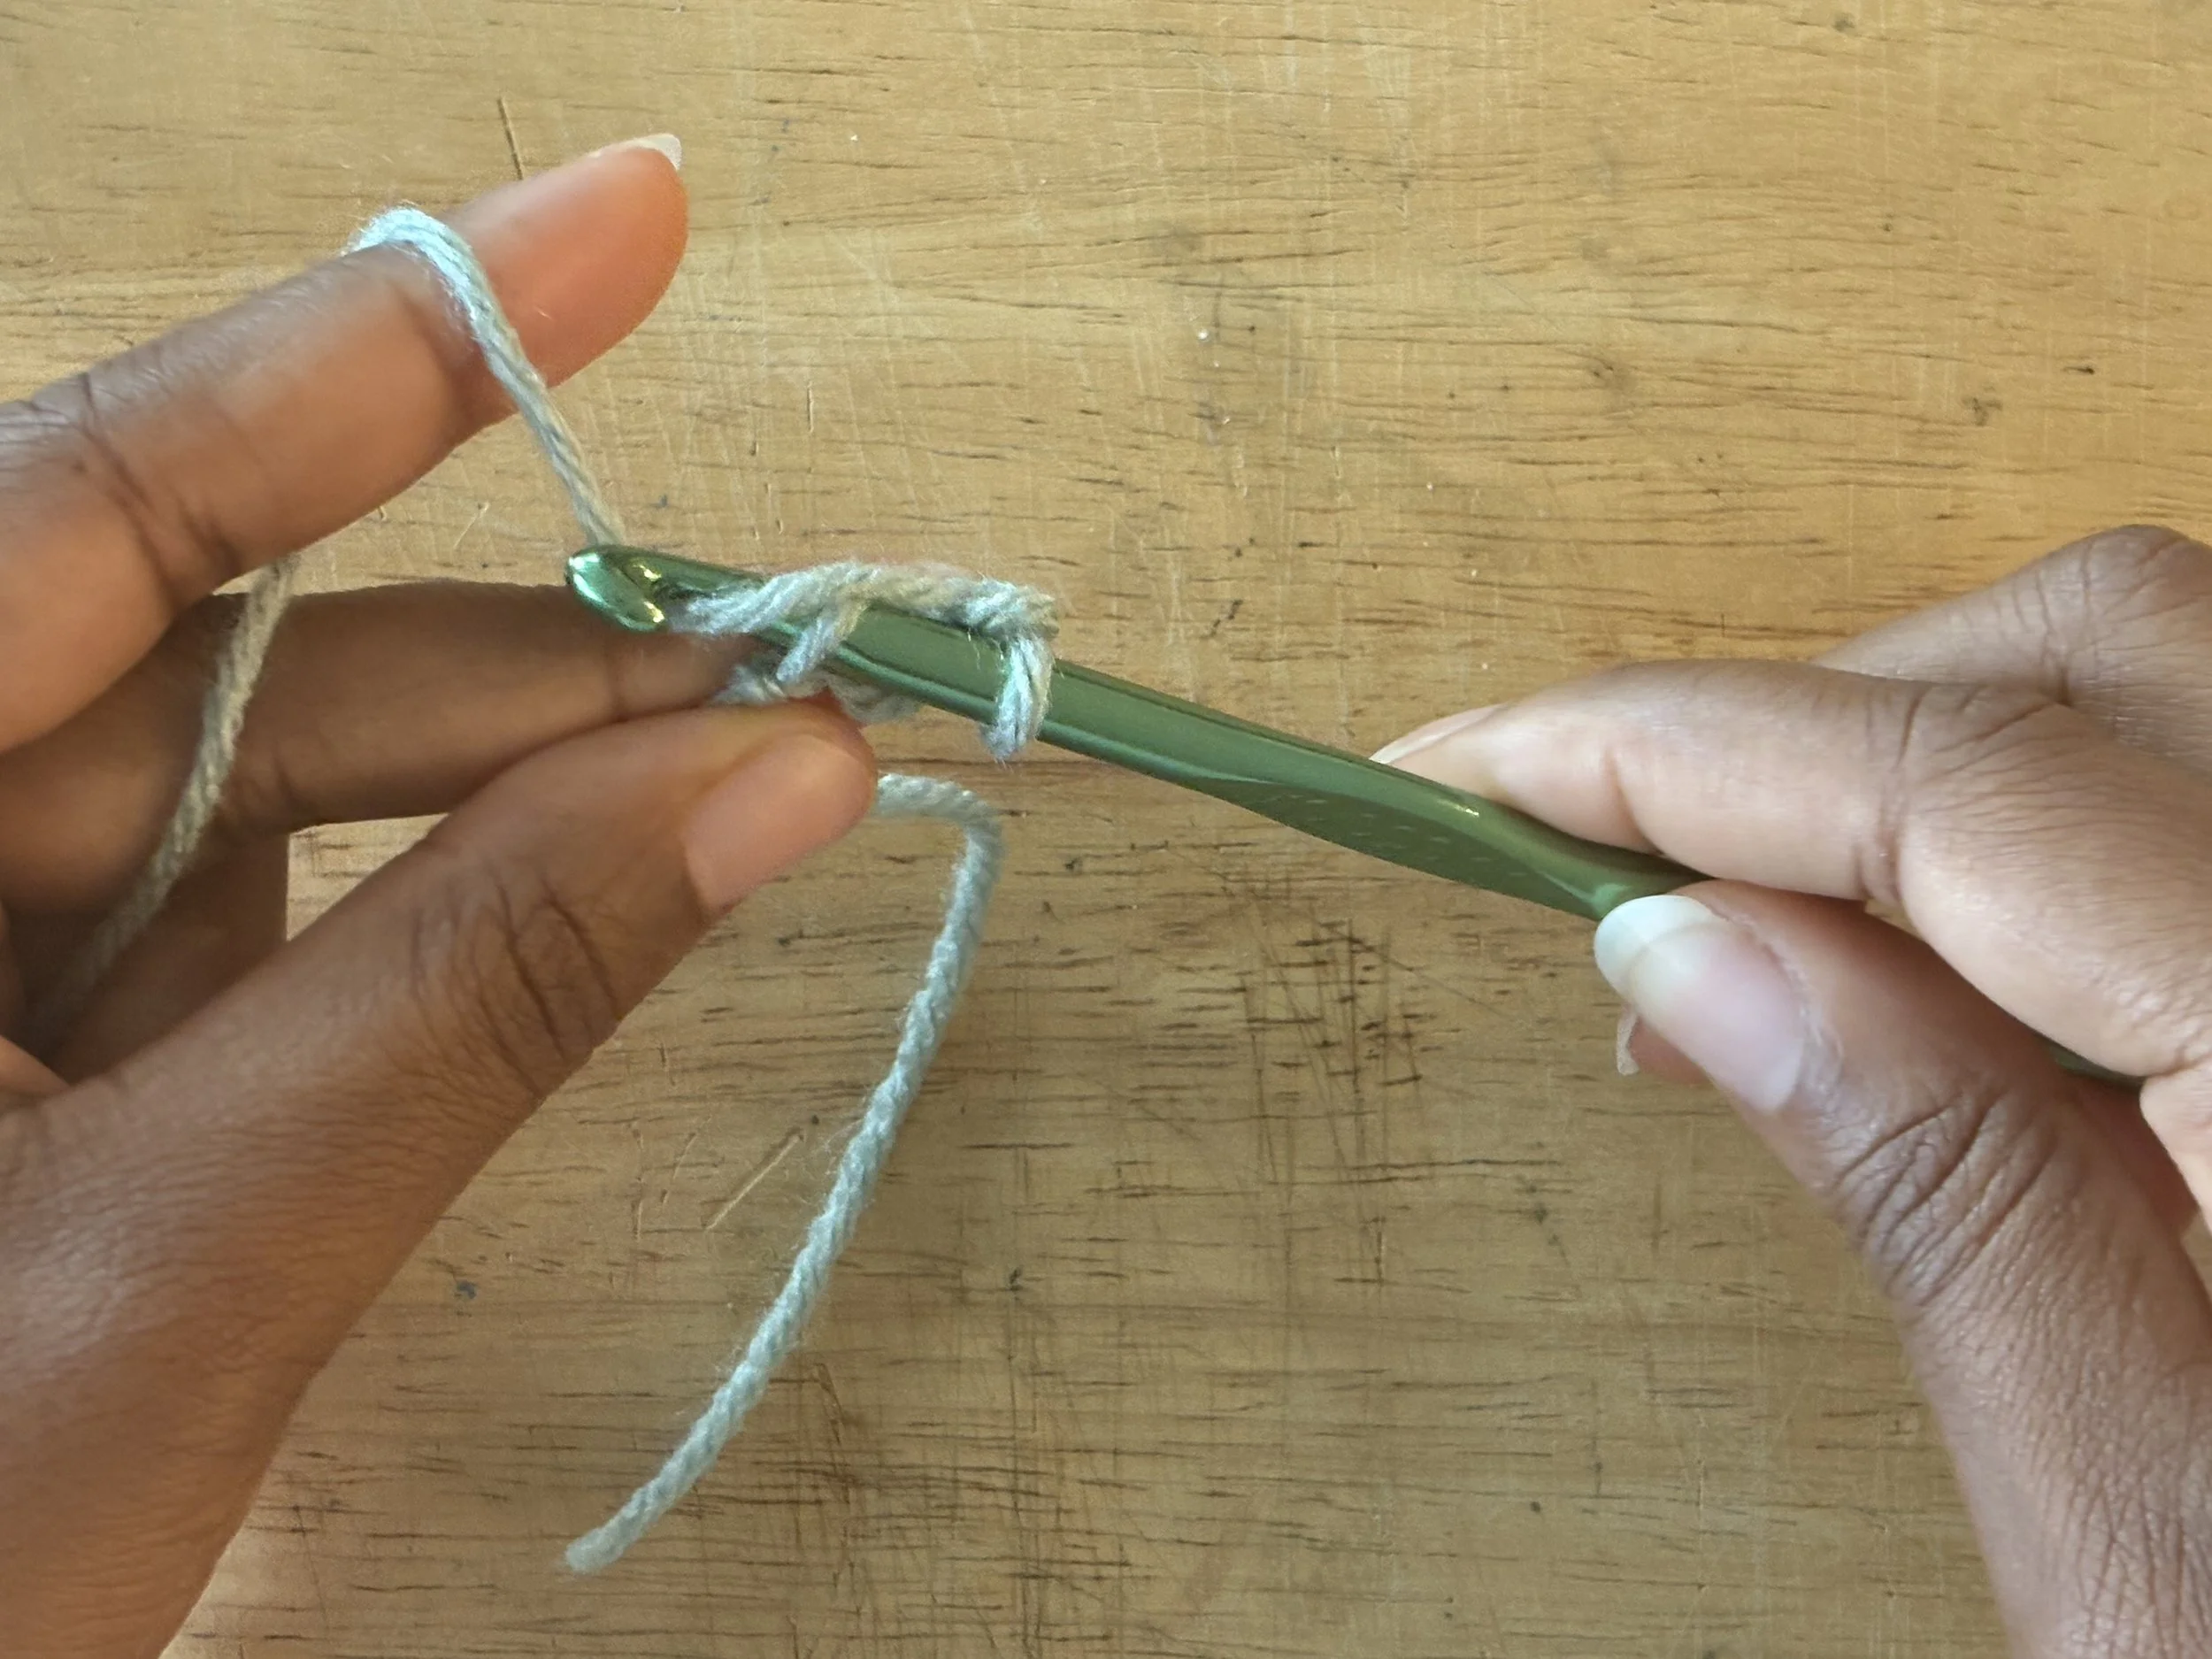
Image 10: Yo with the working yarn.
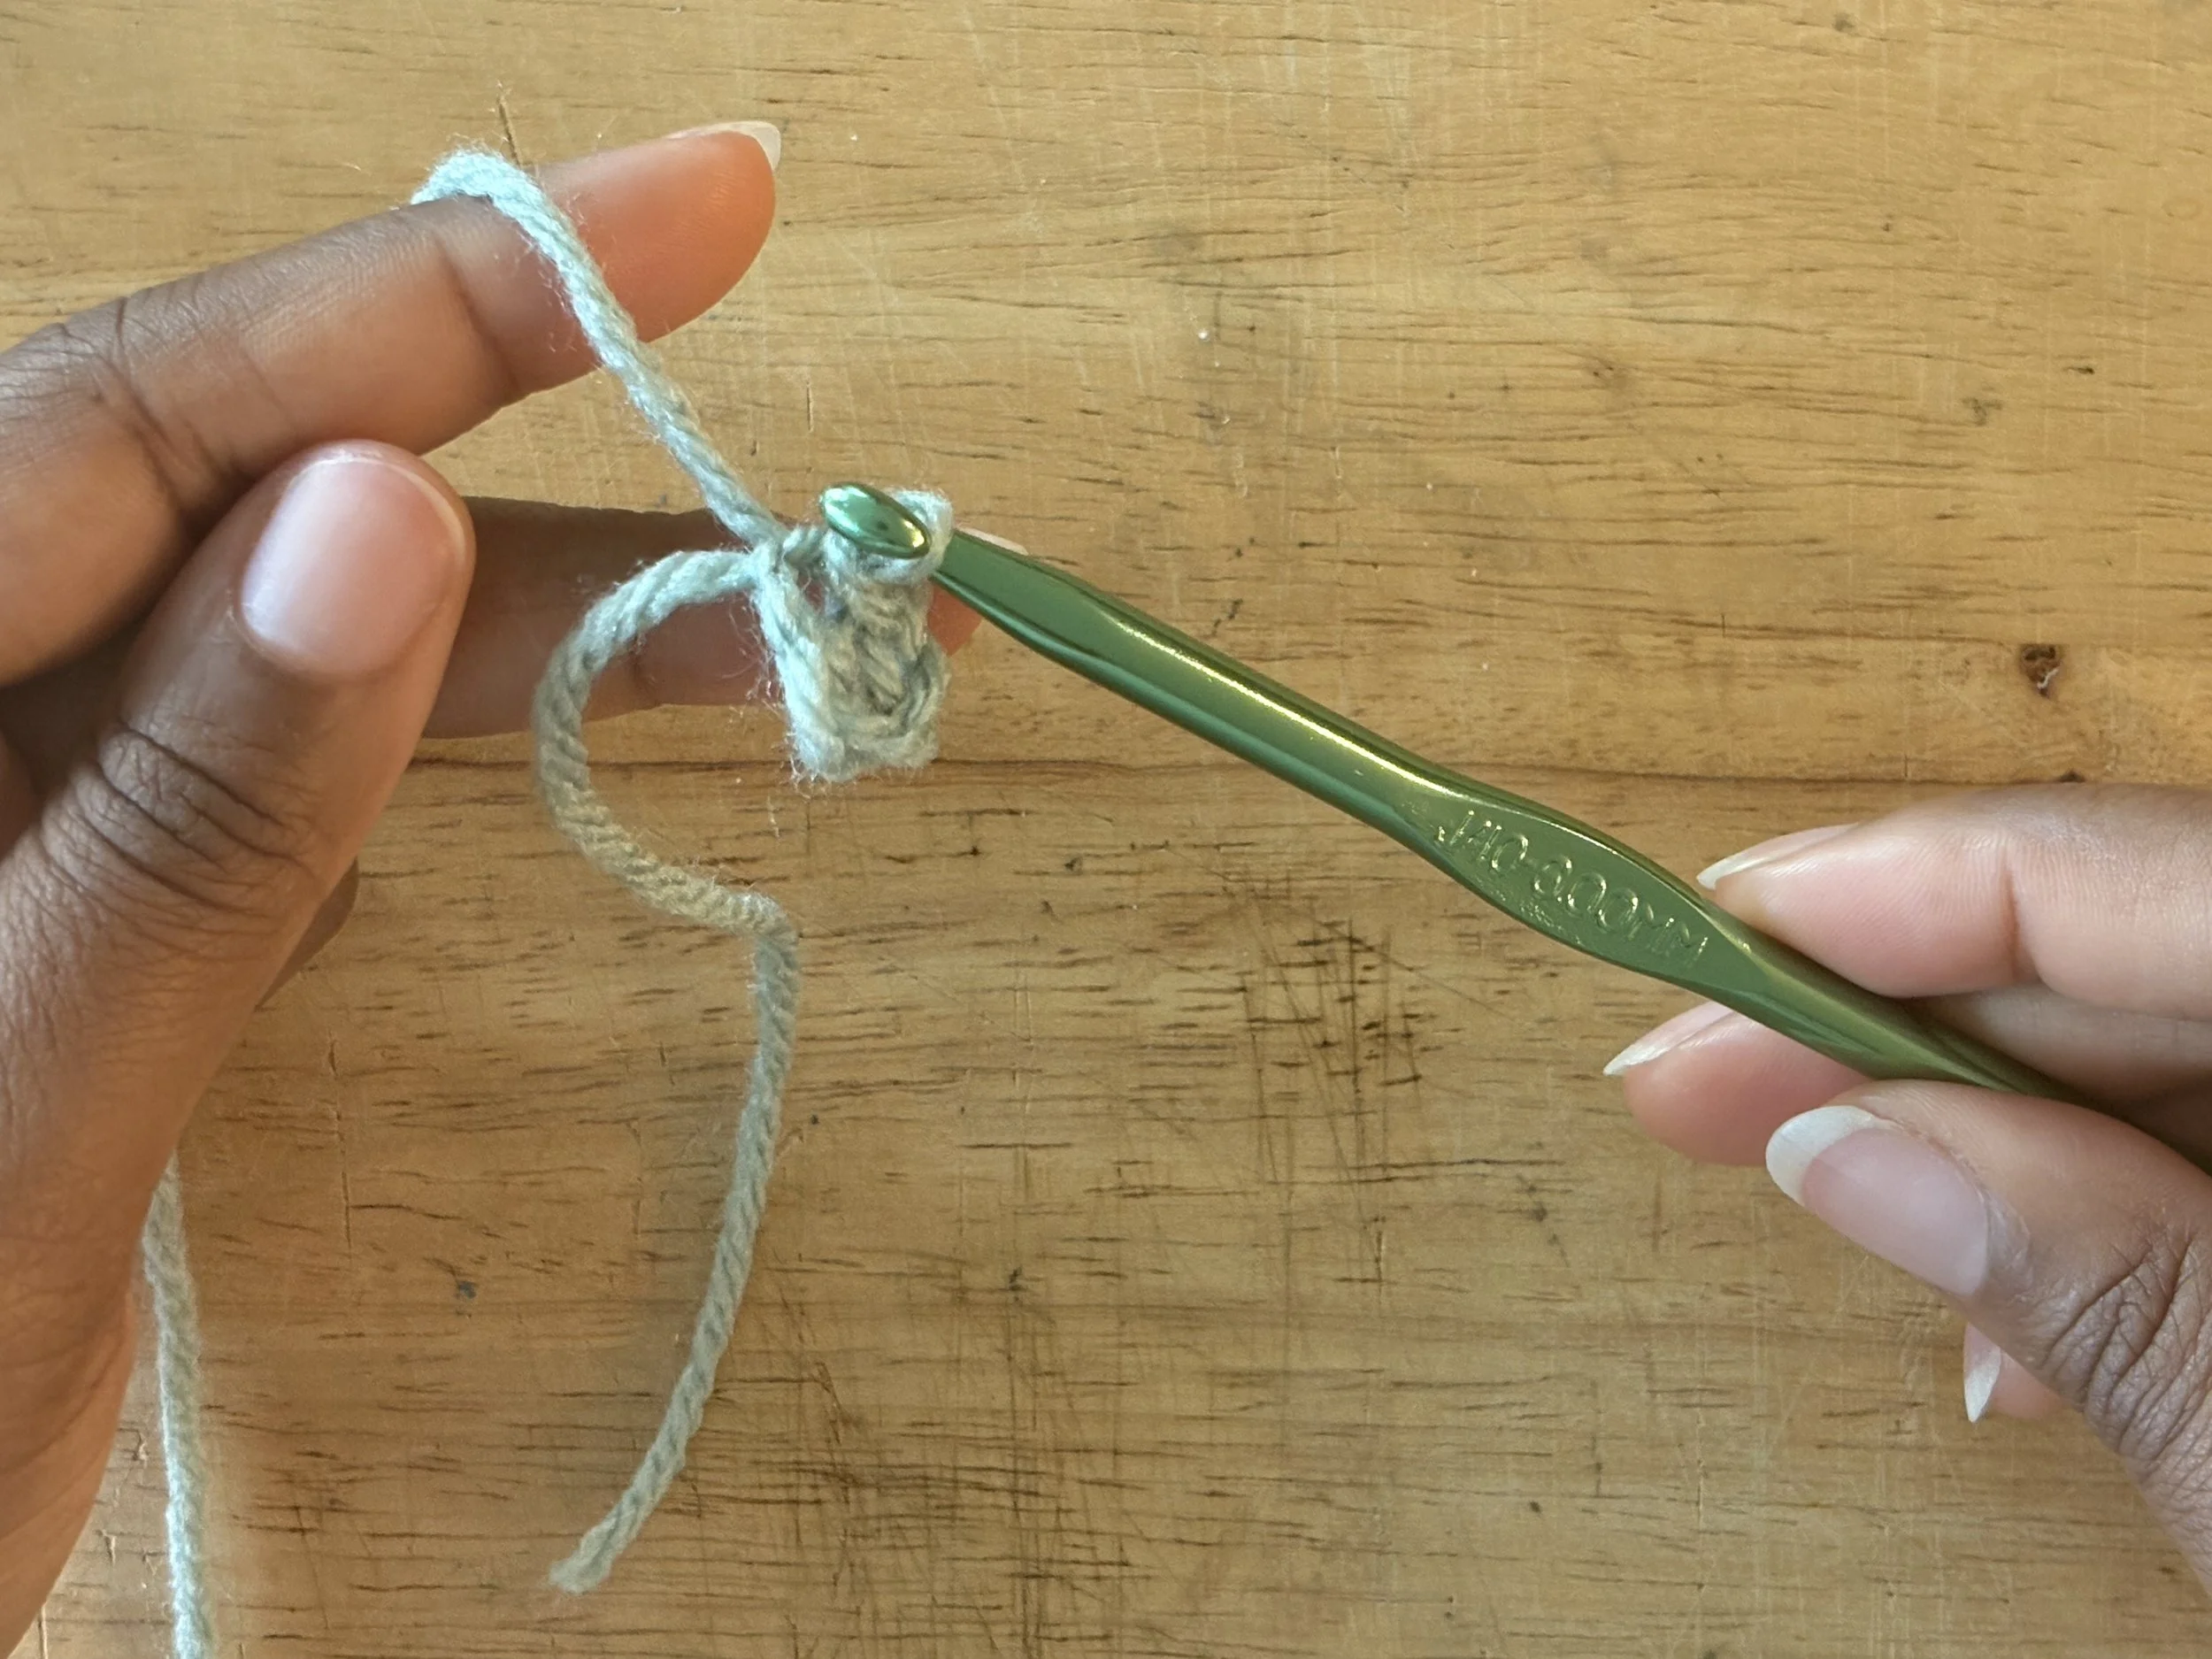
Image 11: Pull the loop through both loops on the hook to close the ring.
The magic ring is now complete! Next, we’re going into the first round of the granny square.
Note: I am going to teach you how to make a granny square that increases from the corners at every row. This is a super easy trick to make your granny squares neat, and it helps reduce having to weave in ends.
Foundation Round
Once your magic ring is formed, chain 5 straight up from the ring.
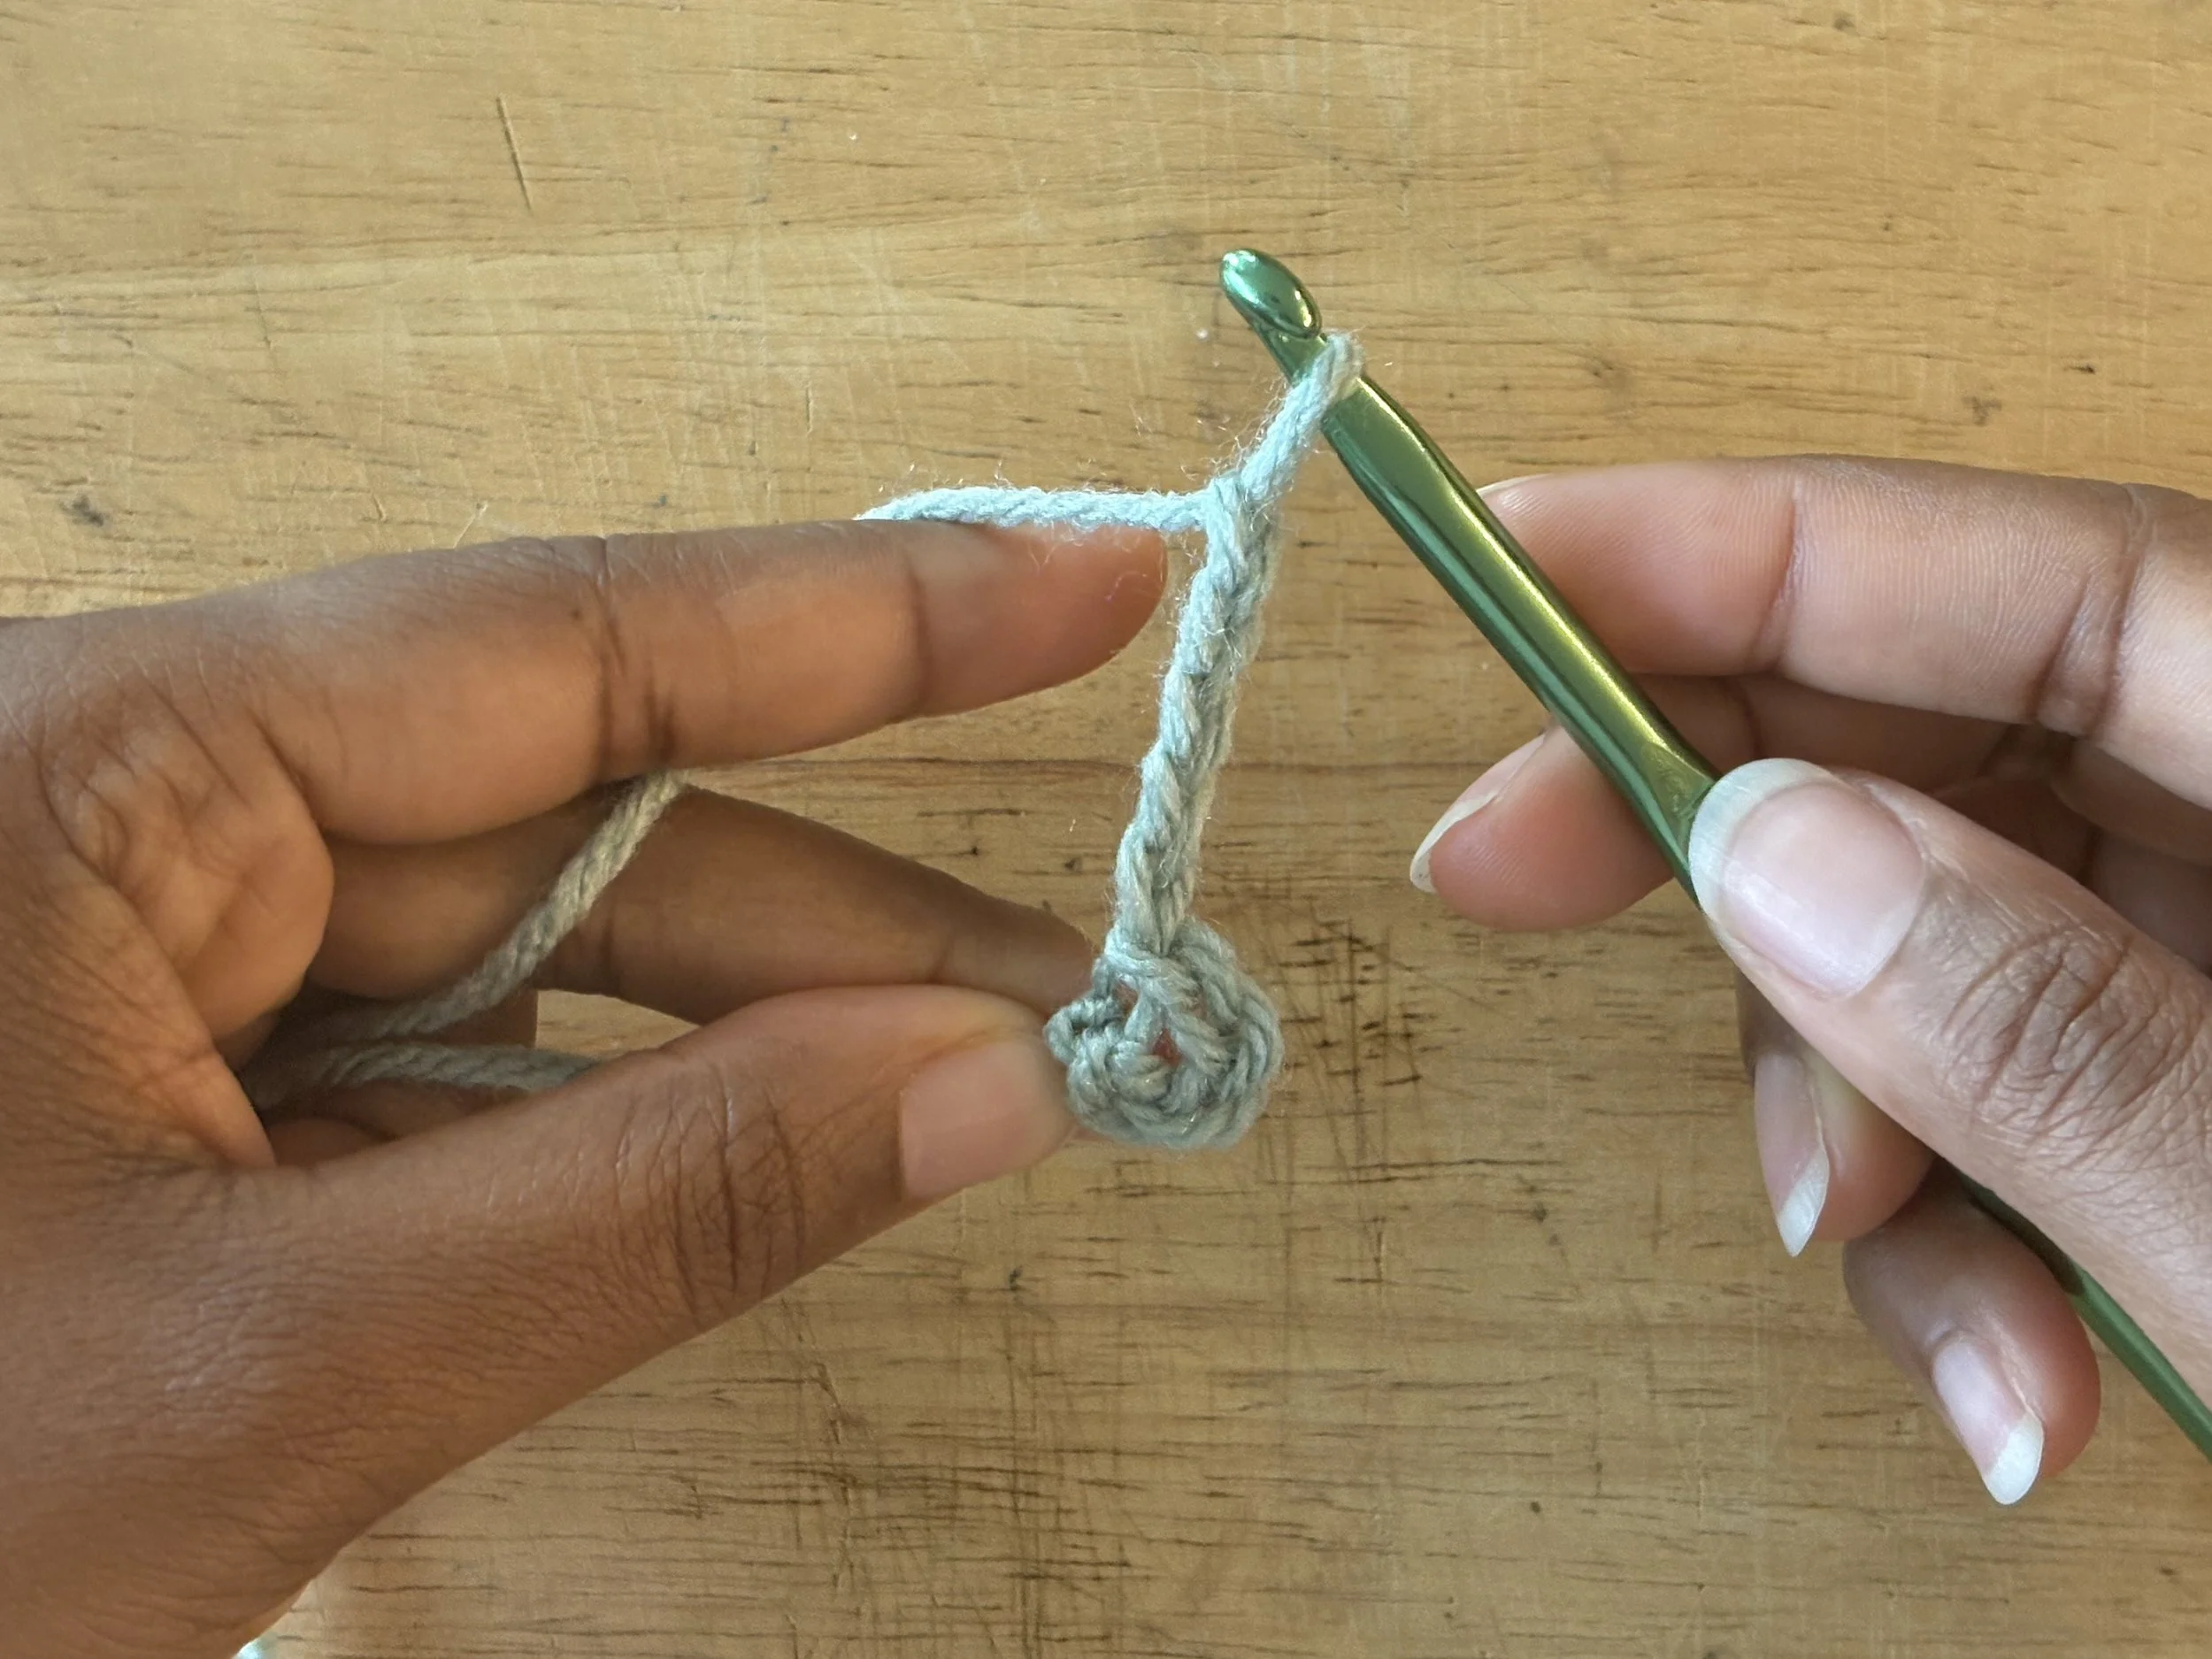
Image 12: Ch 5 straight from the ring.
Next, make a “double crochet (dc)” into the ring. To make a double crochet: yarn over, insert the hook into the ring (from front to back), yarn over and pull the loop back through the ring, yarn over and pull through the first two loops on the hook, then yarn over one last time and pull through the last two loops on the hook.
Tip: try not to make your stitches too tight!
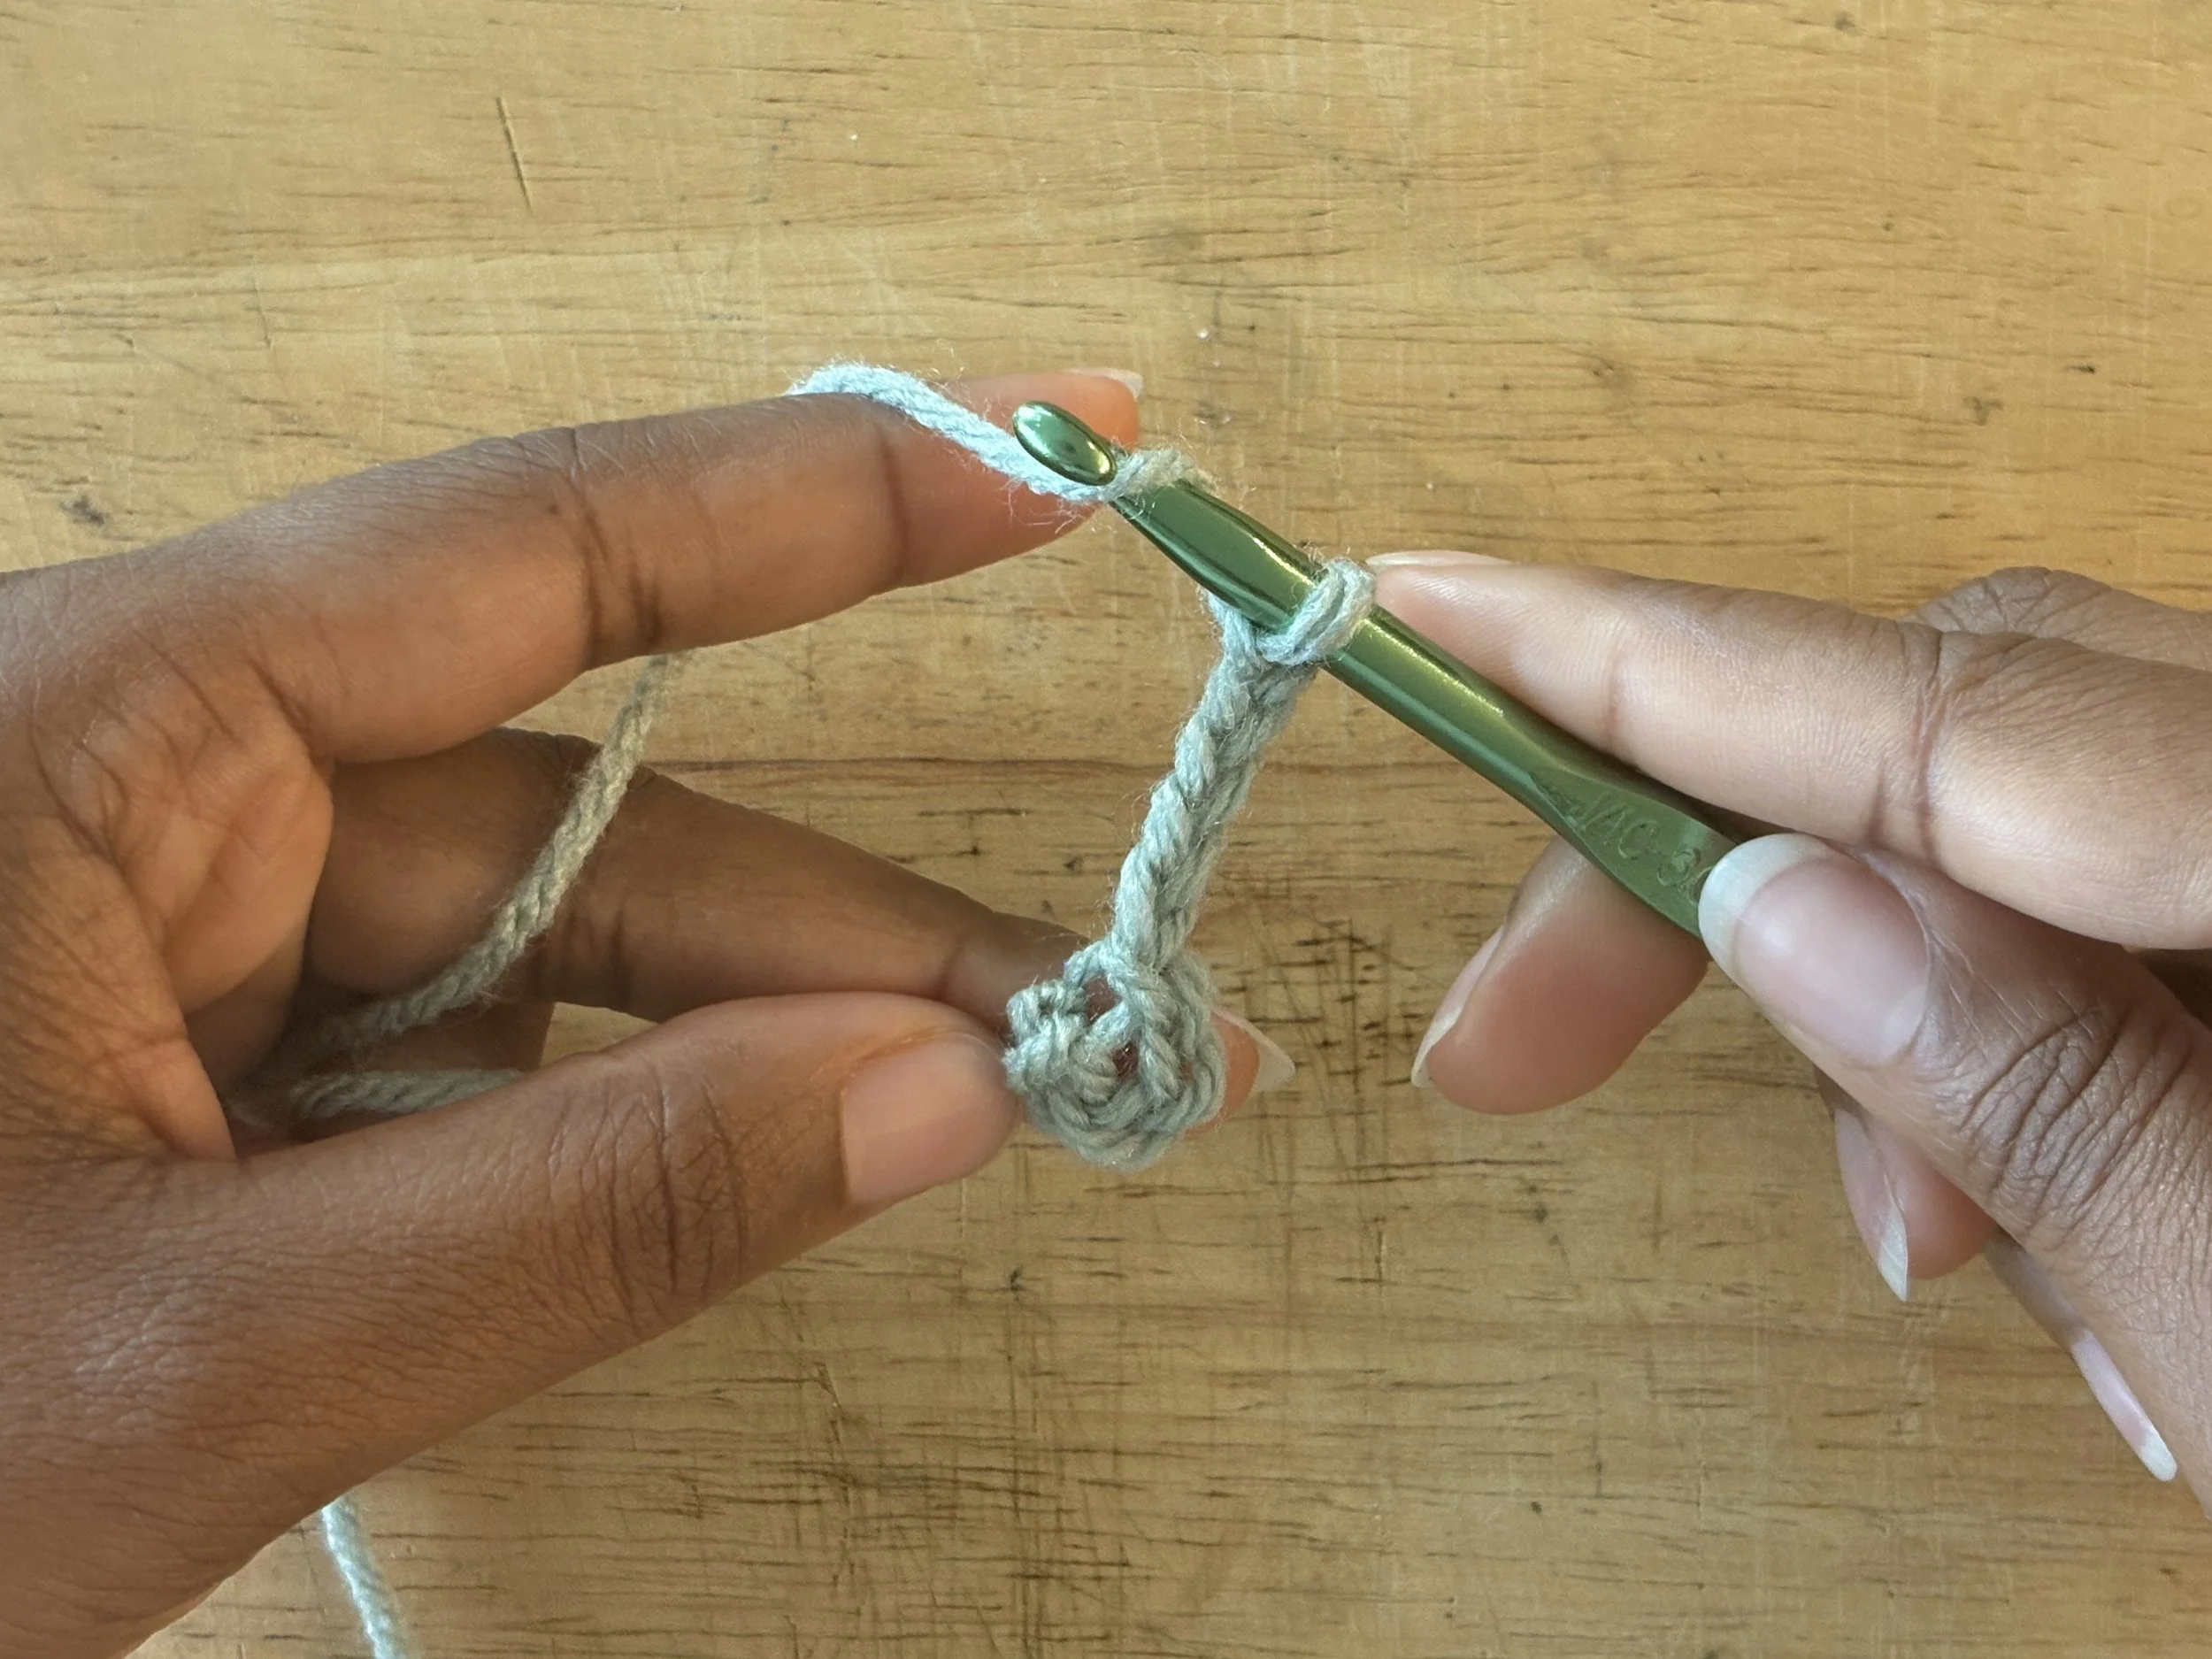
Image 13: Yarn over on the hook.
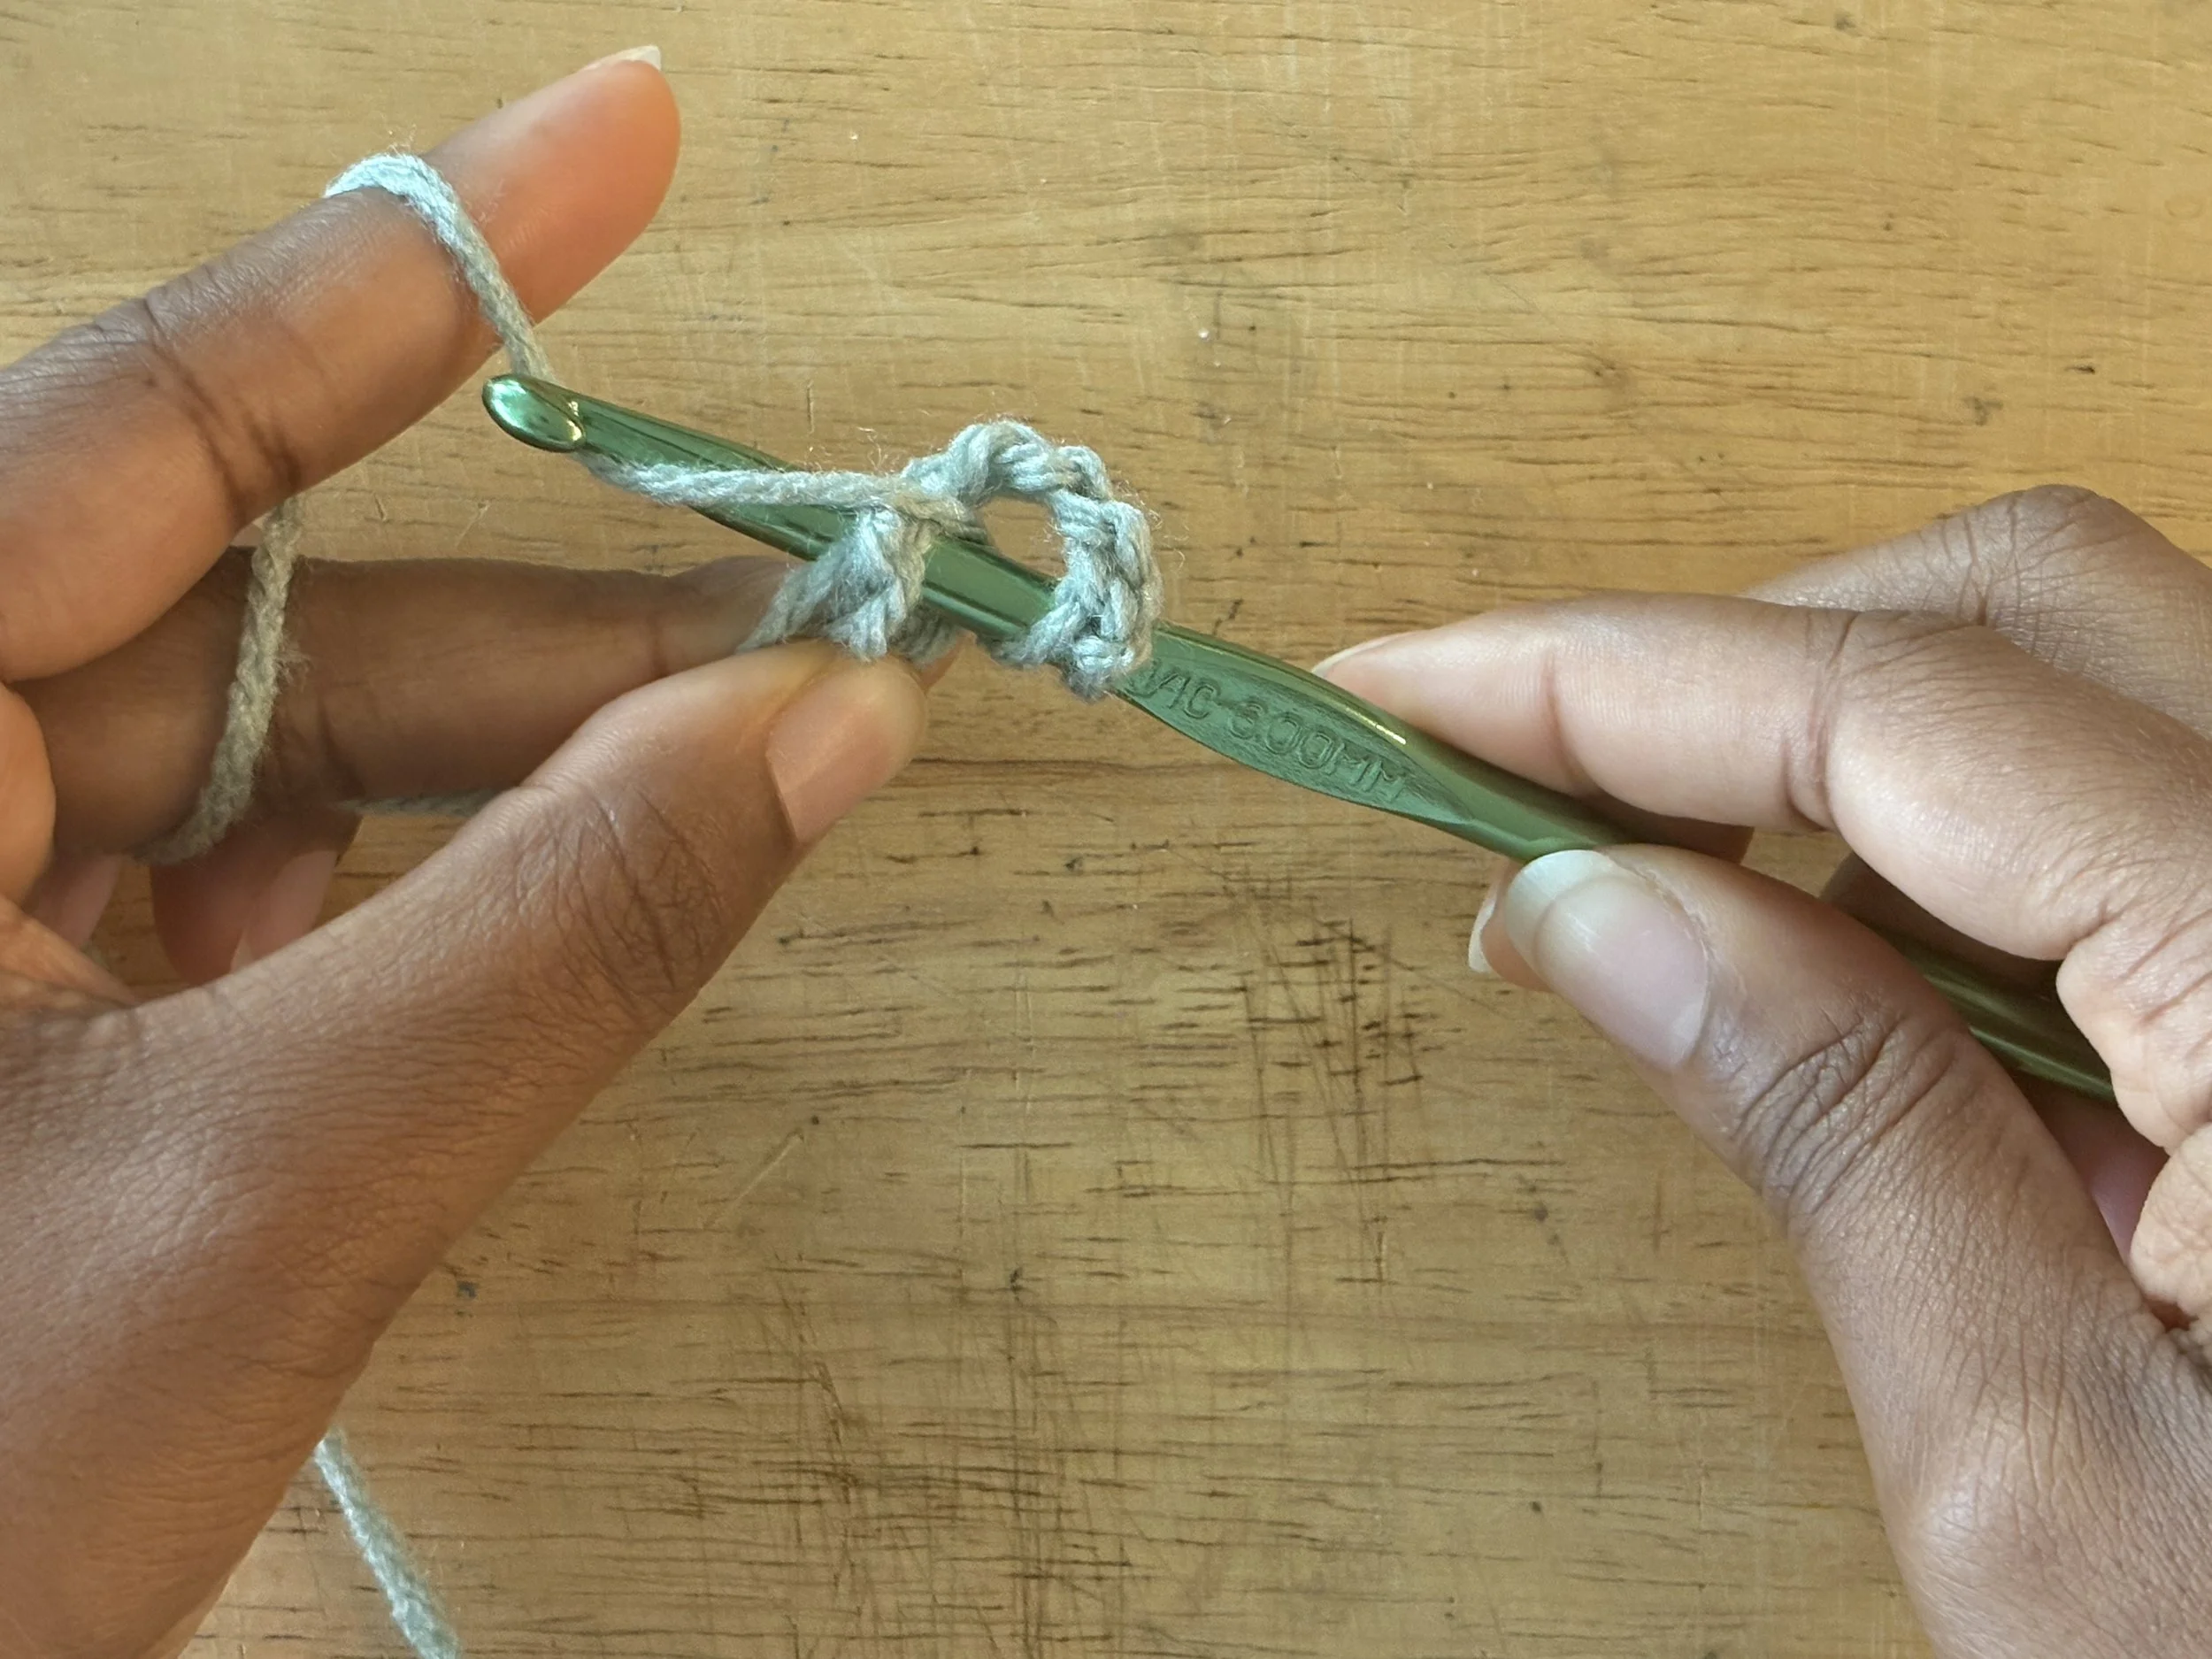
Image 14: Insert hook into the ring.
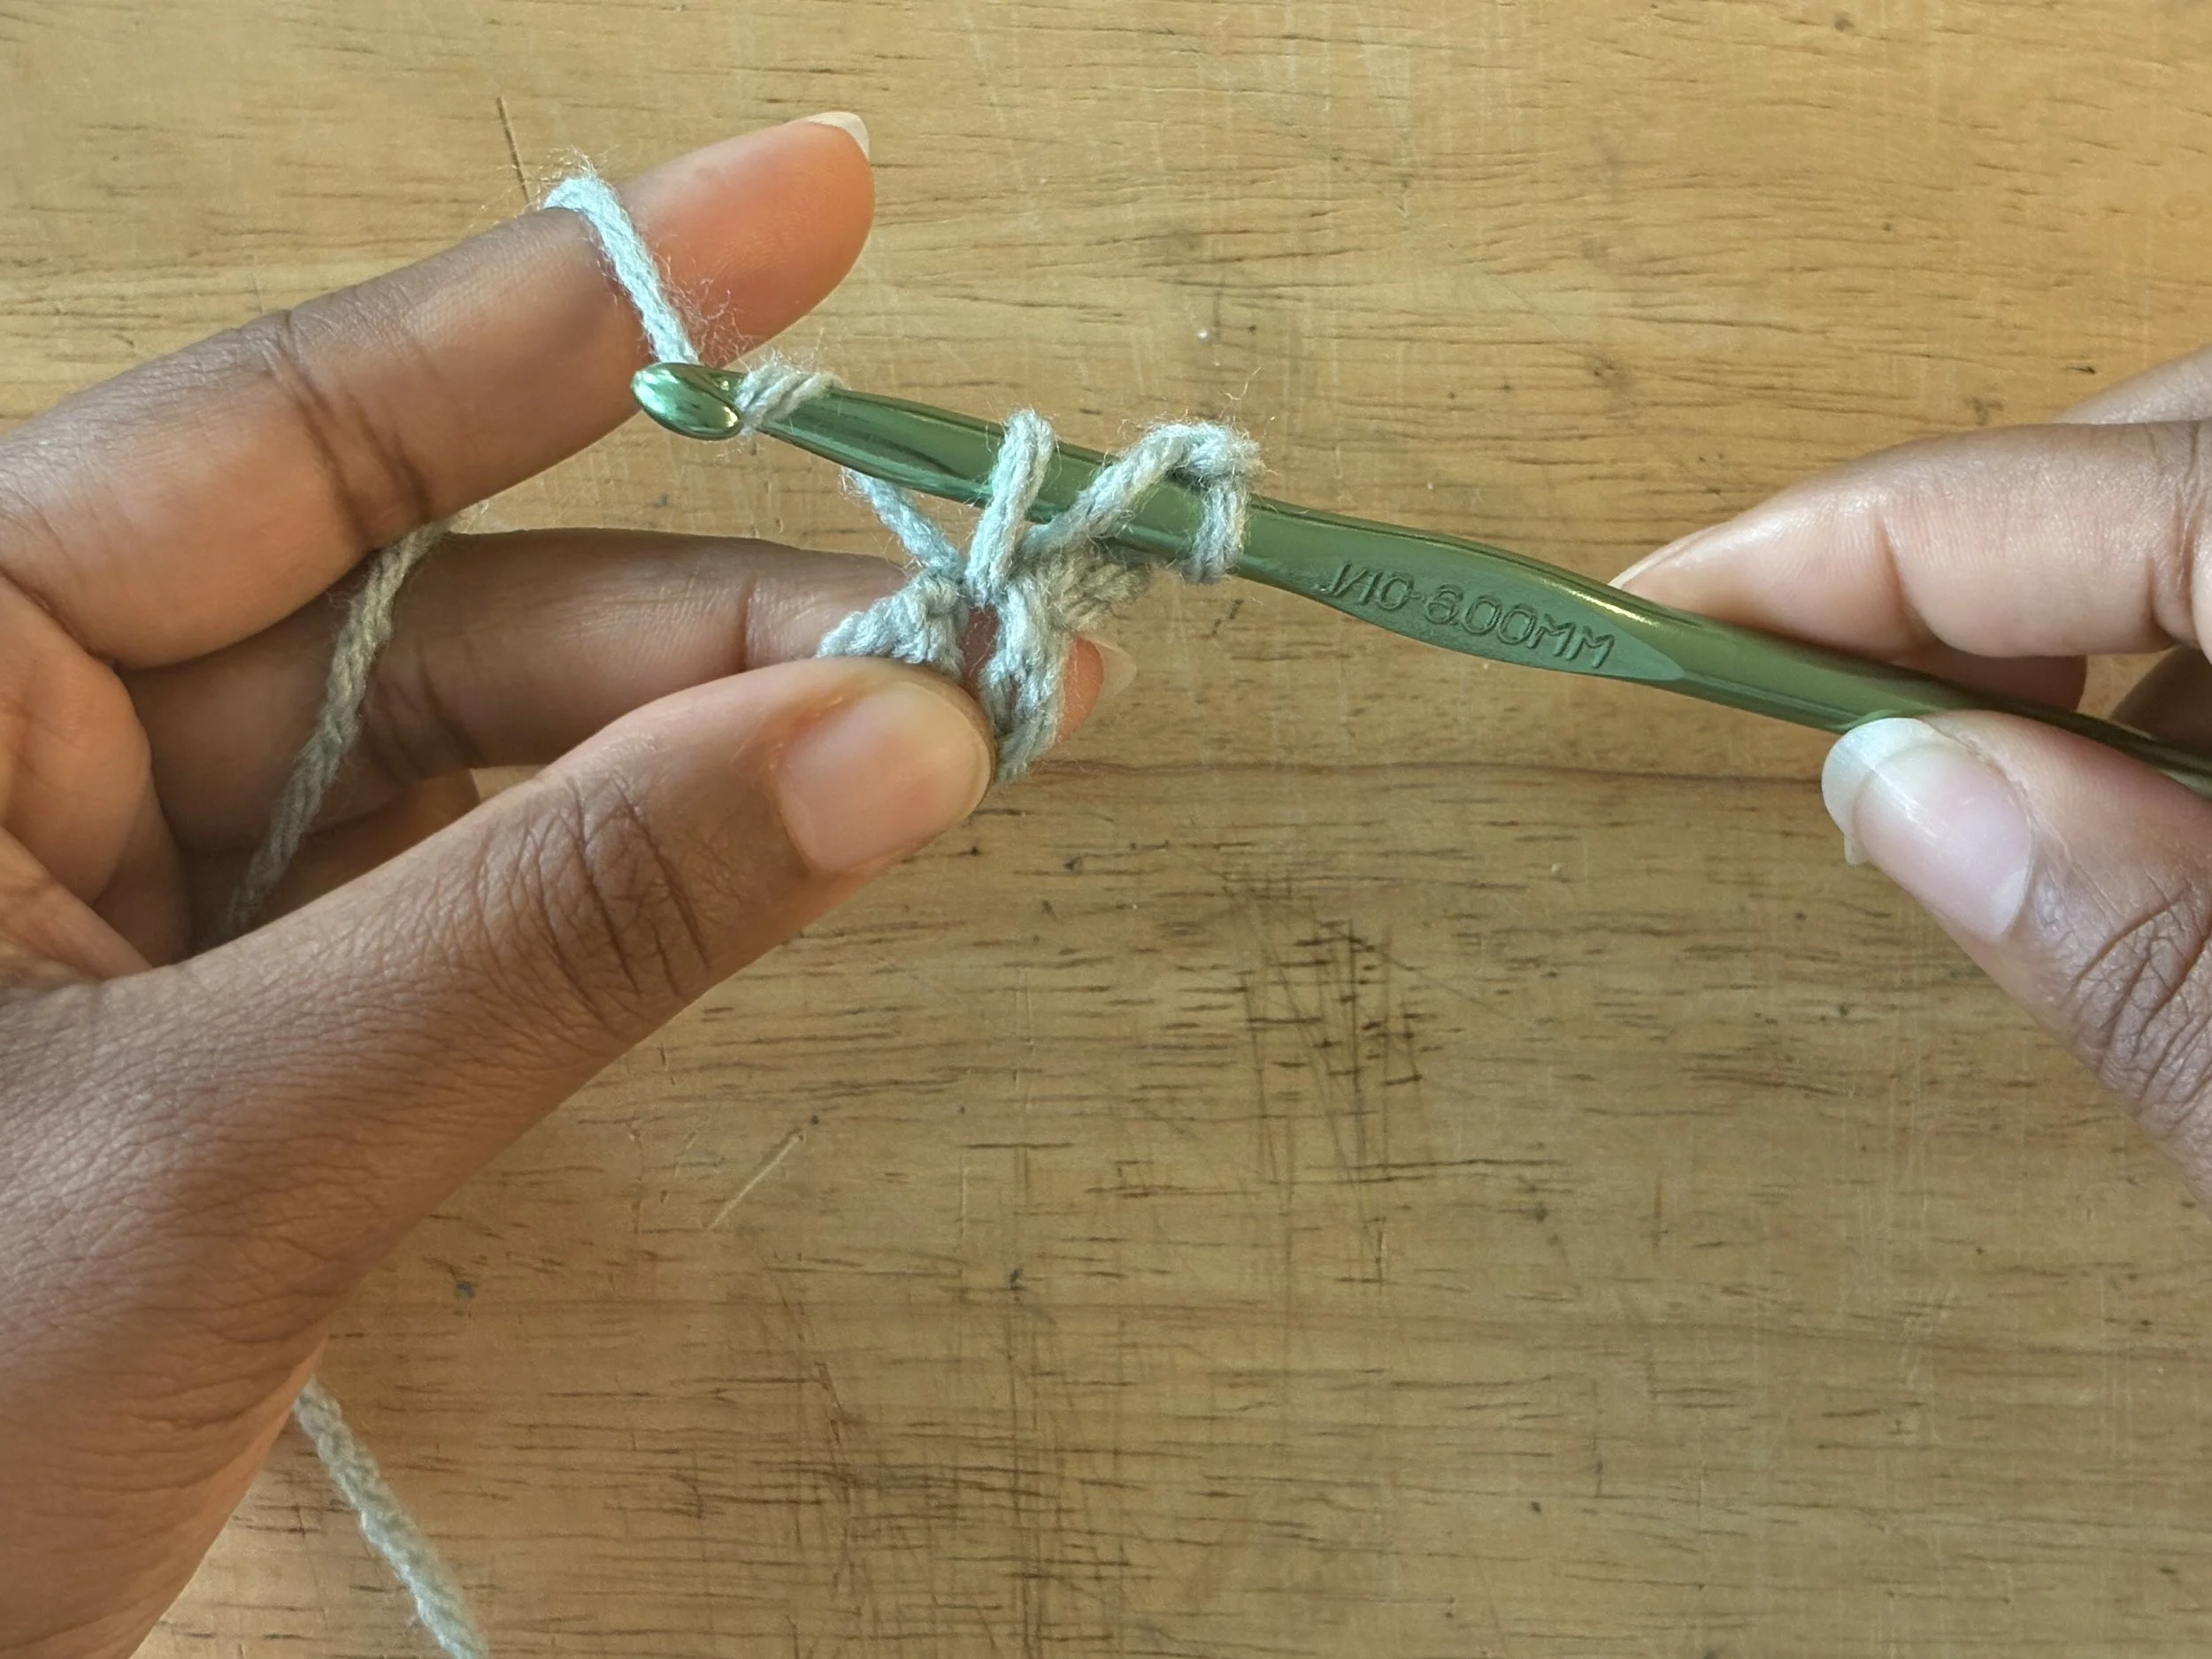
Image 15: Pull up a loop from the ring. YO on the hook again.
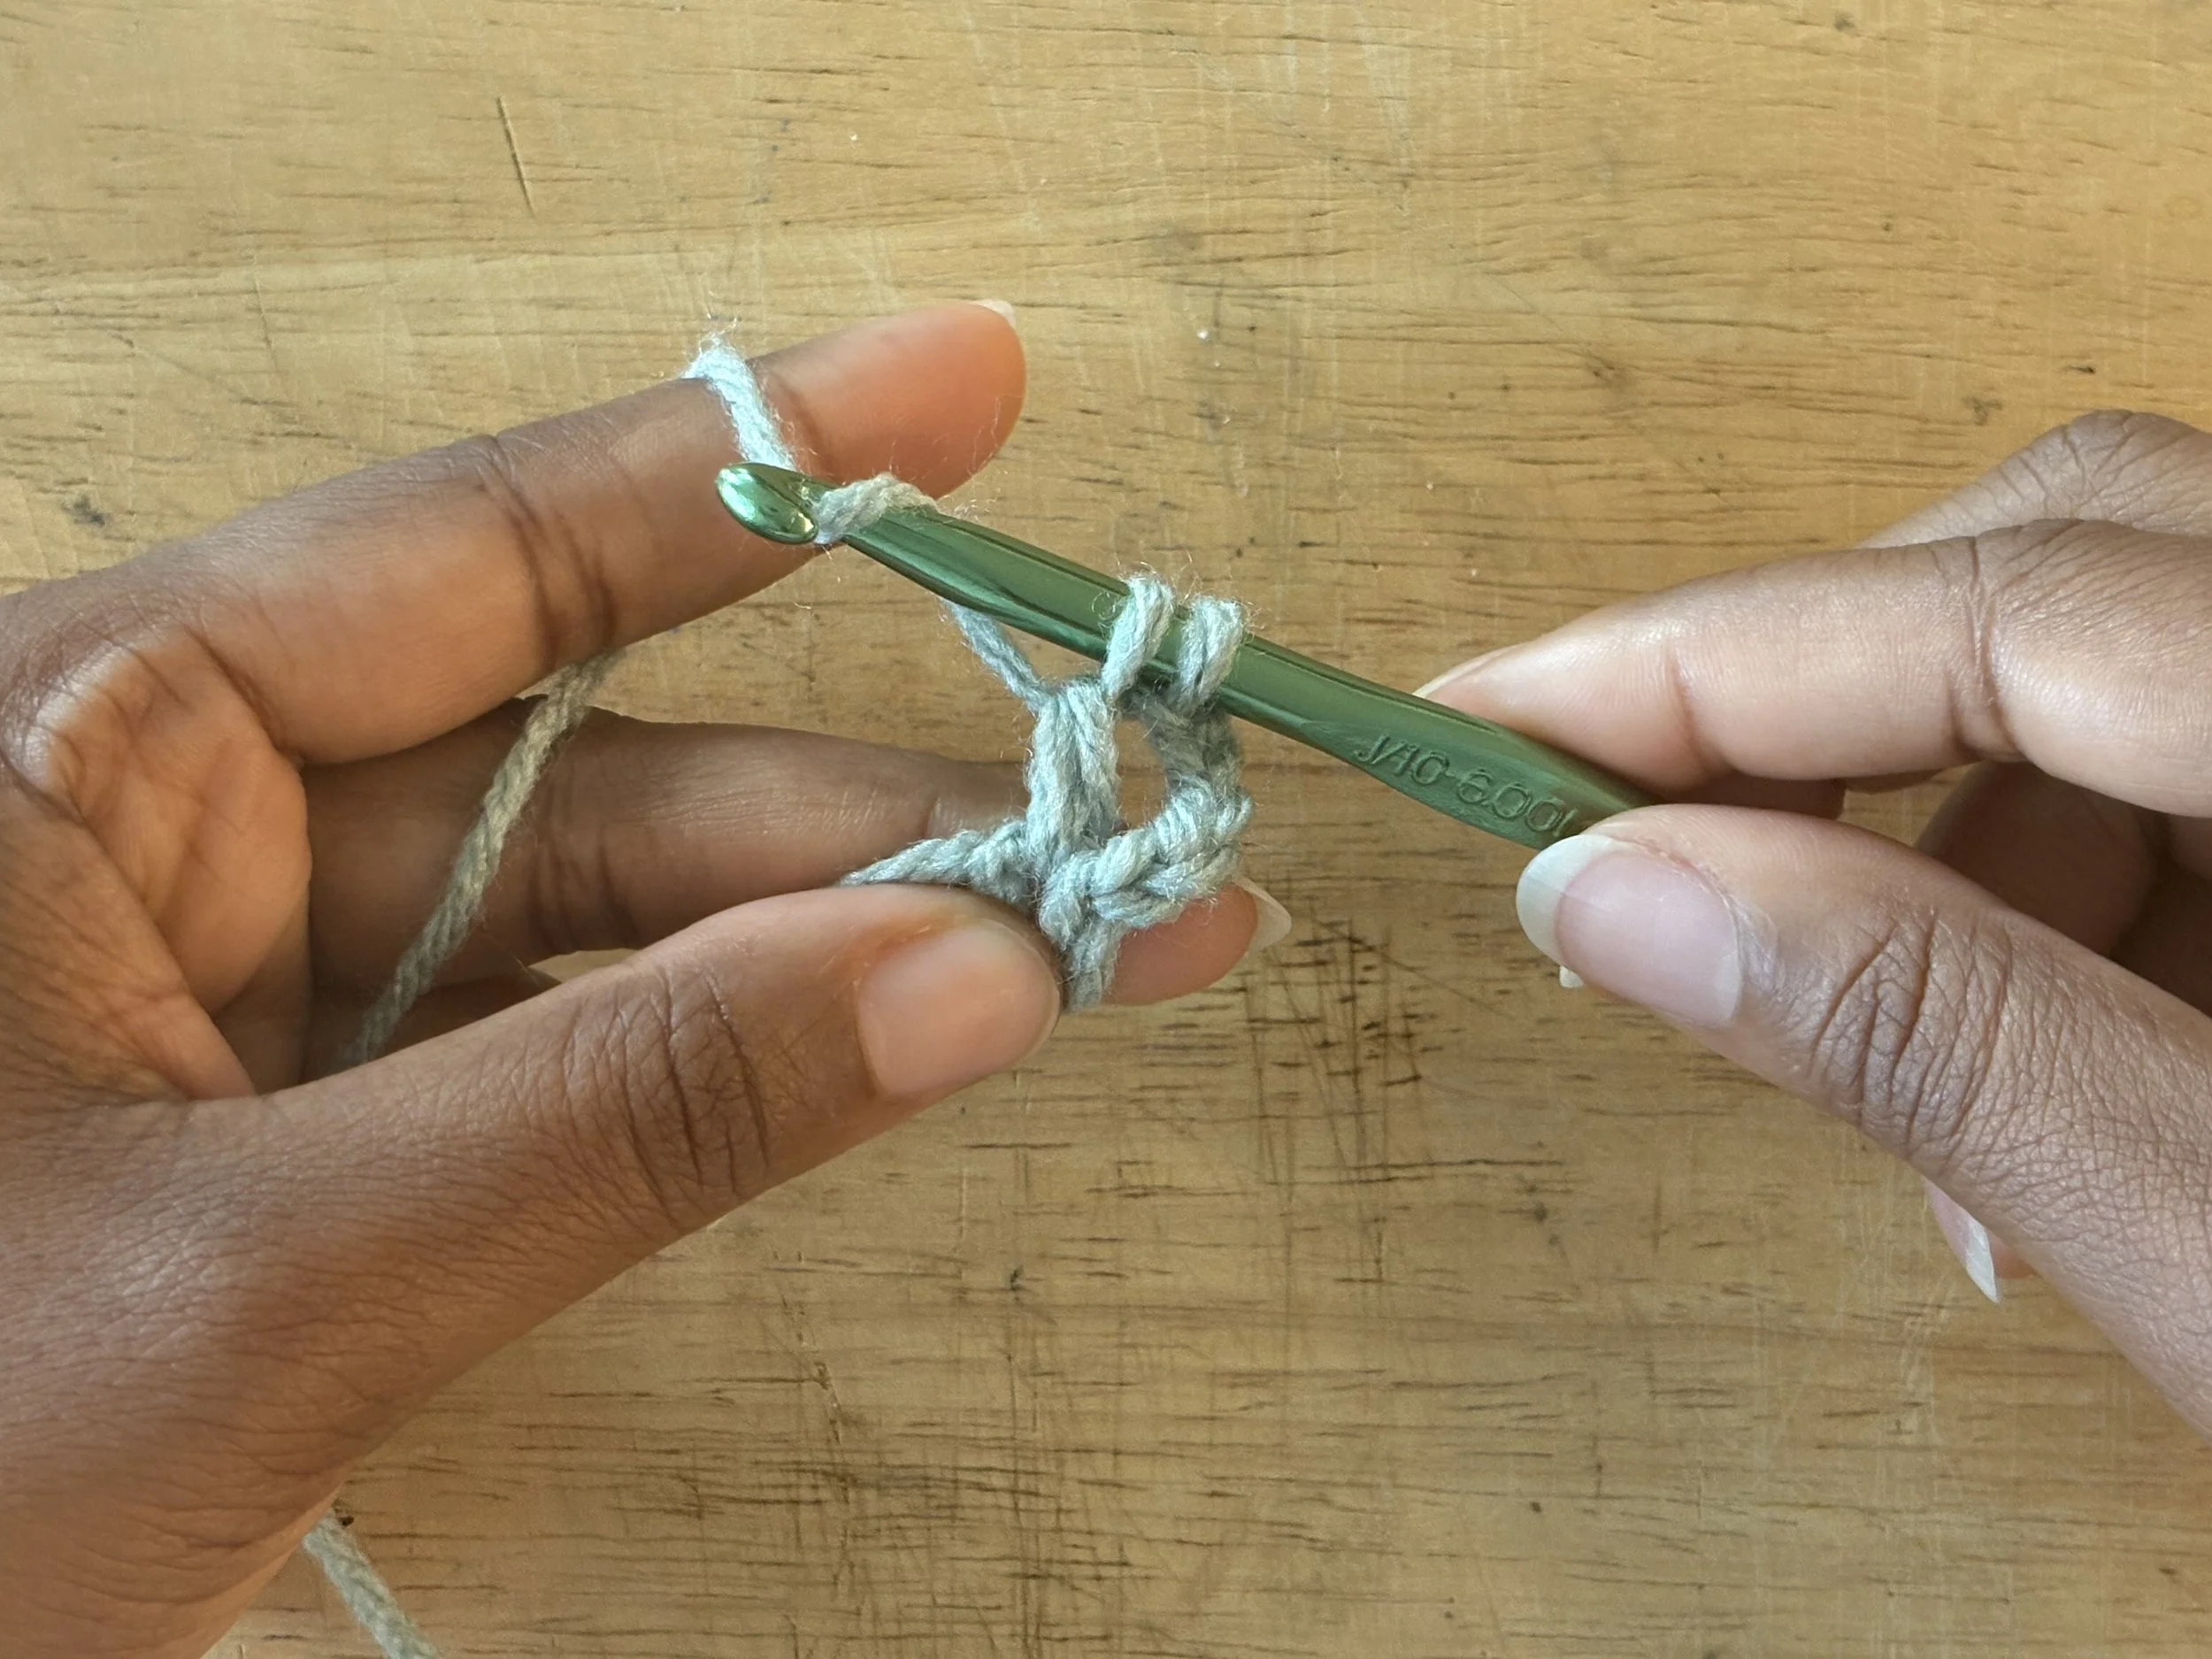
Image 16: Pull your YO through the first two loops on the hook. YO again.
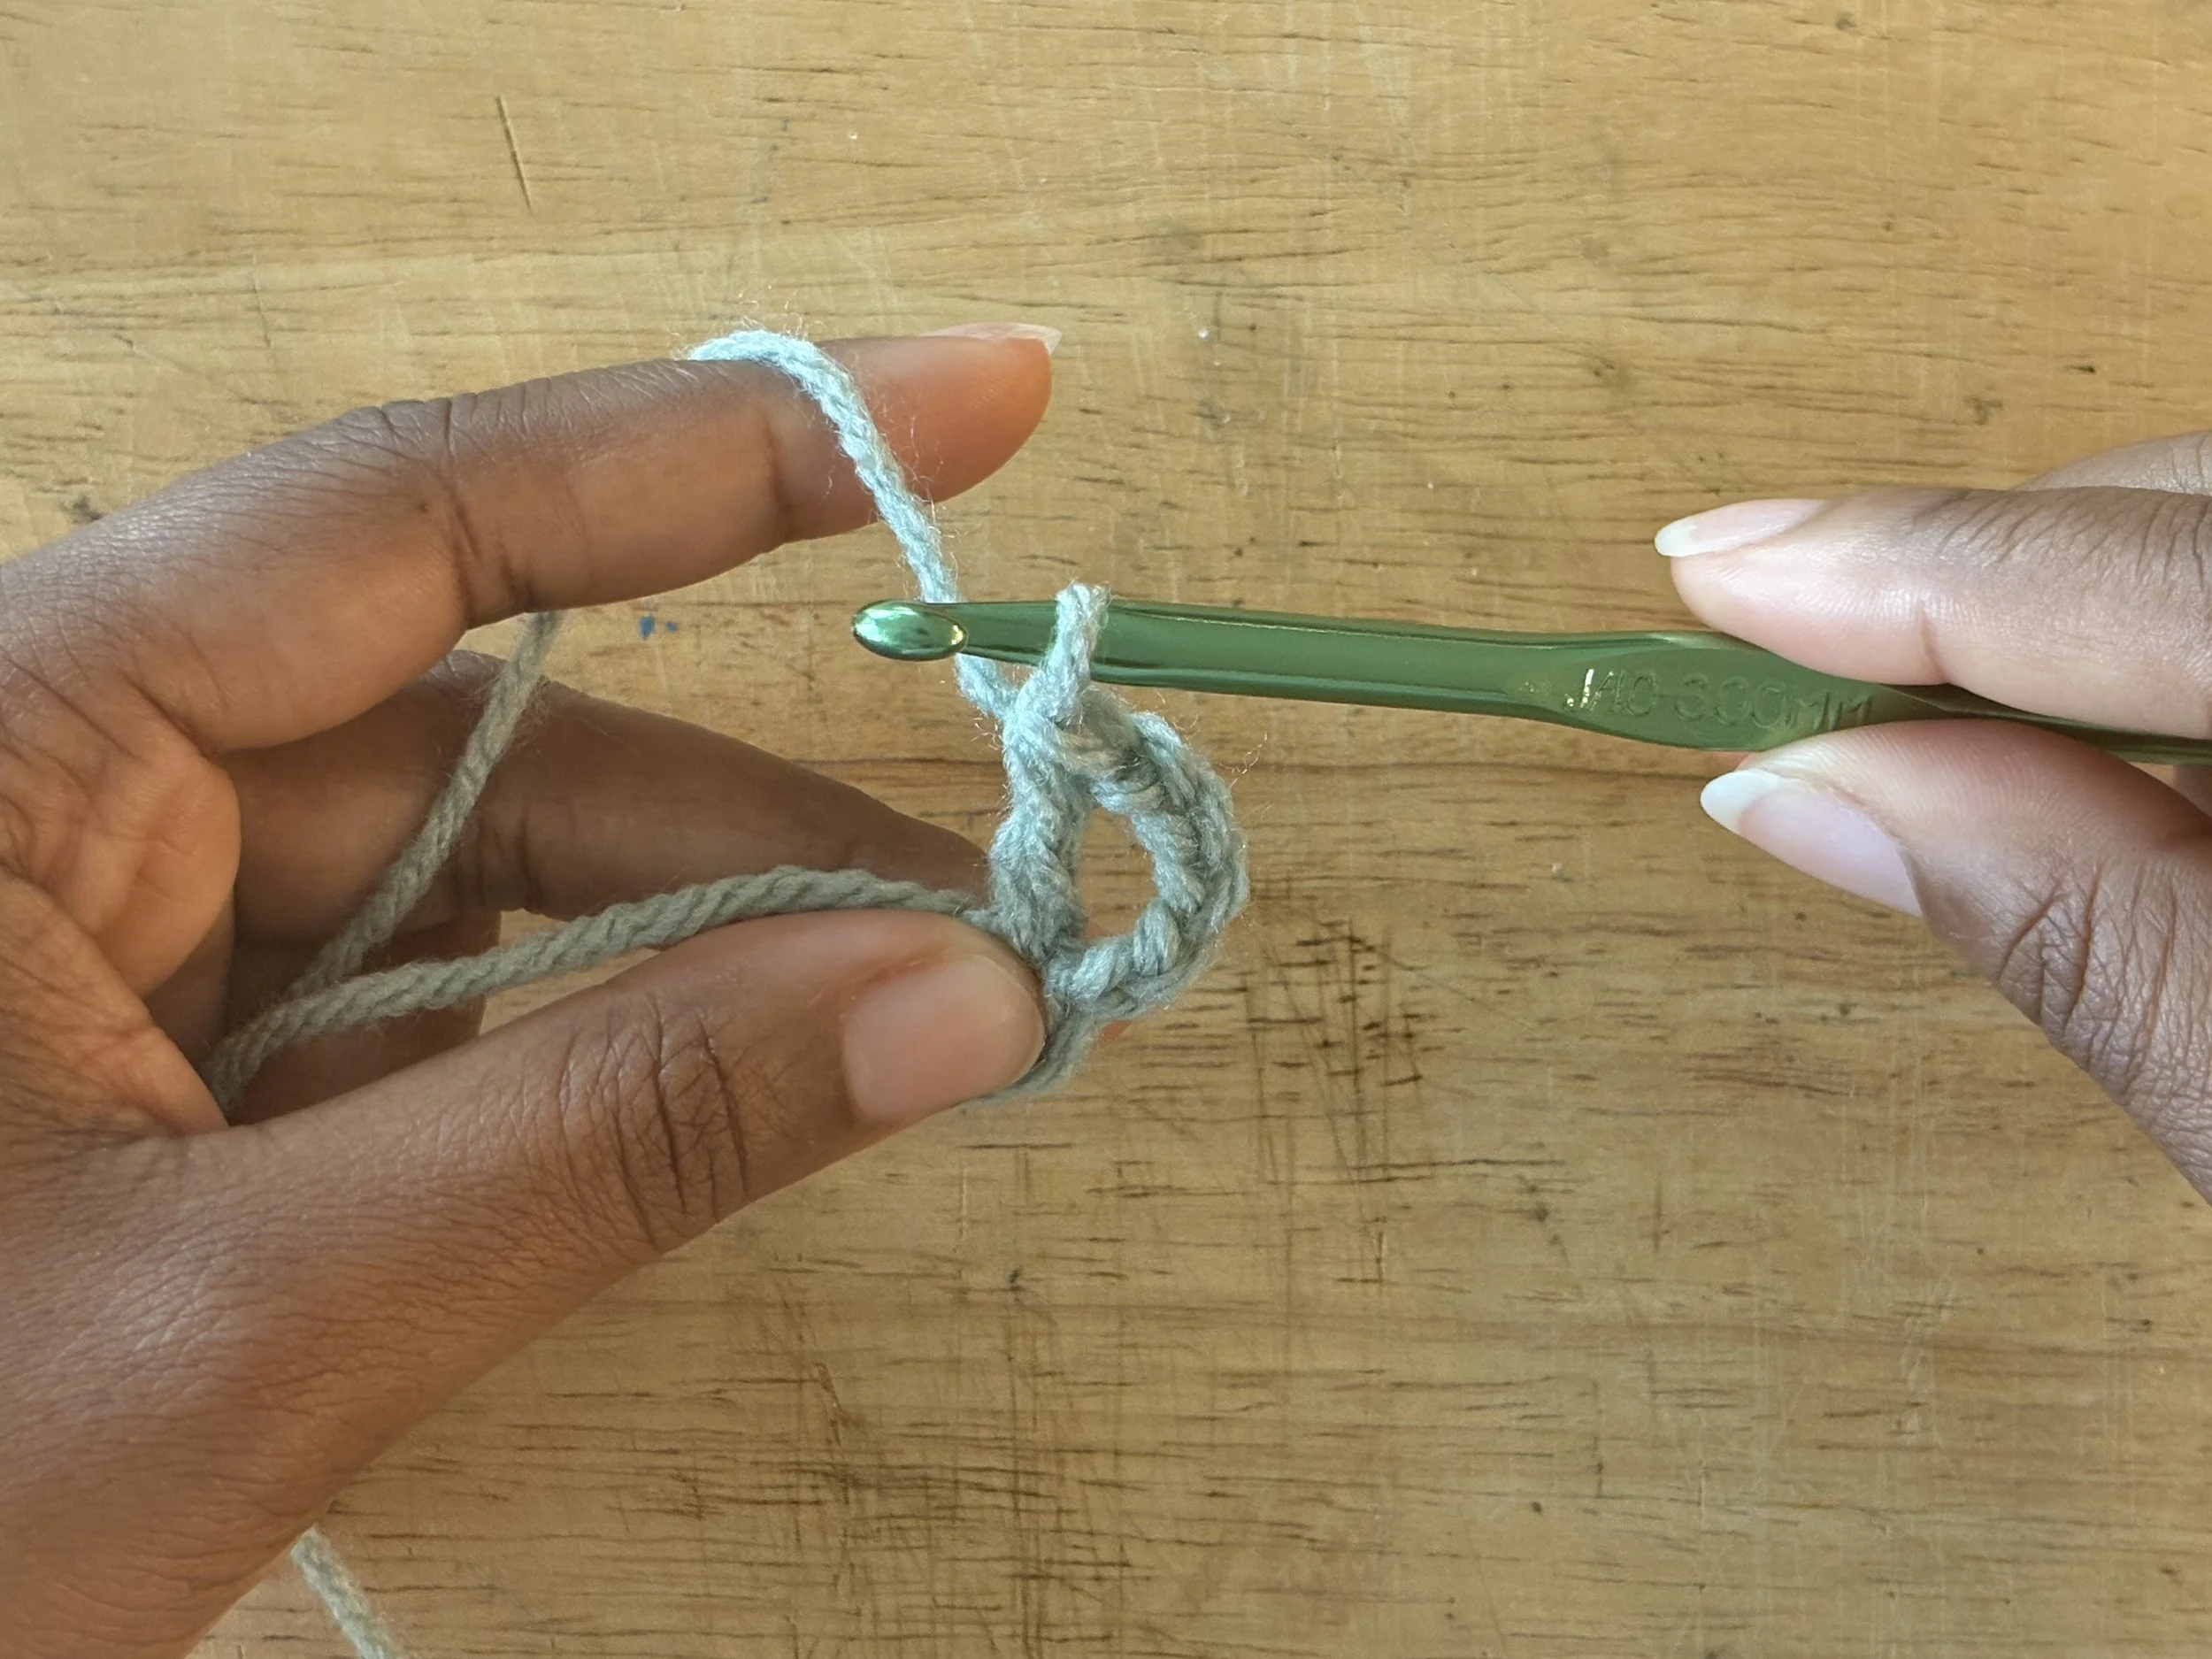
Image 17: Pull YO through the two loops on the hook. This is how your project should look at this point.
After making your first double crochet, make two more immediately after. You should now have 3 double crochets in a row.
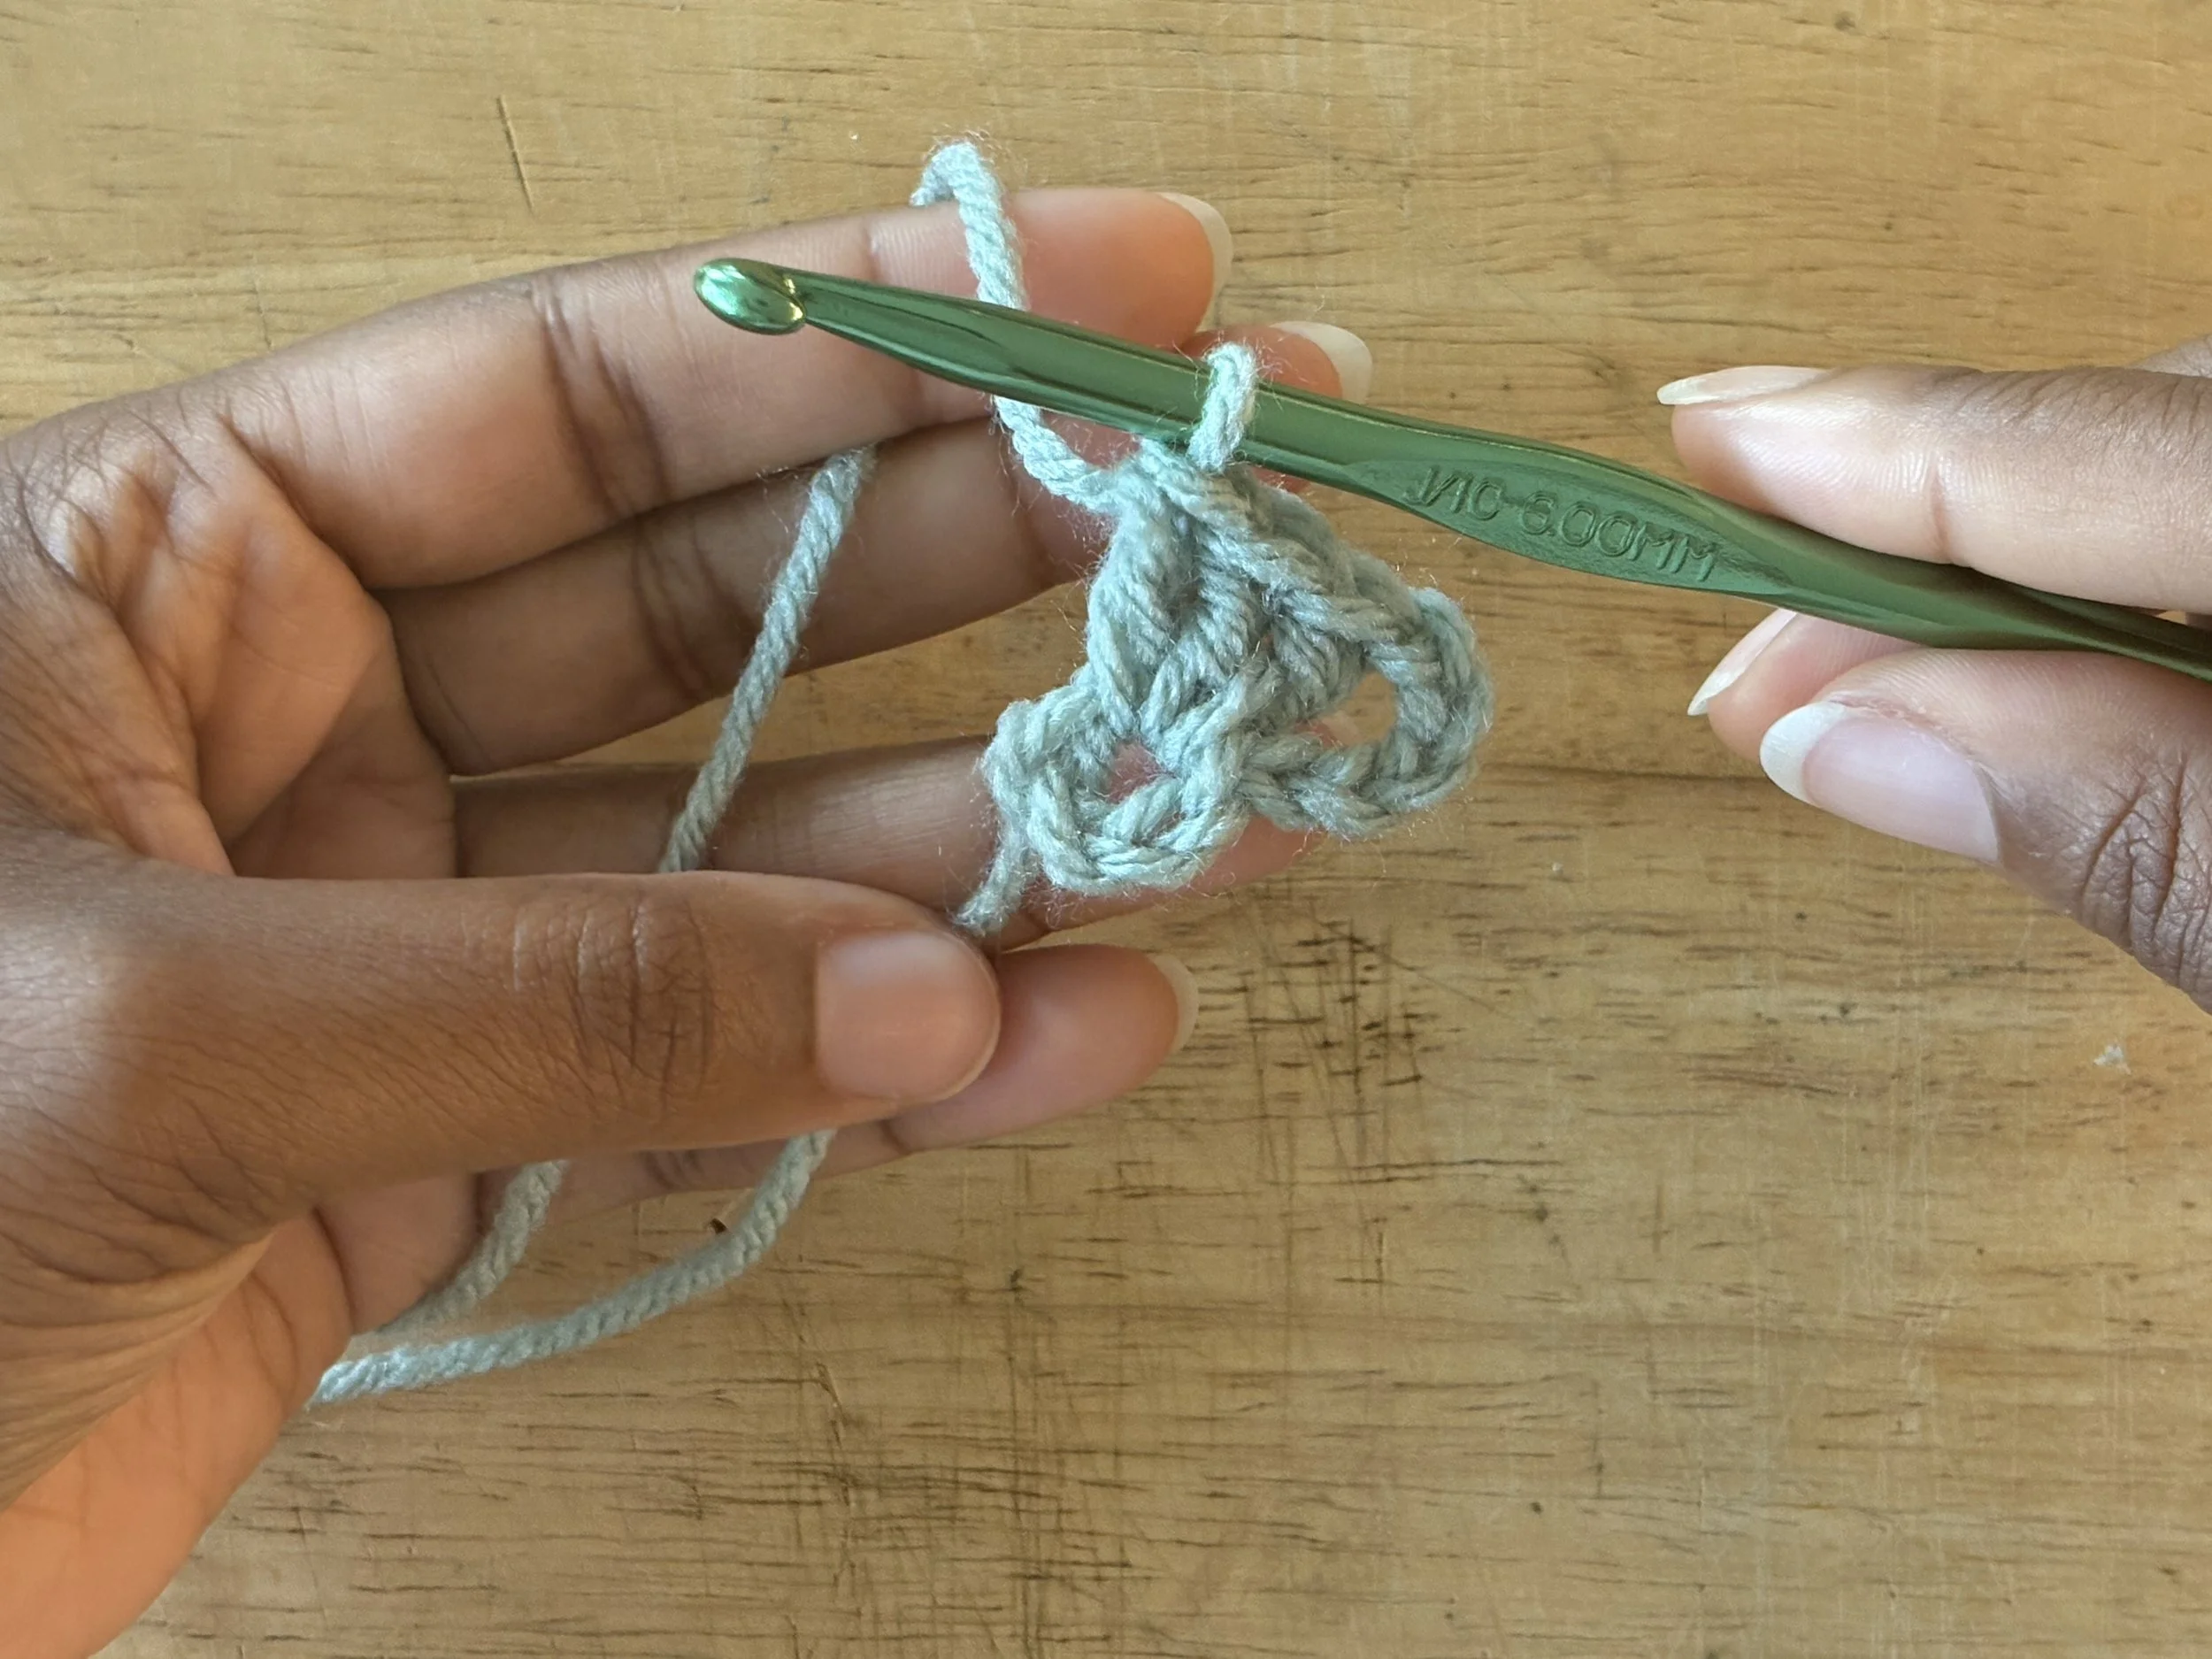
Image 18: Chain 5, plus 3 double crochets in the magic ring
Don’t worry if this first section looks a little uneven, that’s normal at this point. It will all come together at the end of the round.
Next, chain 3.
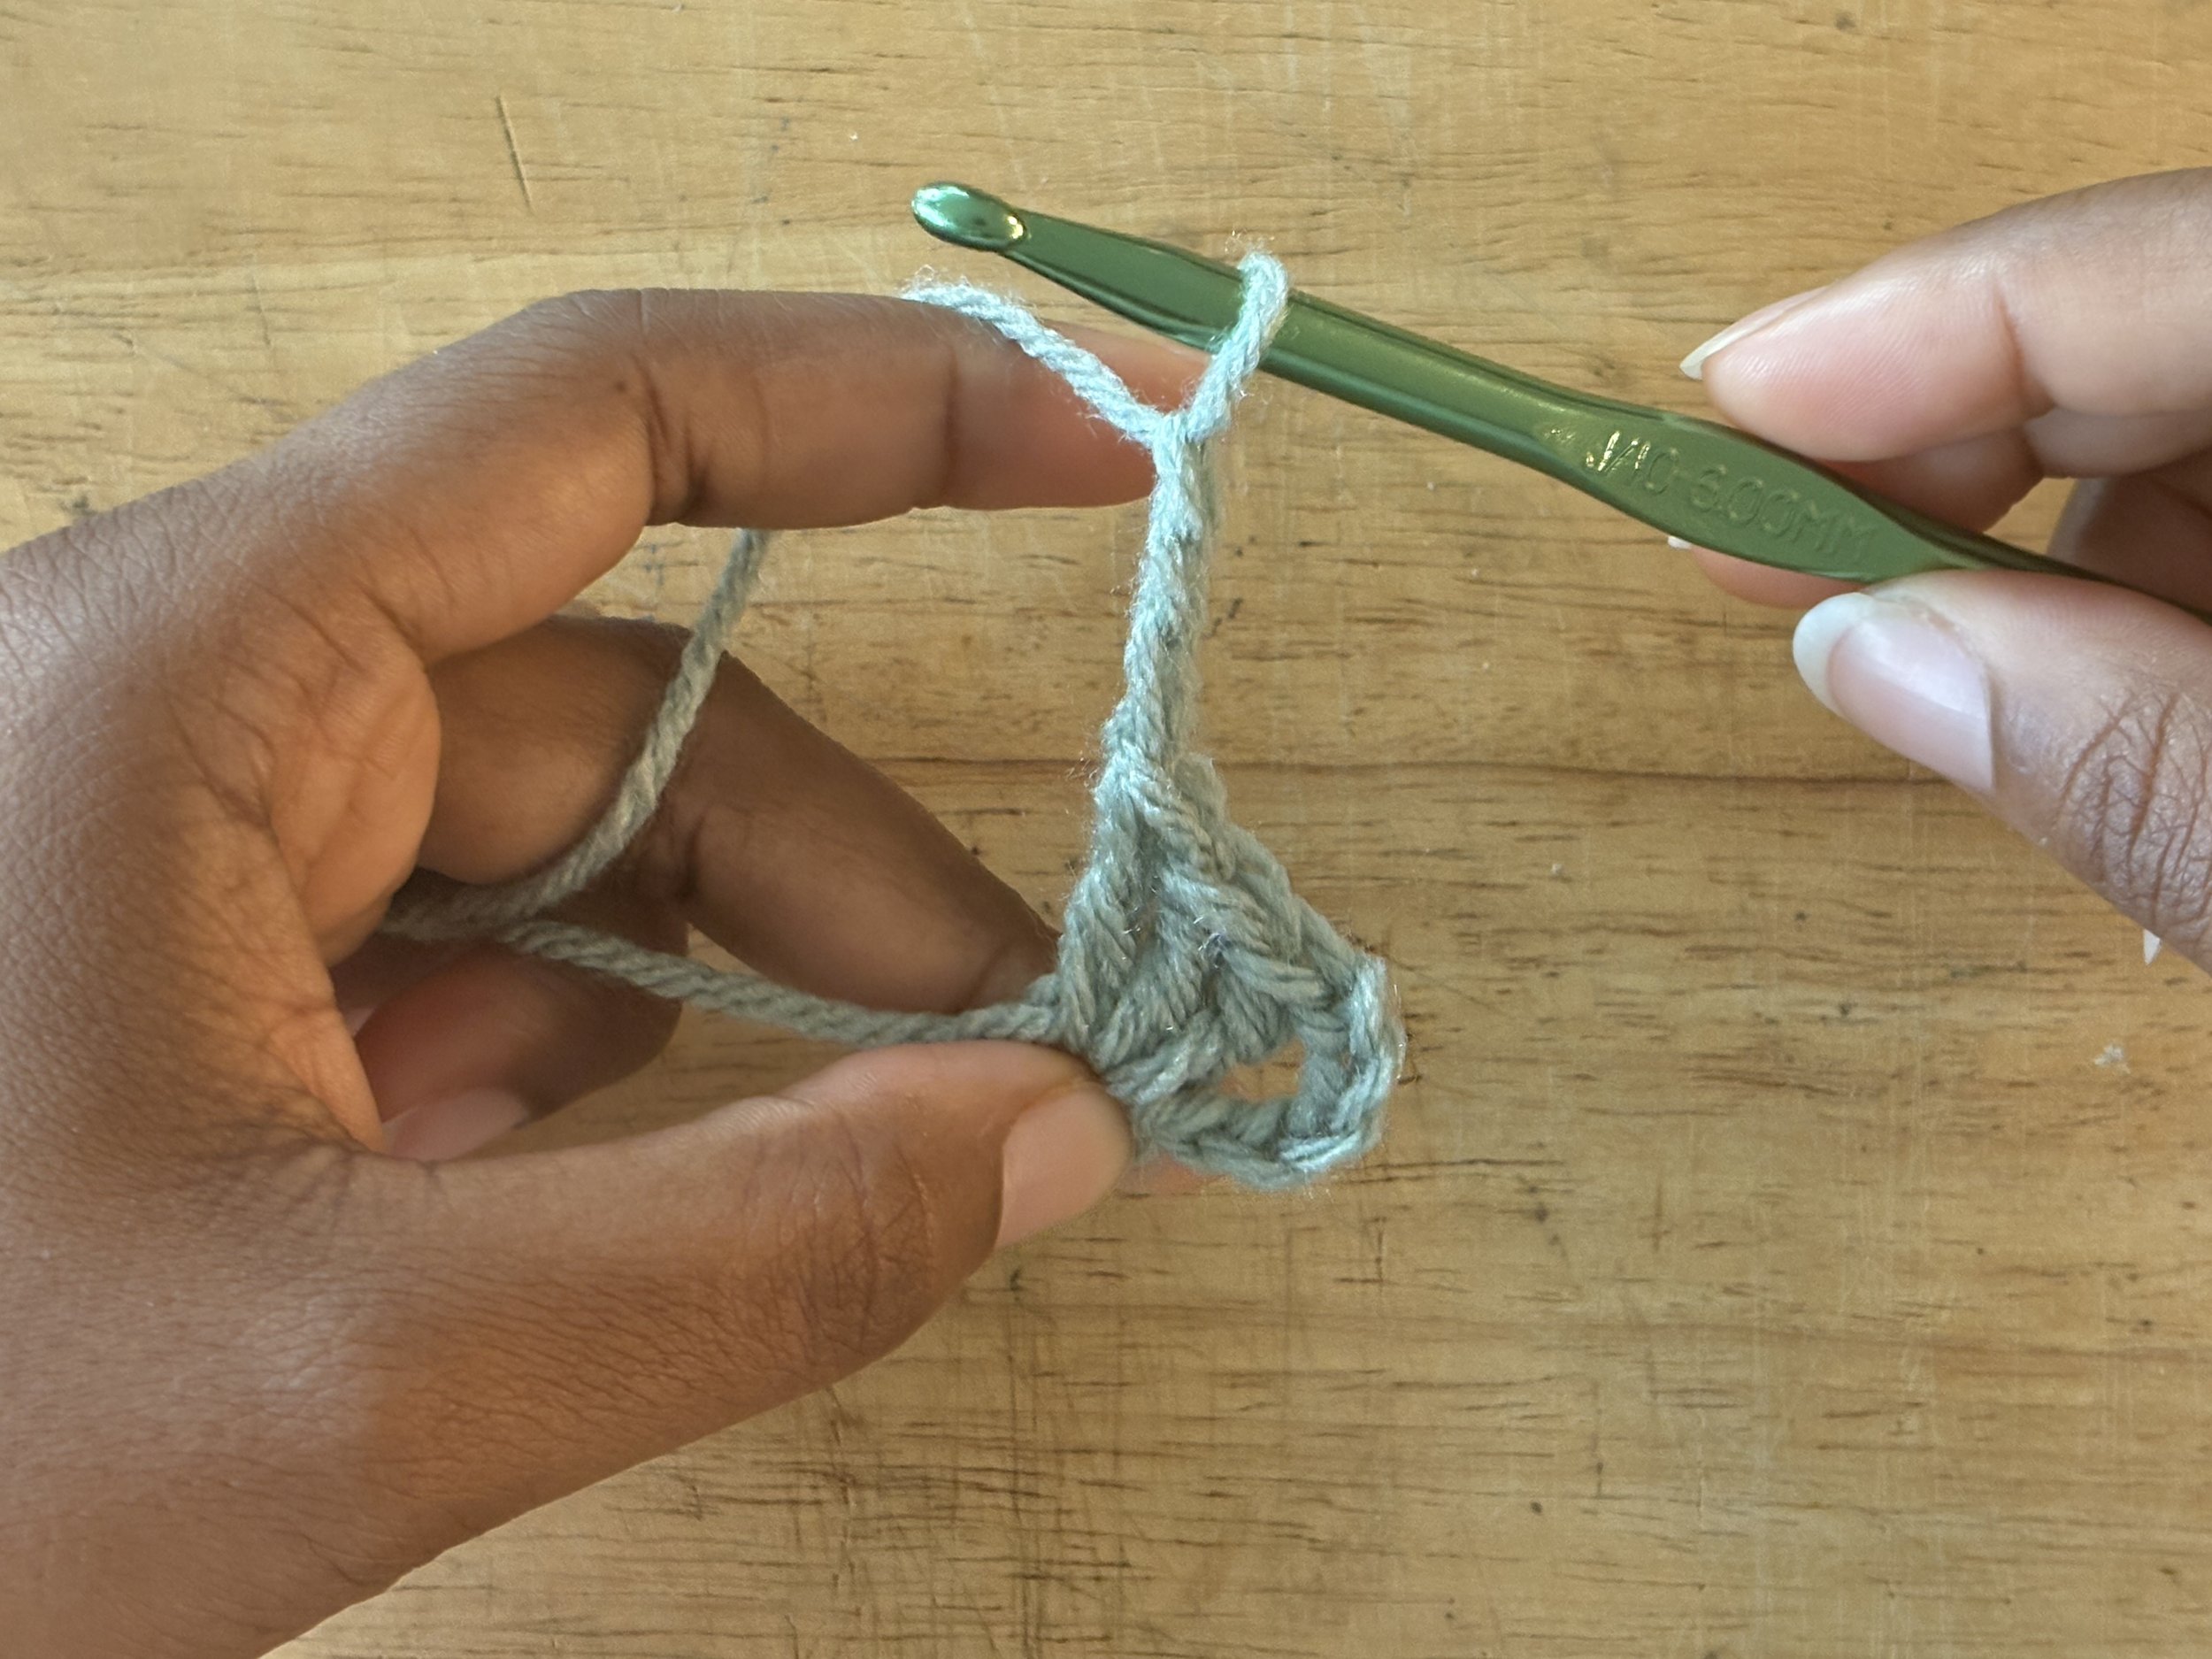
Image 19: Chain 3
After the chain 3, you’re going to make another 3 double crochets in the magic ring, followed by a “chain 3”.
You’re going to repeat the “double crochet 3, chain 3” sequence one more time, for a total of three full “double crochet 3’s” and three “chain 3’s” [see image 20].
After the last chain 3, you’re going to make only two double crochets. You should now be all the way around the ring, back to the “chain 5” starting point [see image 21].
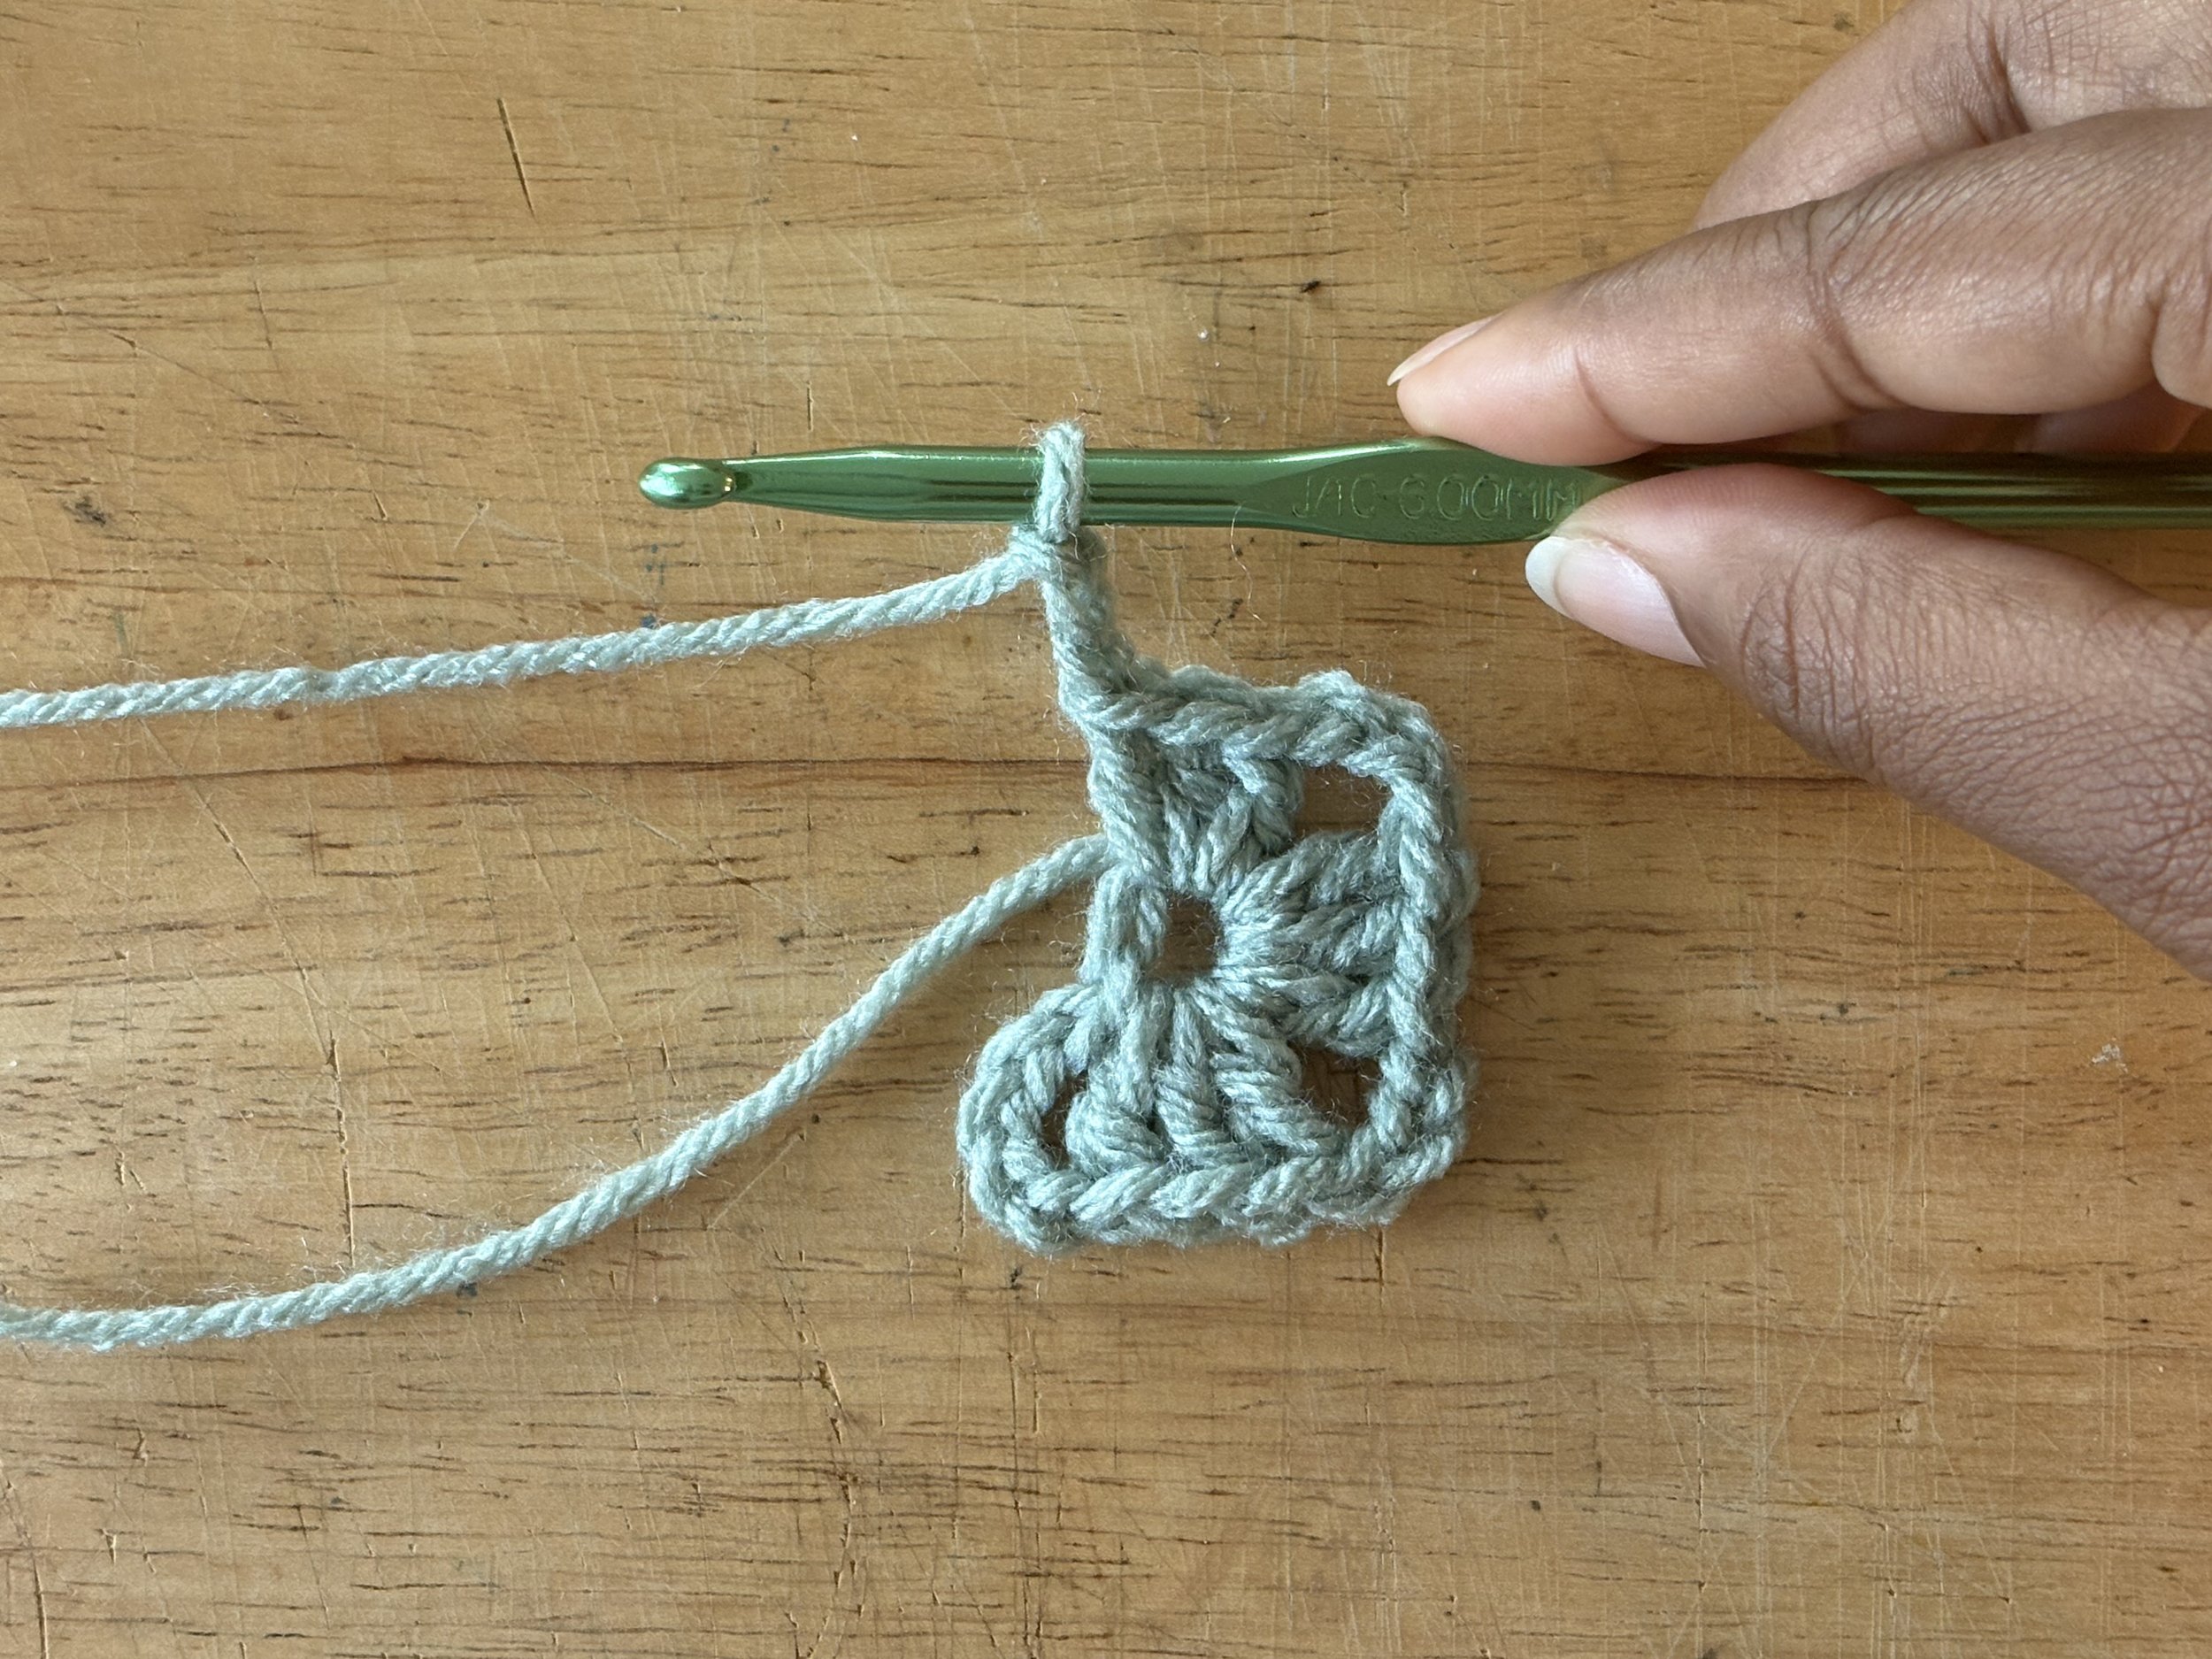
Image 20: 3 Ch 5, followed by 3 sequences of DC 3, Ch 3.
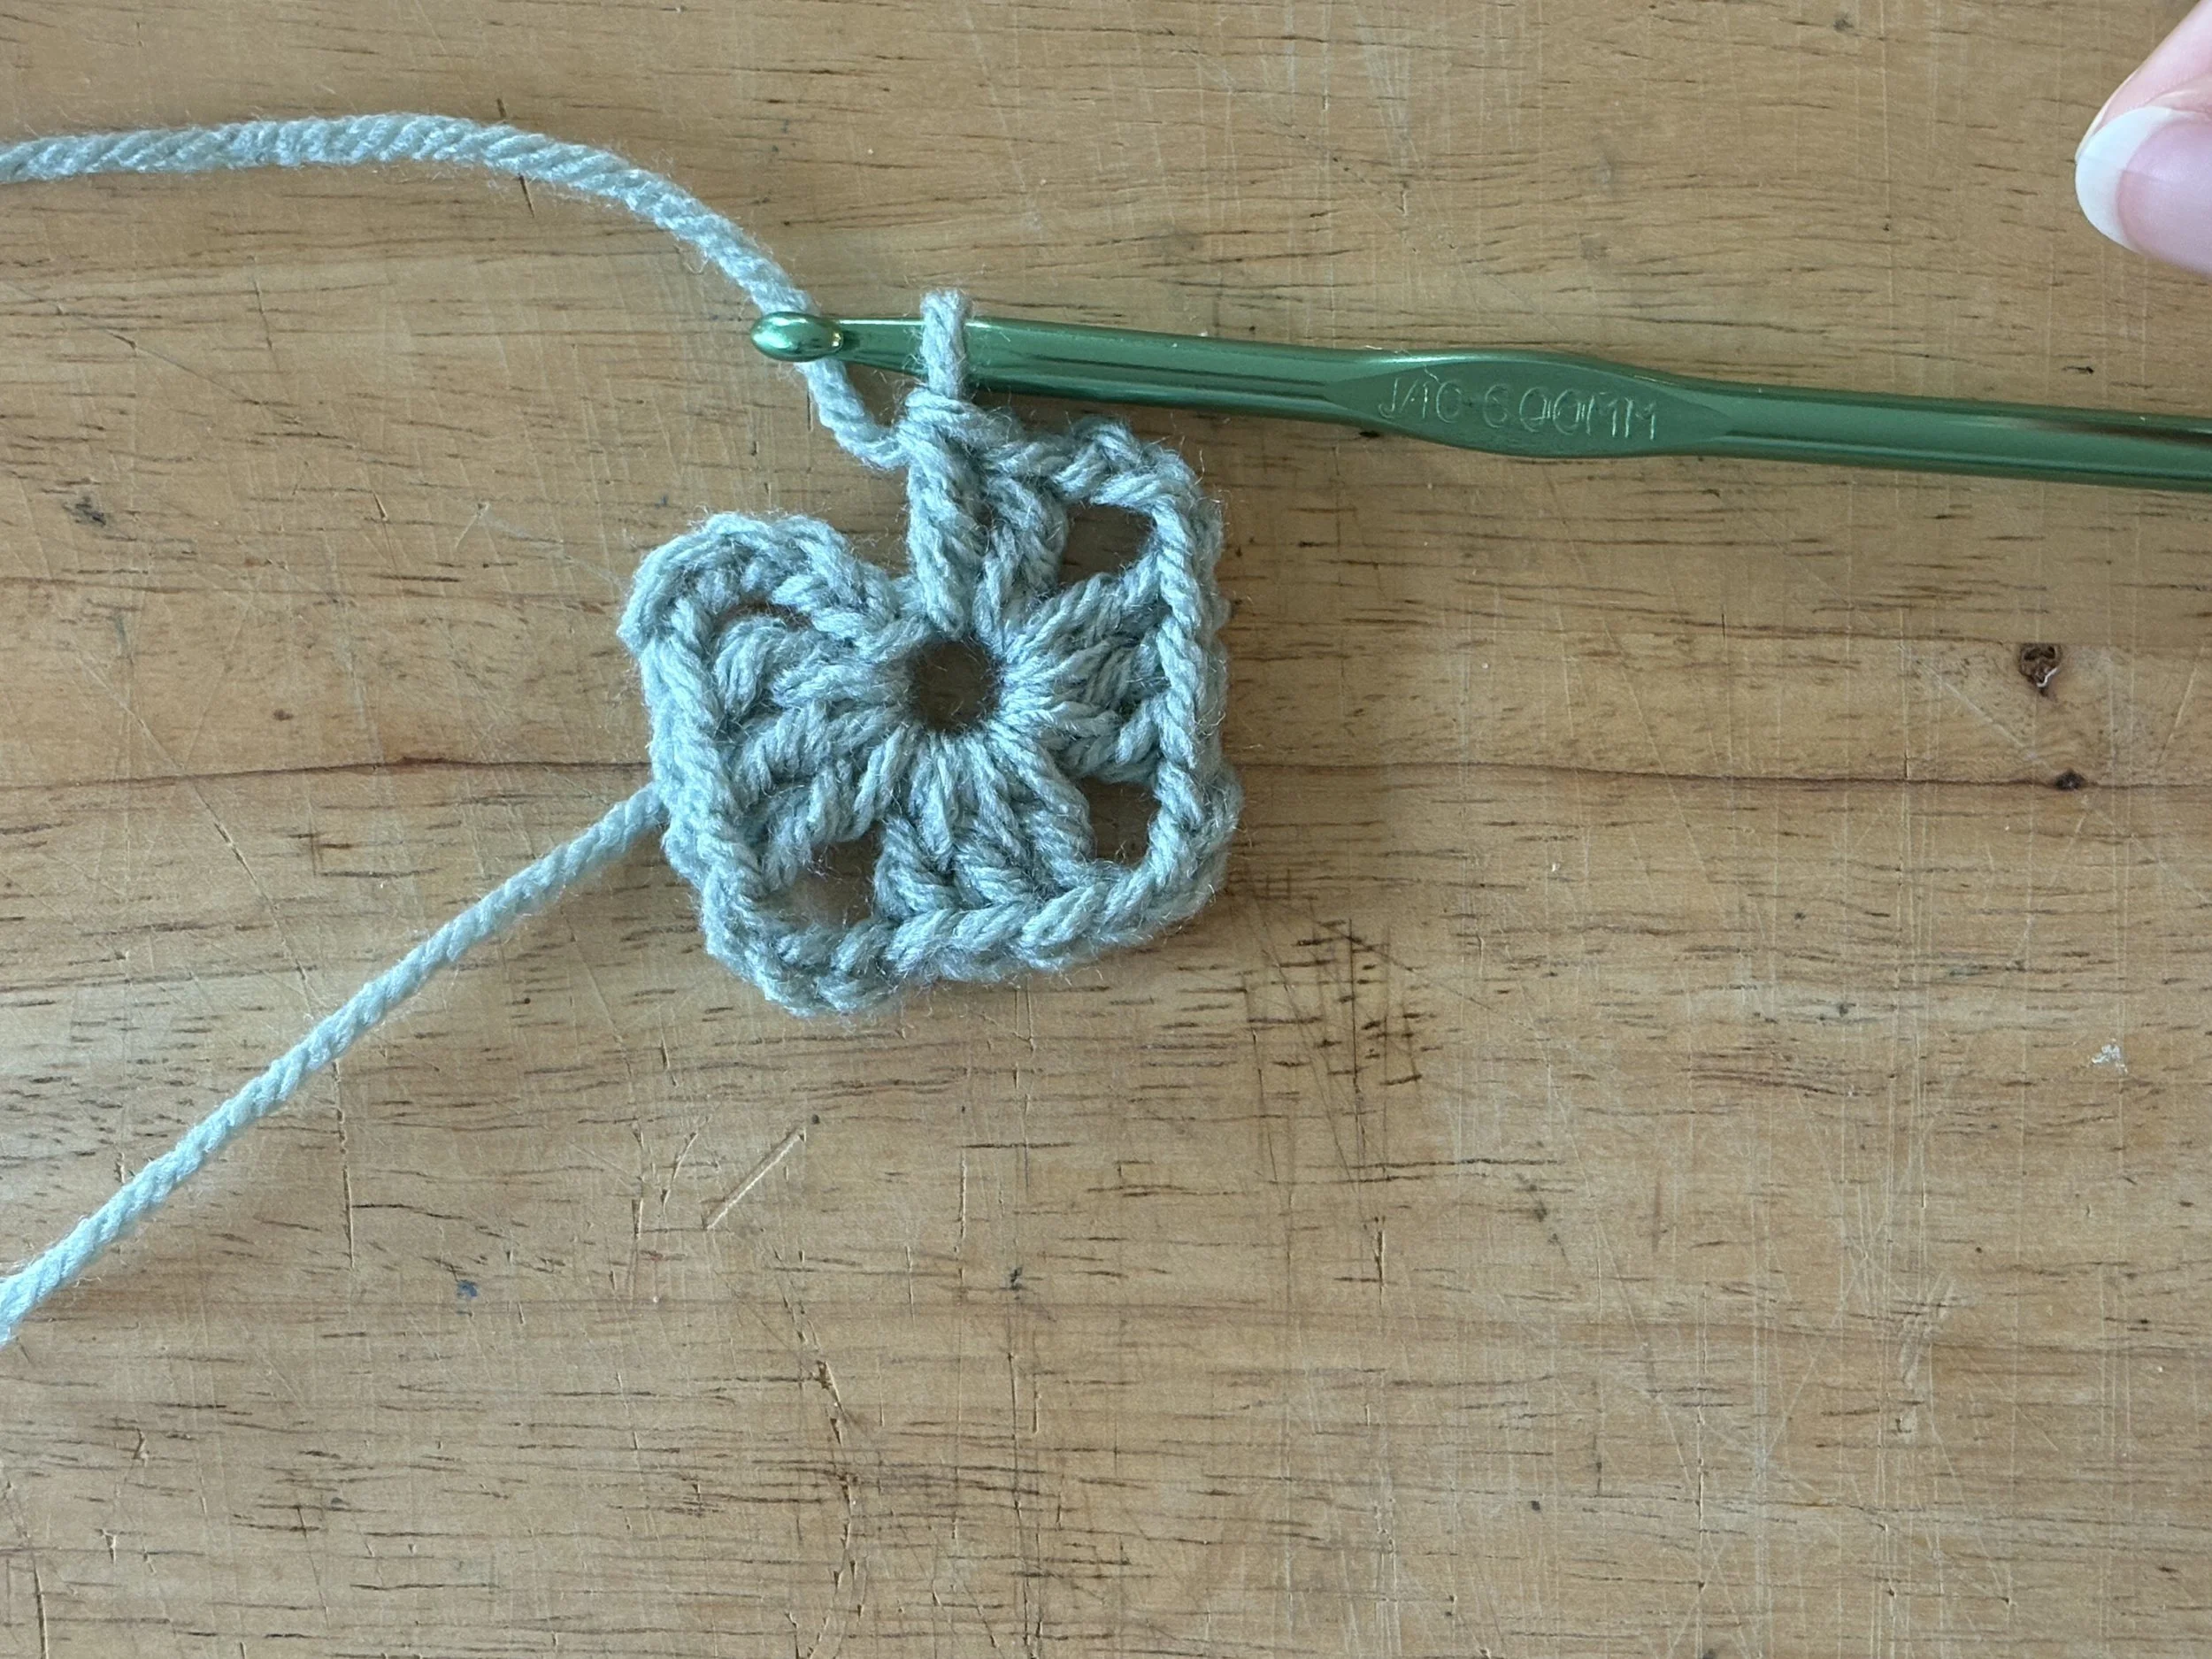
Image 21: DC 2 in the last sequence. You should be back at the start of the work.
You can slide your stitches around the ring if you need to.
To finish the round, slip stitch into the top of the chain 5 space.
You don’t need to slip stitch into a specific stitch, just insert your hook around the entire chain at the same height as your double crochet stitch.
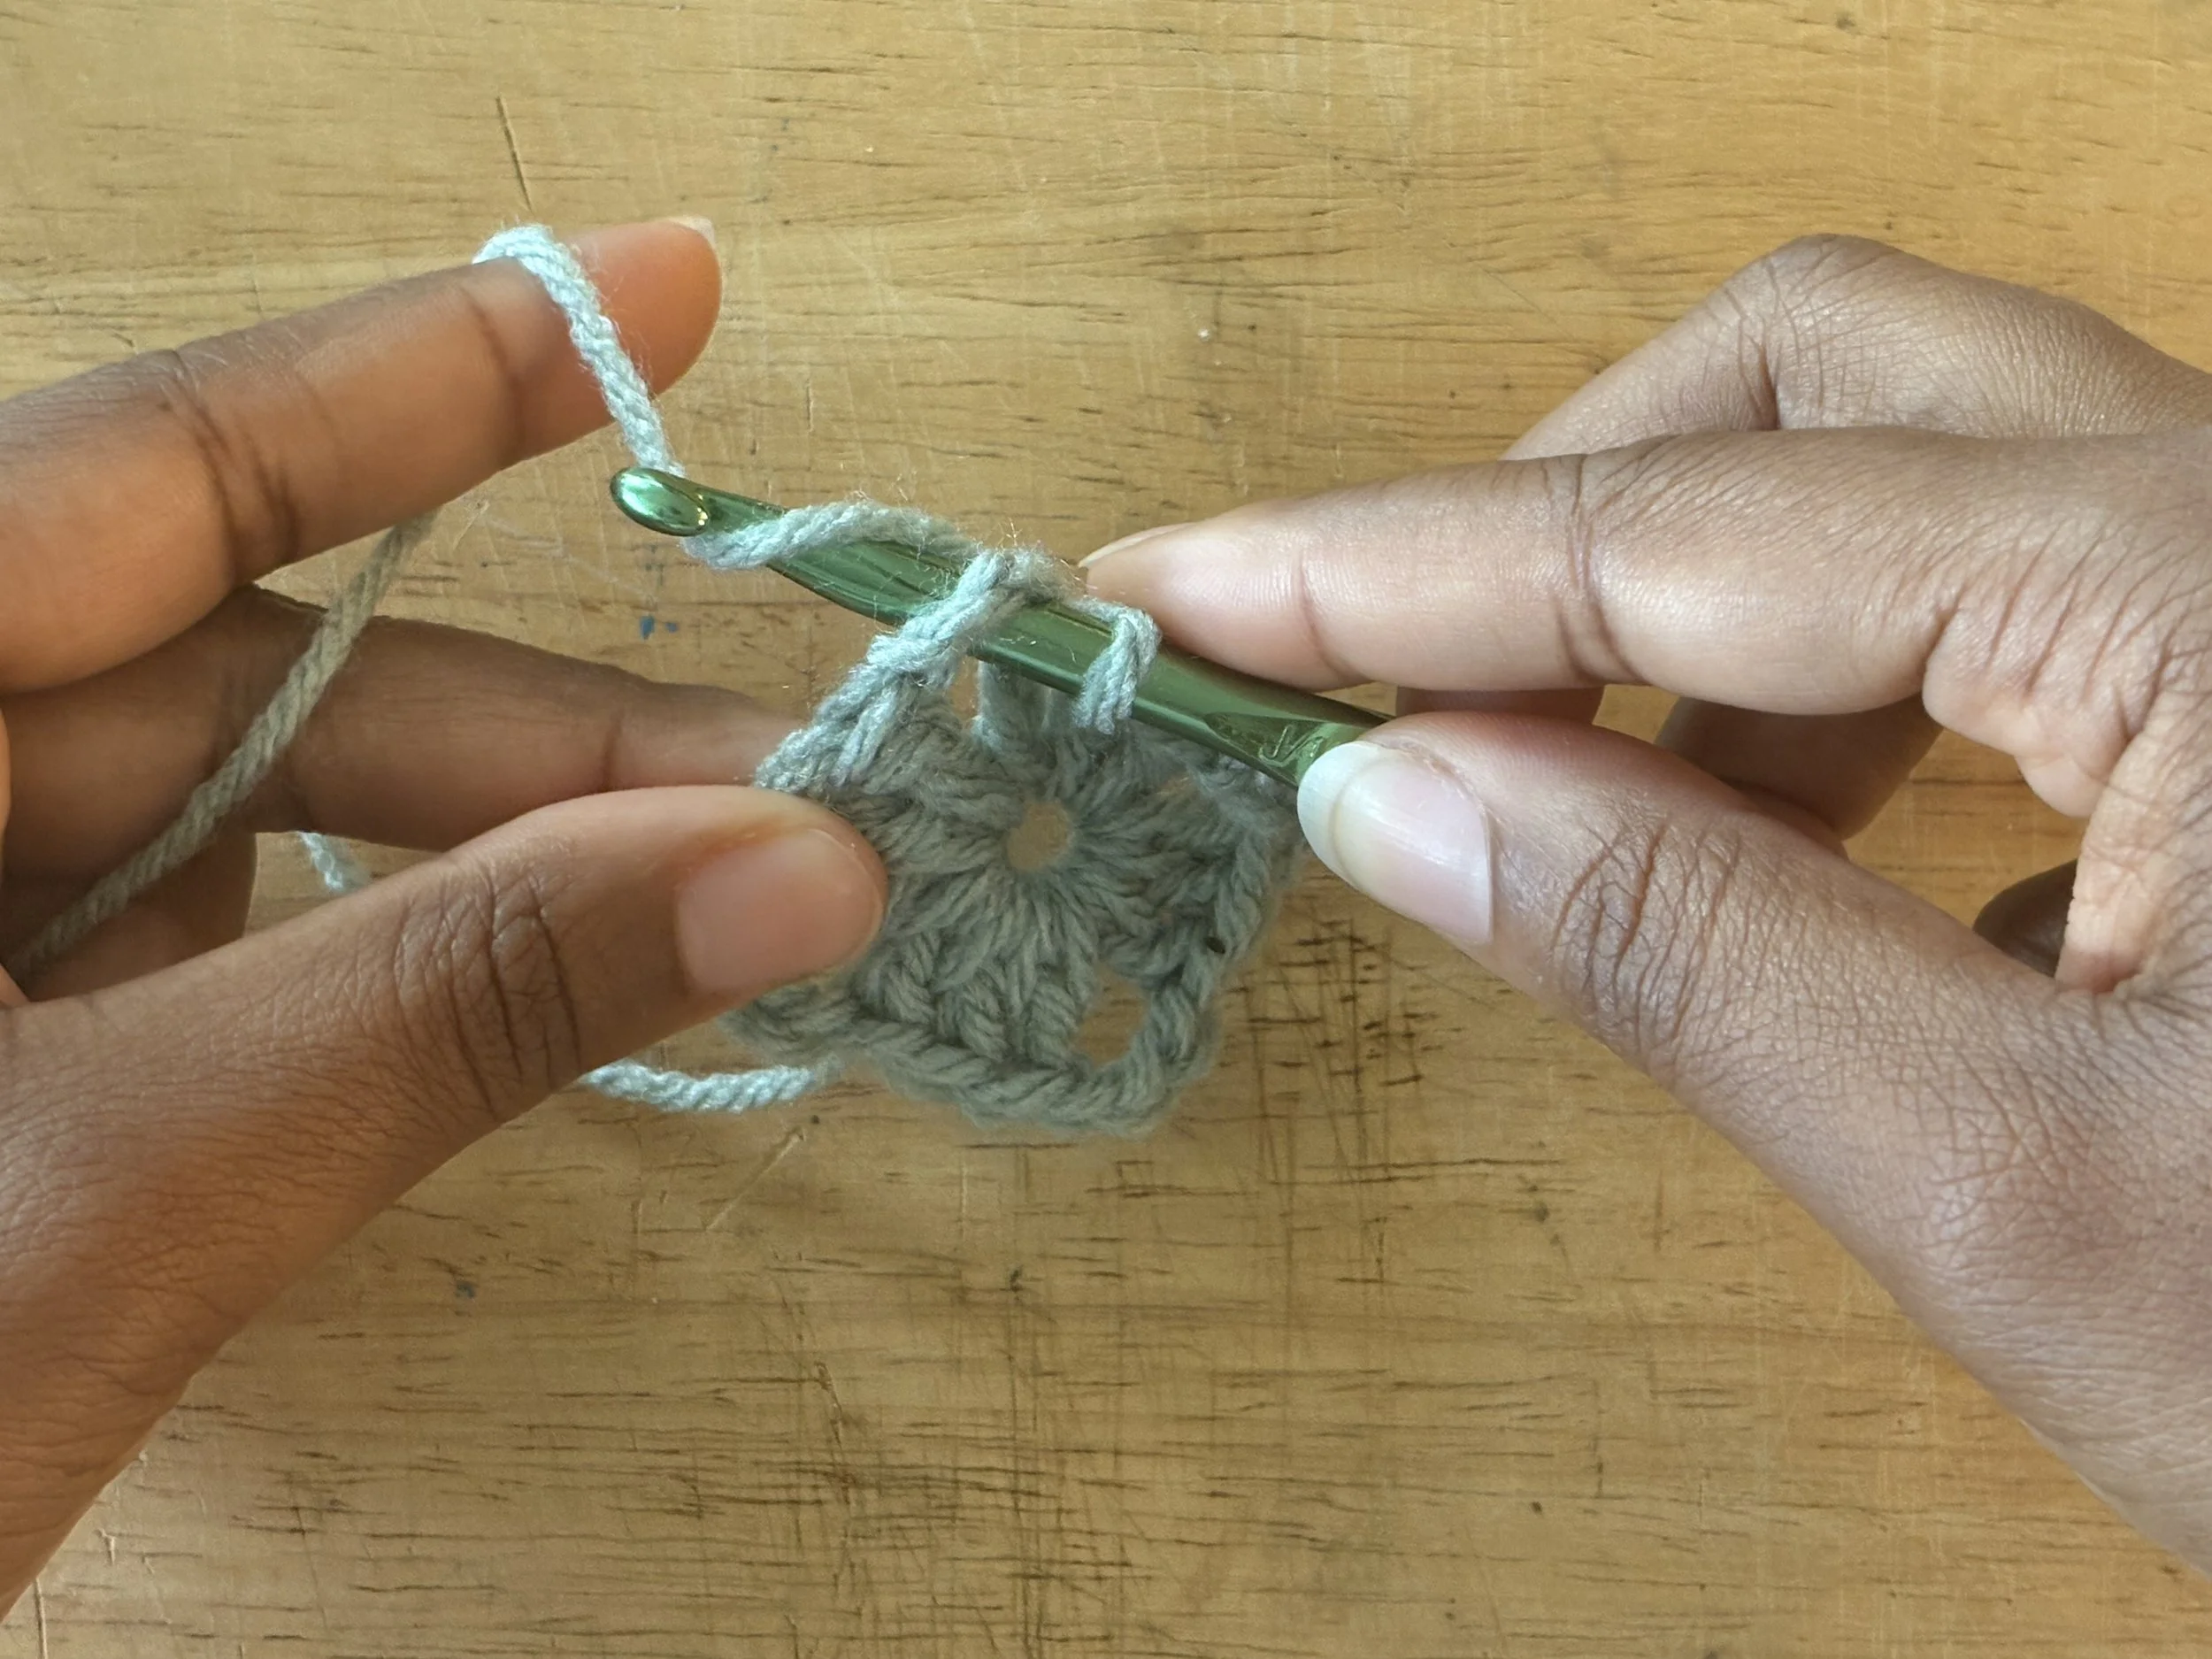
Image 22: Insert hook into the chain 5 space. YO.
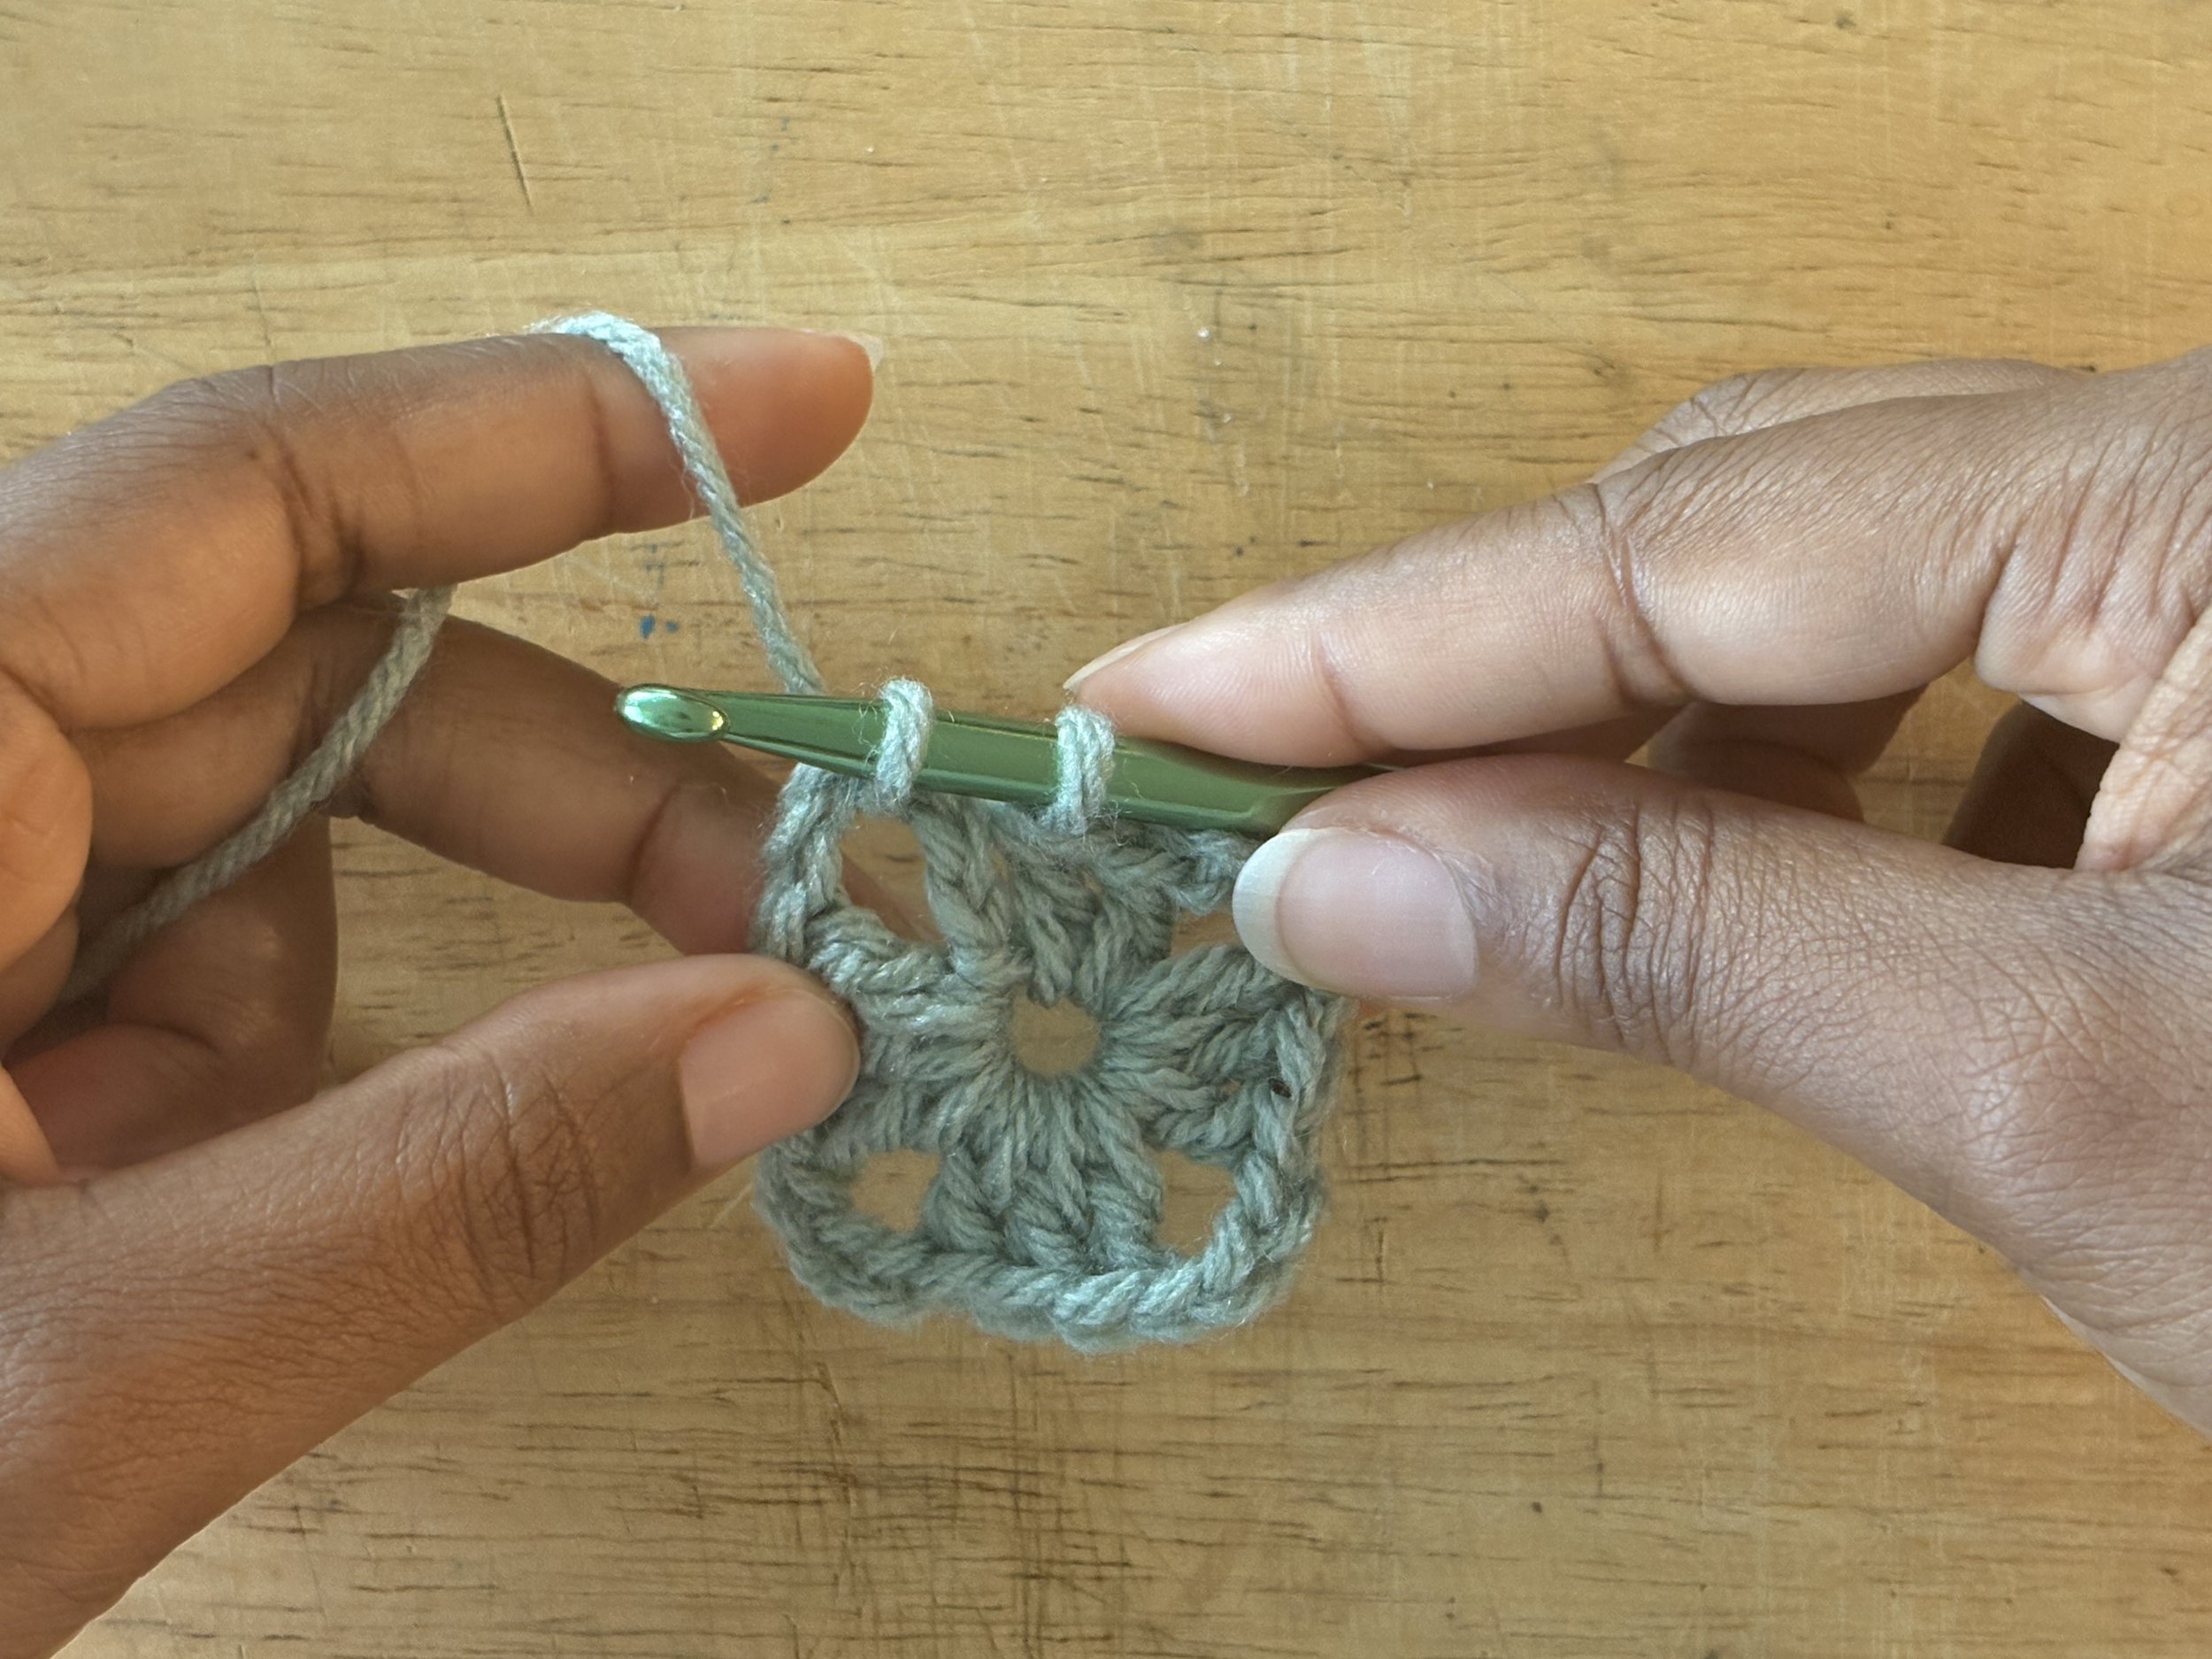
Image 23: Pull YO through the chain 5 space. Do not YO again.
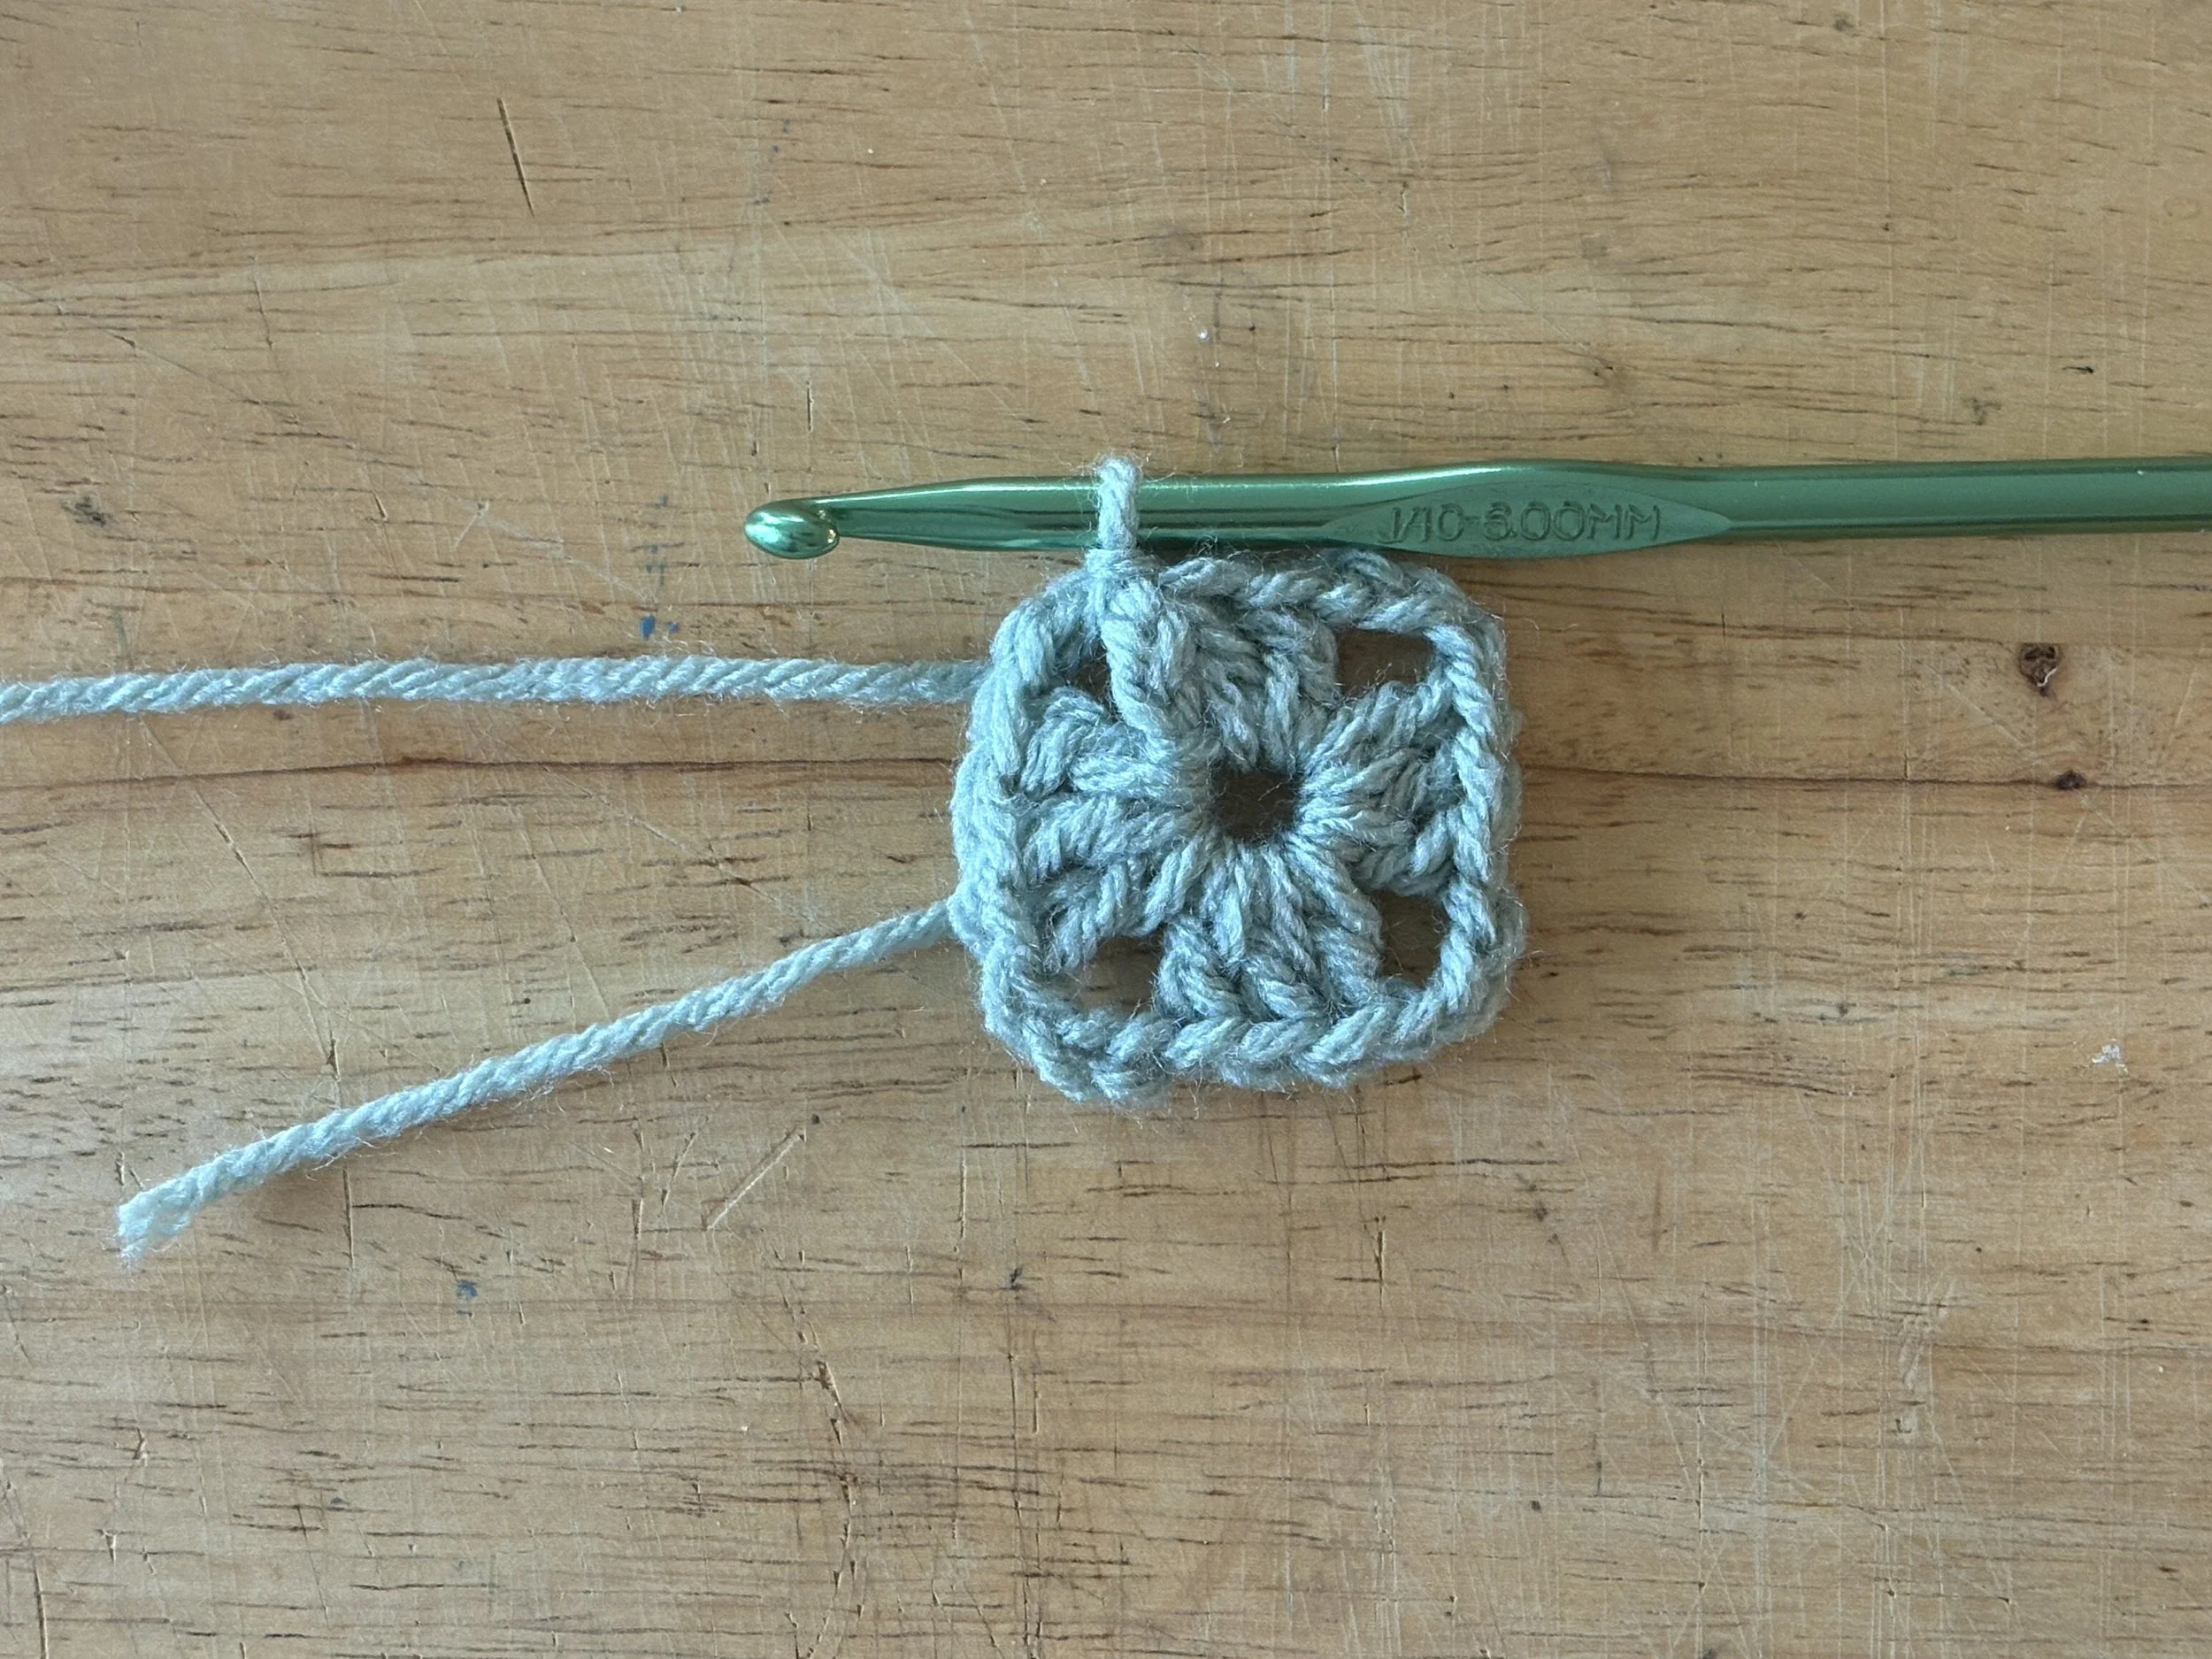
Image 24: Pull the same loop through the last loop on the hook. This completes the slip stitch (sl st).
The last thing to do is to chain 1, then slip stitch into the same space.
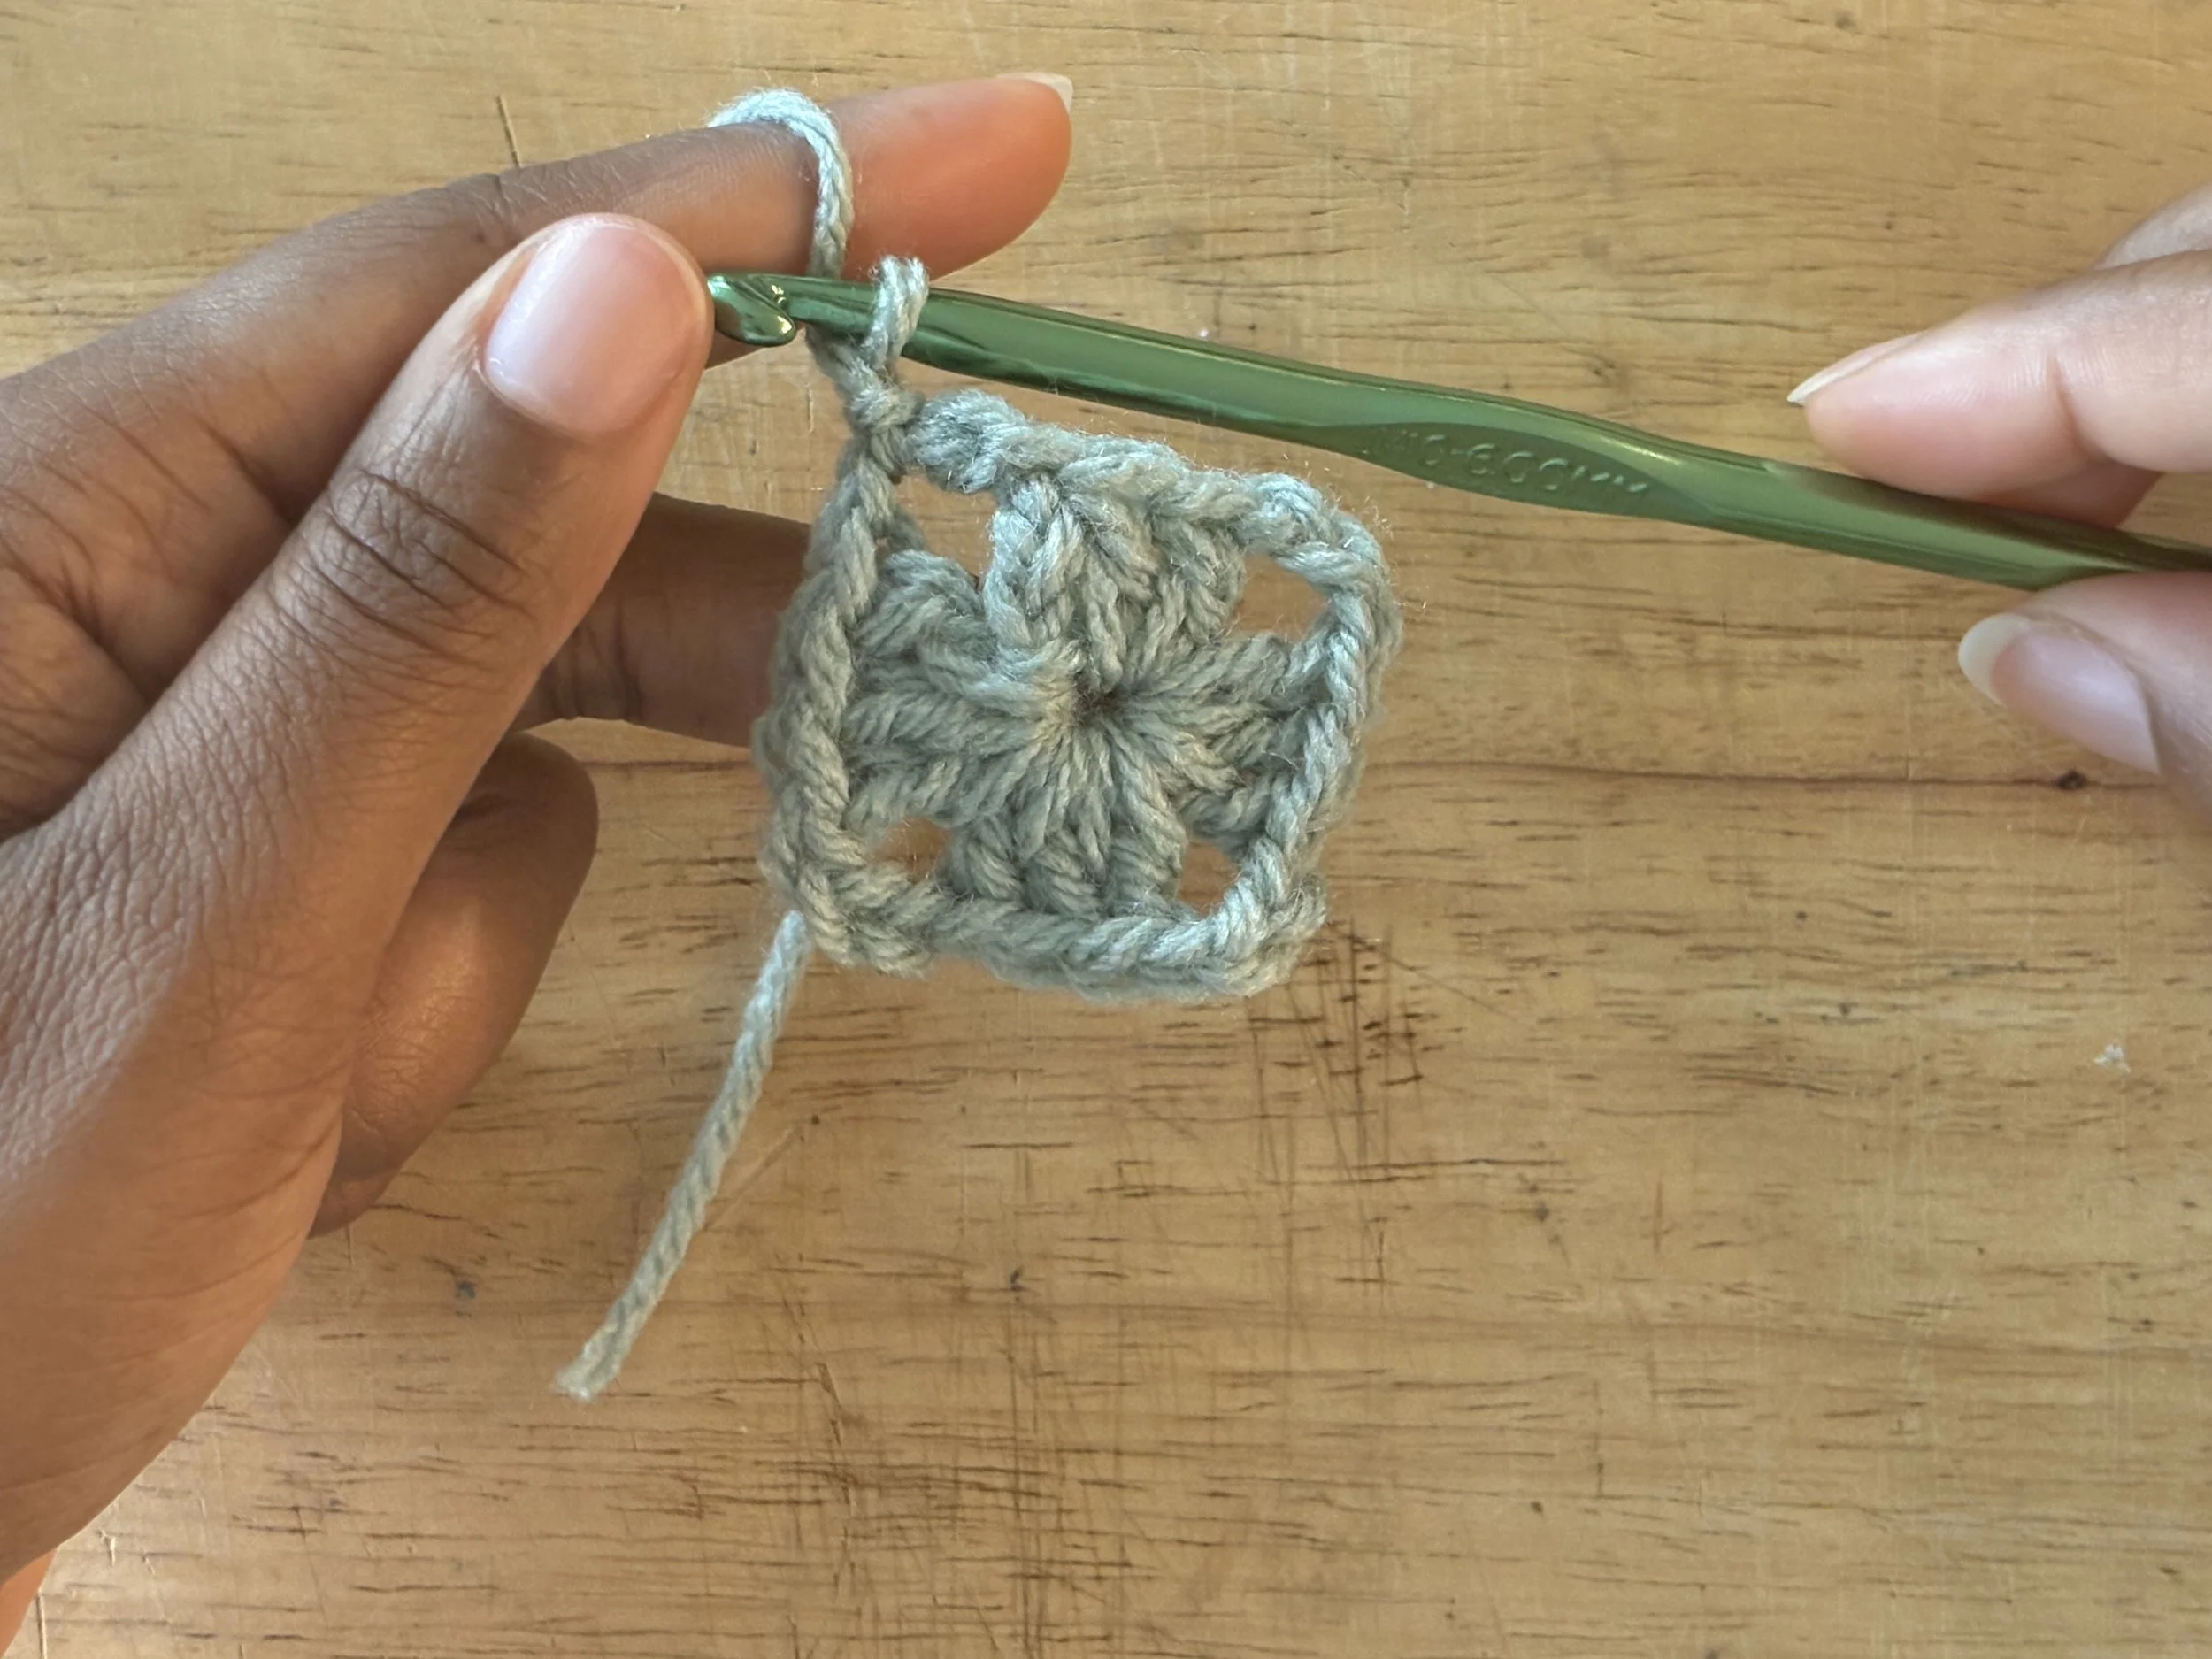
Image 25: Ch 1 and sl st in the same ch 5 space.
This will put your hook right in the middle of that corner space, and this is part of the setup for the positioning of the next round.
Round 2
We’re going to continue the granny square “in the round,” which means to continue going in the same direction without turning the work.
From the corner center of the foundation round/round 1, chain 4.
We start with a chain 5 on the foundation round, but from here on out, it will be a “chain 4”.
Make 3 double crochets into the same space [see image 26].
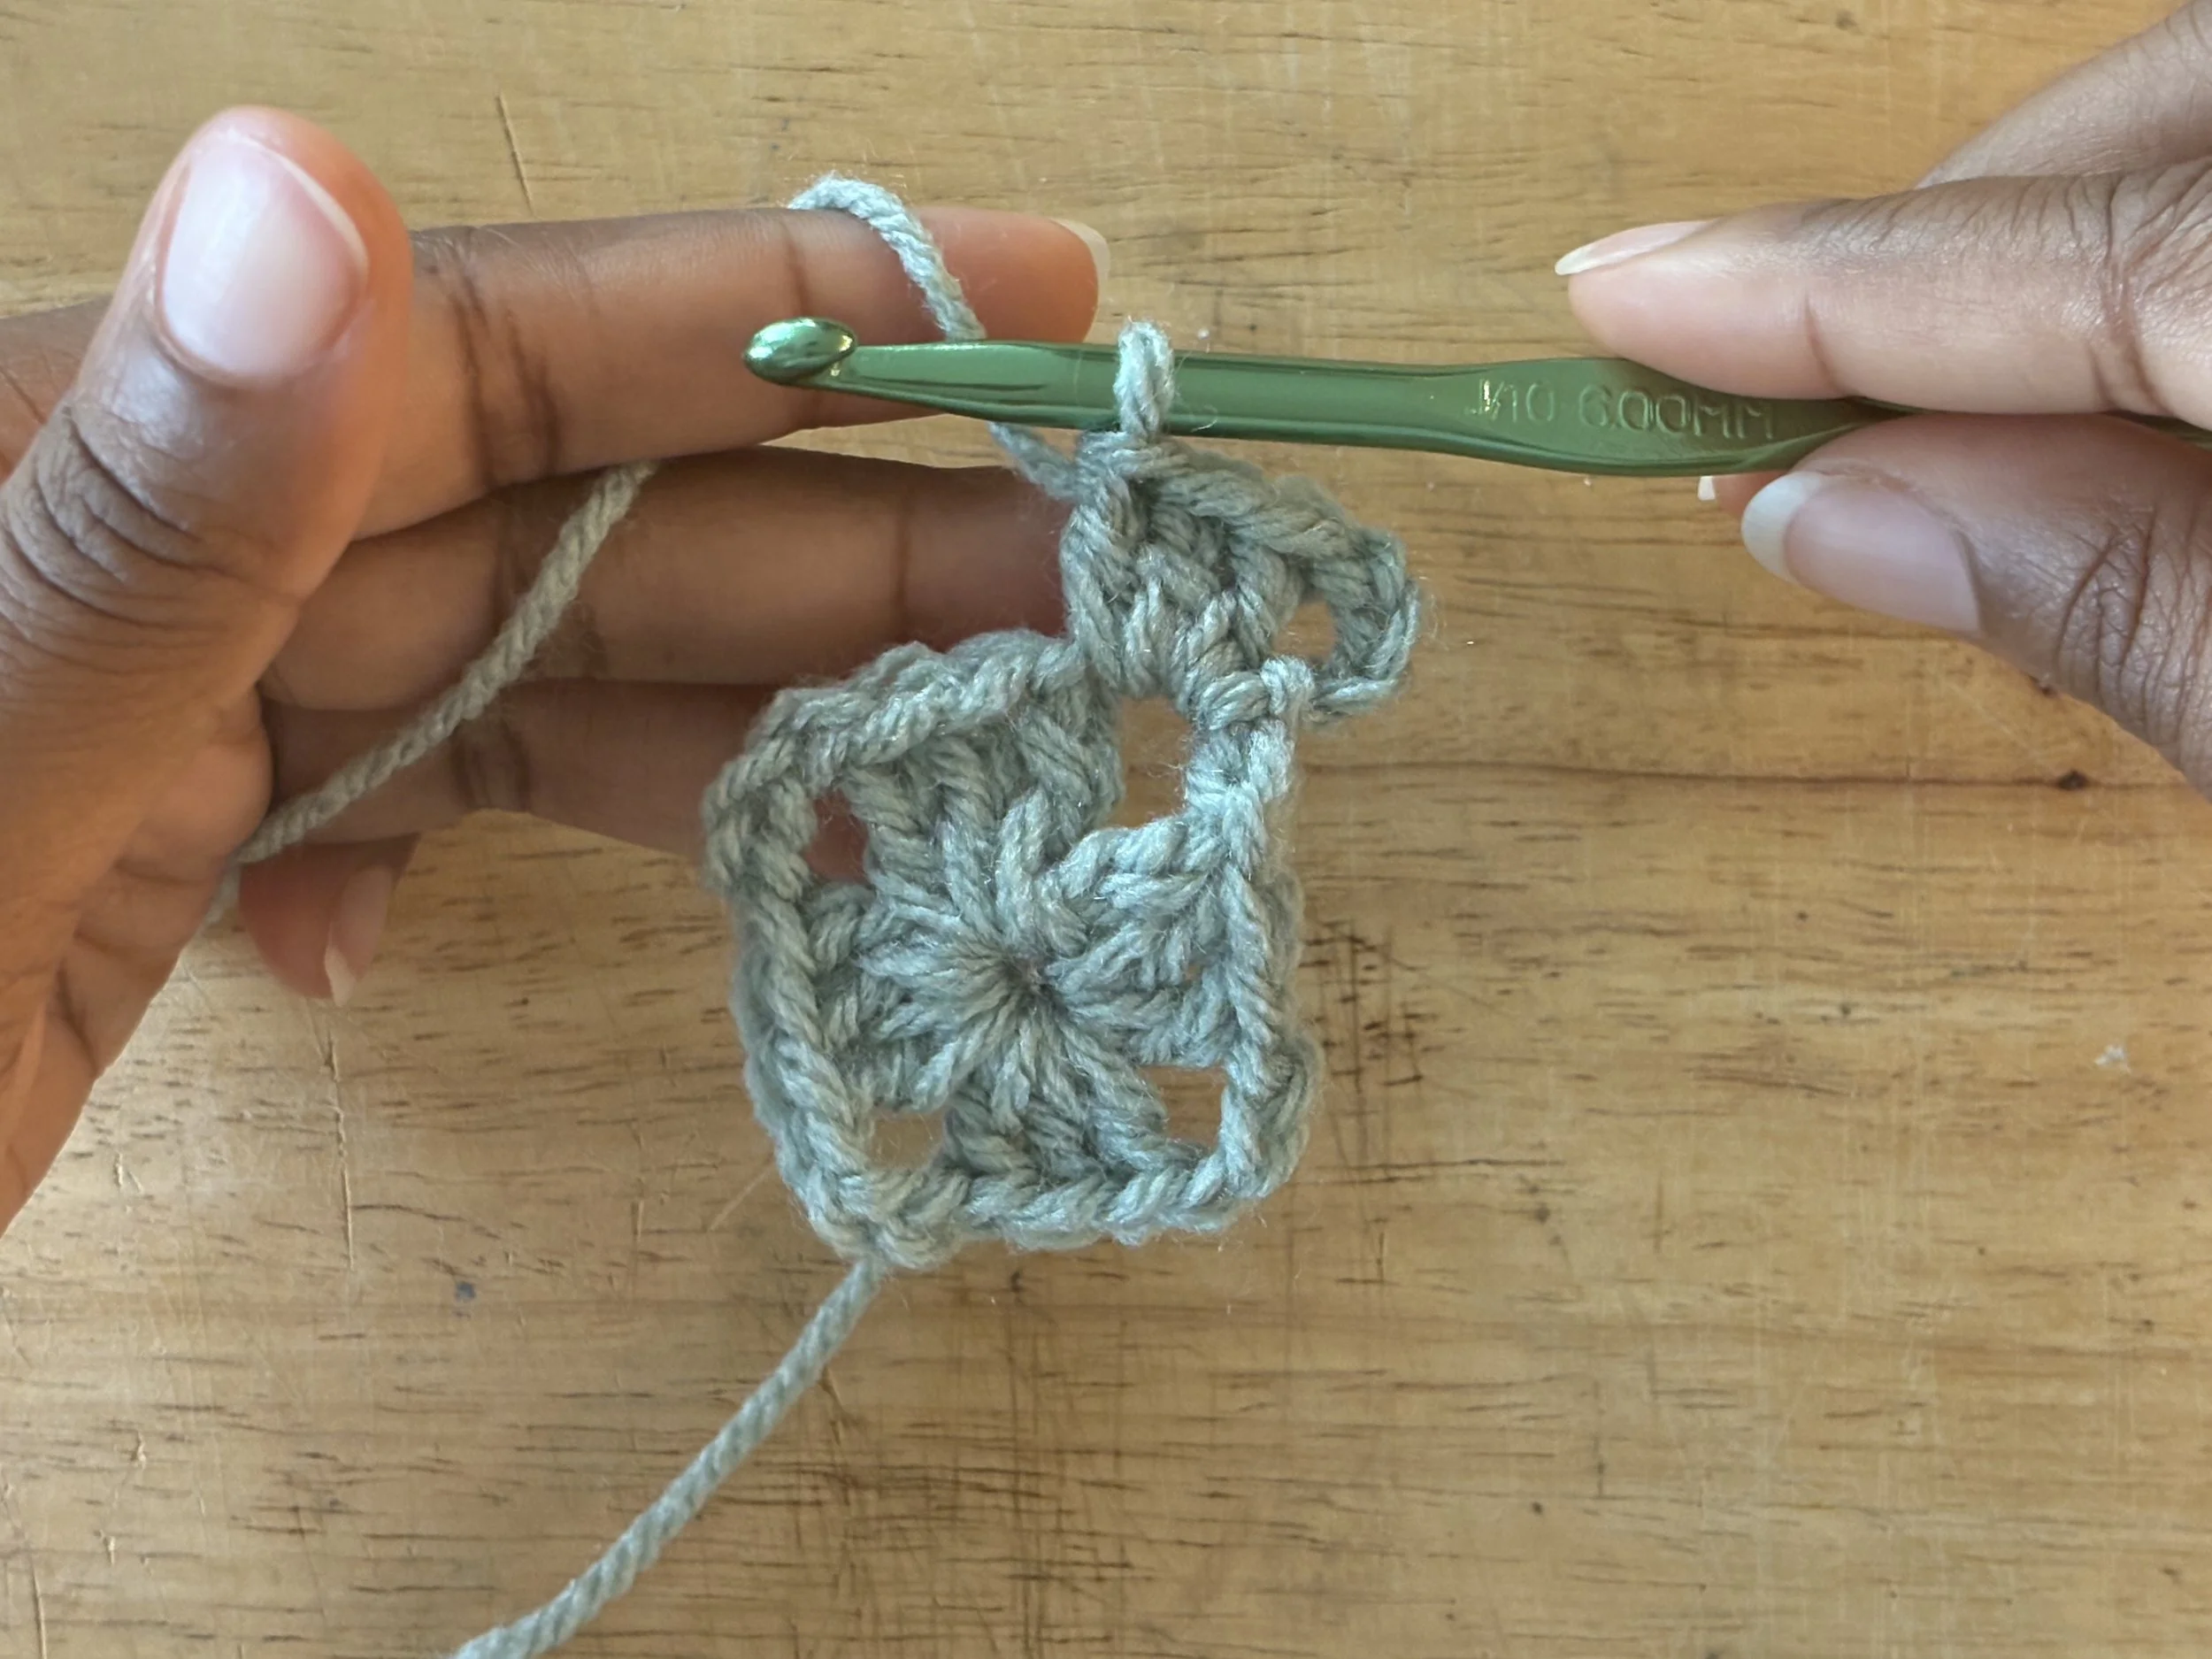
Image 26: Corner of round 2 done.
In the next corner, make 3 double crochets, chain 2, and make 3 more double crochets. You have now made a corner.
Note: we made a chain 3 in the foundation round, but from here on out, we’re going to chain 2.
Repeat the “double crochet 3, chain 2, double crochet 3” in the next 2 corners [see image 27].
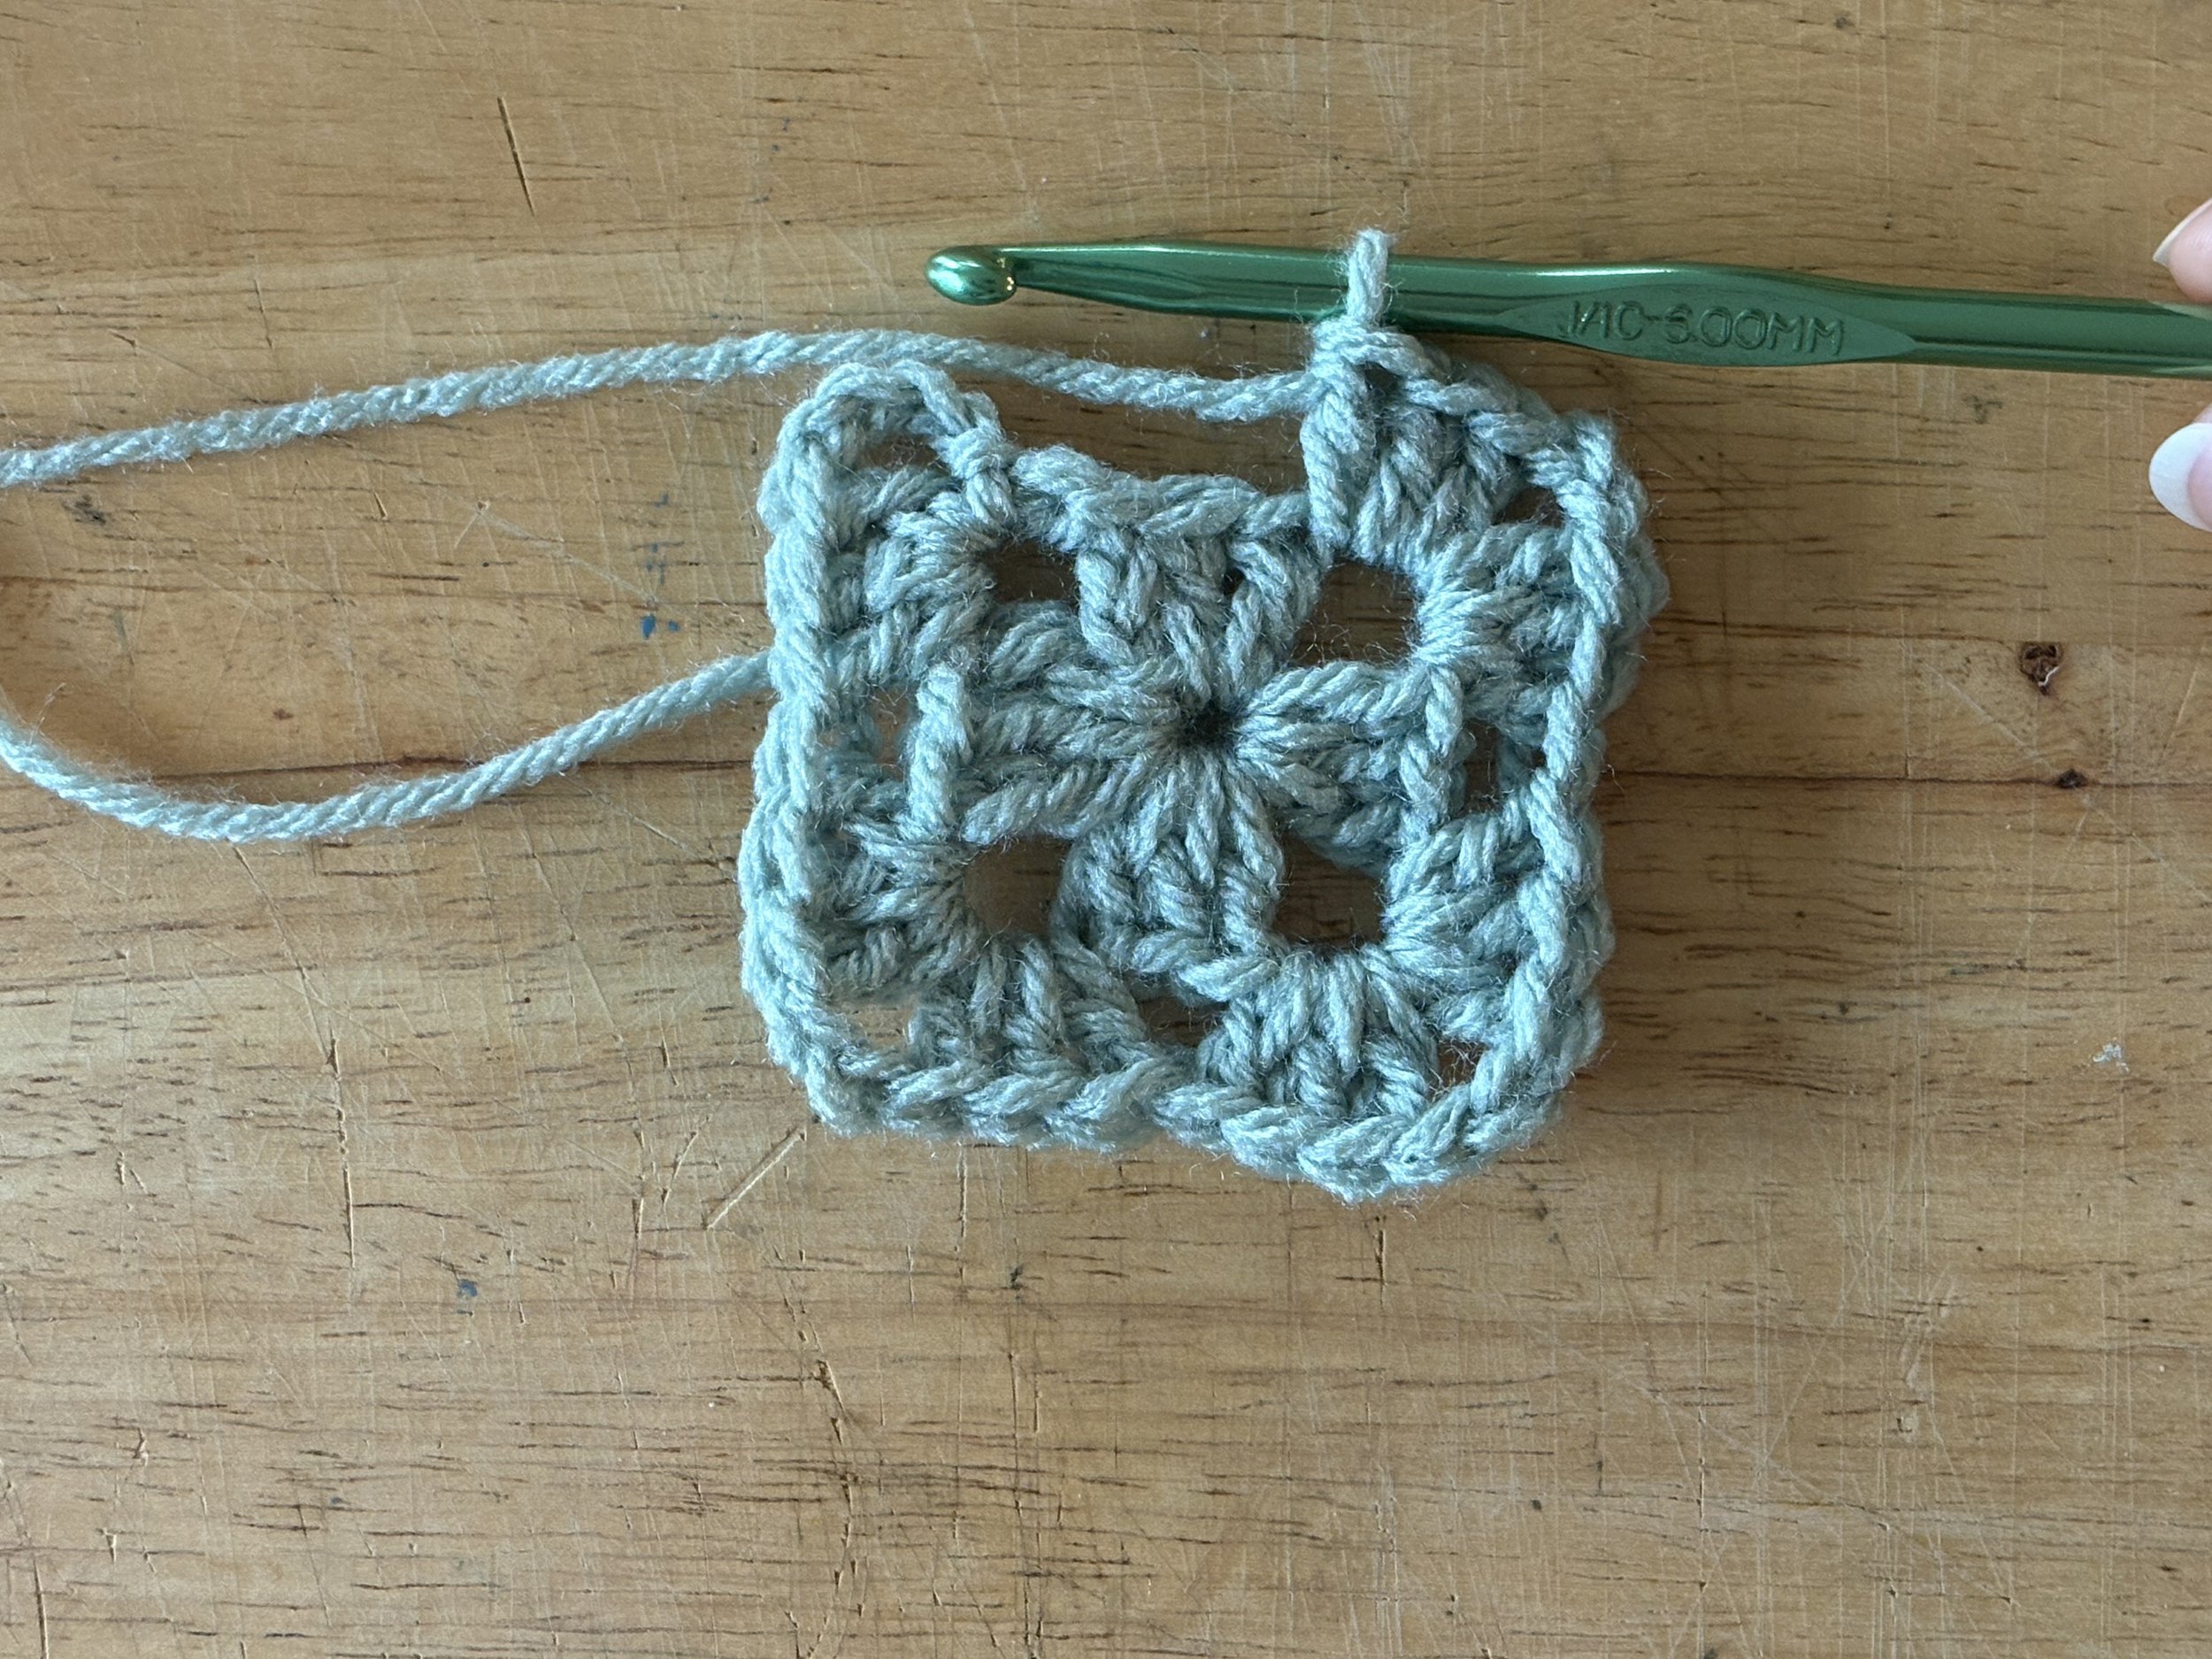
Image 27
In the last corner, make 2 double crochets, and slip stitch into the chain 4 space [see image 28].
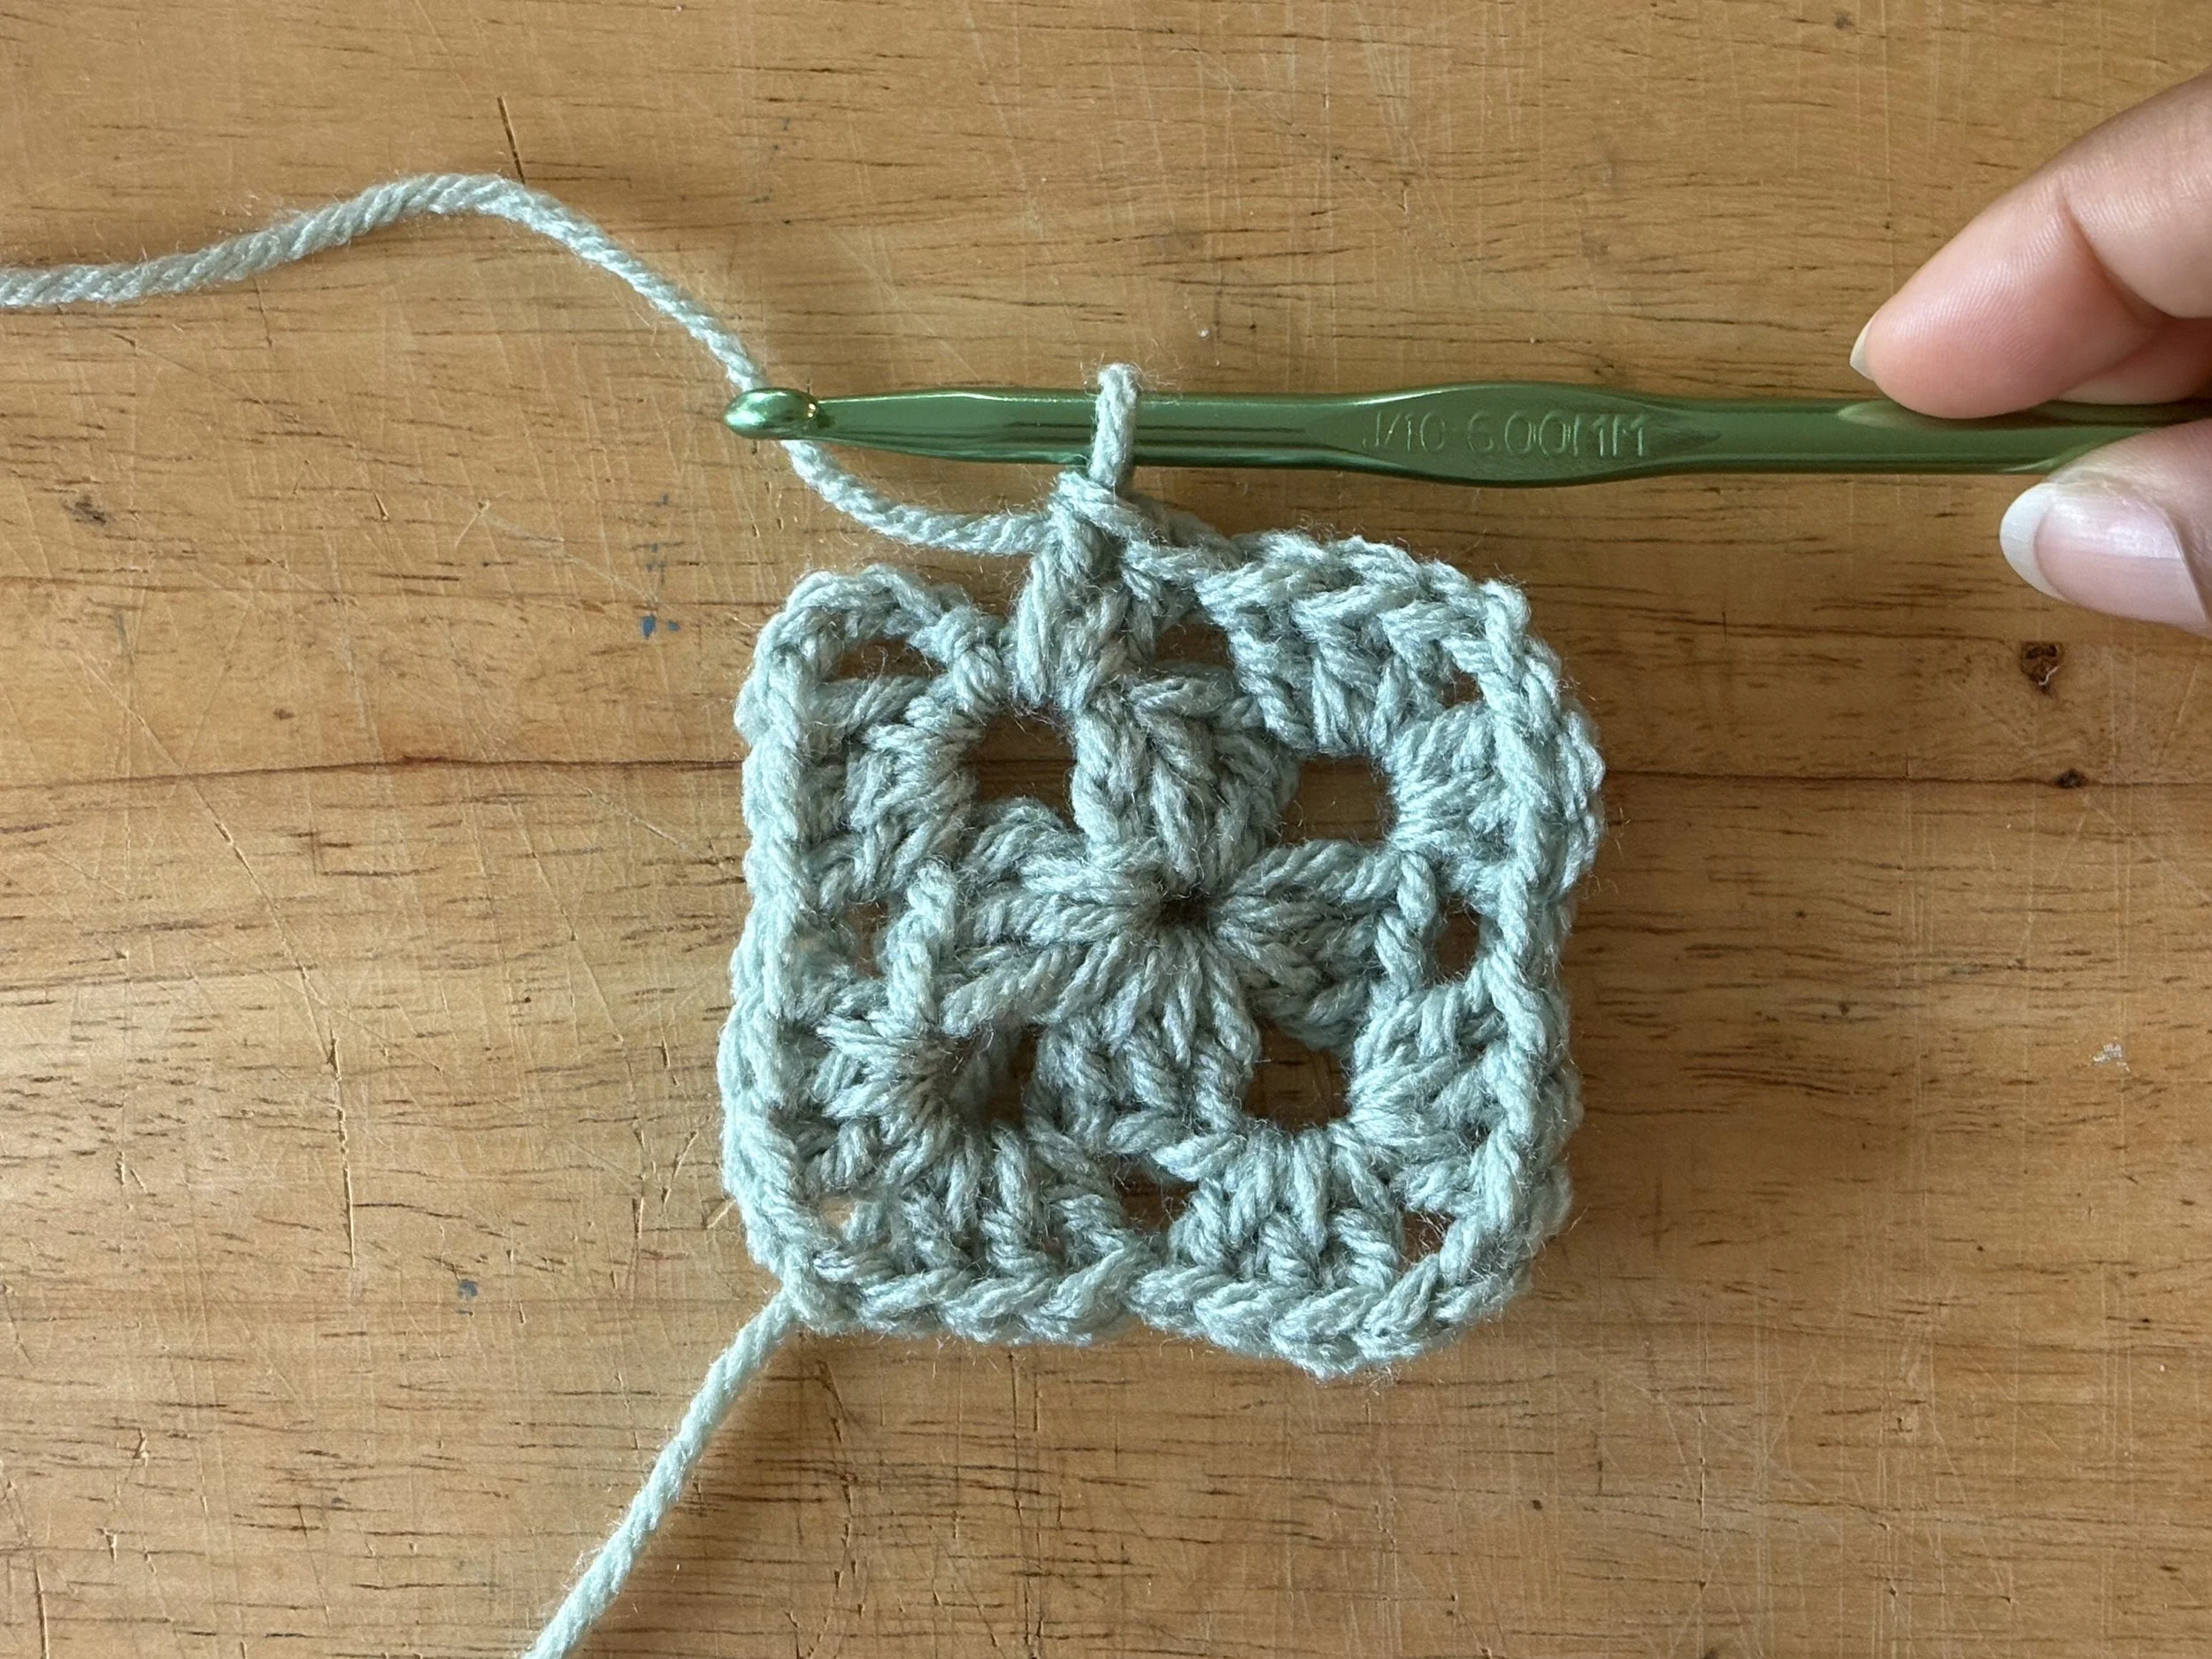
Image 28
Just as before, you’re going to end the round with a chain 1 and slip stitch in the same space to position your work in the middle of the corner.
You have now completed your second round!
Starting with a “chain 4” and ending with a “sl st” on each round is the trick that will allow us to increase from the corner at every round [see image 29].
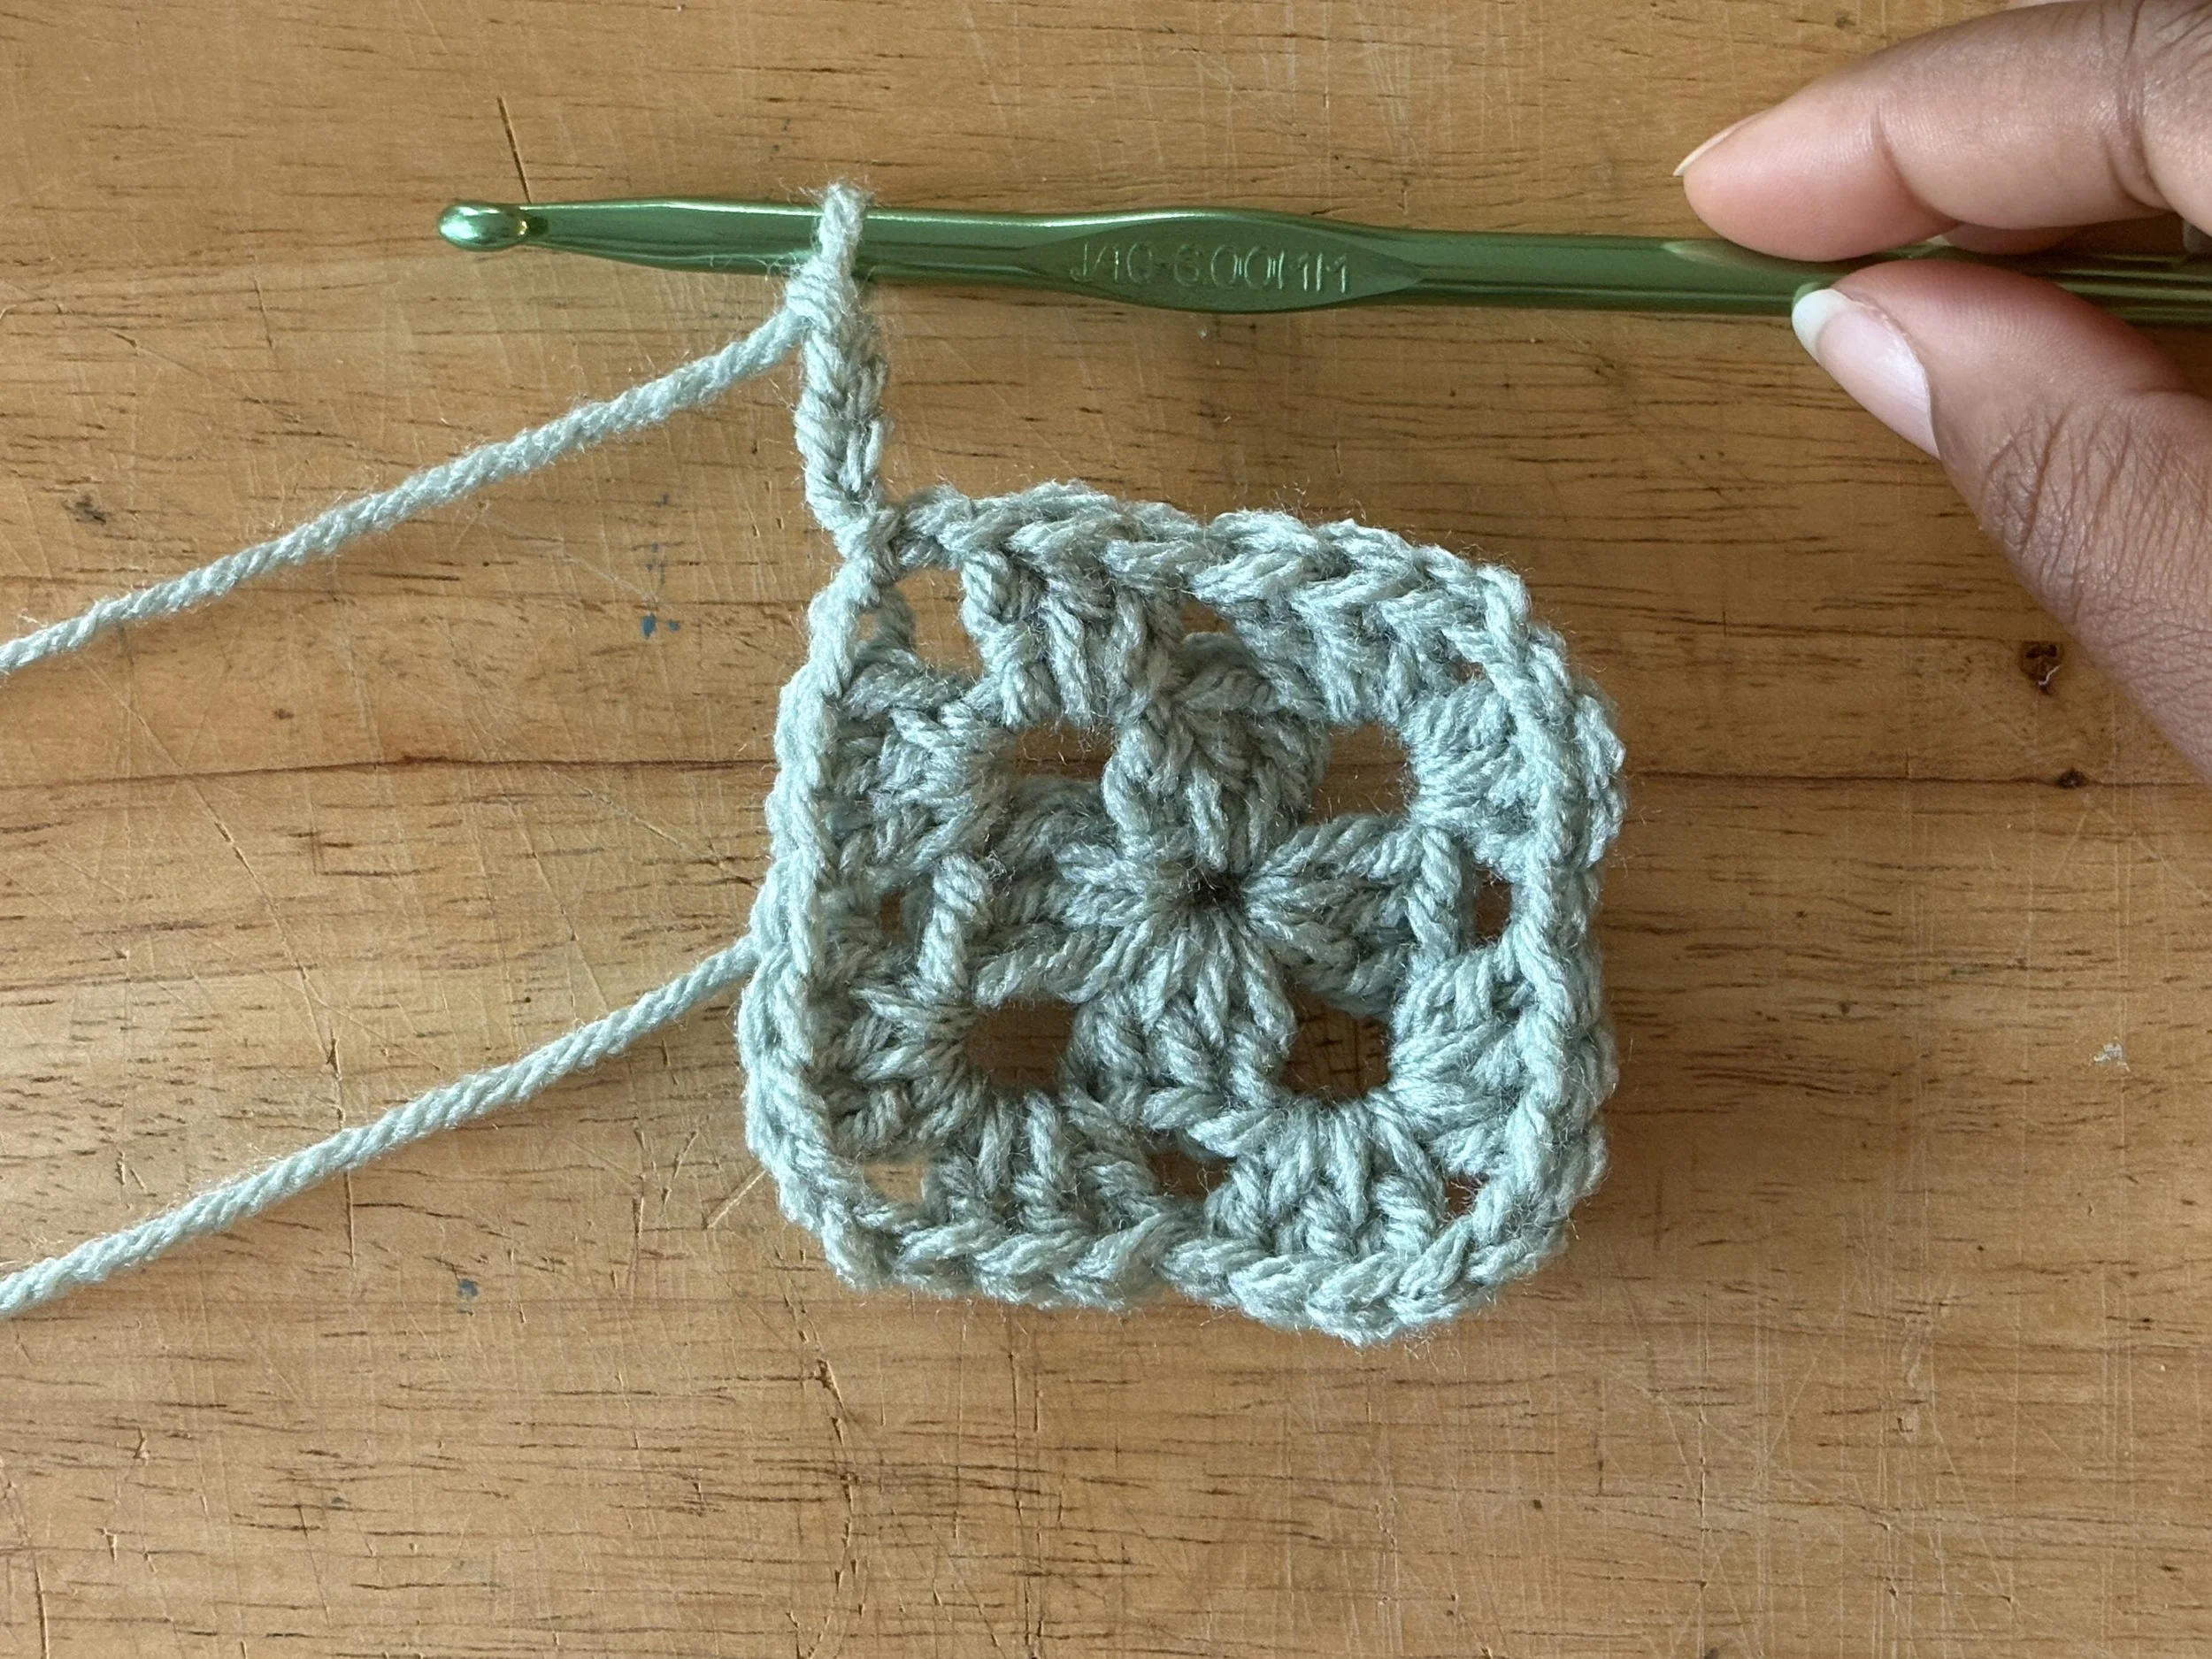
Image 29
Round 3 and Beyond
This last round can be repeated however many times you want to make your granny square whatever size you want.
Chain 4, double crochet cluster in the same space.
In the next space, which is a “side space,” make 3 double crochets.
Note: some tutorials say to make a chain stitch in between spaces, but I personally prefer the look of the granny square without the extra chain.
In the next corner space, make 3 double crochets, chain 2, make 3 double crochets. The next space should be a side space.
Double crochet 3 in the side space [see image 30].
Repeat the sequence of “double crochet 3, chain 2, double crochet 3” in each corner, followed by “double crochet 3 in the side space” two more times, until you get to the last corner [see image 31].
In the last corner, double crochet 2, slip stitch into the top of the chain 4 space. Chain 1 and slip stitch in the same space to position your work in the corner [see image 32].
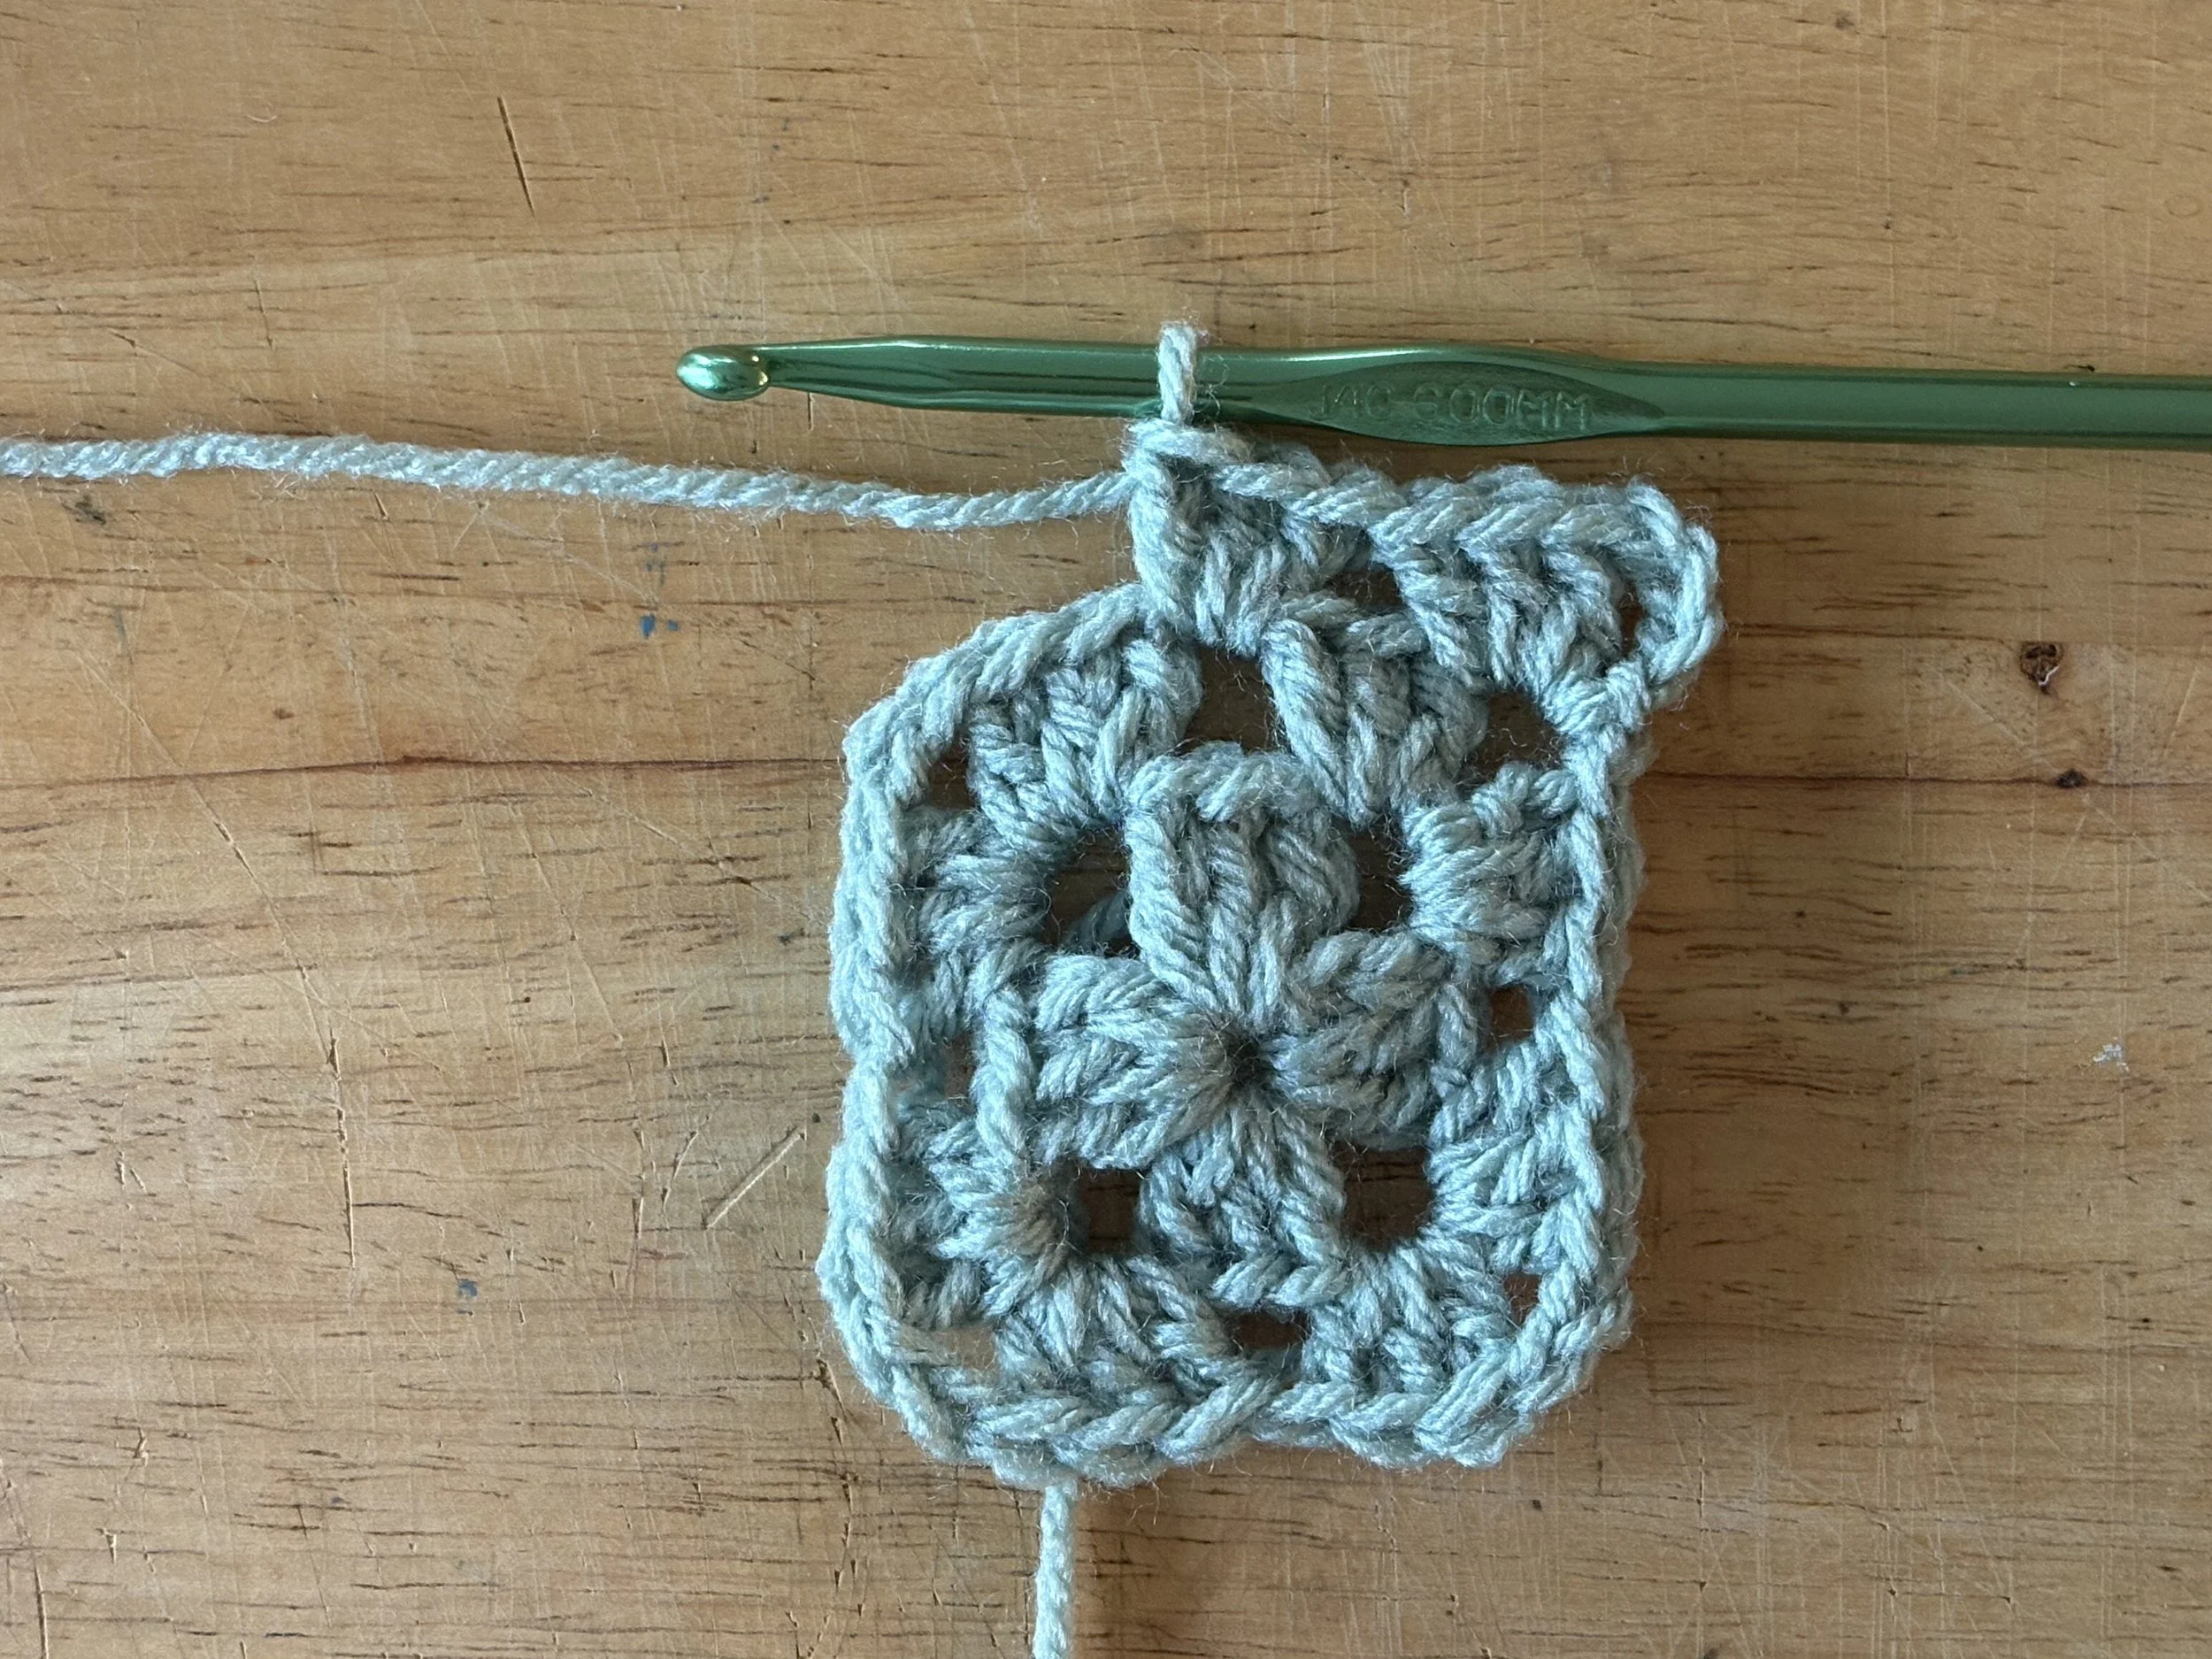
Image 30
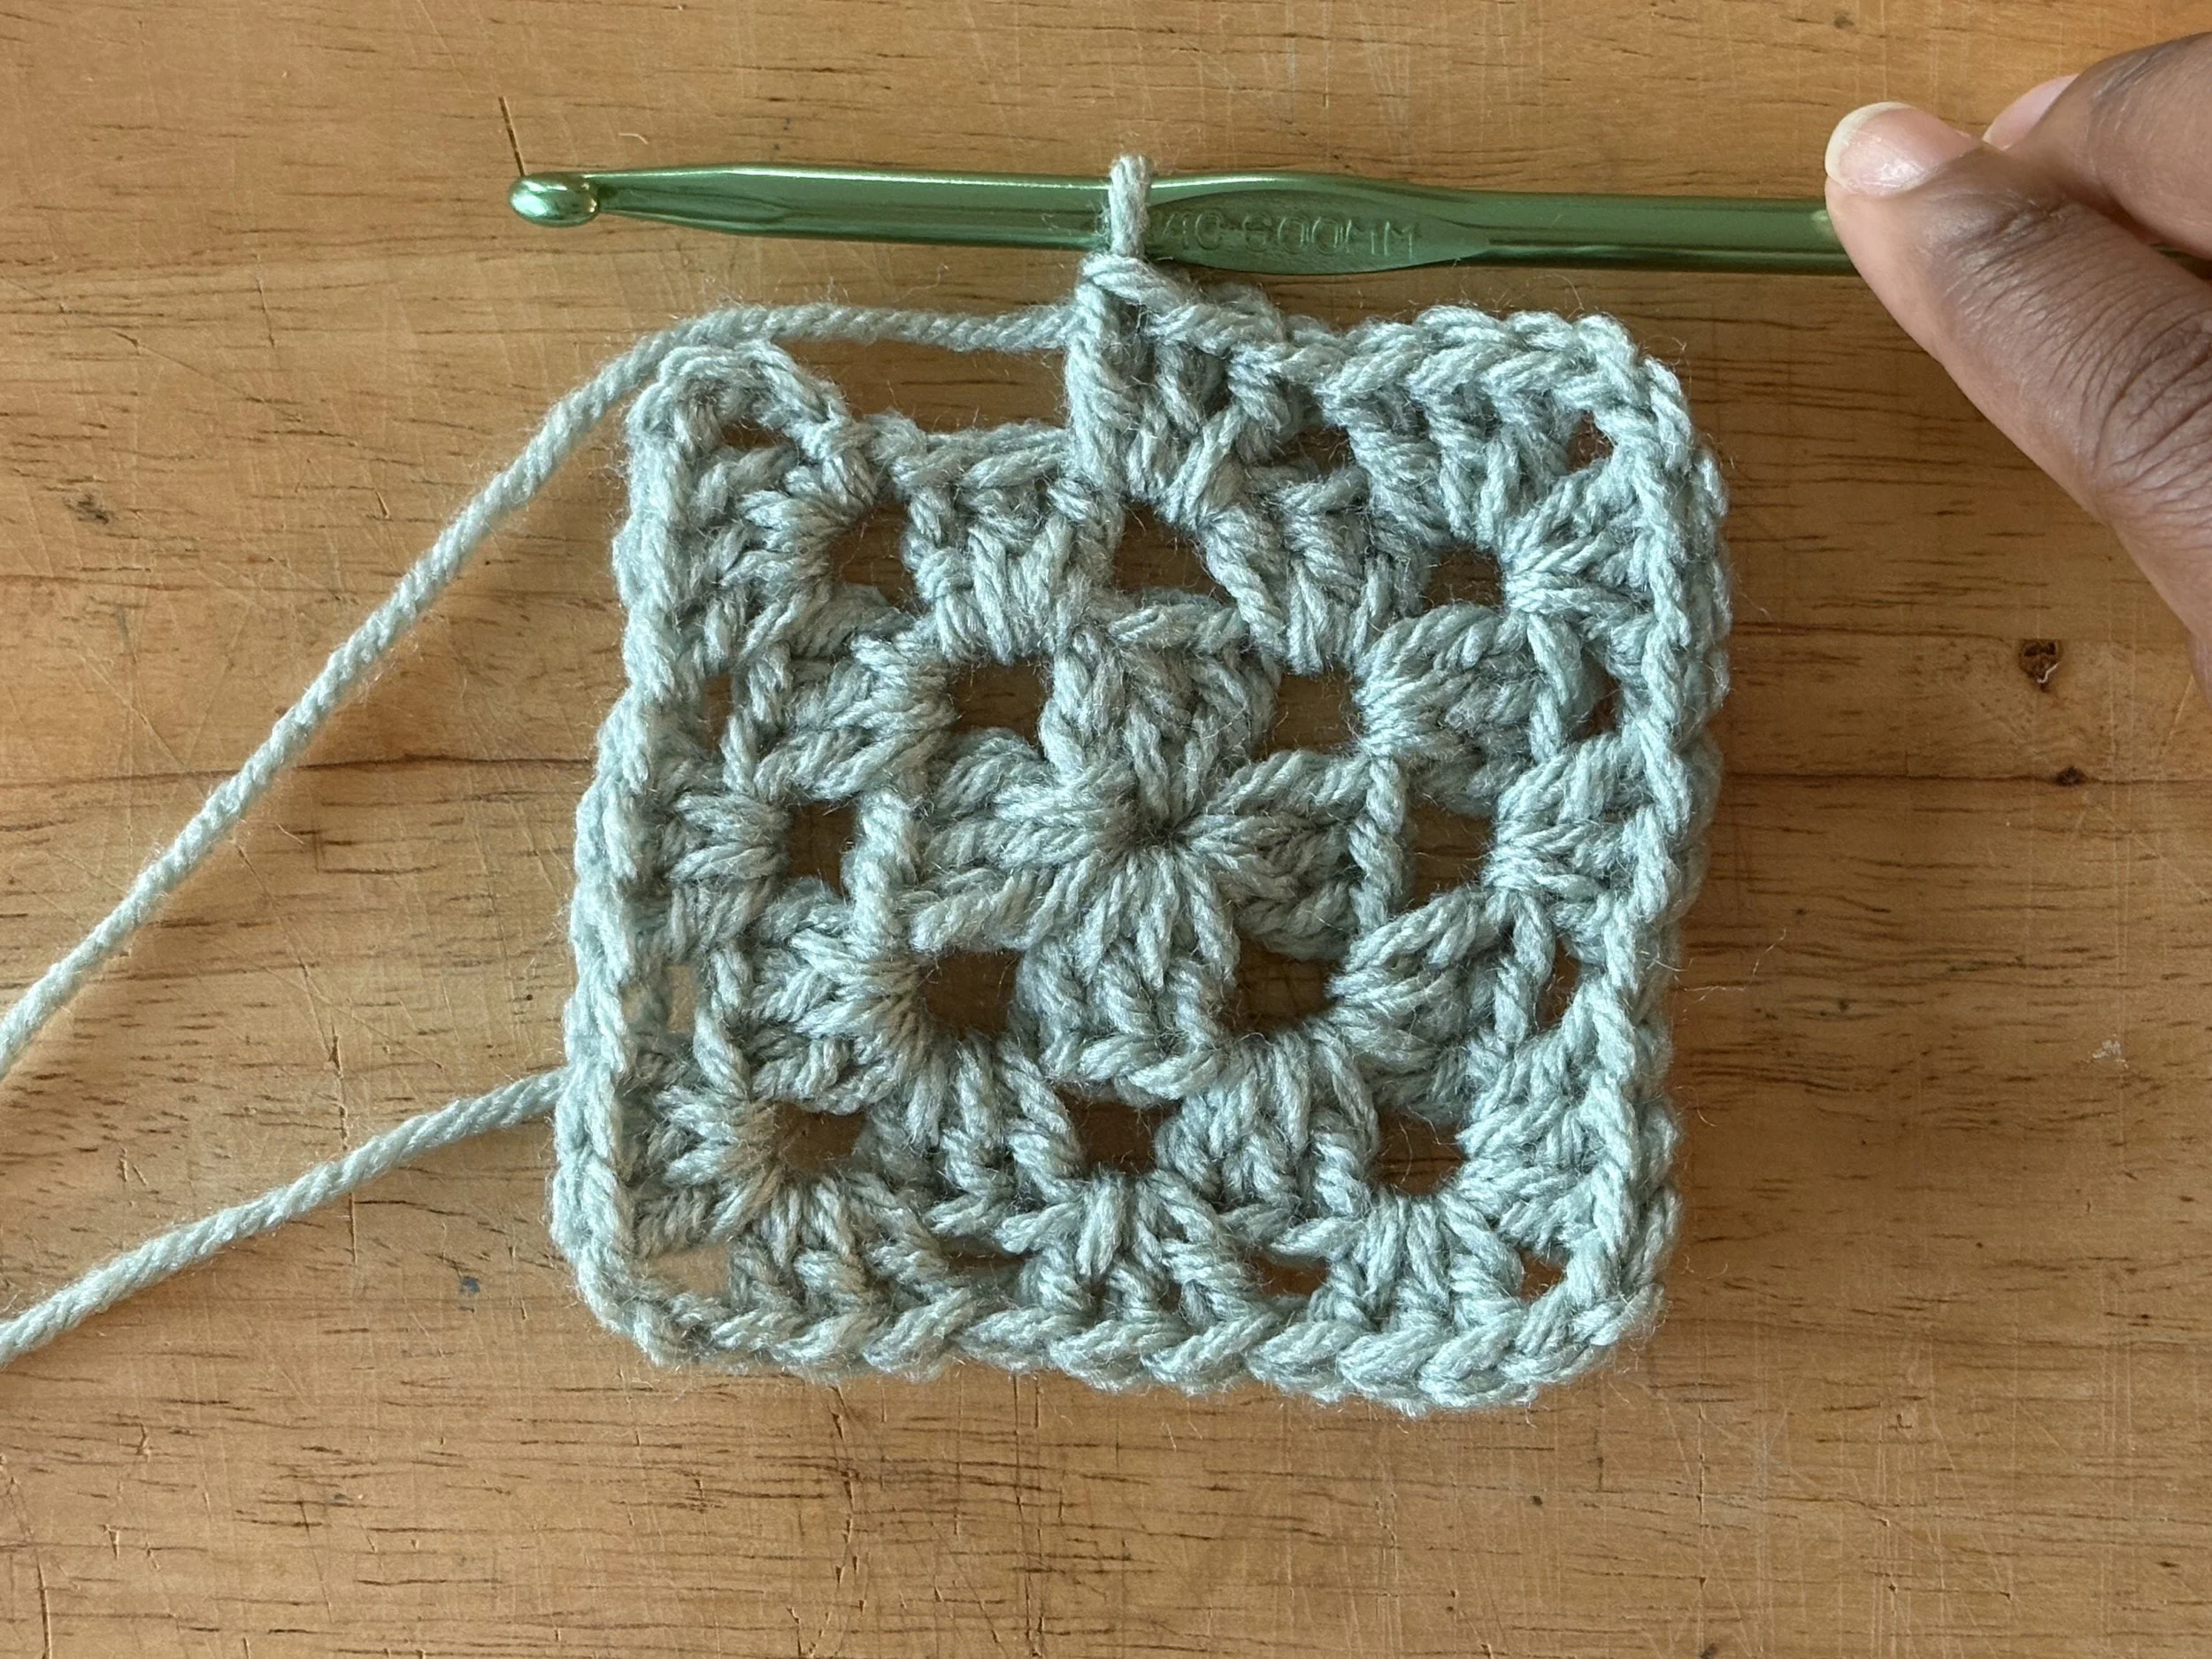
Image 31
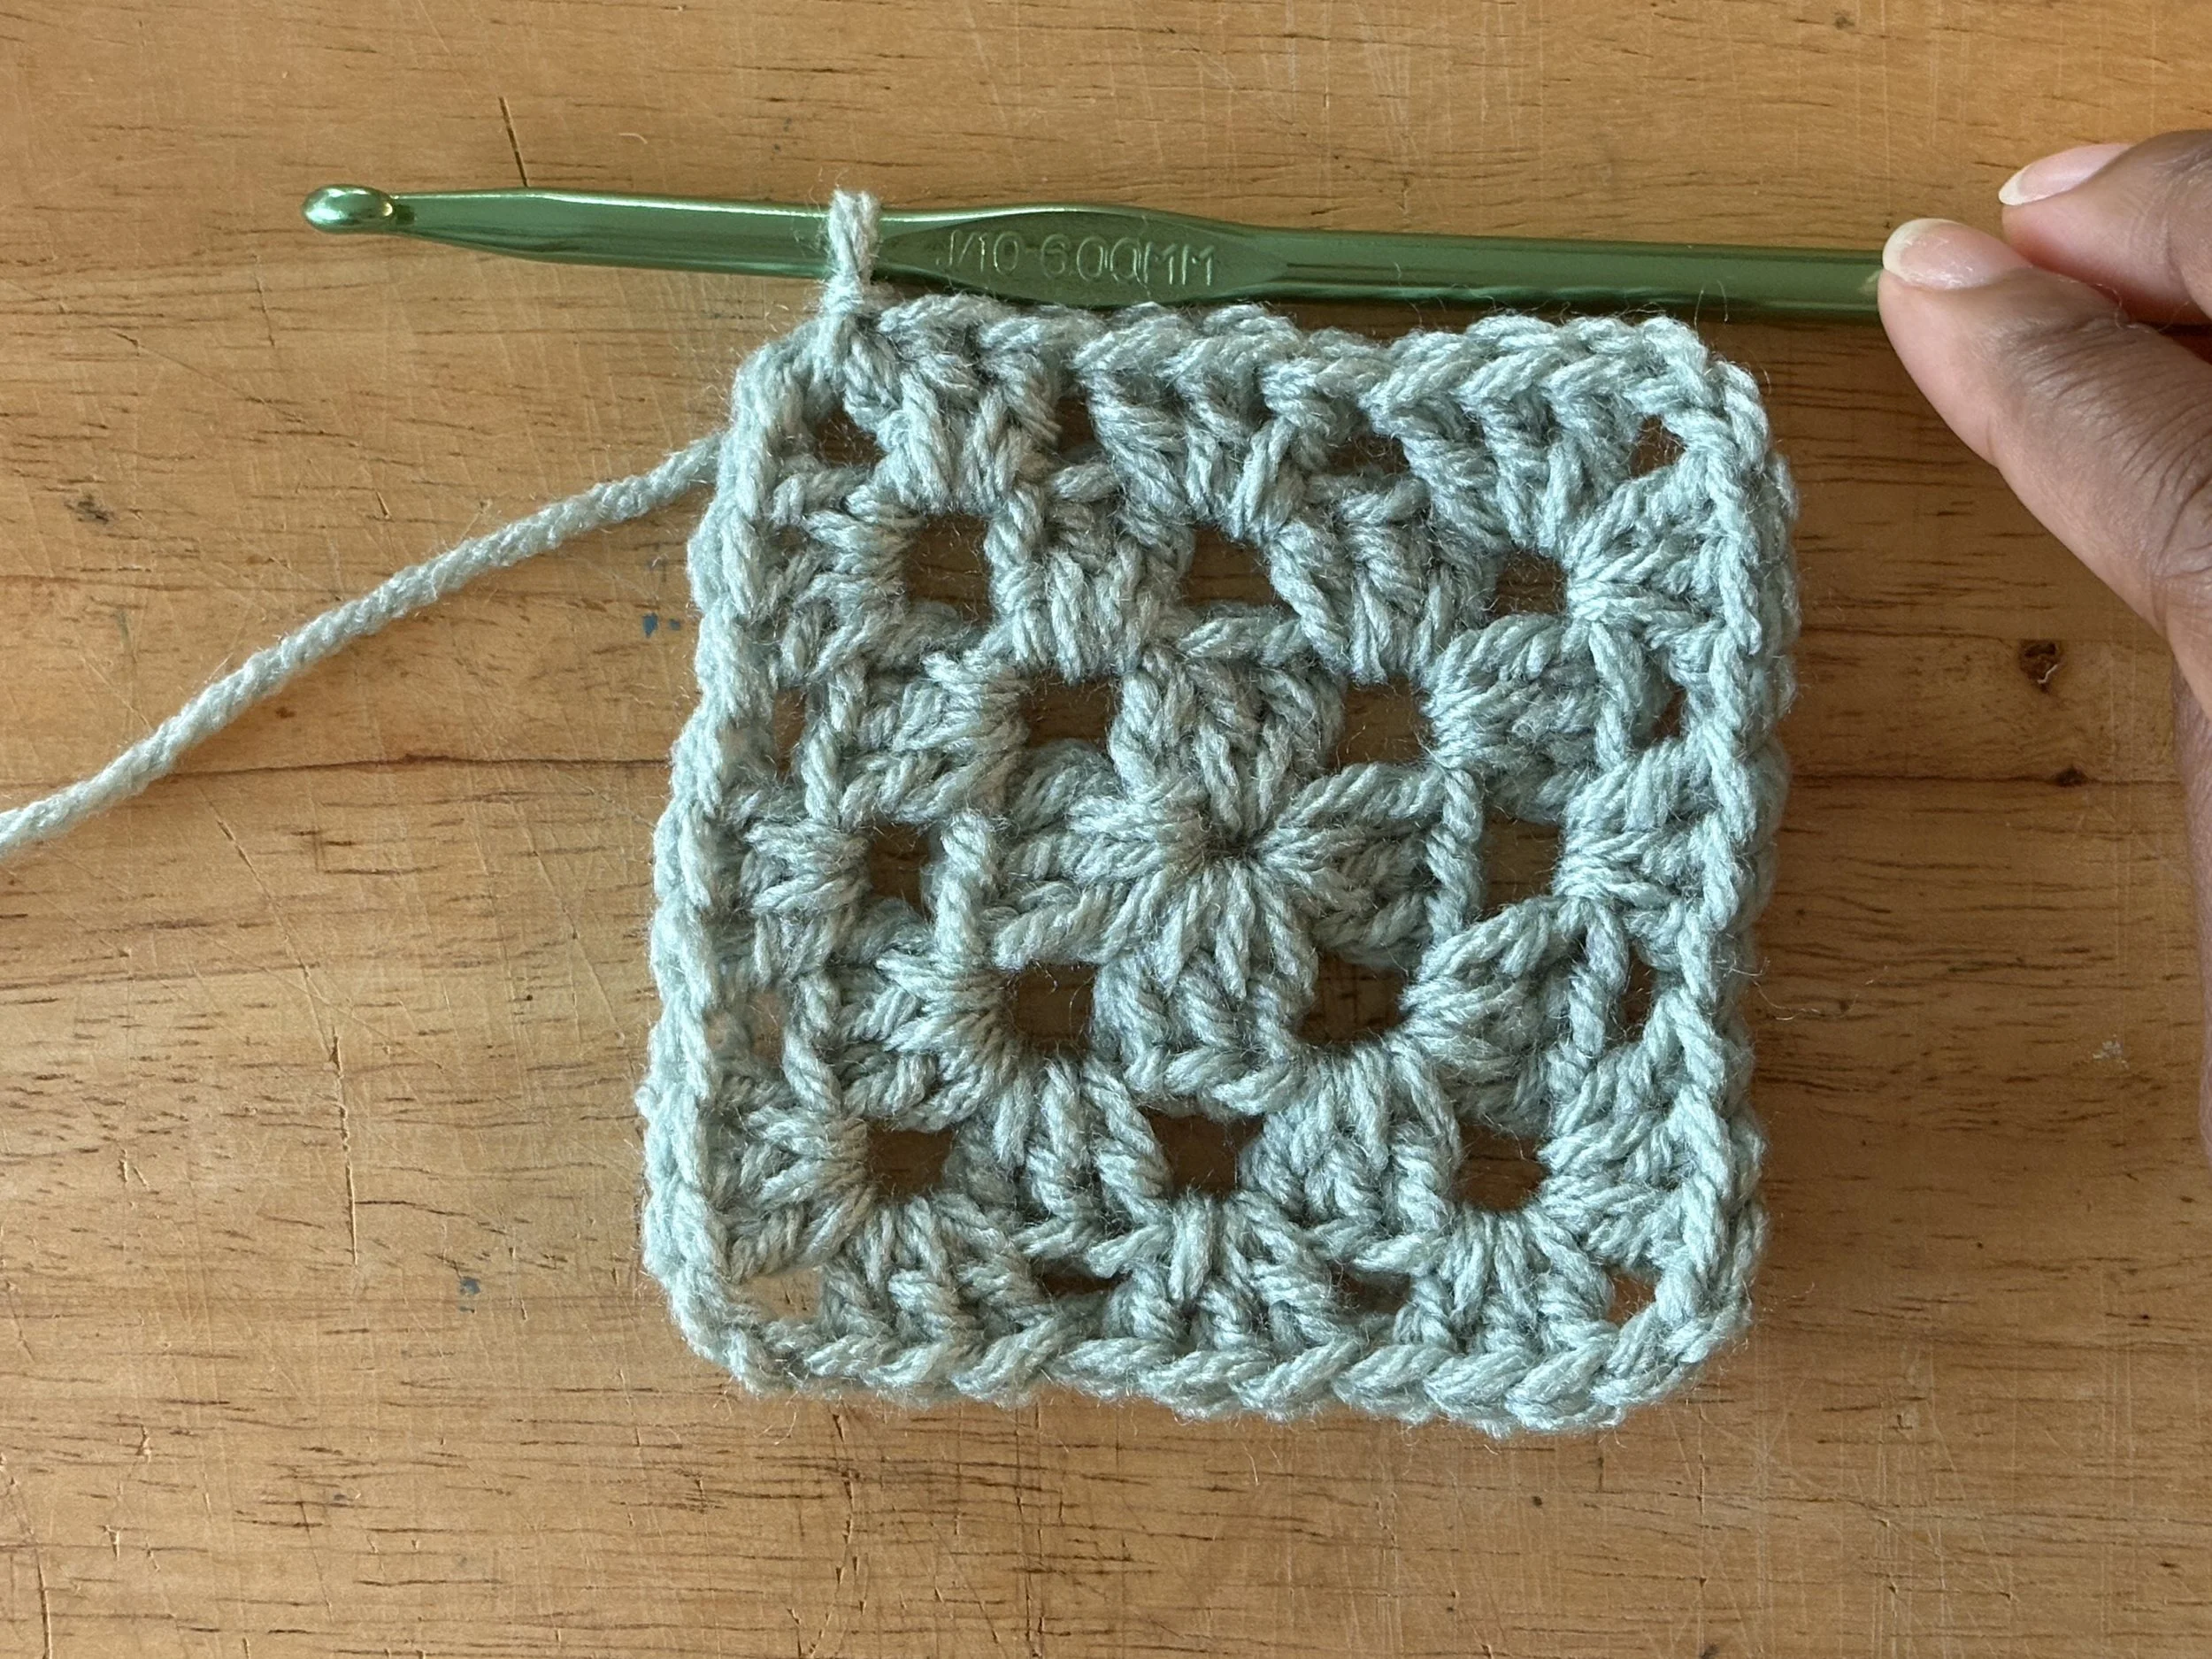
Image 32
You can repeat this round as many times as you’d like to make the granny square bigger.
In each side space, you’re going to make 3 double crochets.
In each corner space, you’re going to “double crochet 3, chain 2, double crochet 3”.
At the end of each round, you’re going to “slip stitch in the top of the chain 4 space” and then “chain 1, slip stitch” into the same space to center your work in the corner.
If you’re finishing your work, you will finish after the “slip stitch in the top of the chain 4 space.” Then, cut the yarn with your scissors and pull the tail end through your last loop.
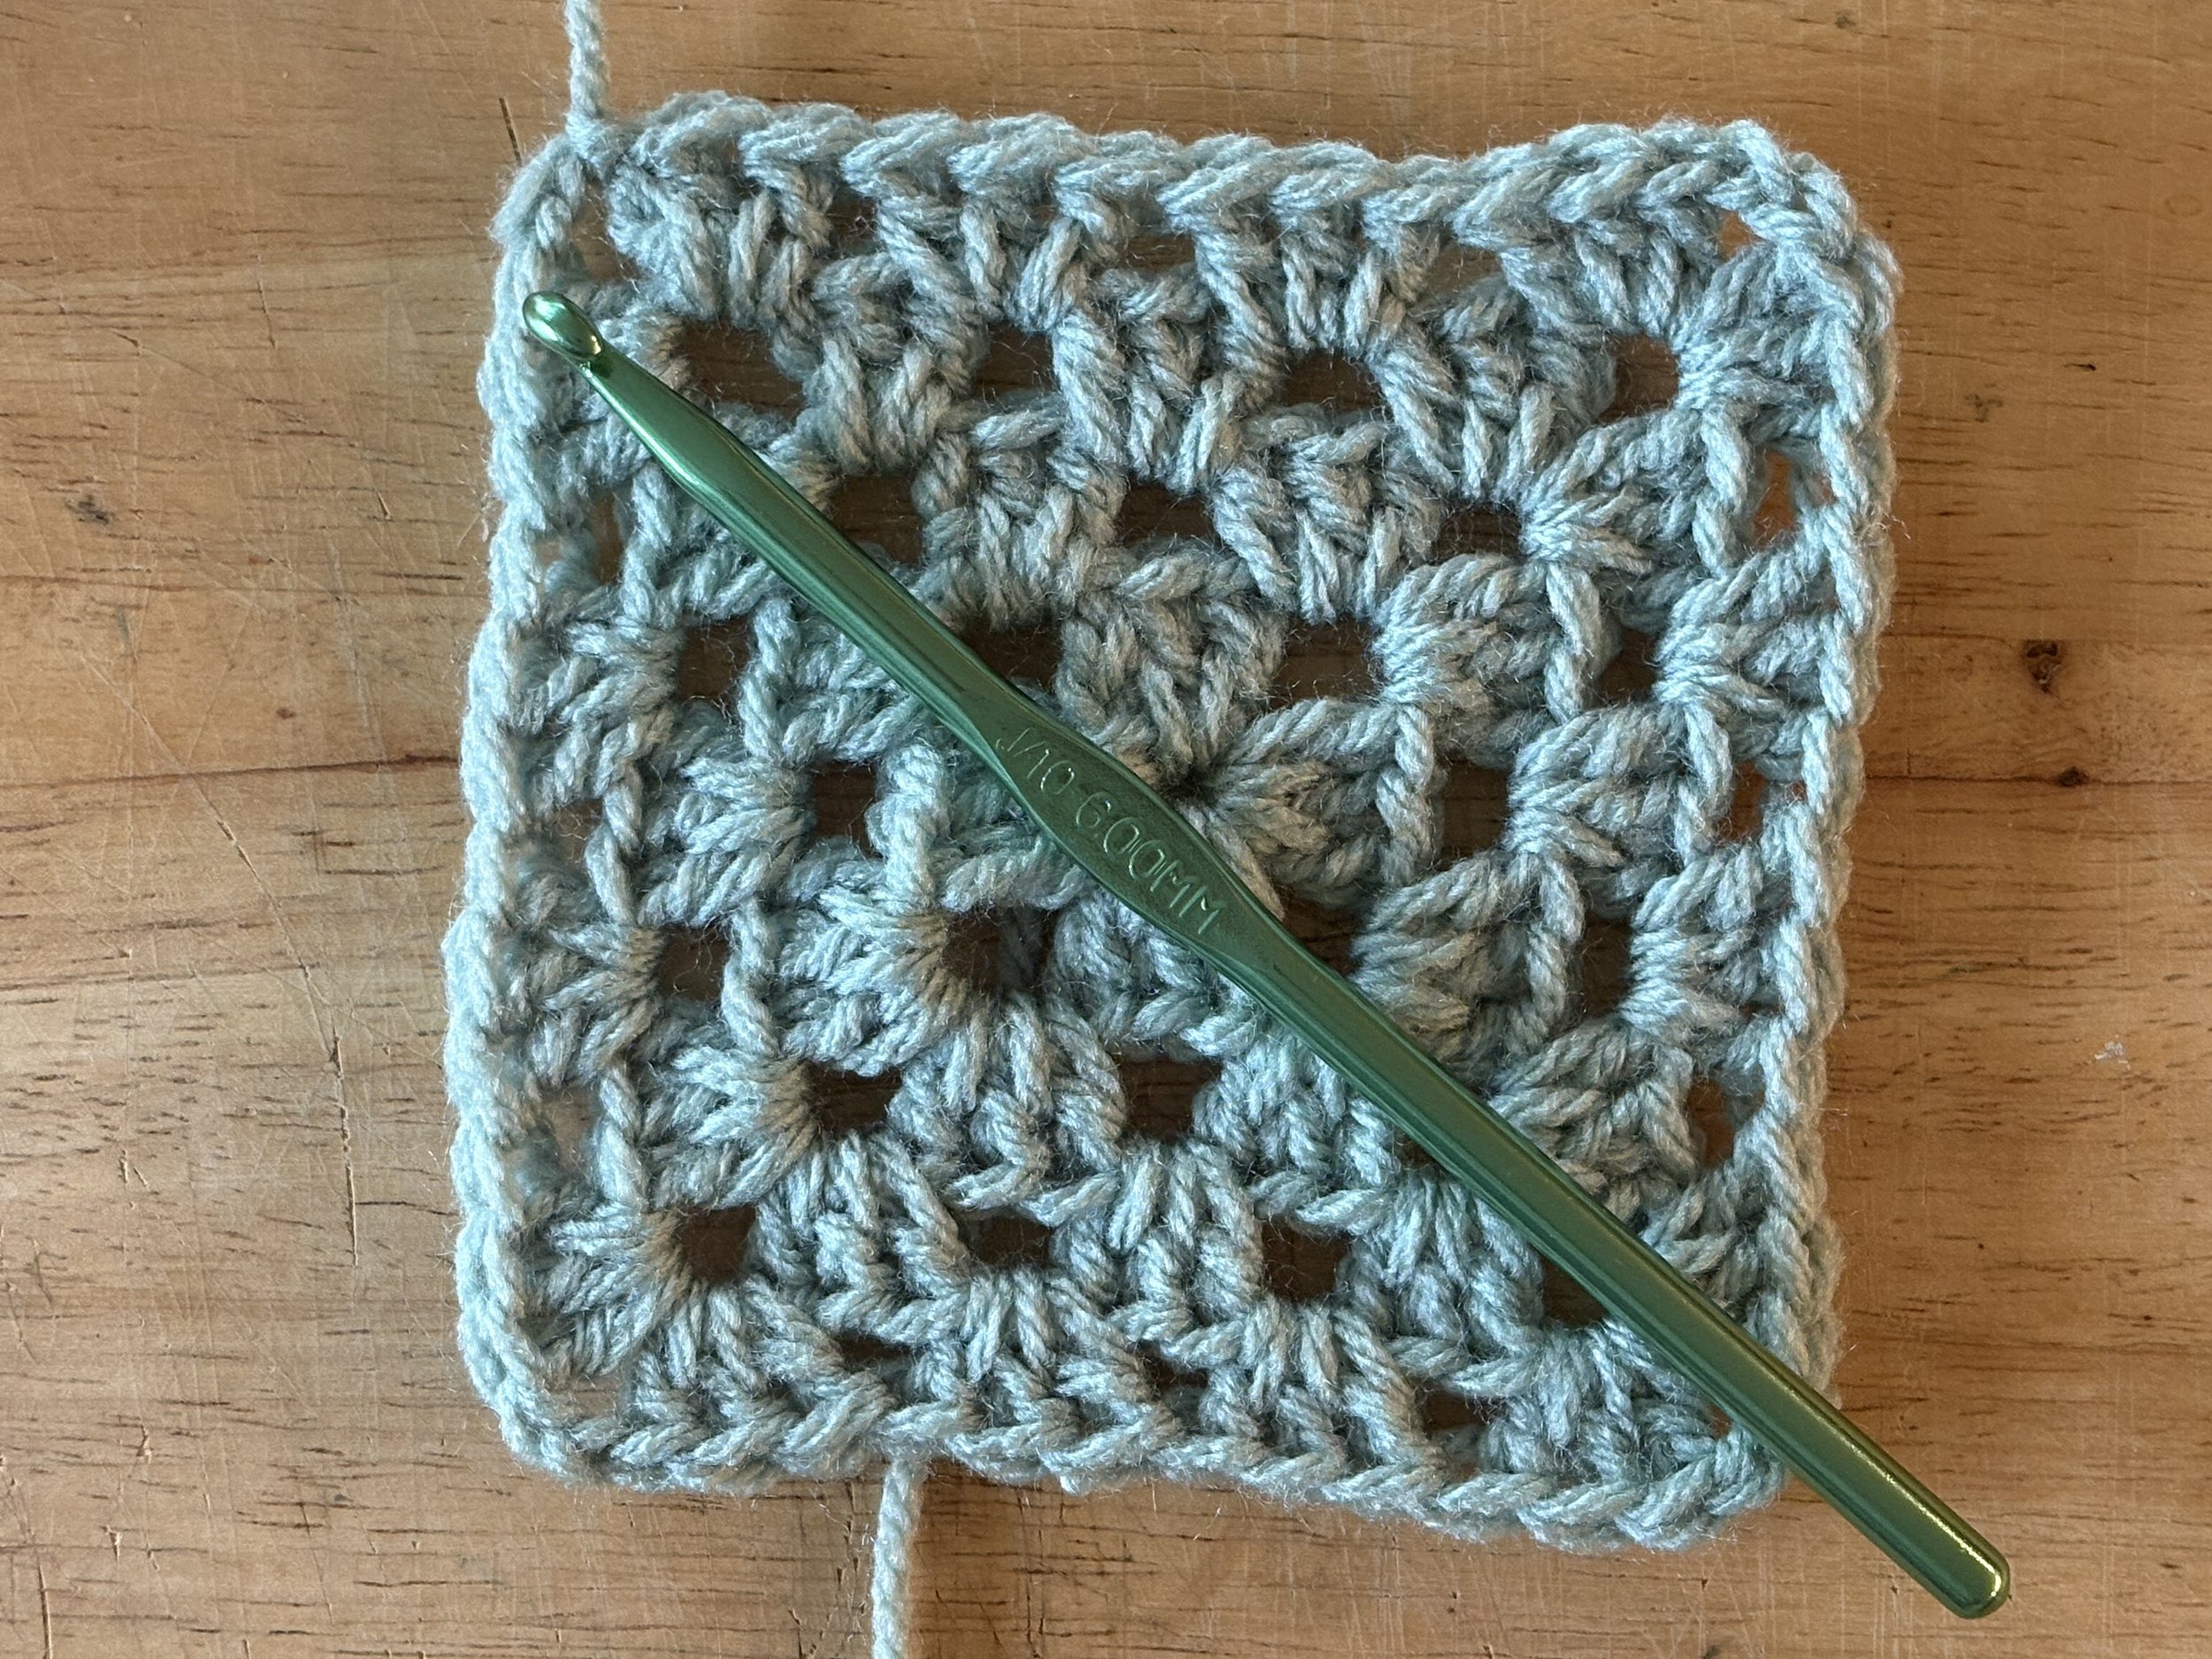
Congratulations! You’ve just learned the foundation of crochet! Every granny square you make will become faster, neater, and more consistent as you practice.
What’s next?
So now that you know how to make a granny square, what exactly can you do with a granny square? The beauty of the granny square is that there are so many projects you can make with this simple little pattern! Some examples are:
Blankets (you can make a blanket from one large, continuous granny square, or from multiple smaller granny squares all stitched together)
Pillows/pillow covers
Bags/purses
Book covers
Scarves
Sweaters and other wearables
Honestly, if you only ever learned how to crochet a granny square, with a little bit of tweaking, you can make almost anything you want!
After you’ve mastered the granny square, this is where I recommend you start learning the crochet stitches and their abbreviations. But the good news is this: you already know three!
Double crochet (dc)
Chain stitch (ch)
Slip stitch (sl st)
If you want to continue learning how to crochet, click here [link to crochet stitches] to learn crochet stitches, abbreviations, and how to read a crochet pattern.This will put your hook right in the middle of that corner space, and this is part of the setup for the positioning of the next round.
