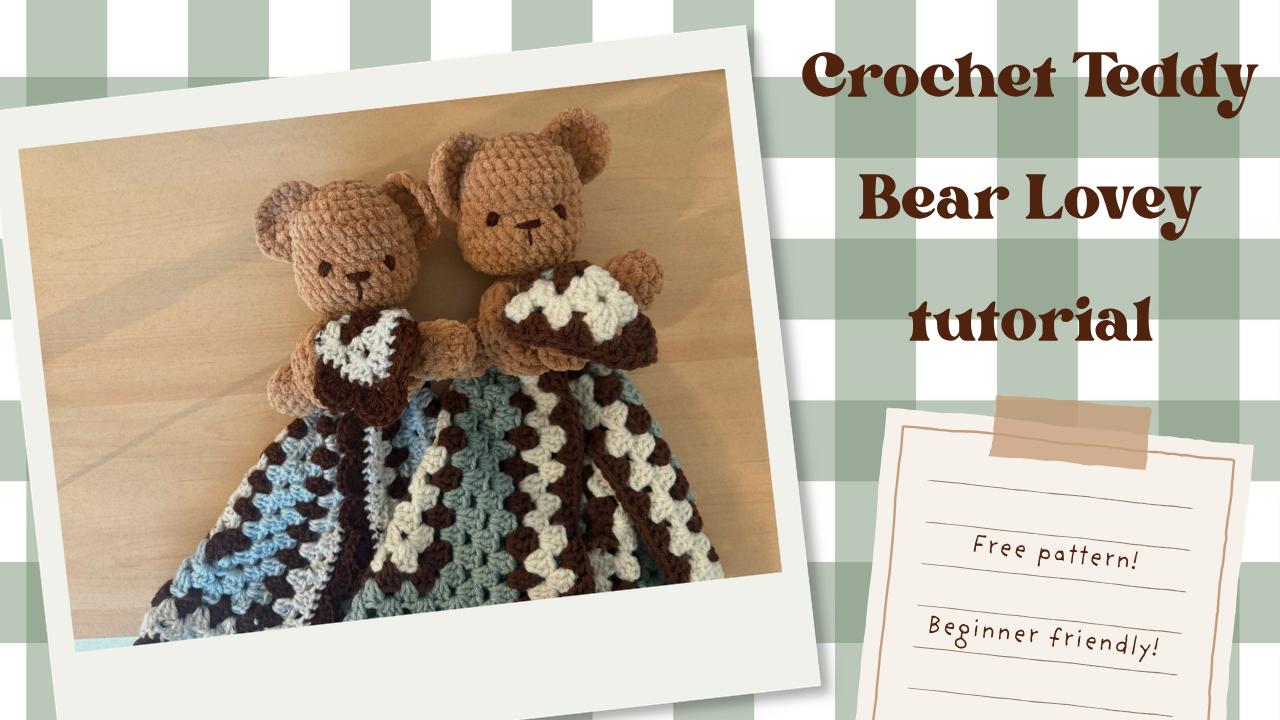
Teddy Bear Lovey - Free Crochet Pattern
This crochet teddy bear lovey is made with a plushie body and a granny square blanket, which makes the perfect cozy gift. The Granny square blanket can also easily be customized to add your own unique touch. Try different granny square patterns and sizes for a different look!
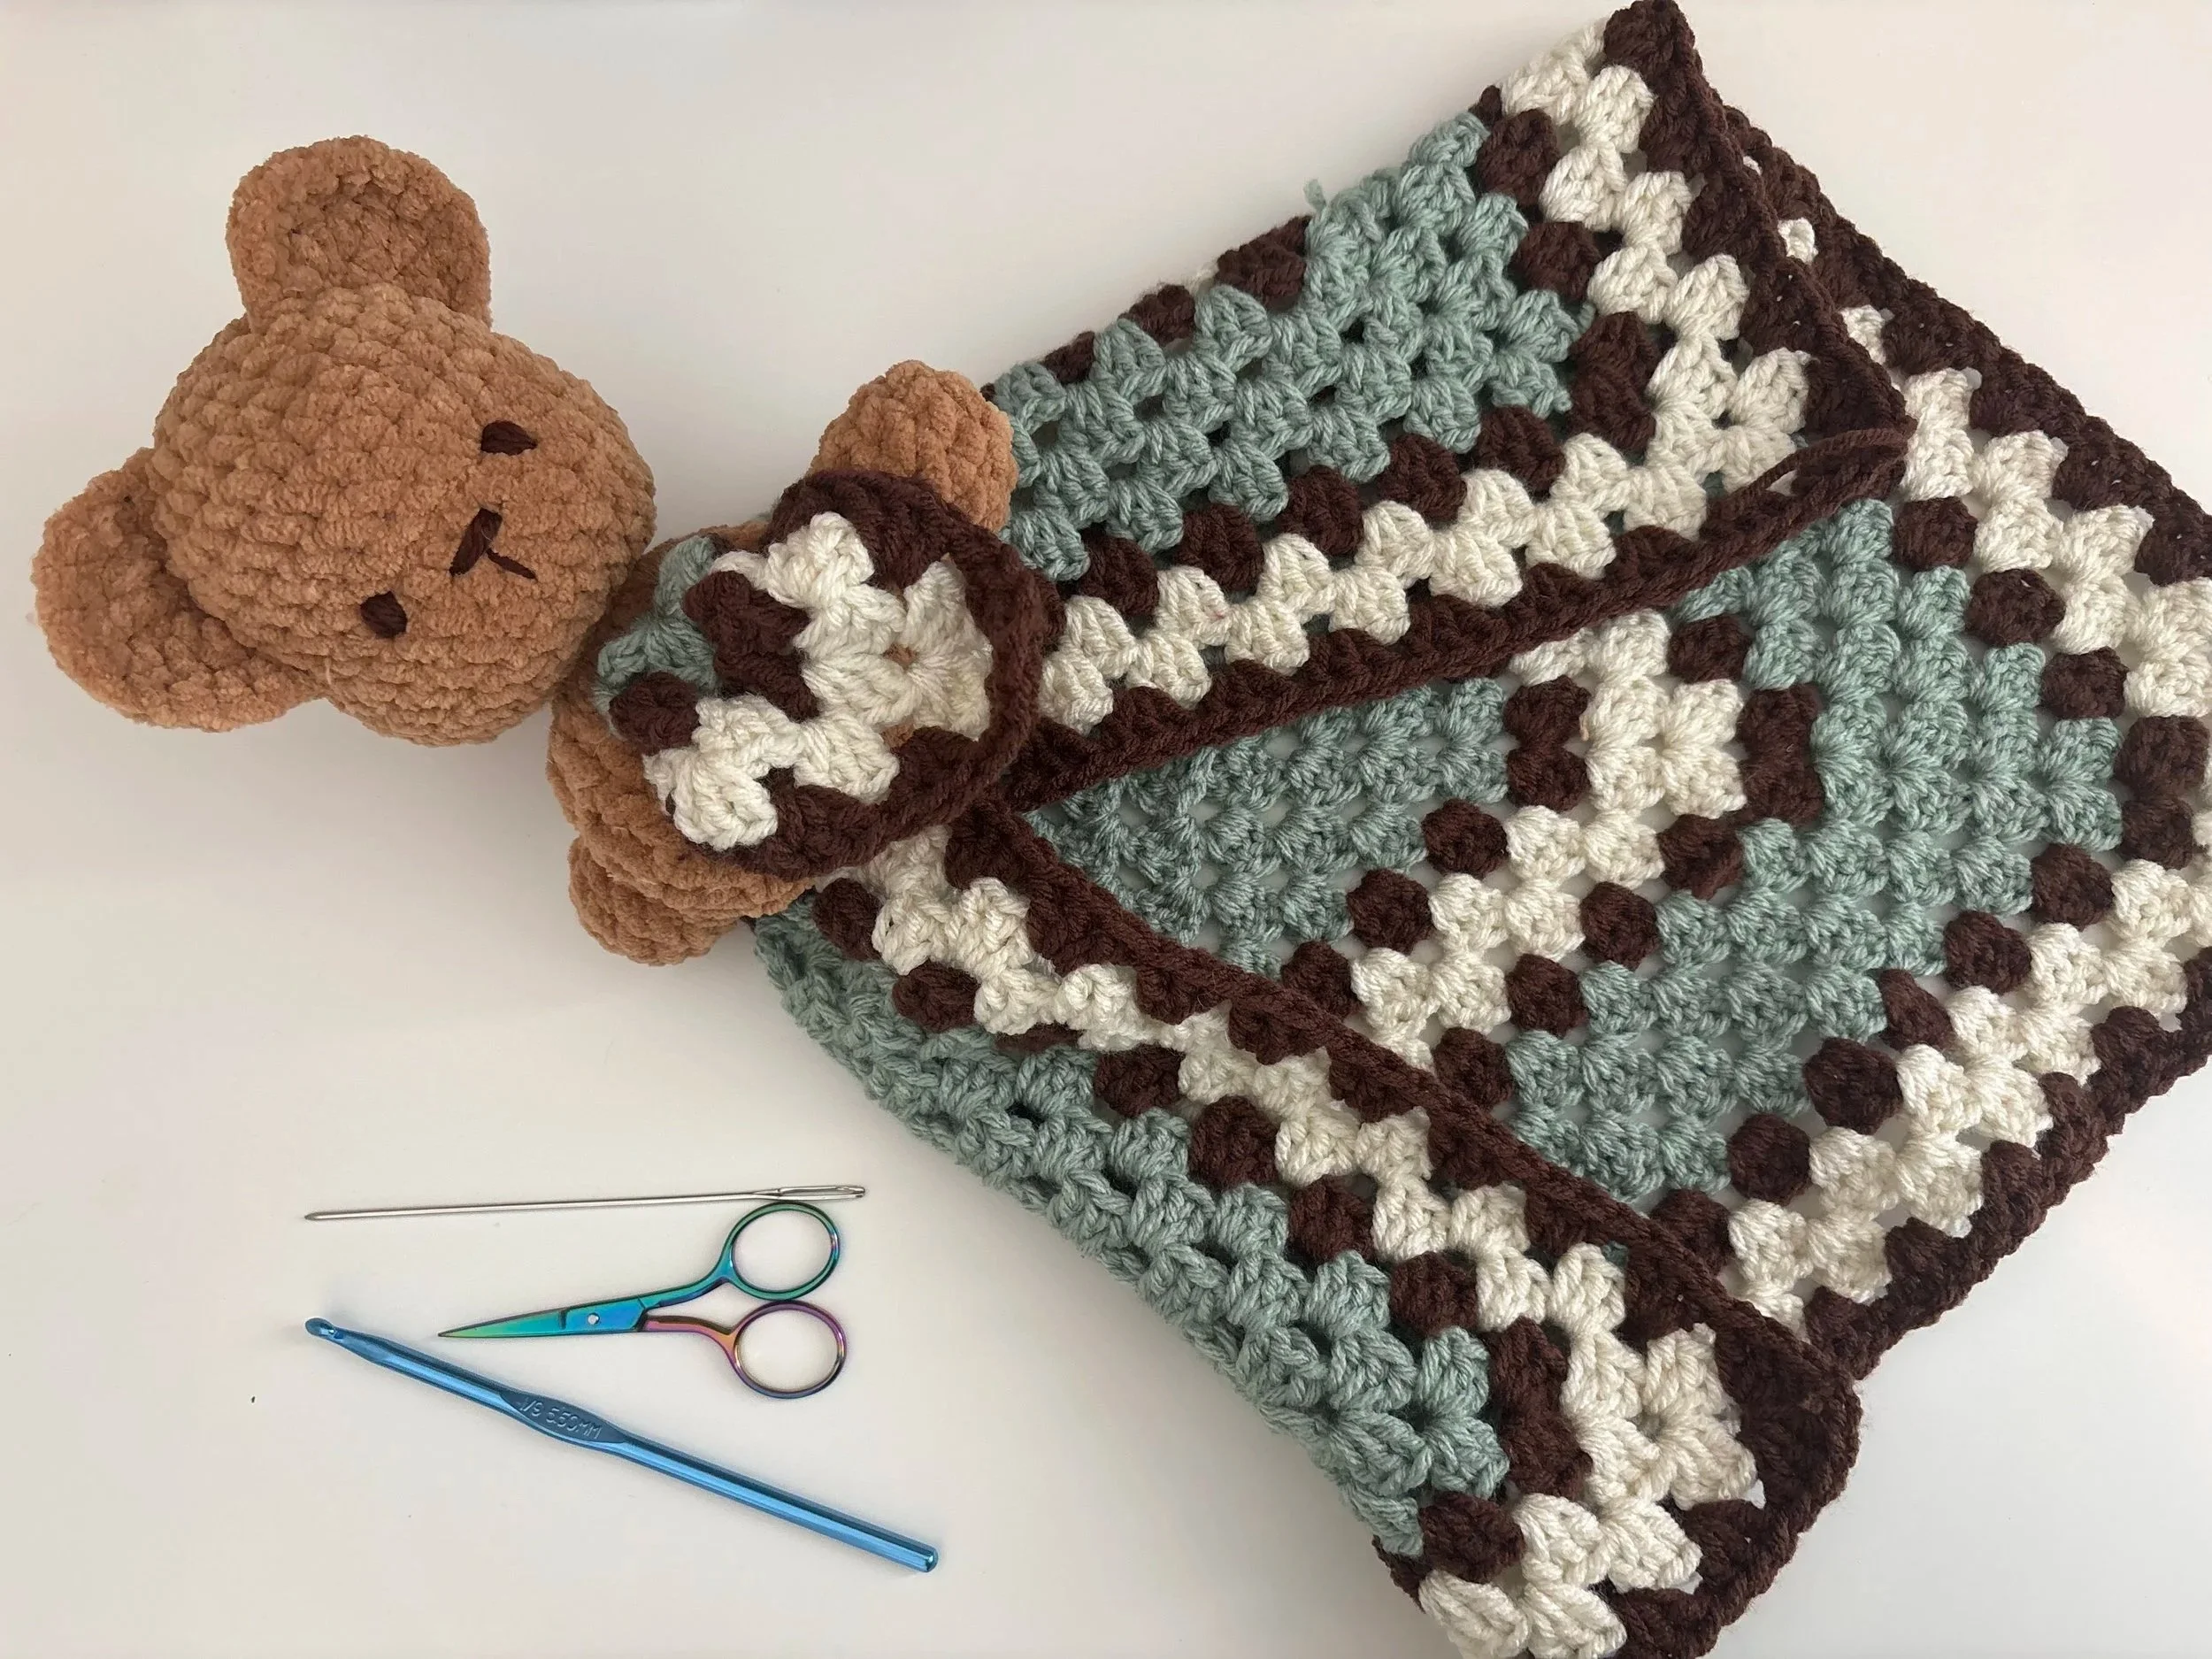
Materials
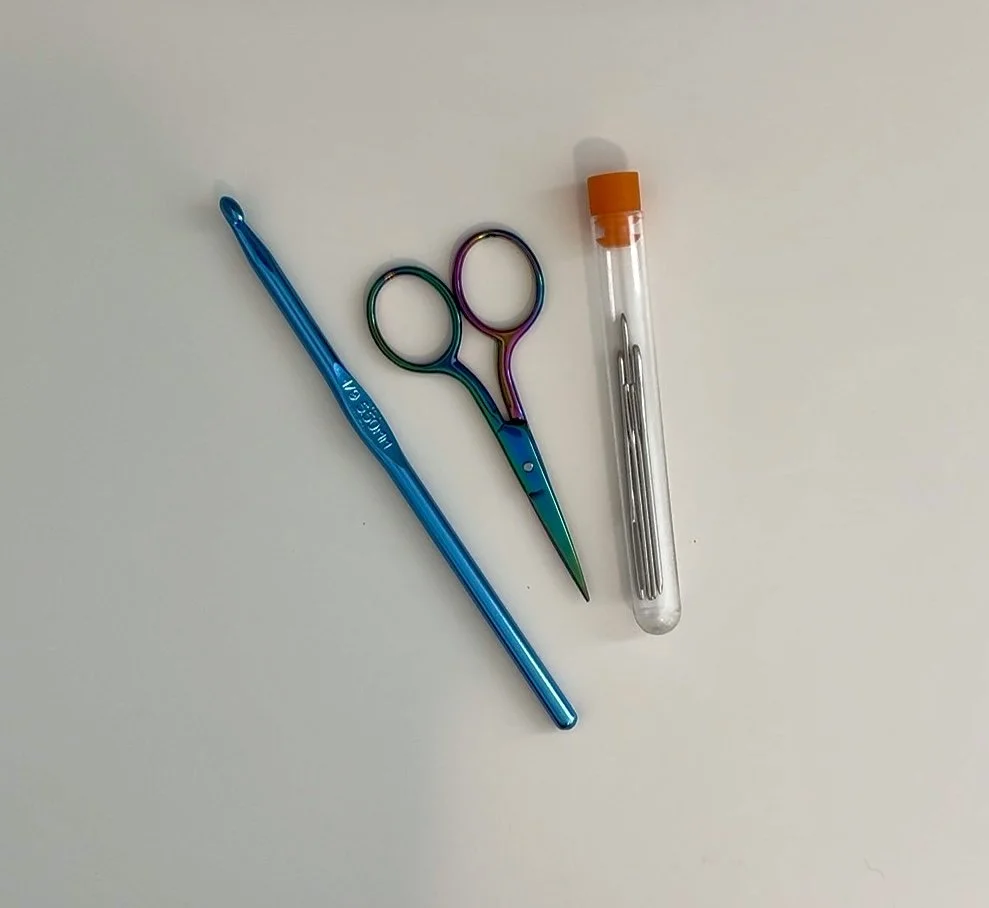
Crochet Hook - 5.0 mm
Yarn
bulky, size 6 - one skein in the color brown (bear) or white (Bunny)
worsted weight, size 4 - one skein each in 2 colors to make the granny square blanket. Also use just a bit of brown yarn to embroider the eyes and nose.
Scissors
Embroidery needle
Stuffing
Stitch marker
Stitches/terminology
MR - magic ring (I use the chain 2 method)
SC - single crochet
Hdc - half-double crochet
DC - double crochet
BLO - back loops only (crochet in only the back loops)
Dec - decrease (invisible decrease method)
Inc - increase (make 2 in the same stitch)
St(s) - Stitch(es)
Rnd(s) - Round(s)
This pattern is written in US terminology. The pattern is worked in the round continuously, unless otherwise stated. Please feel free to watch the video version [link here] if you would prefer to follow along that way.
Overview
Skill level: Advanced beginner - intermediate
Hook size: 5.0 mm (H)
Yarn size: 6.0, bulky
Project time: Approx 3 hours, depending on skill level and speed.
Project skills: Low sew, increase/decrease, single crochet, half-double crochet, embroidery, face-shaping, and assembly
Note: This project is written in US terminology and worked in the round.
Pattern - Body
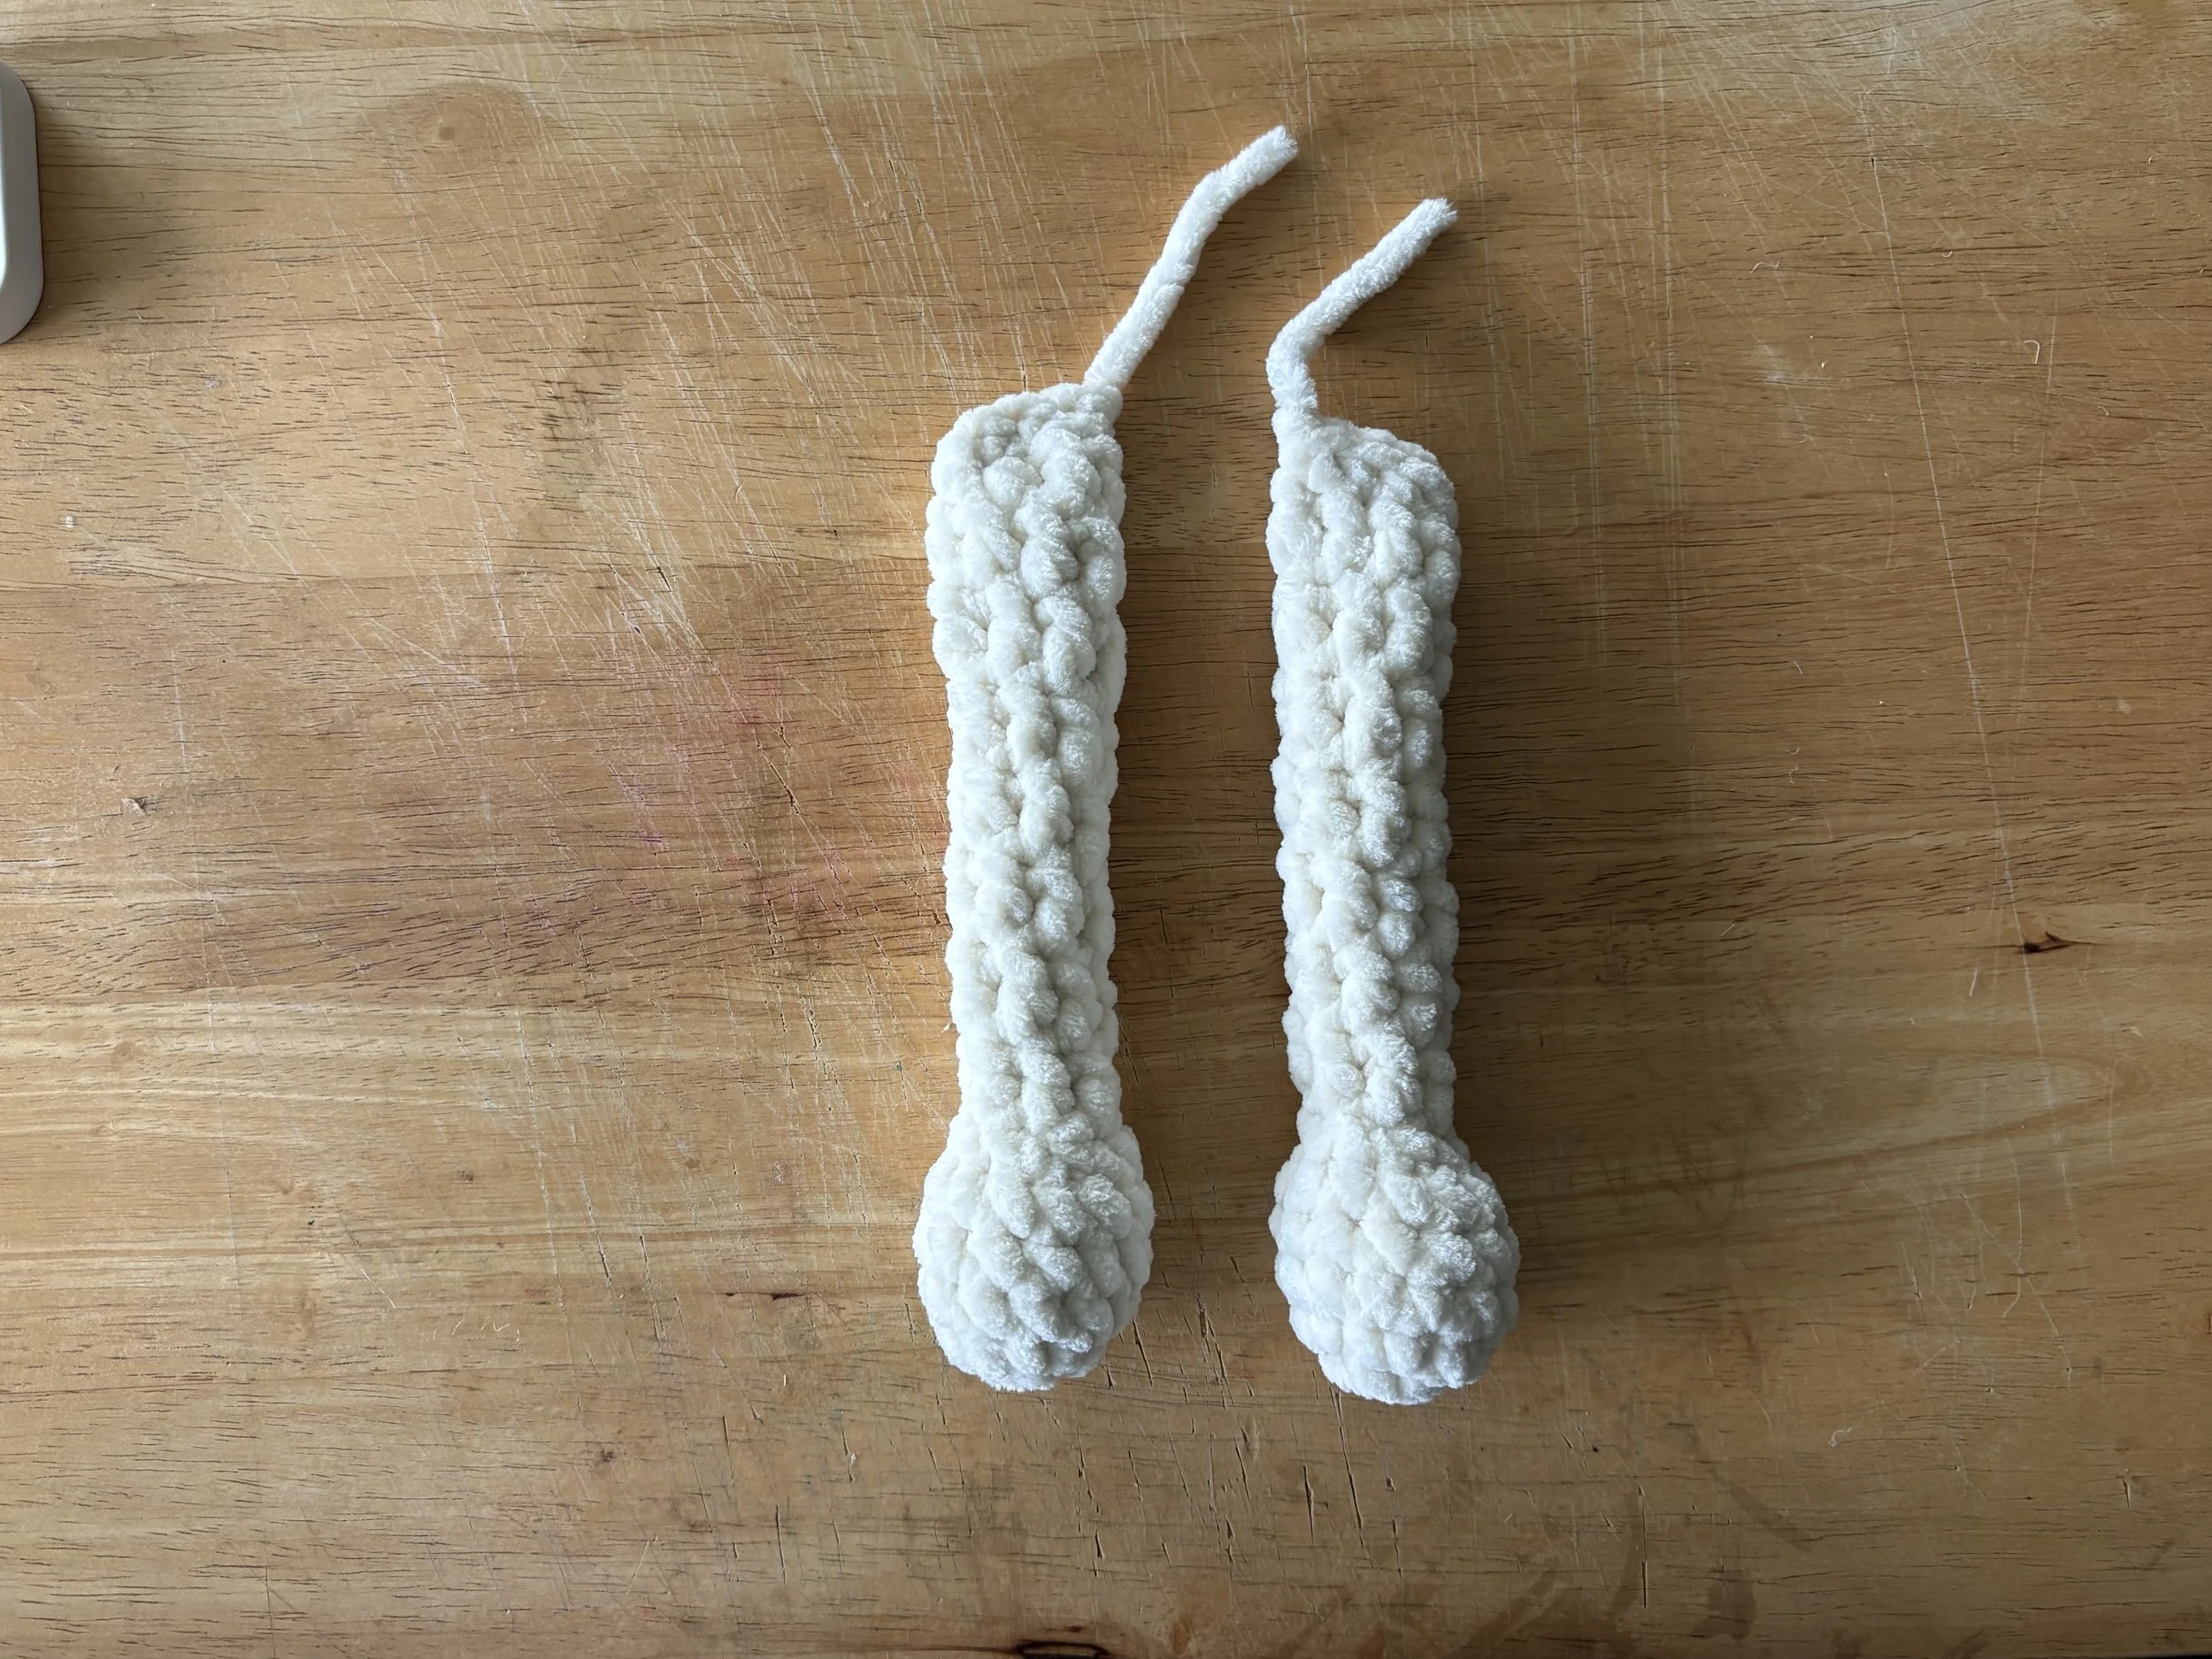
Arms
Make 2
Make 6 sts in a MR
Round 1: (Inc) x6 - 12 sts
Round 2-4: SC around x 3 rnds - 12 sts
Round 5: (Dec) x6 - 6 sts
Stuff the hand.
Round 6-13: DC around x8 rounds - 6 sts
Make a Hdc and a SC to even out the round.
Leave the arm part un-stuffed.
Fold in half and SC 3 across the top to close the arm.
Fasten off, hide the ends.
Head
Make 6 in a MR
Round 1: (Inc) x6 - 12 sts
Round 2: (SC, inc) x6 - 18 sts
Round 3: (SC 2, inc) x6 - 24 sts
Round 4: (SC 3, inc) x6 - 30 sts
Round 5-8: SC around x 4 rnds - 30 sts
Round 9: (SC 9, inc) x3 - 33 sts
Round 10-11: SC around x 2 rnds - 33 sts
Round 12: (SC 2, Dec) x7, SC 2, SC 3 together (Dec 3) the last 3 sts- 30 sts
Round 13: (SC, Dec) x8 - 16 sts
Round 14: (Dec) x8 - 8 sts
Round 15: (Inc) x8 - 16 sts
Attach arms to the next round.
Round 16: SC, attach arm 1 across 3 sts, SC 6, attach arm 2 across 3 sts, SC 3 - 16 sts
Round 17: SC around in each st - 16 sts
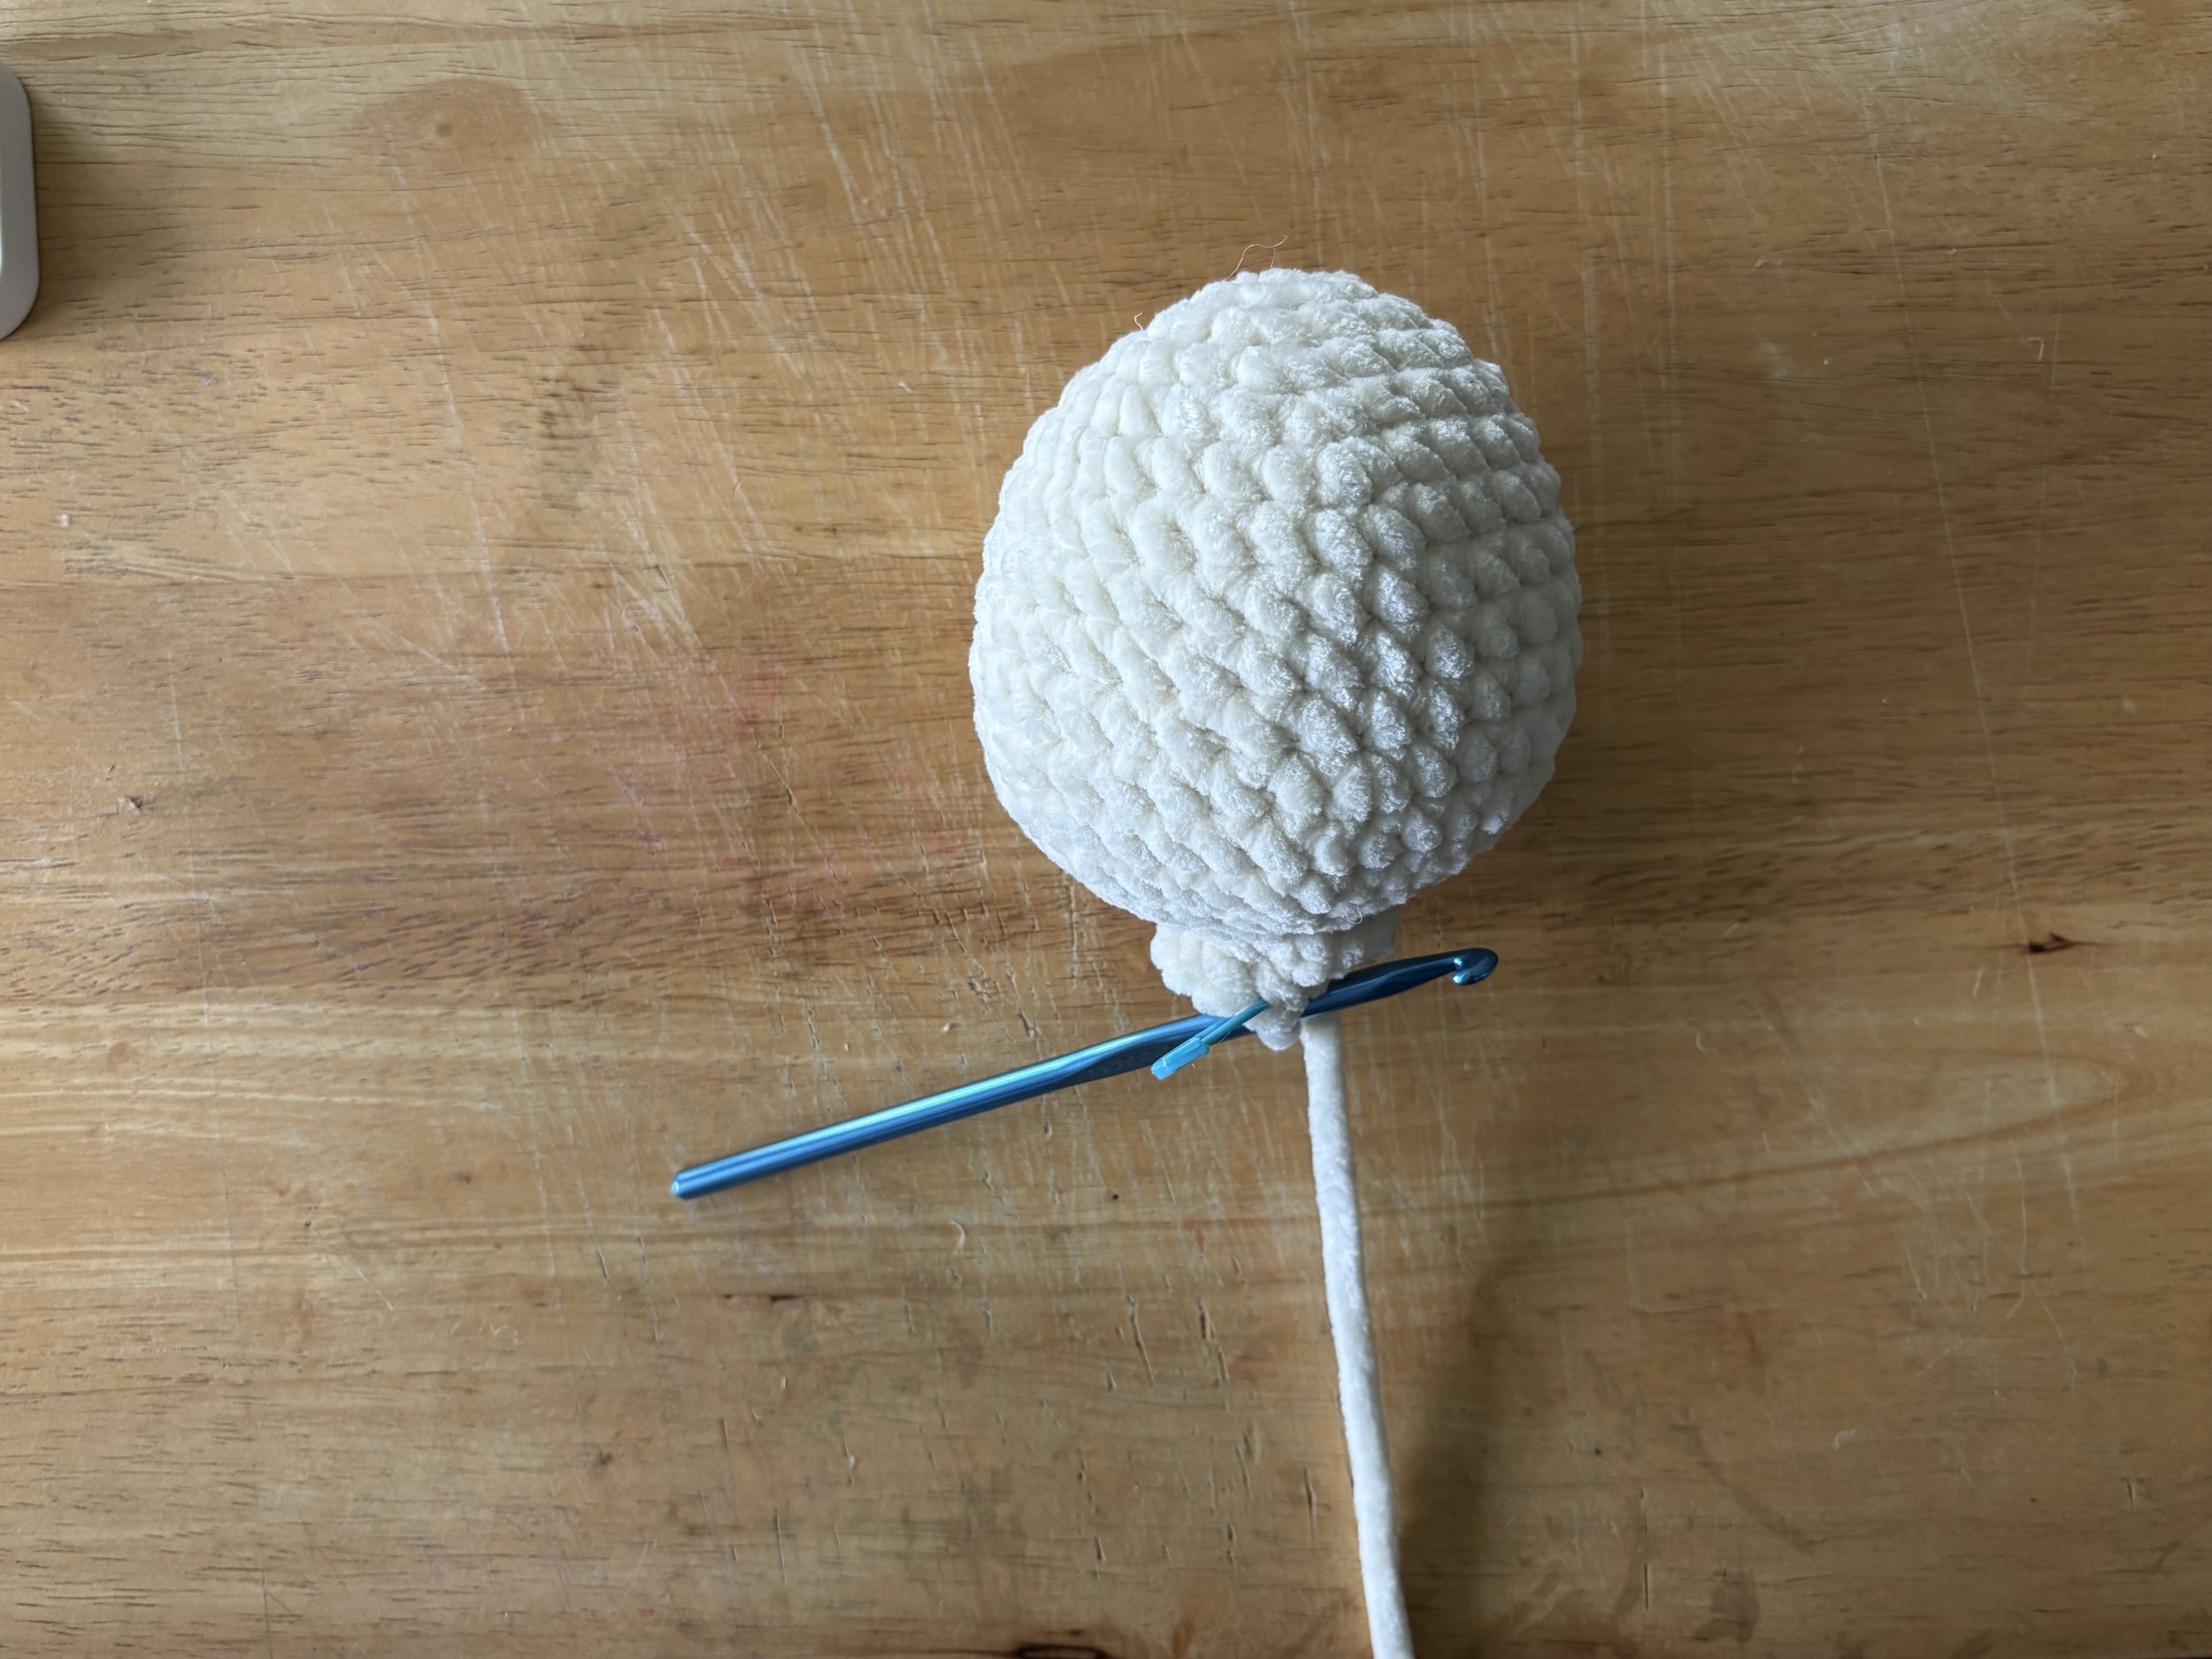
End of Rnd 15
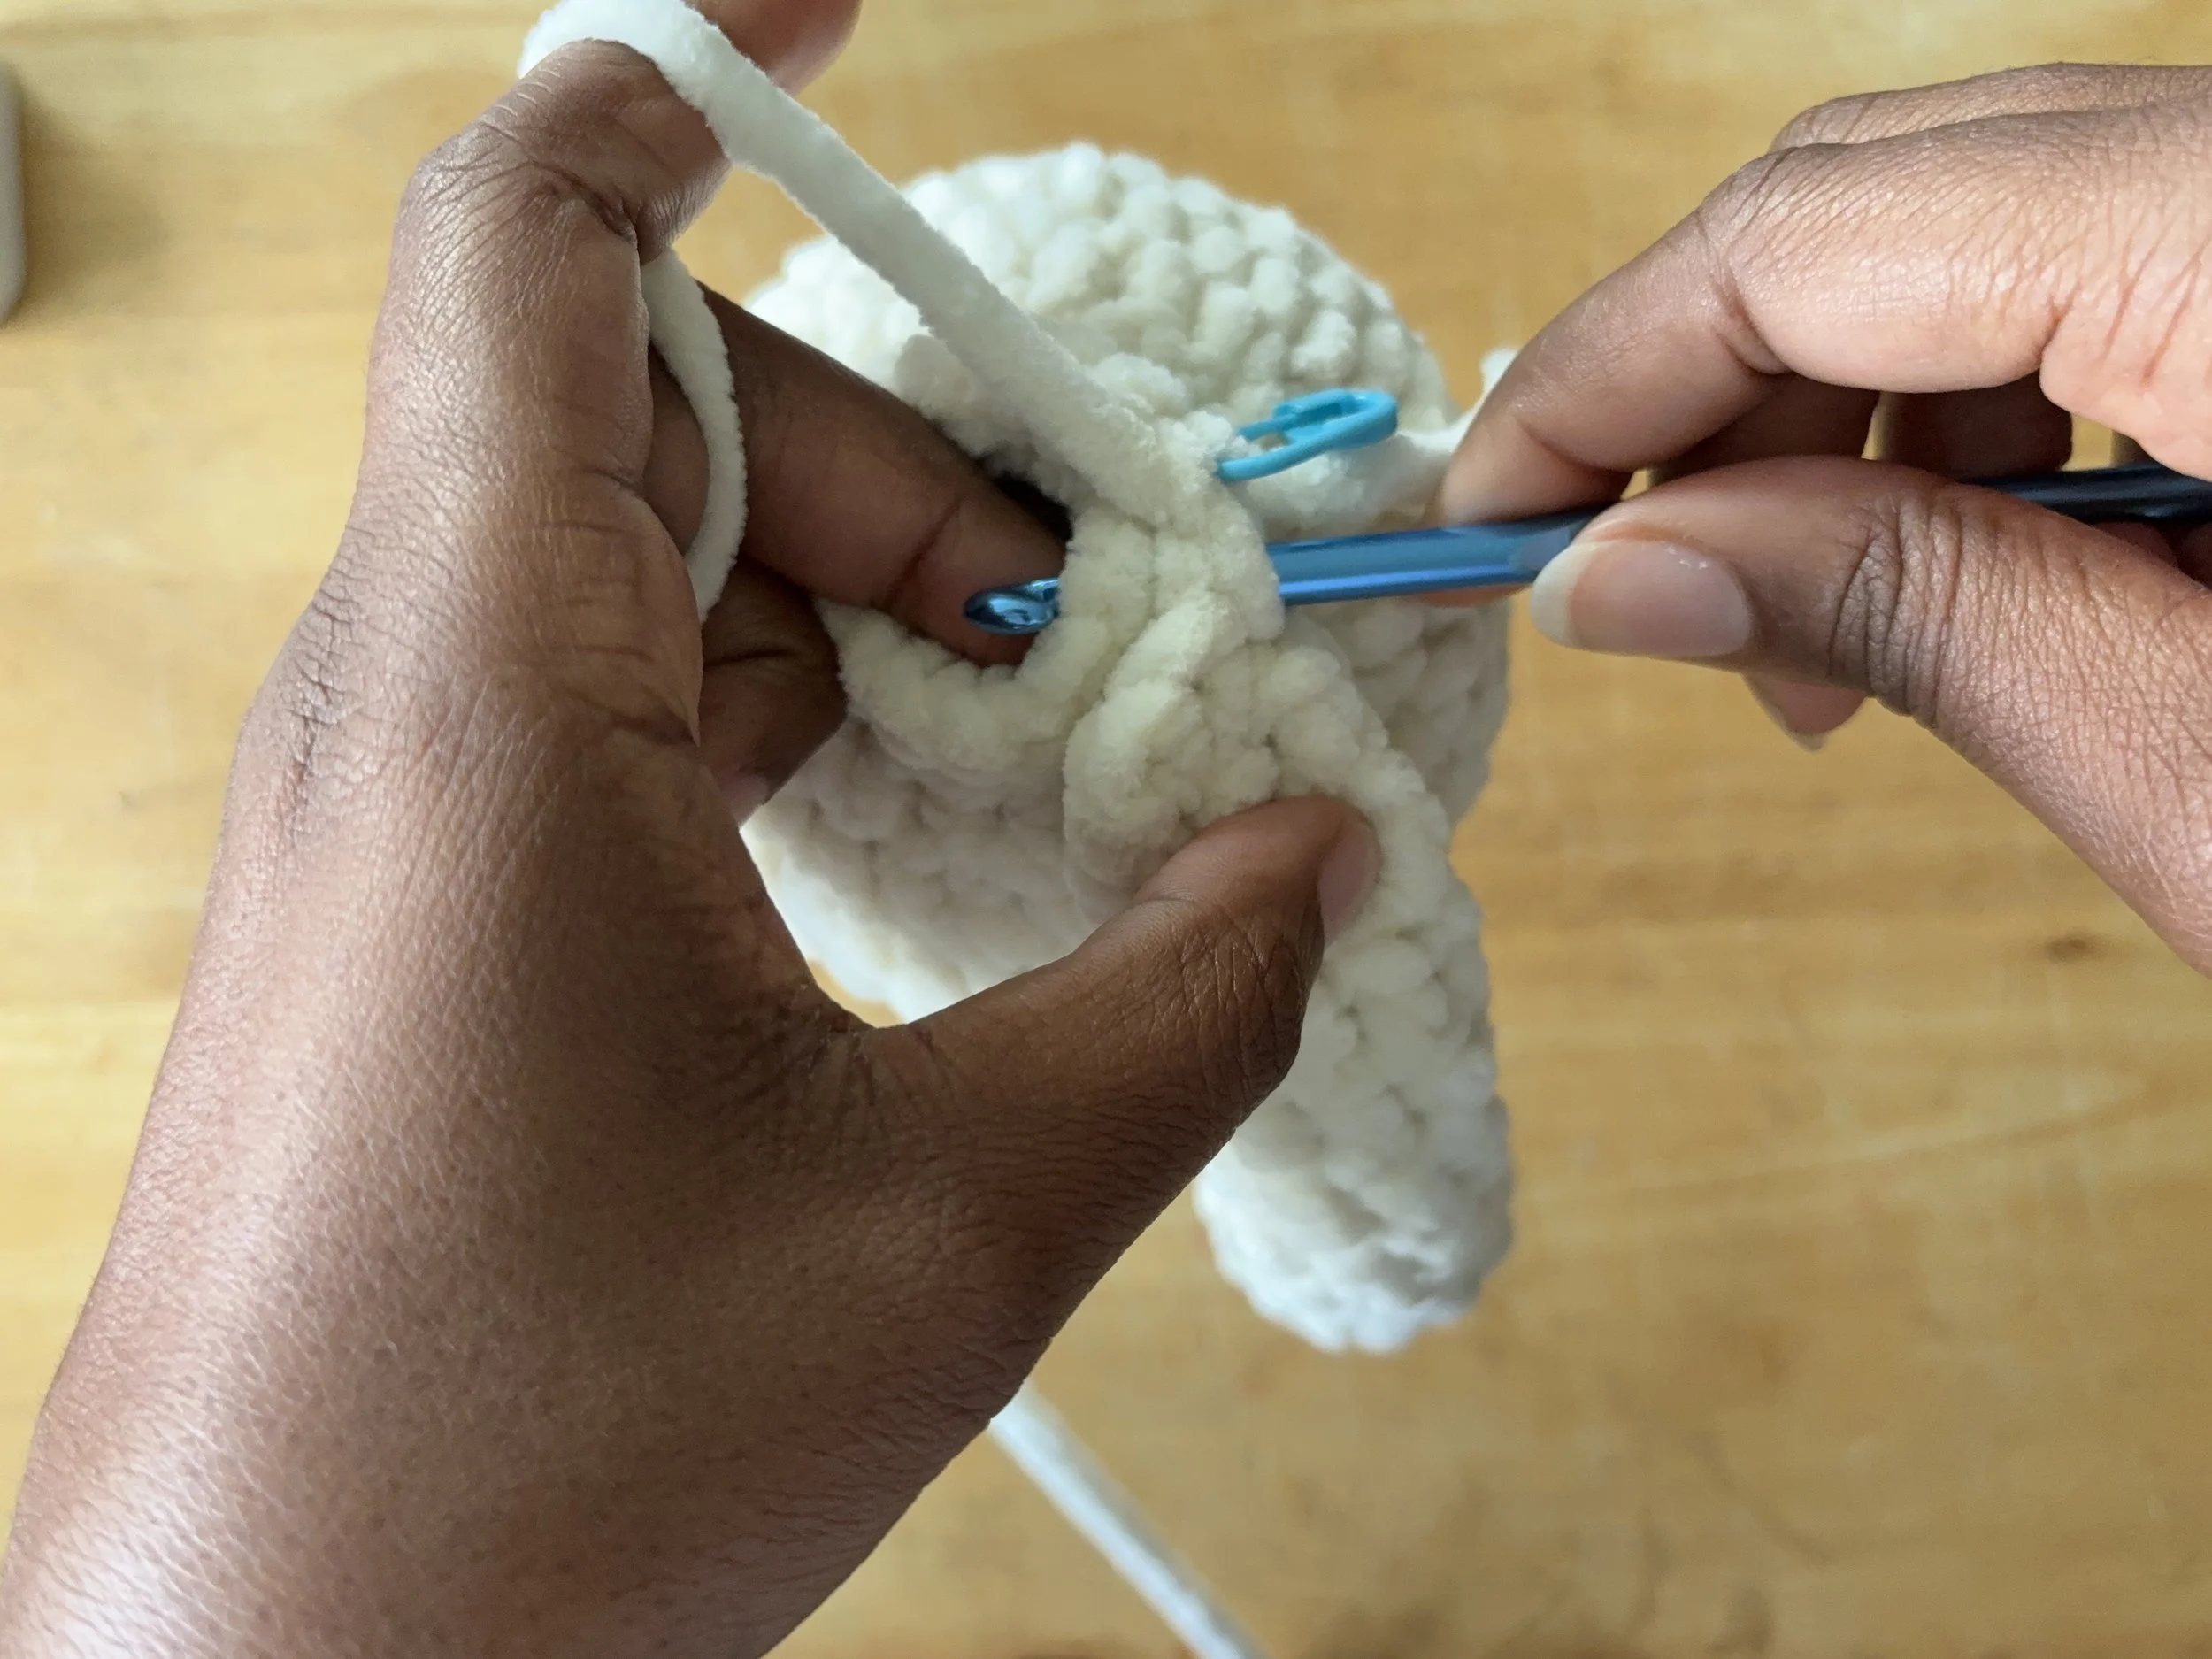
Attaching Arm 1 across 3 sc
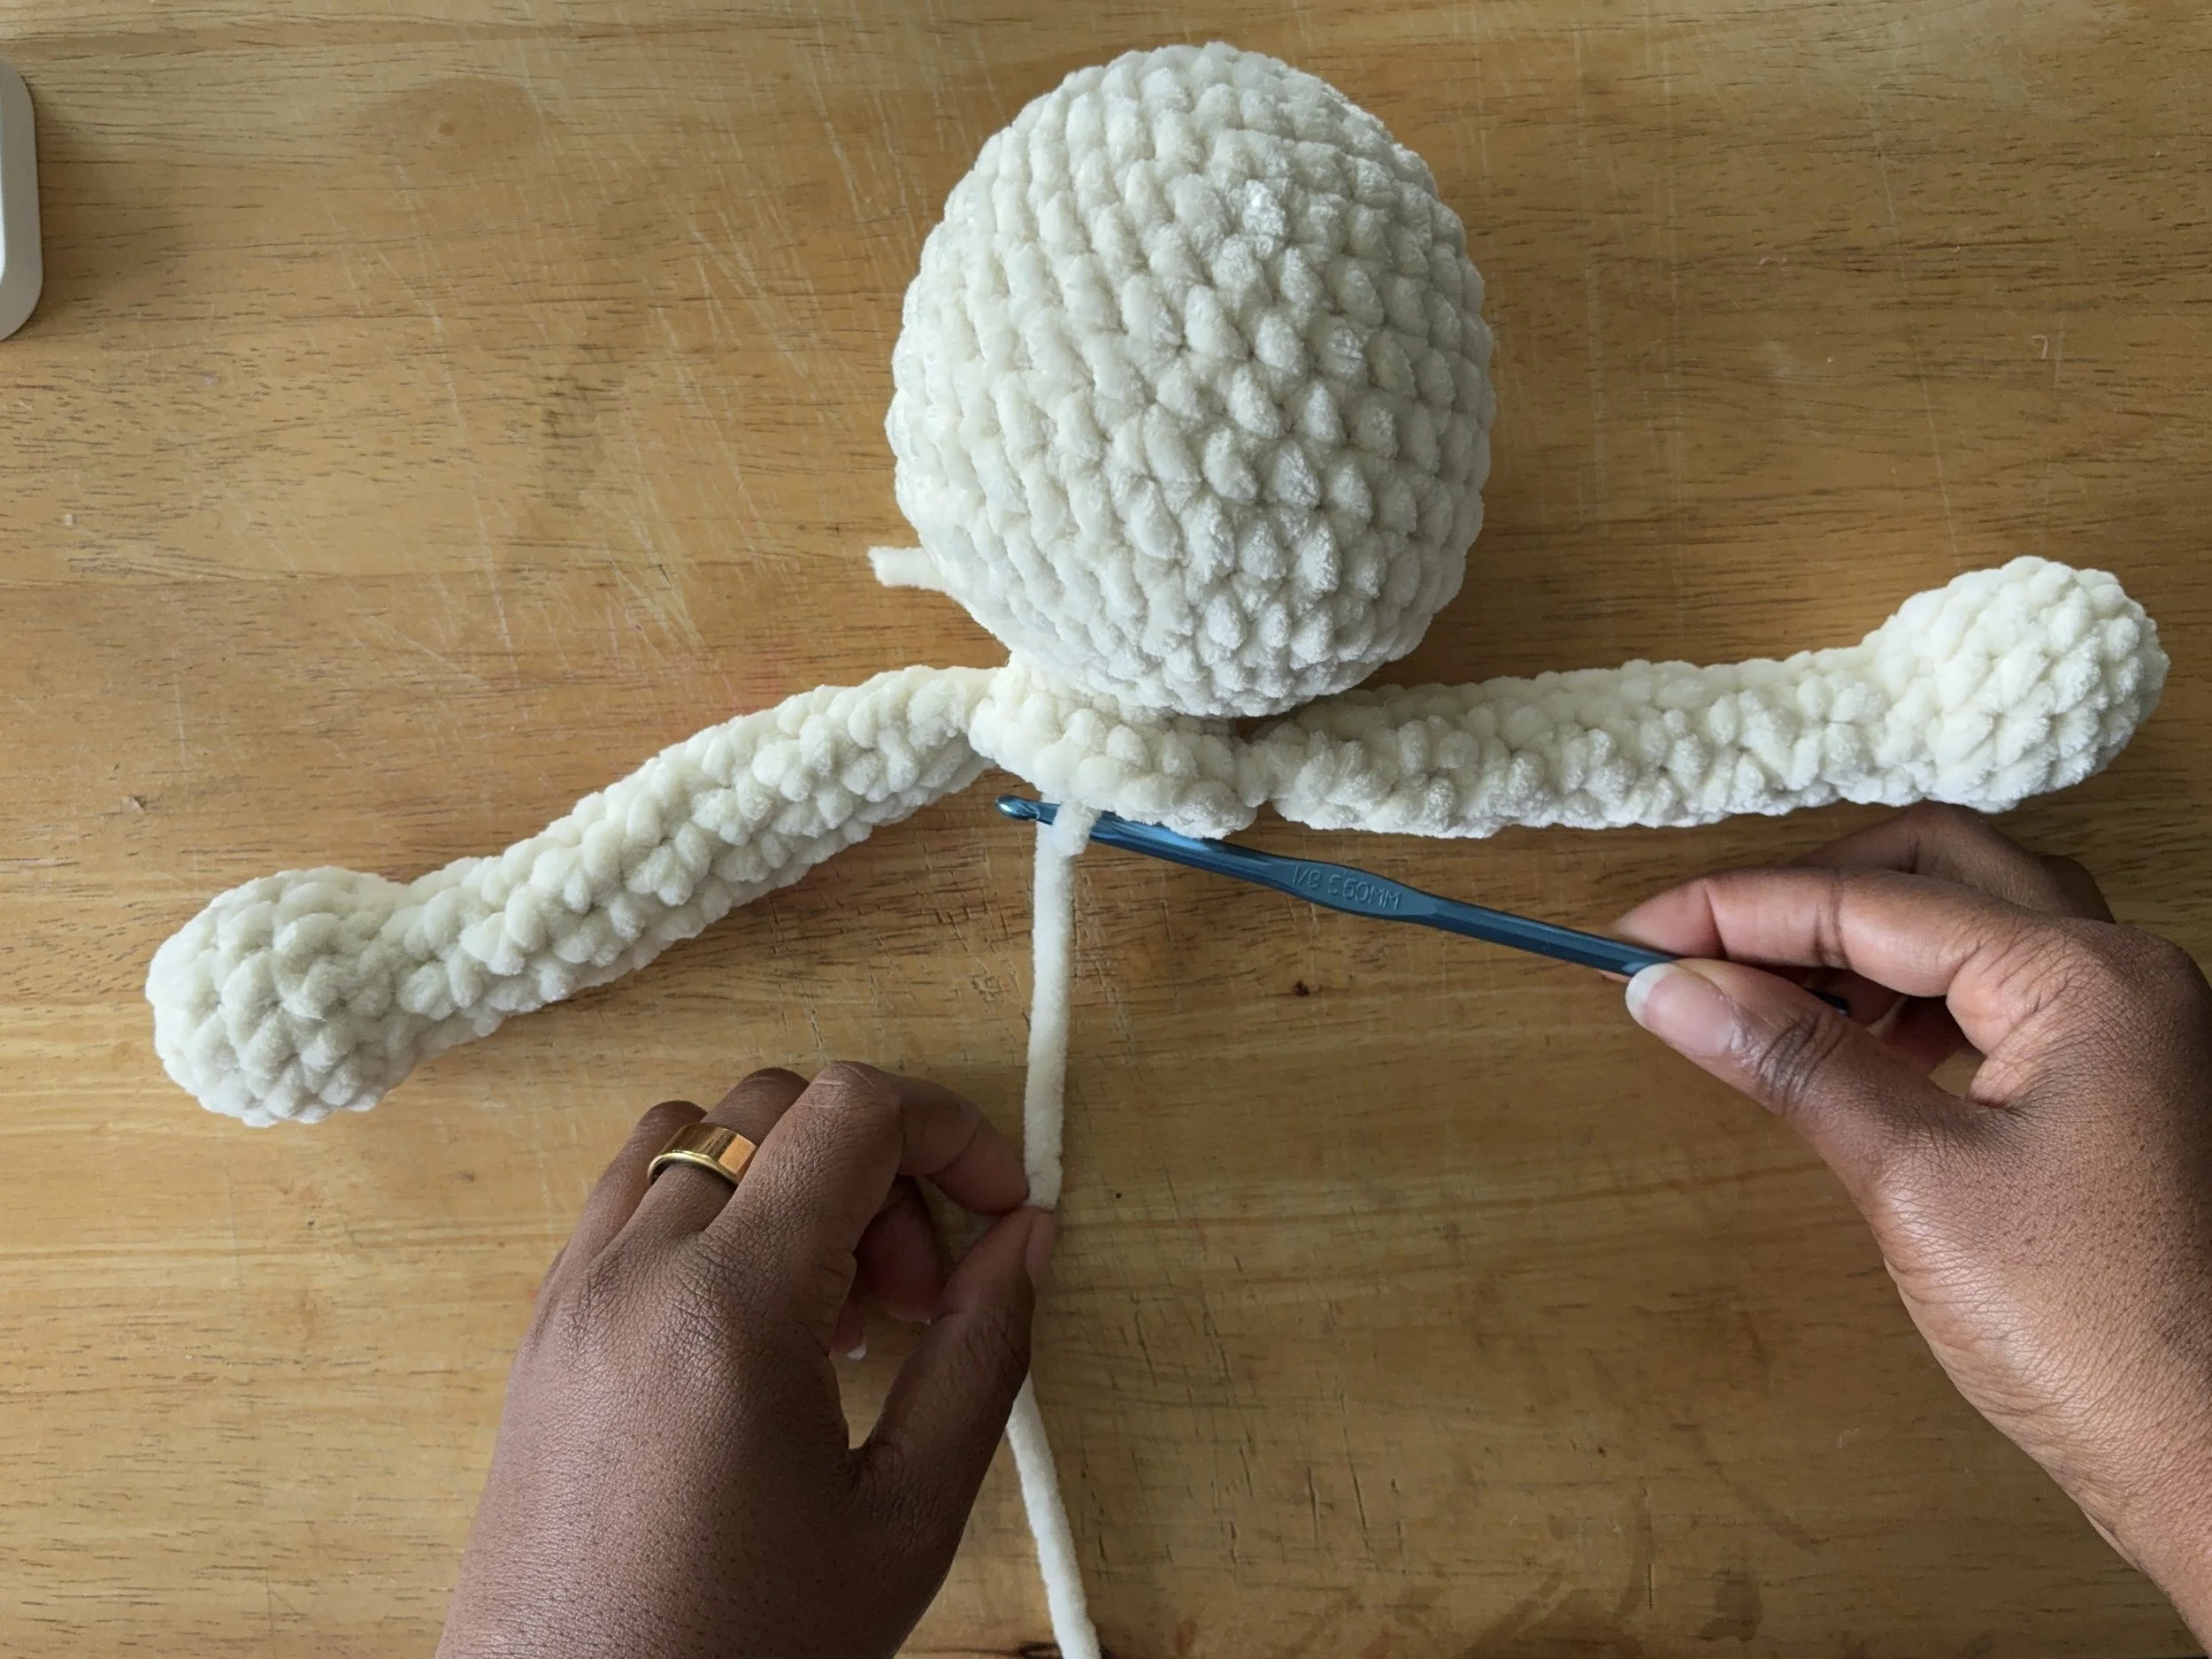
Both arms attached. End of rnd 17.
Finish the Head
We will finish the Head by closing off the hole at the neck. This will make sure no stuffing comes out of the plushie.
First cut a bit of medium/size 4 yarn in a color close to your plushie body, and thread your embroidery needle.
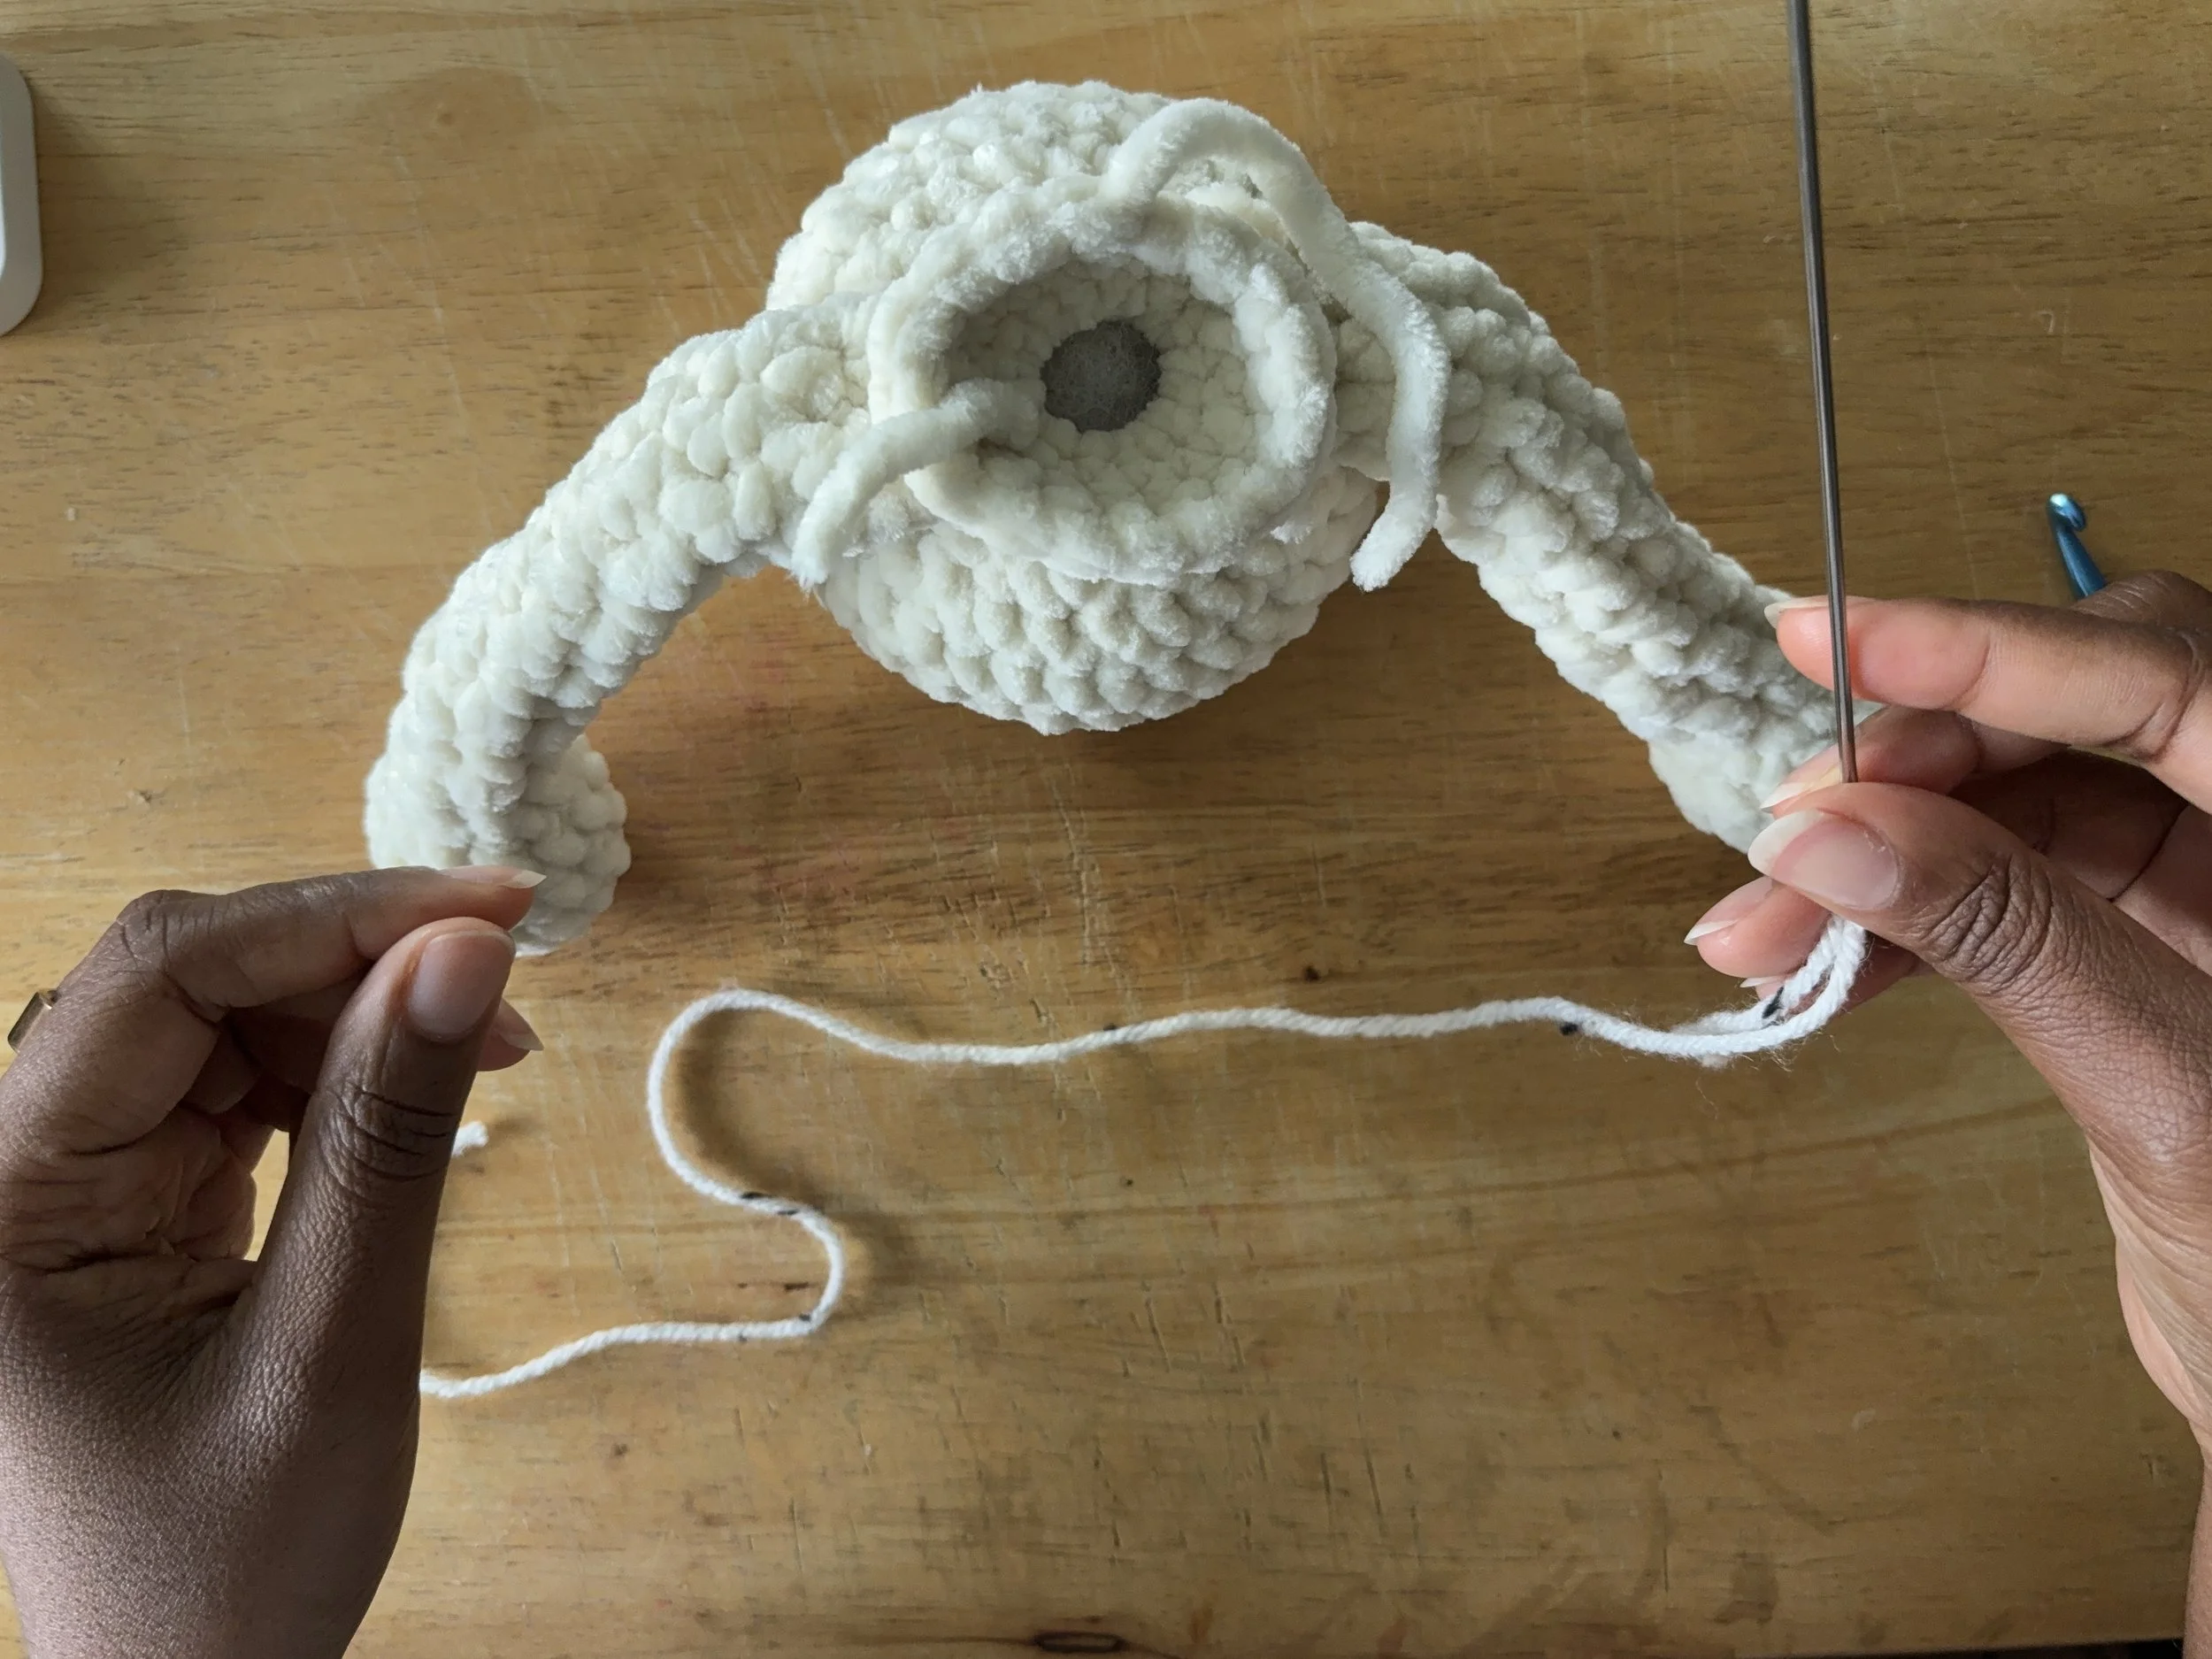
Next, thread the embroidery yarn around the neck of the plushie. Make sure to only pick up the inside loop of the stitch, so the yarn does not show on the outside of the plushie.
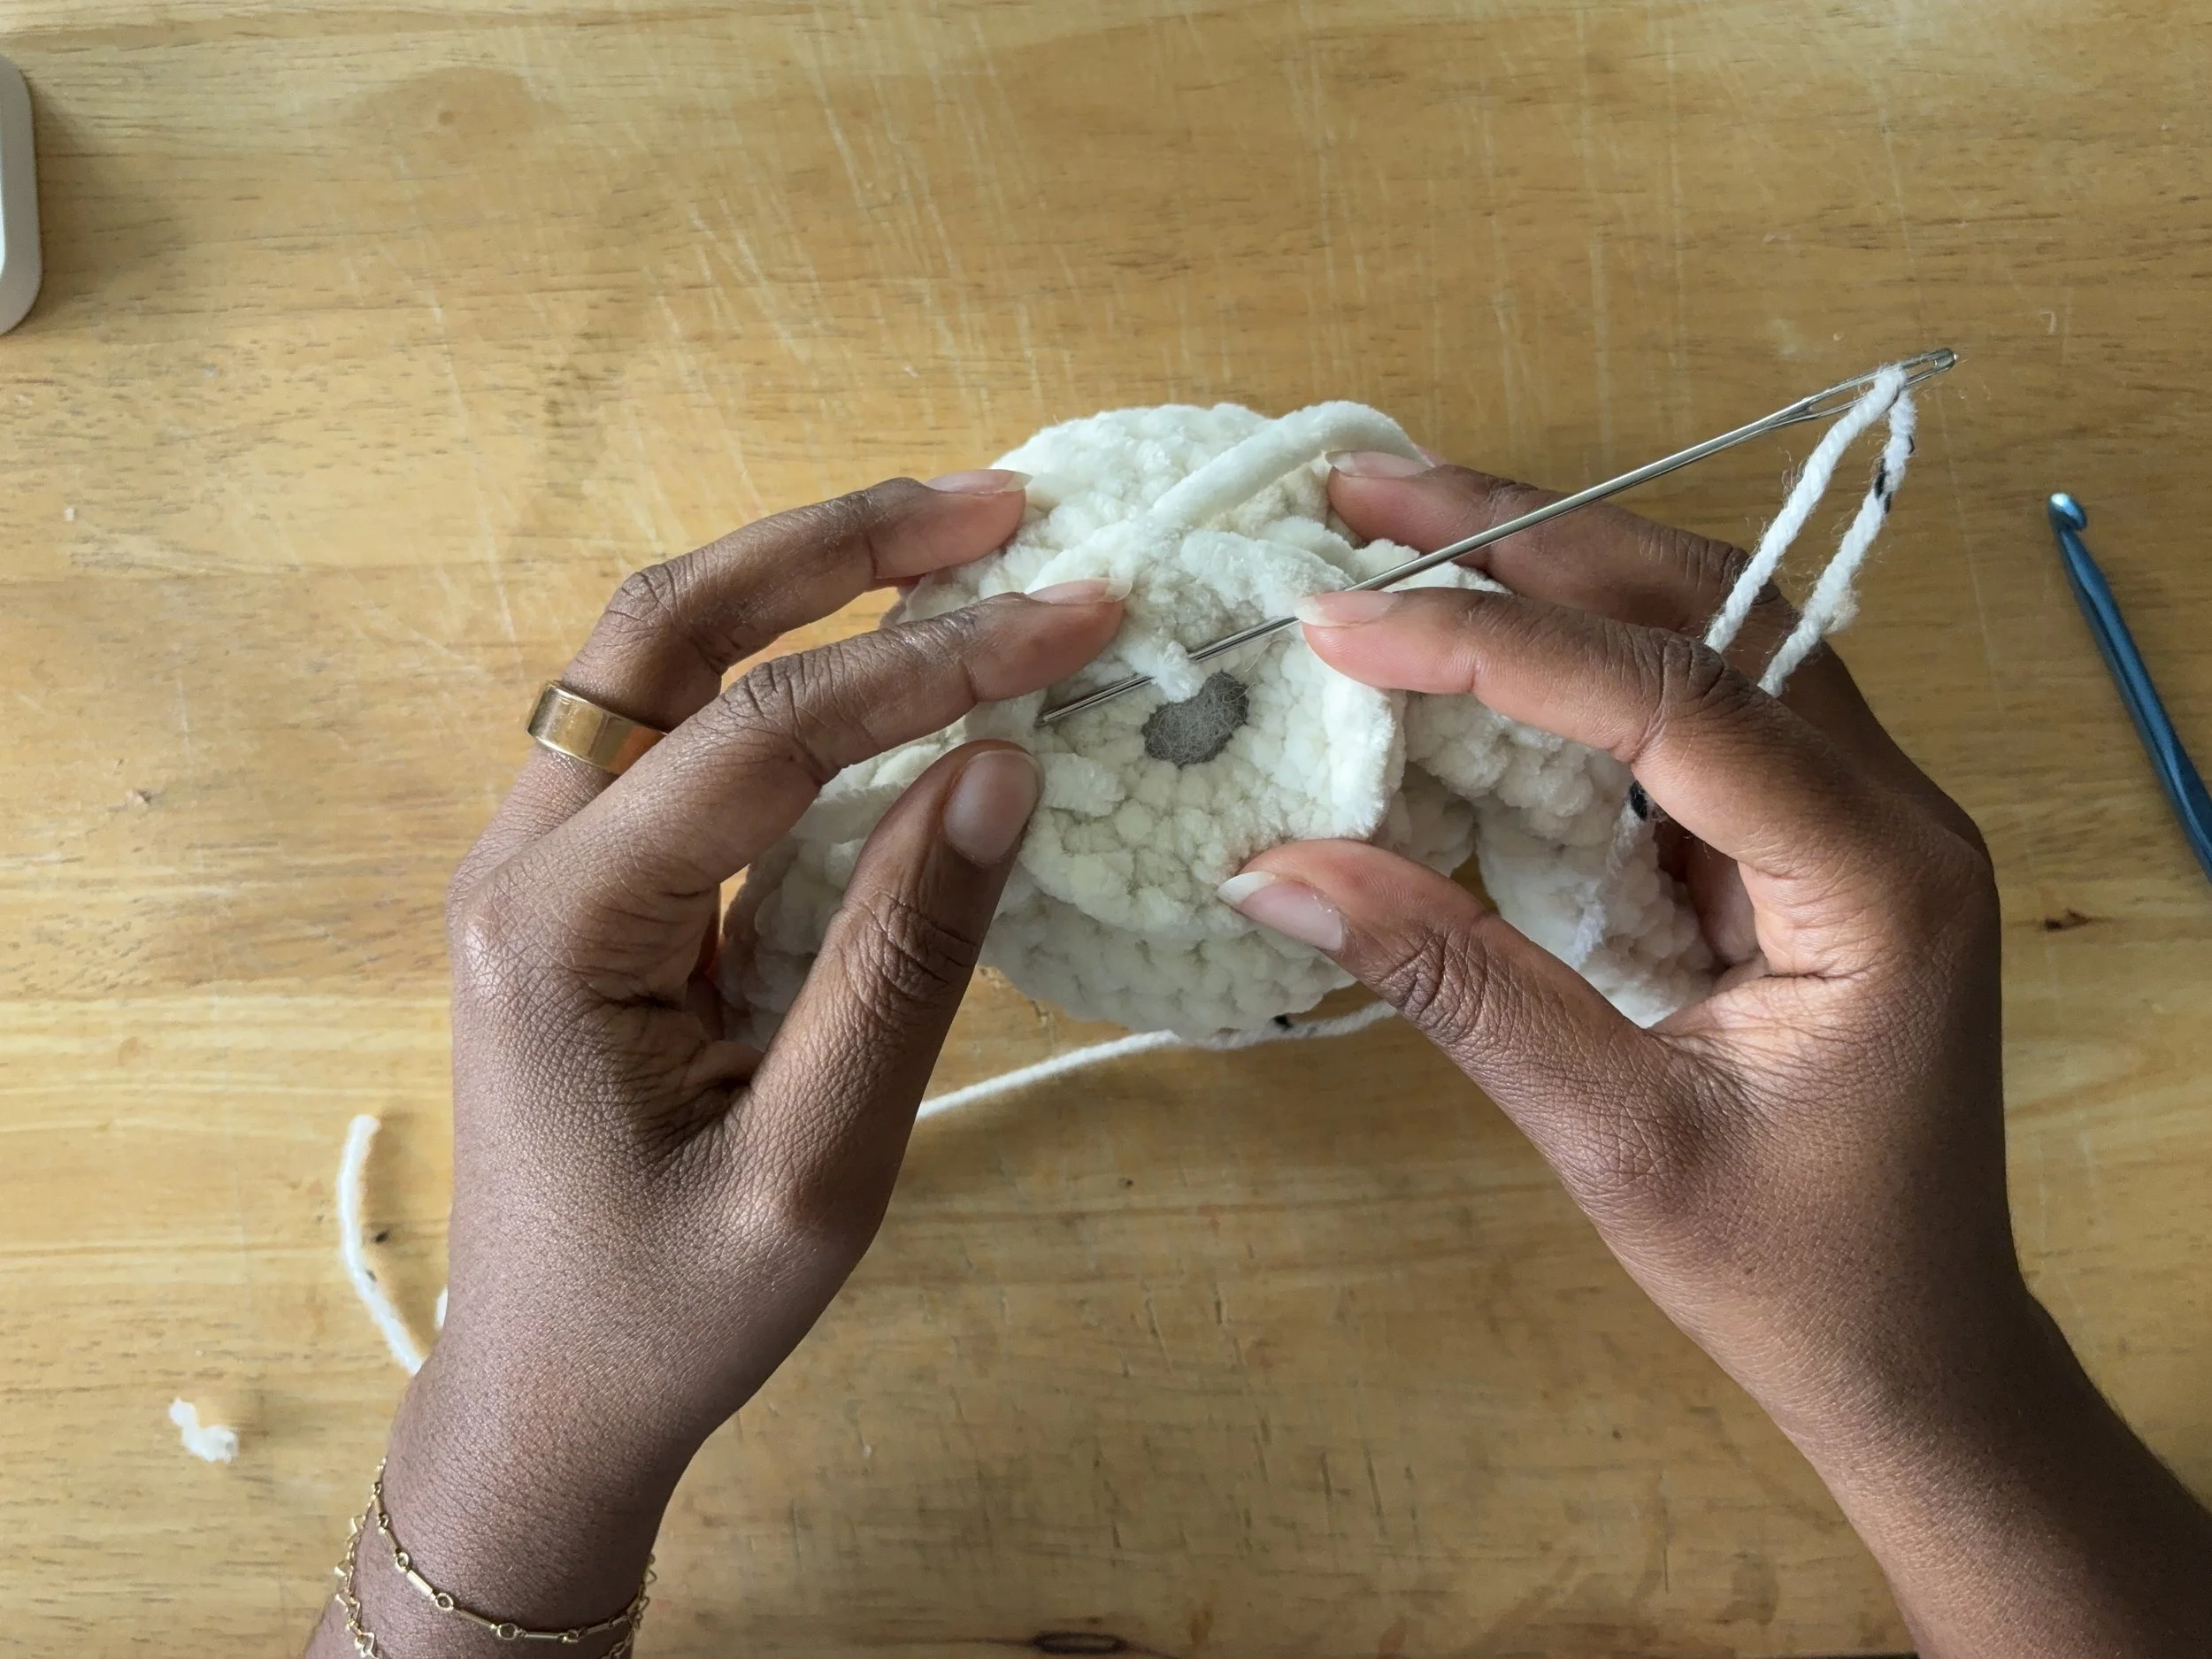
After threading around the entire neck (pick up about 7-8 stitches around), pull tight and secure with a knot.
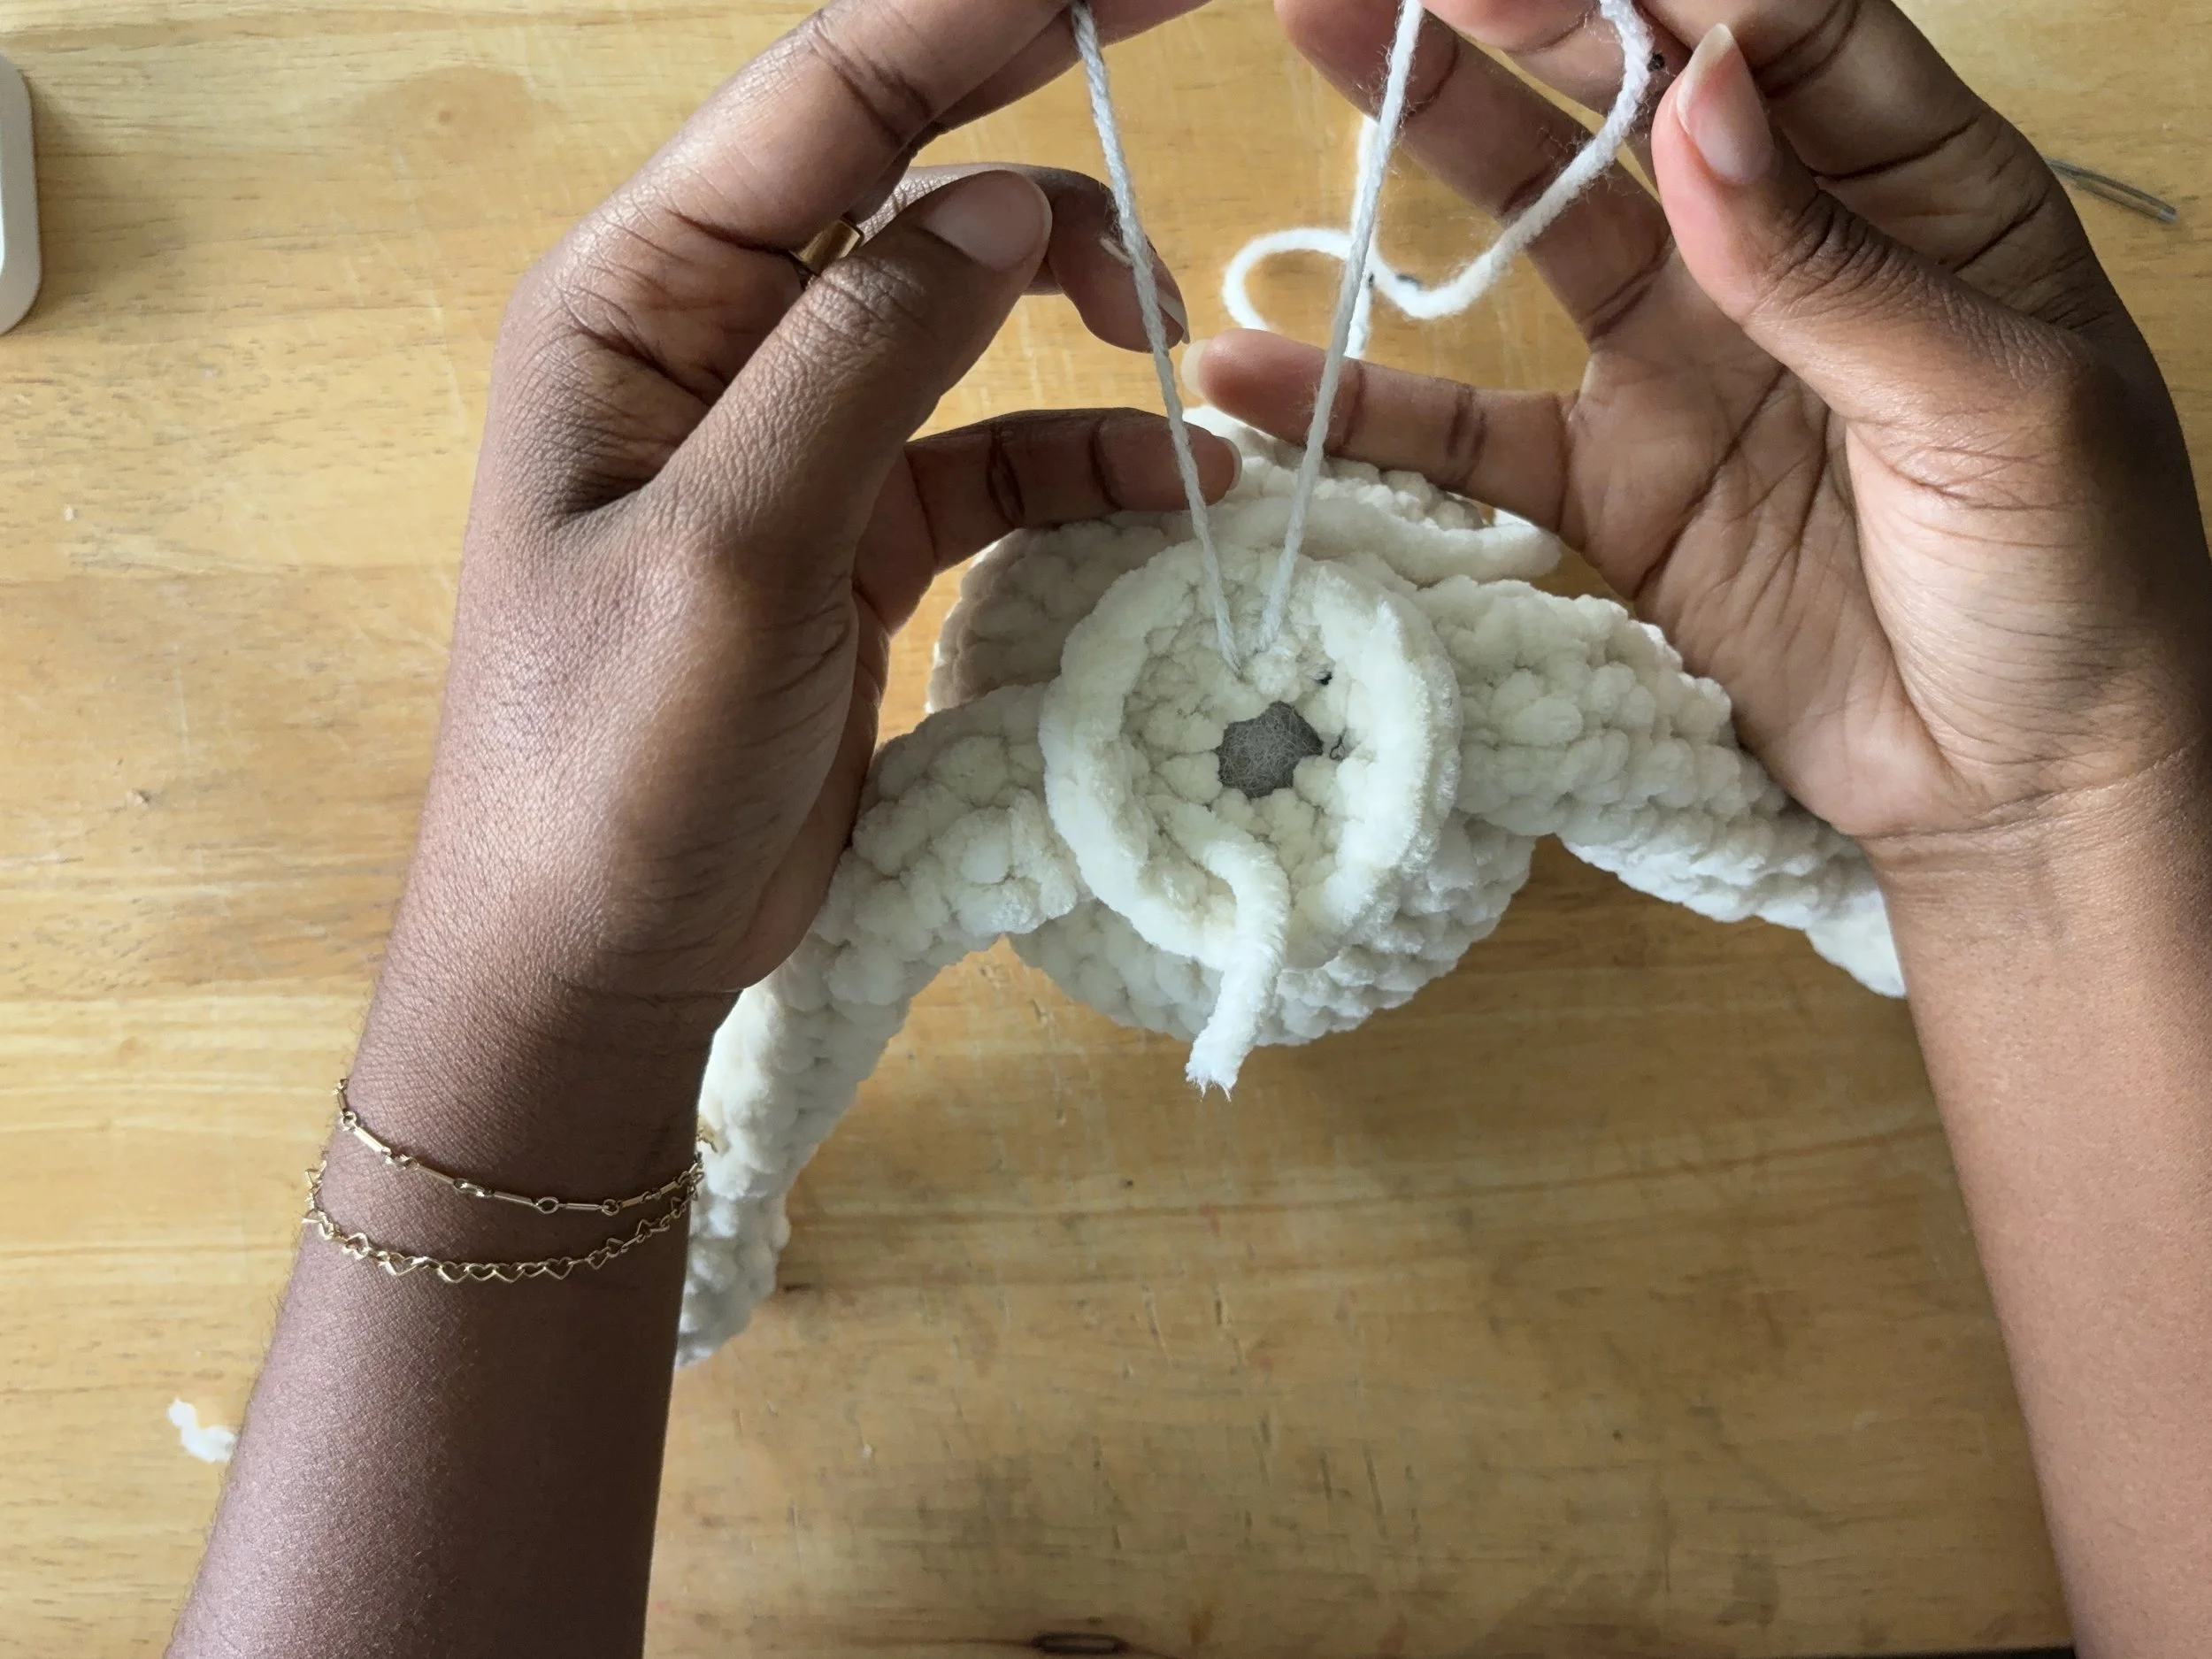
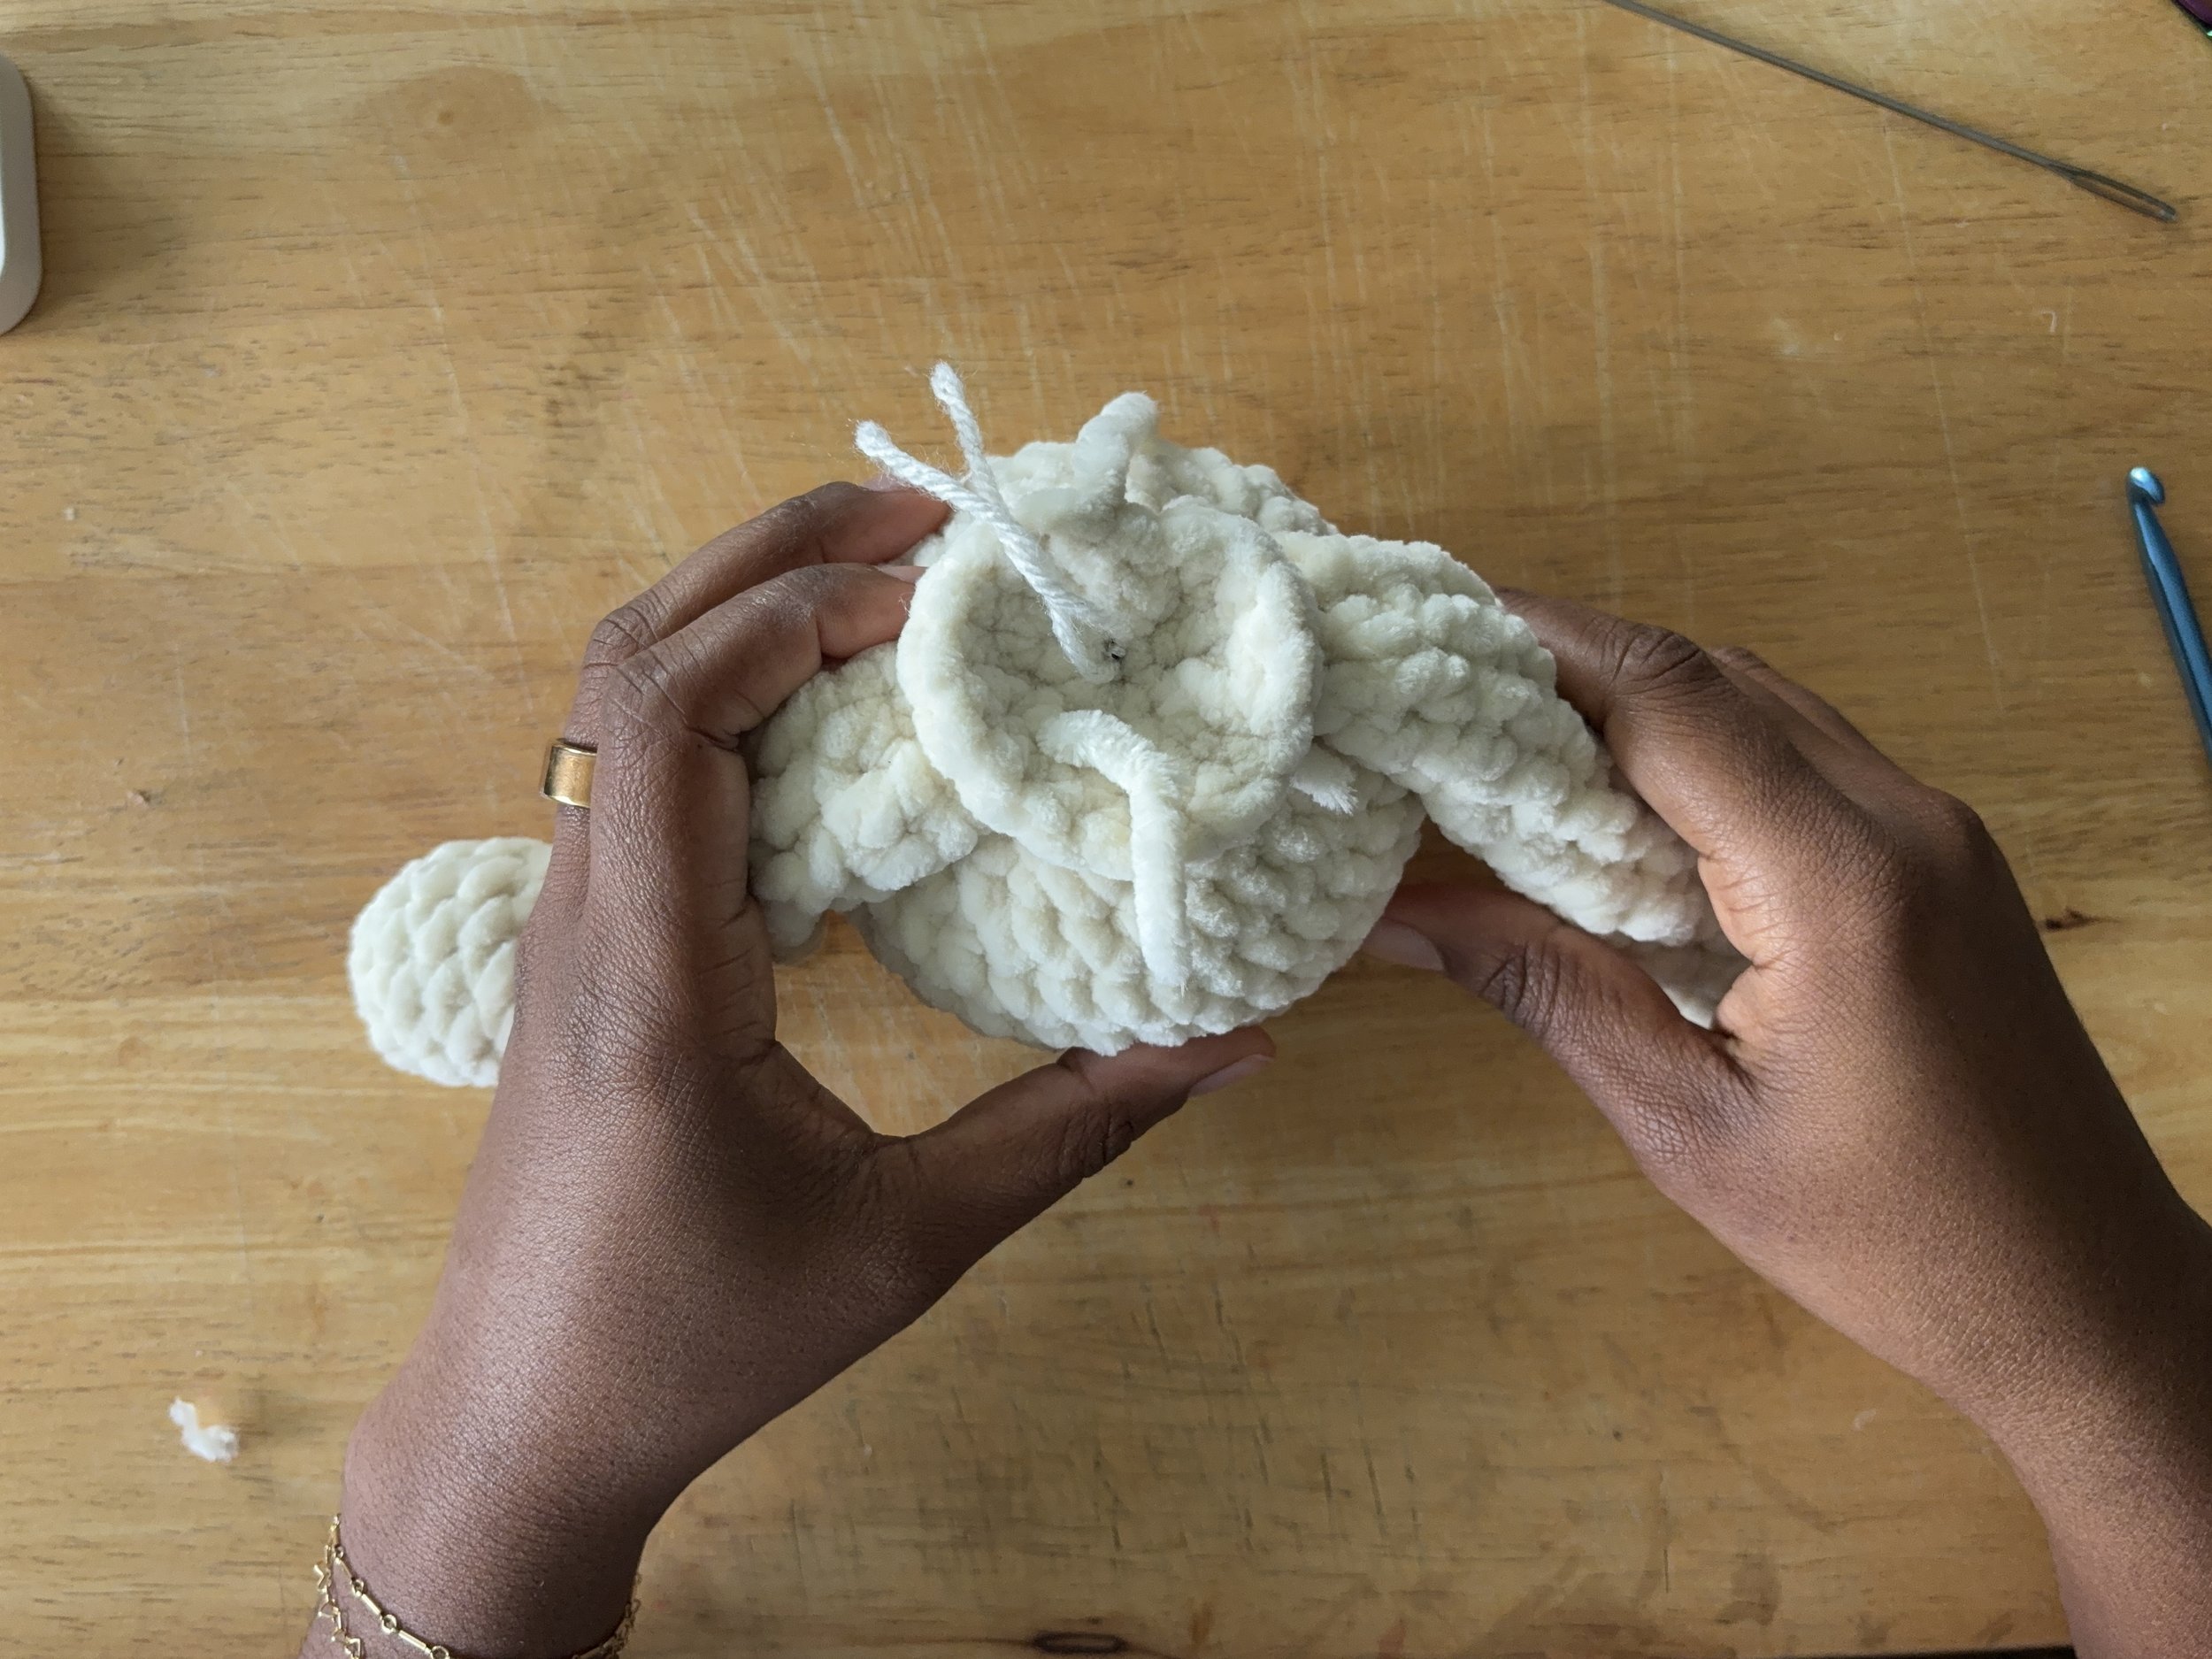
The knot will close the hole. Finish off by hiding all the ends inside the head.
Ears - Teddy Bear Version
Make 2
Start with a Chain 4.
Row 1: In the second chain from the hook; (SC, Hdc) in first st; (DC 3) in second st; (Hdc, SC) in the last st. Chain 1, turn - 7 sts
Row 2: (SC, inc) x3, SC in the last st - 10 sts
Fasten off, leaving a tail to sew onto the head later.
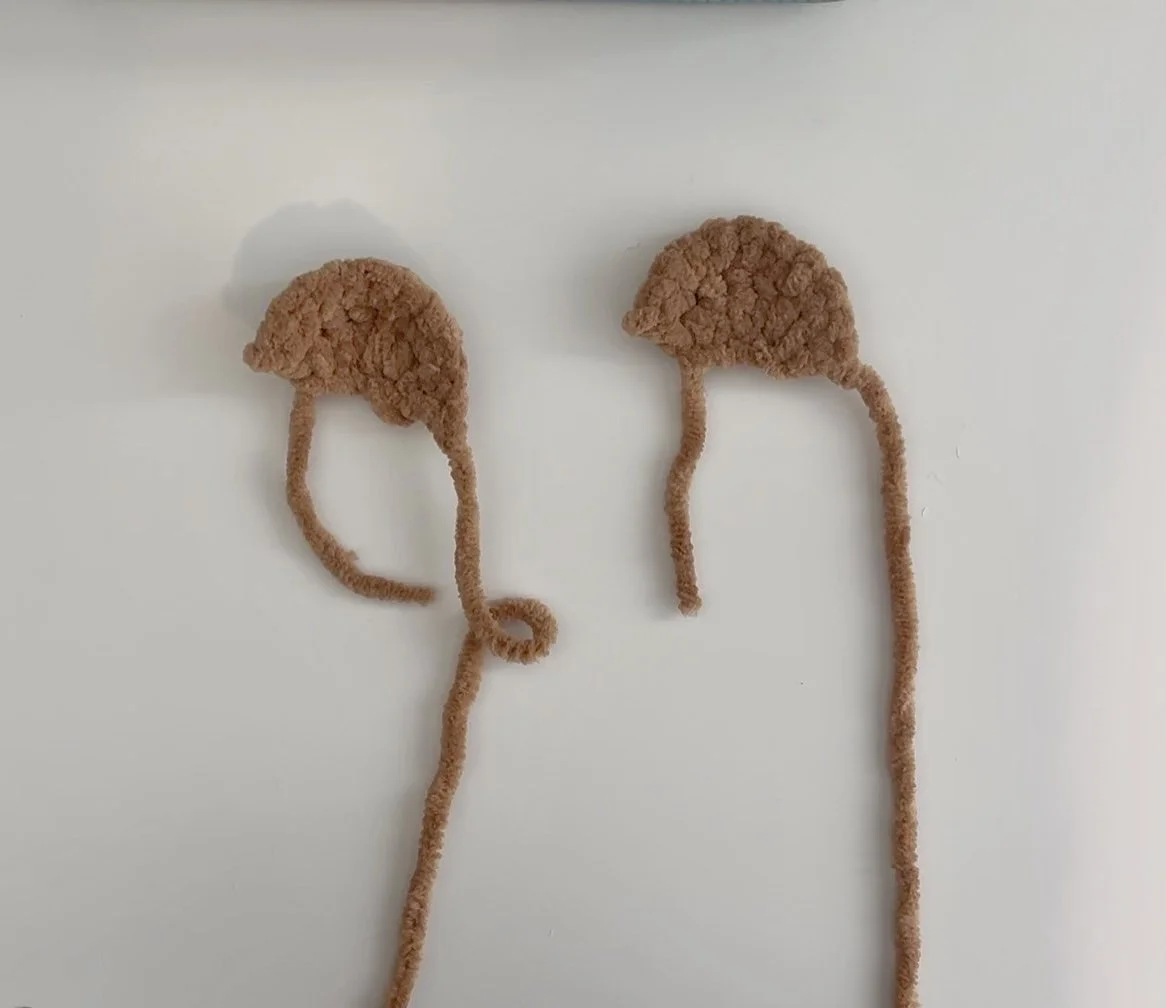
2 teddy bear ears
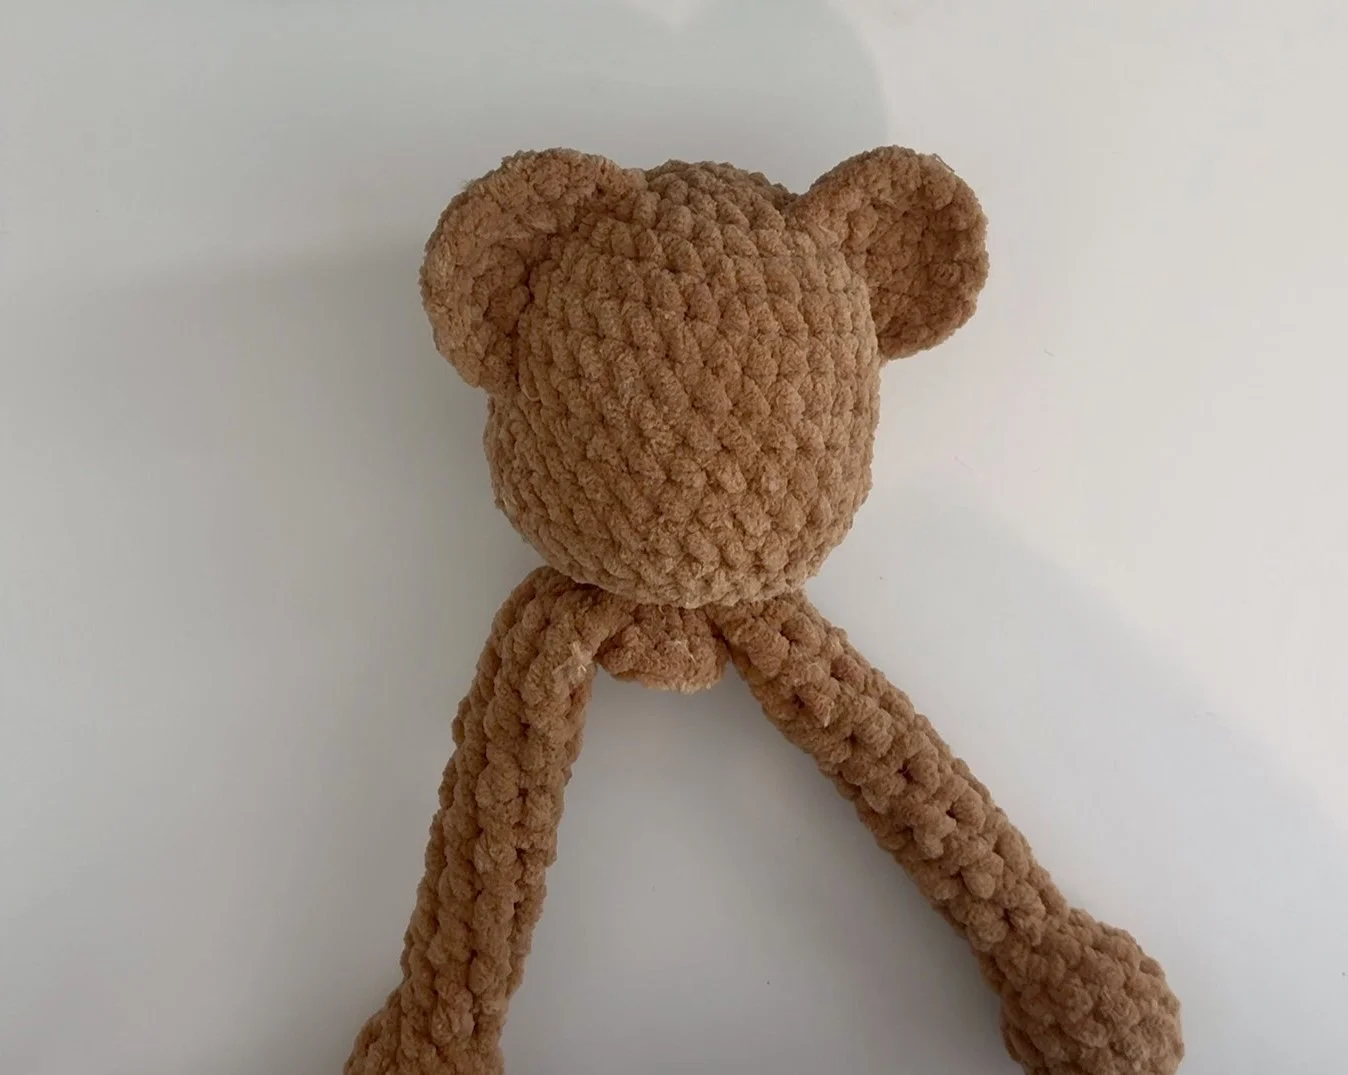
Ears attached to teddy bear head
Teddy bear ears are attached from rounds 3-8, counting down from the top of the head, using a loop stitch. Make sure the ears are tightly secured and curve a bit.
Ears - Bunny Version
Start with a Chain 5.
Row 1: In the second chain from the hook; SC, SC in the next 2 chains, DC 3 in the last st. Turn to the back and SC in the 3 back loops. Ch 1, turn. - 9 sts
Row 2: SC 3, (double crochet Inc) x3, SC 3 - 12 sts
SC the bottom closed, 2 SC.
Fasten off, leaving a tail to sew onto the head later.
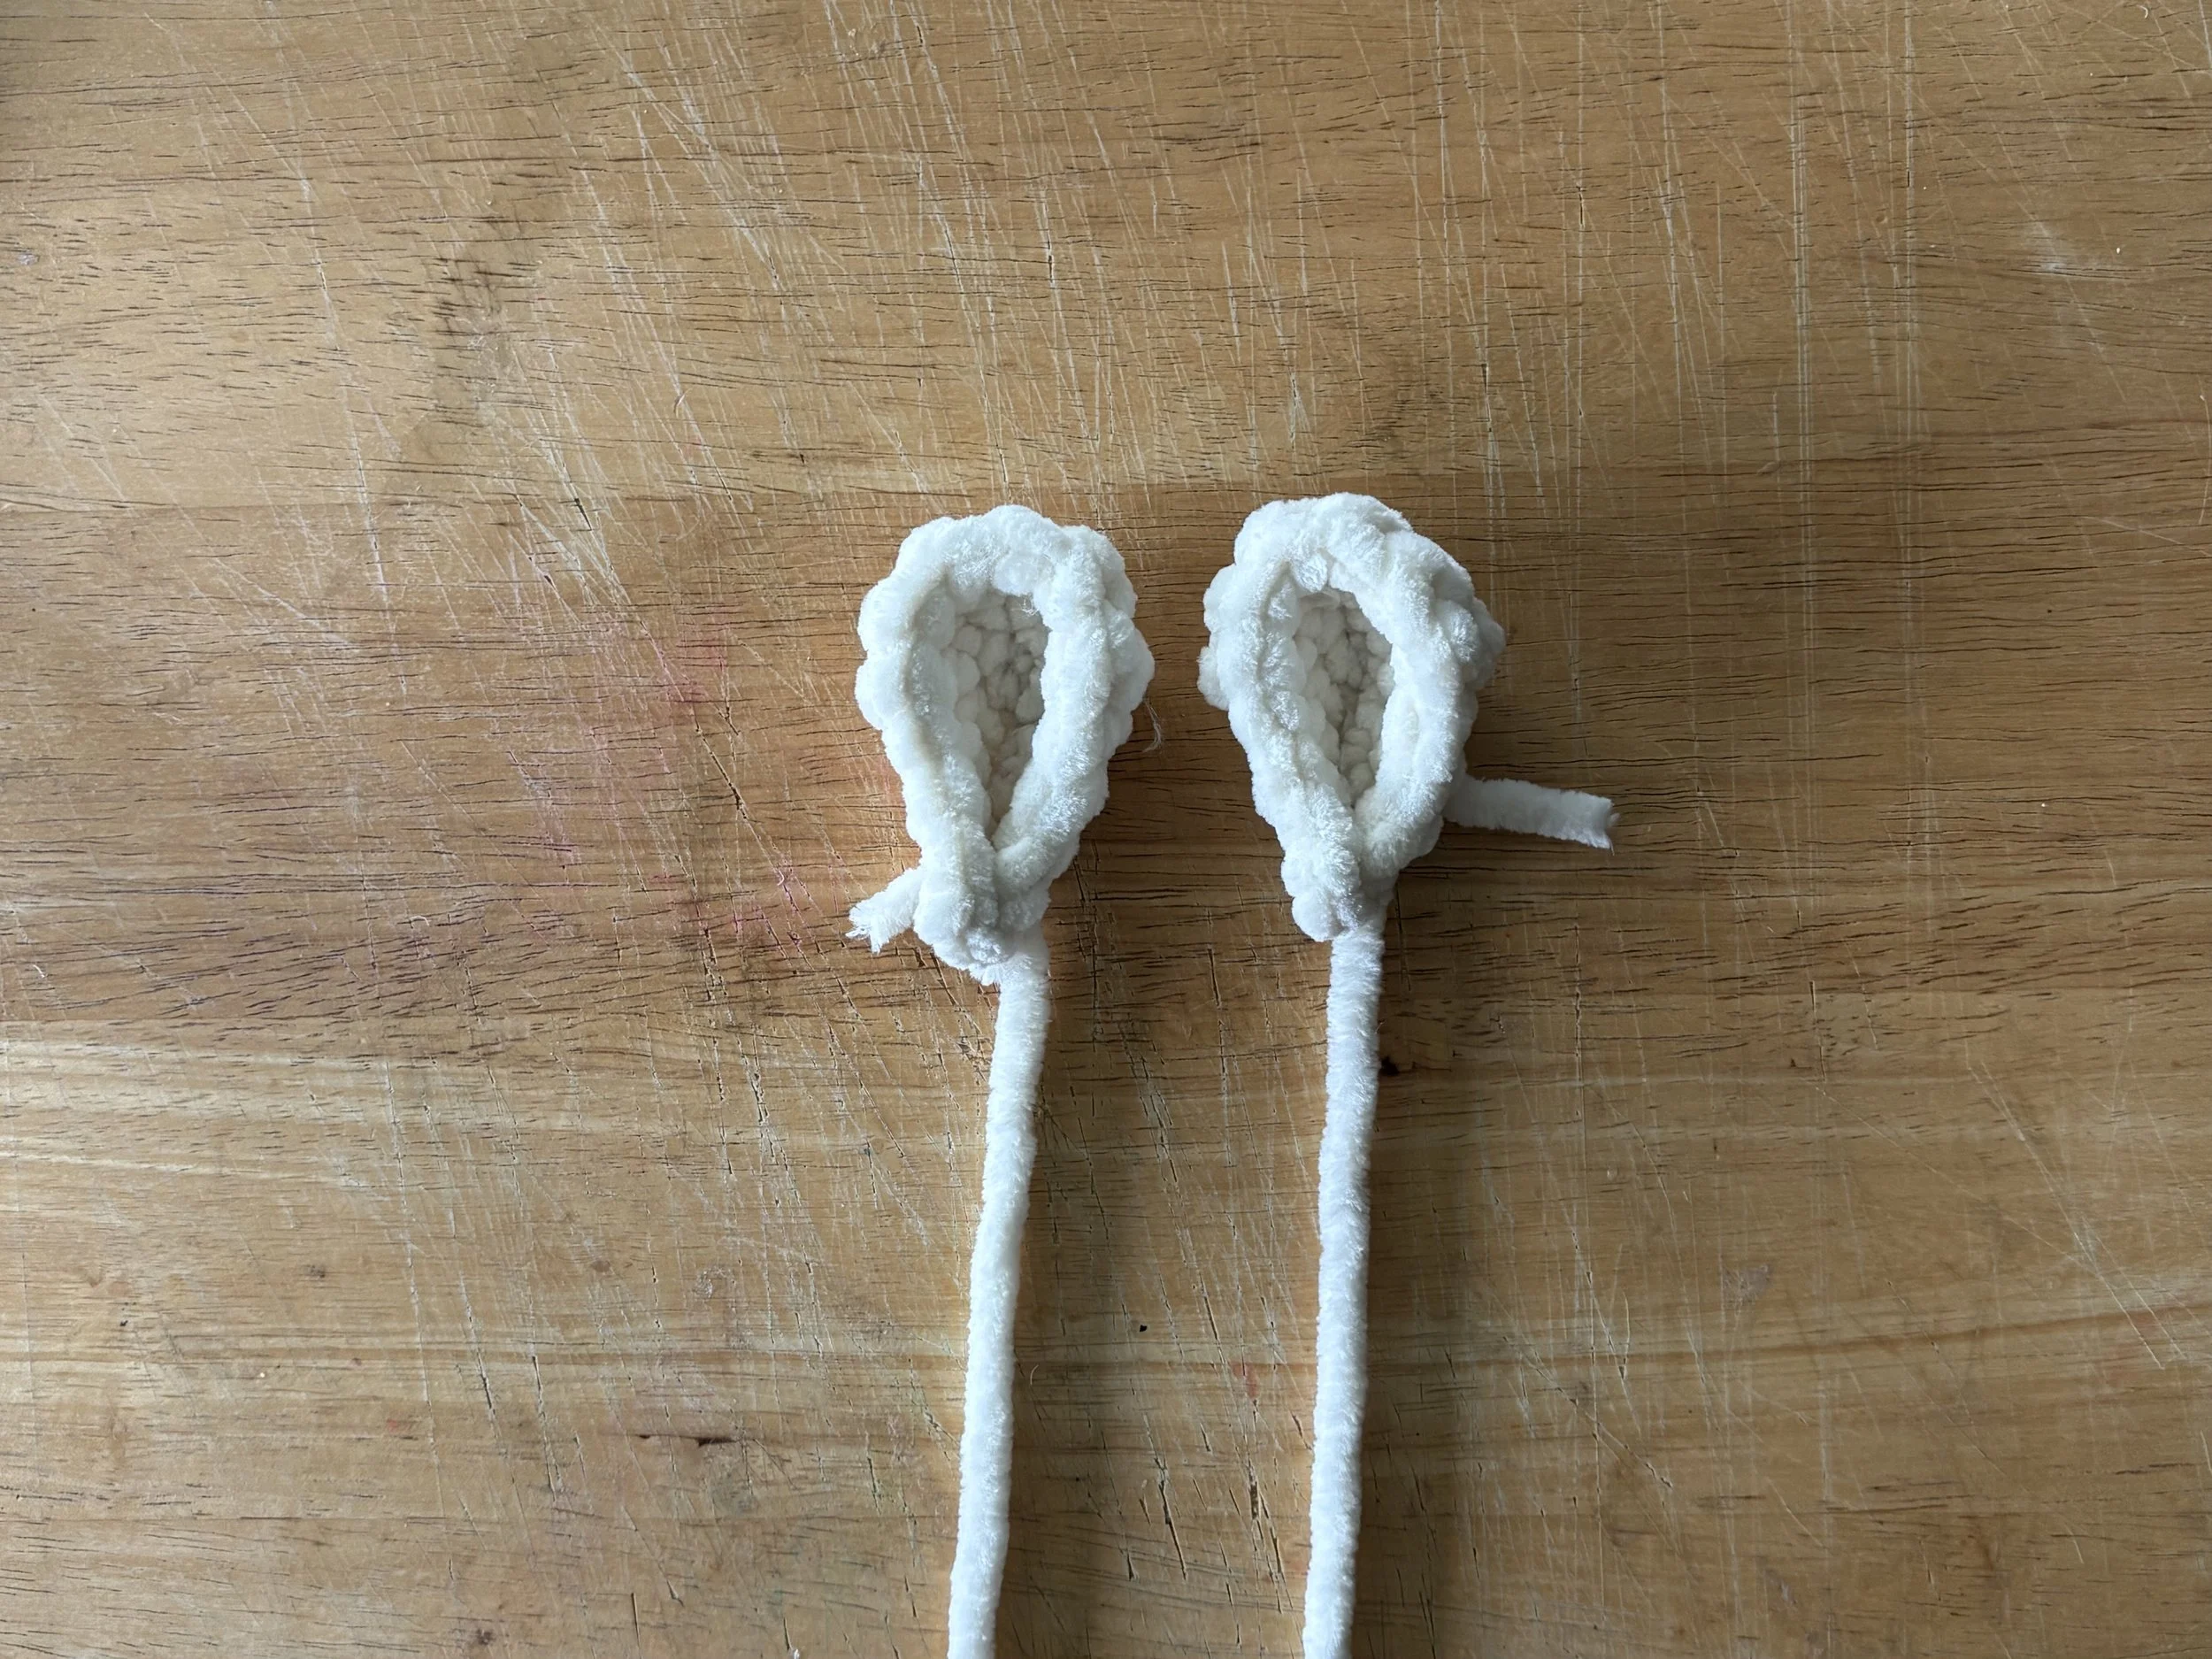
2 Bunny ears
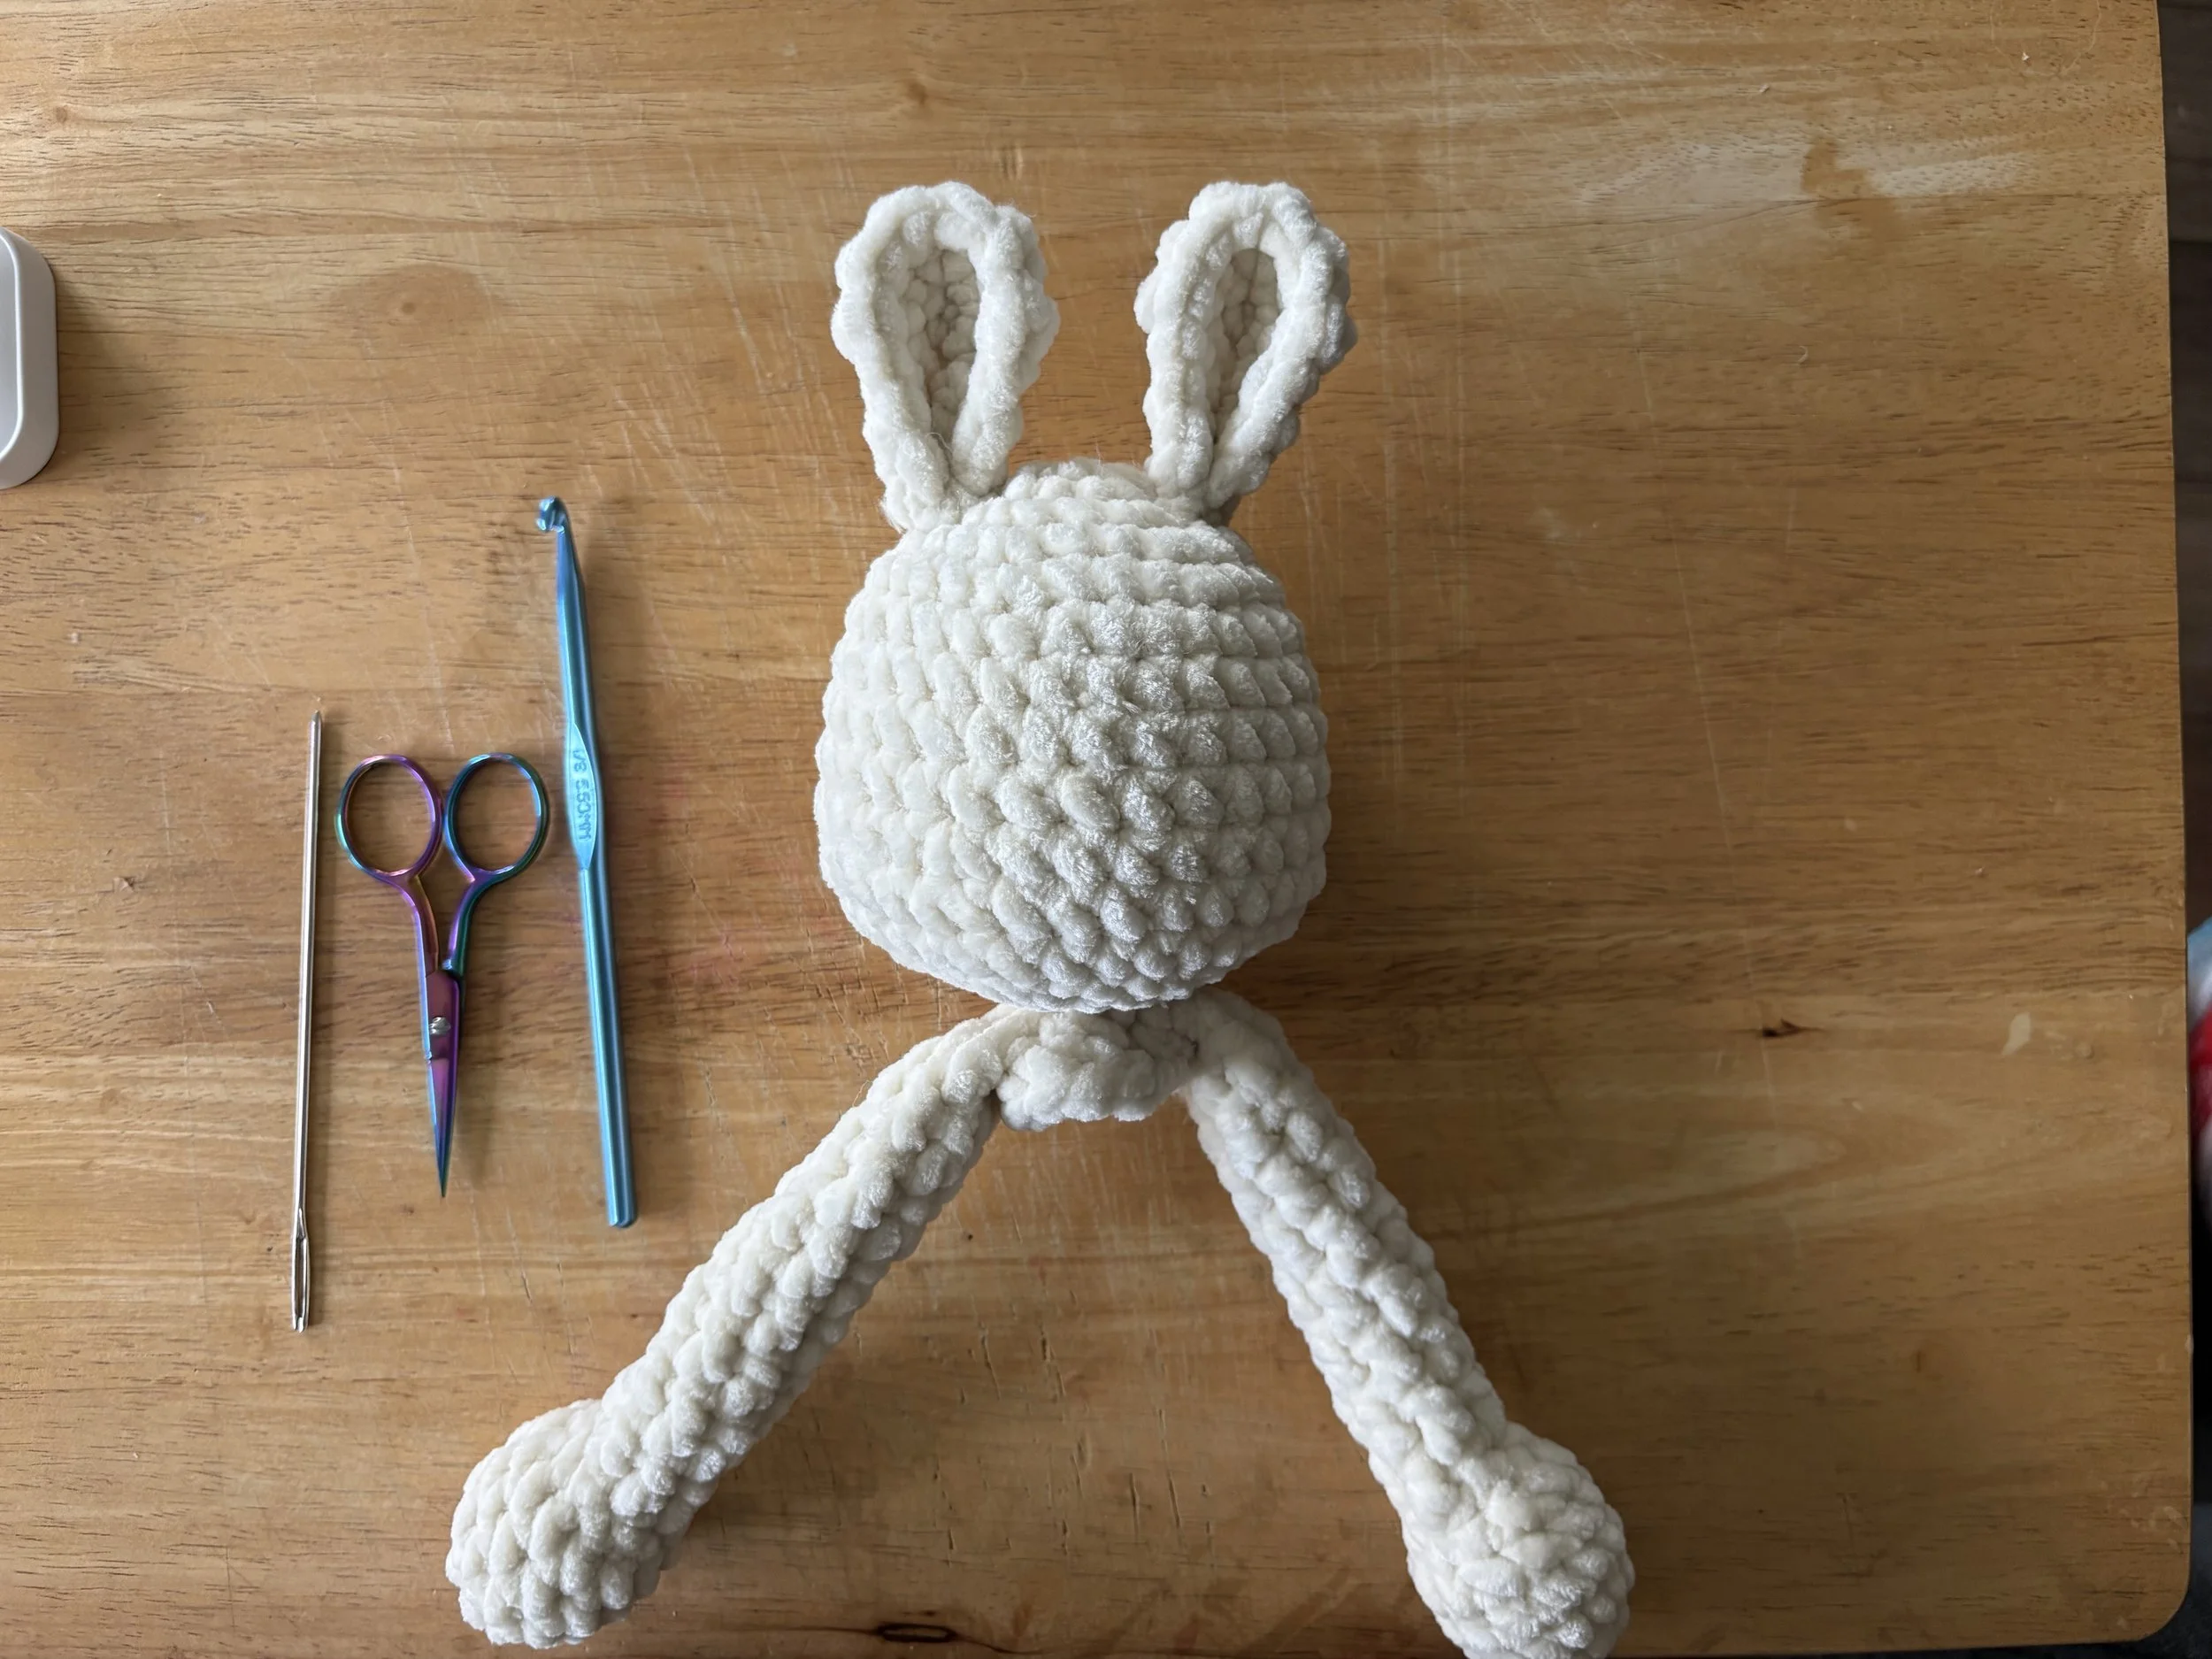
Bunny ears attached to head
Bunny ears are attached to round 3 of the head, counting down from the top, using a loop stitch. Make sure ears are tightly secured and facing forward.
This completes the body section of the lovey. Move on to the next section to complete the granny square blanket piece.
Face Embroidery
I don’t like to use plastic or glass safety eyes for my plushies, so I have included the tutorial on how to embroider the face! Follow along with the pictures below:
Insert the embroidery needle through the top of the head. Count down 9 rows from the top of the head, and exit the needle on that round.
You will insert the needle into the head again, one row up from the exit point, wrapping around 1 stitch.
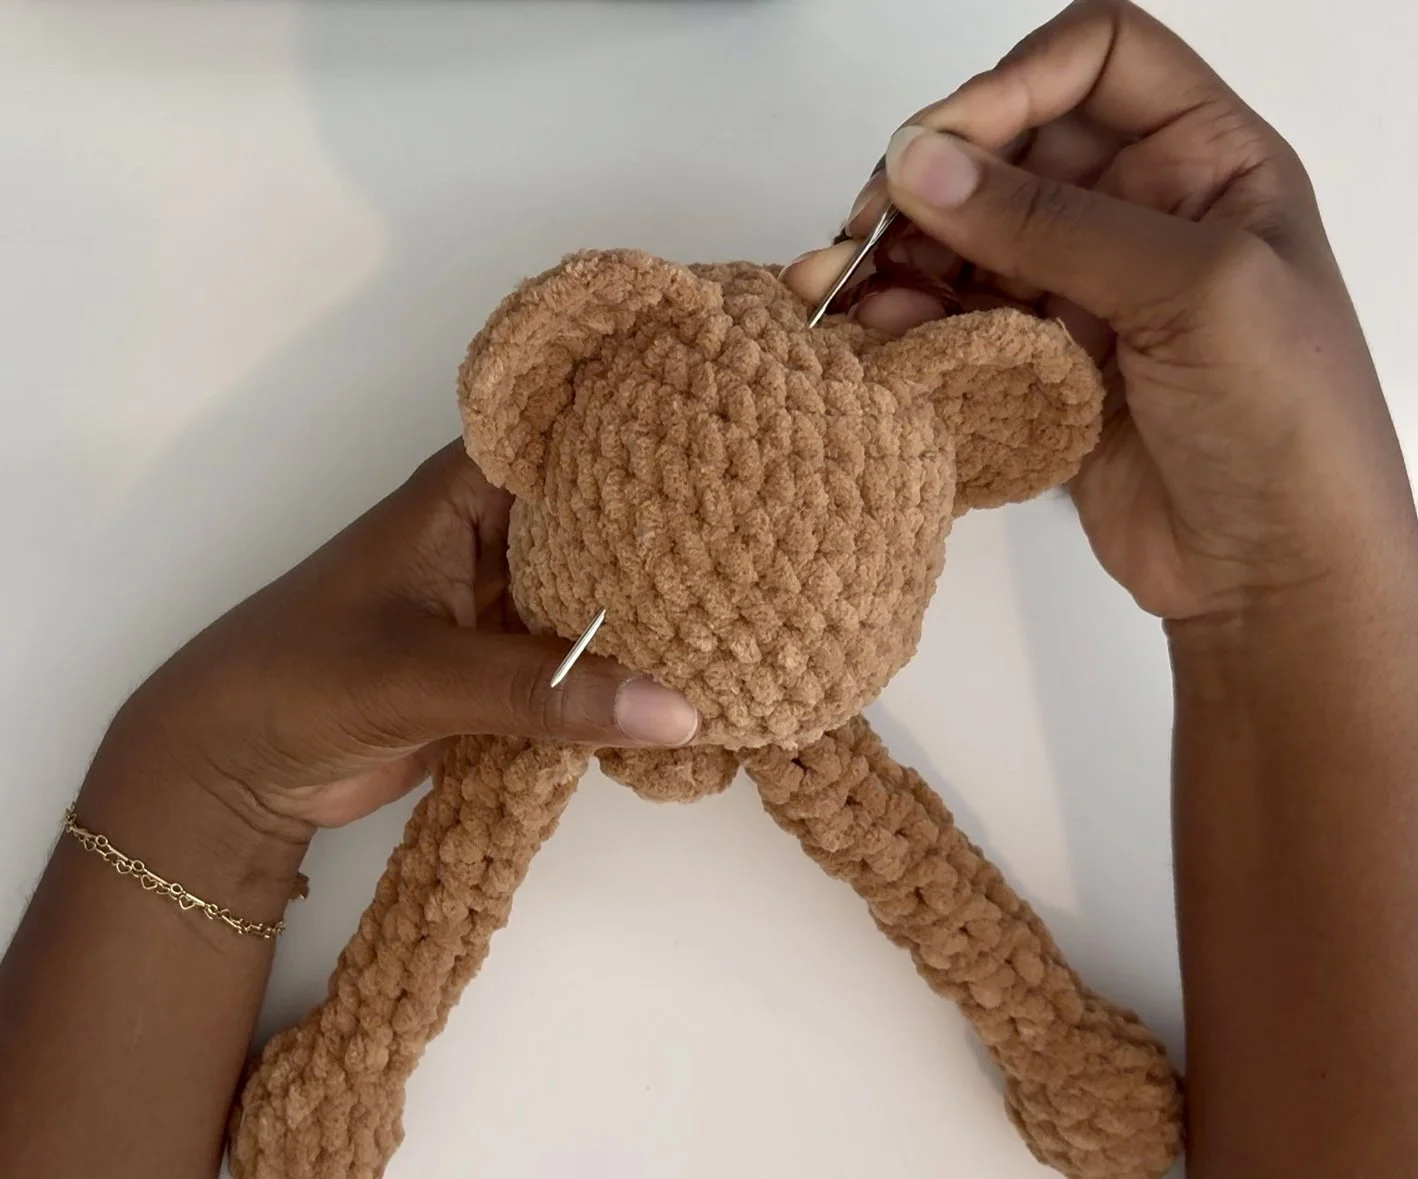
Image 1
Wrap your embroidery yarn around the one stitch about 4-5 times, depending on how large you want the eye to be. On the last stitch wrap, exit the needle to the bottom of the opposite eye [see image 2].
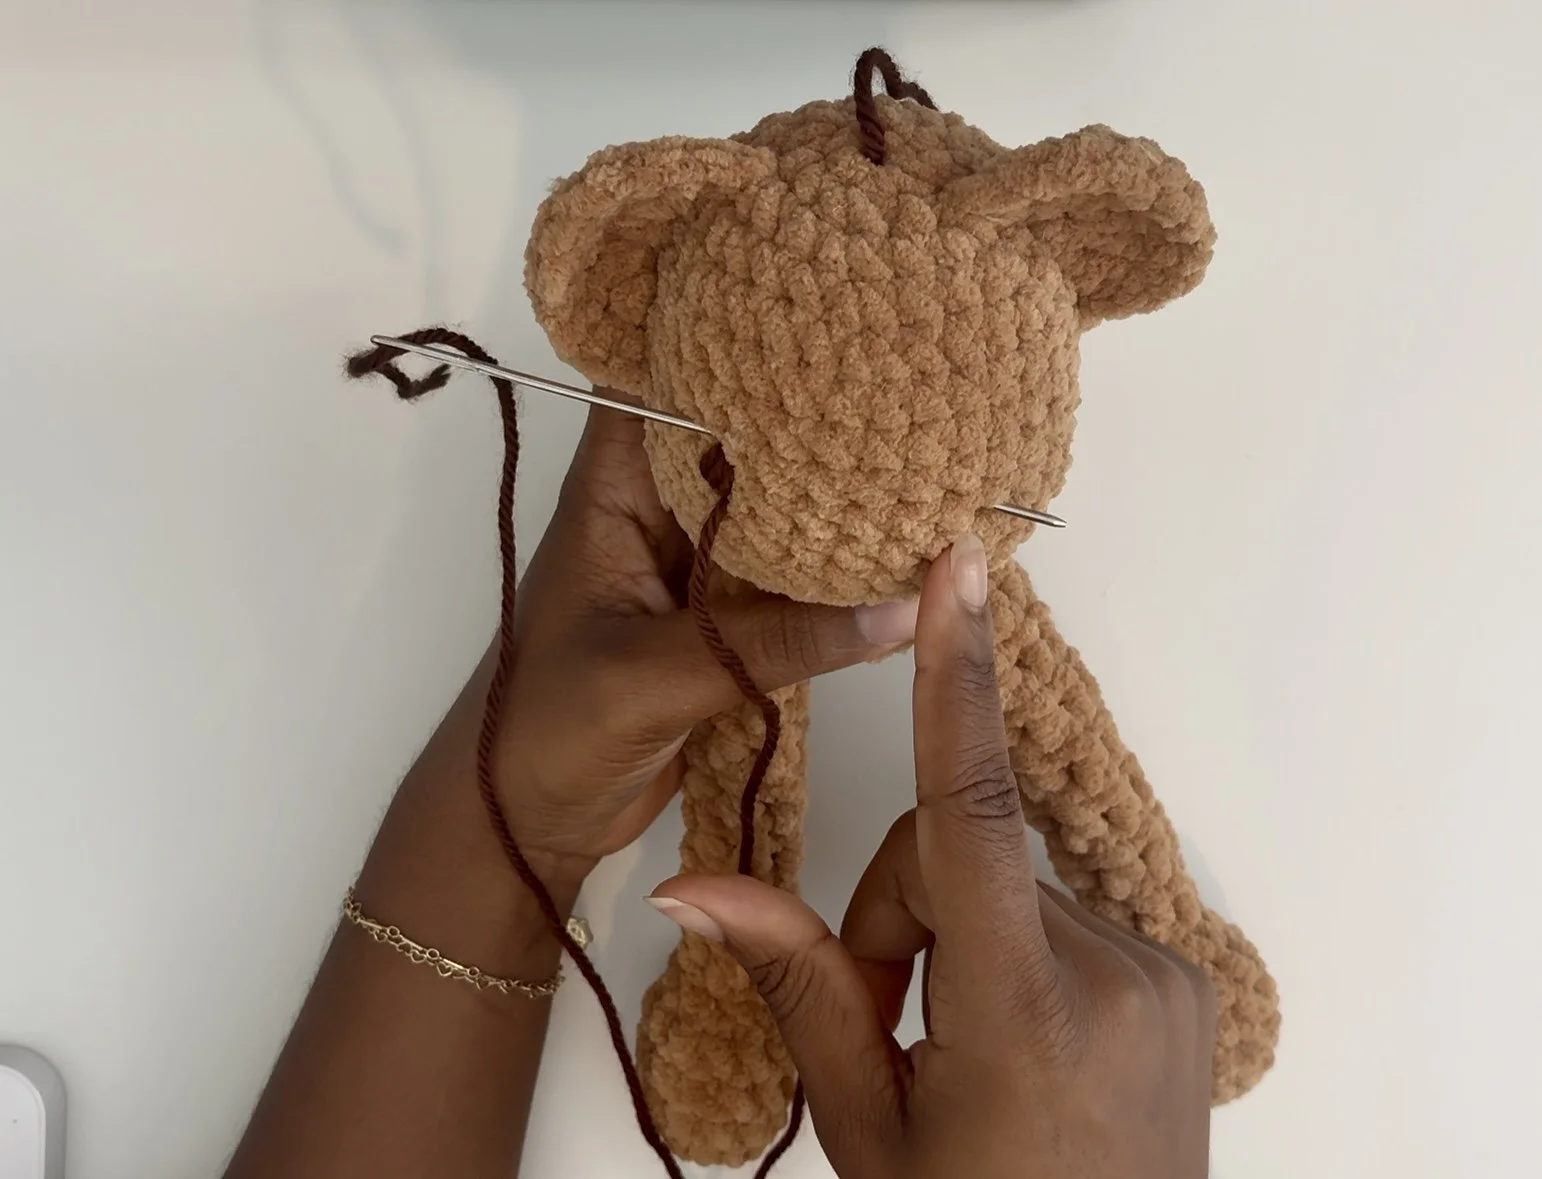
Image 2
Complete the second eye in the same way as the first eye. After the last wrap, exit one row down and 2 stitches away from the opposite eye [see image 3]. The nose should be 2 stitches away from each eye.
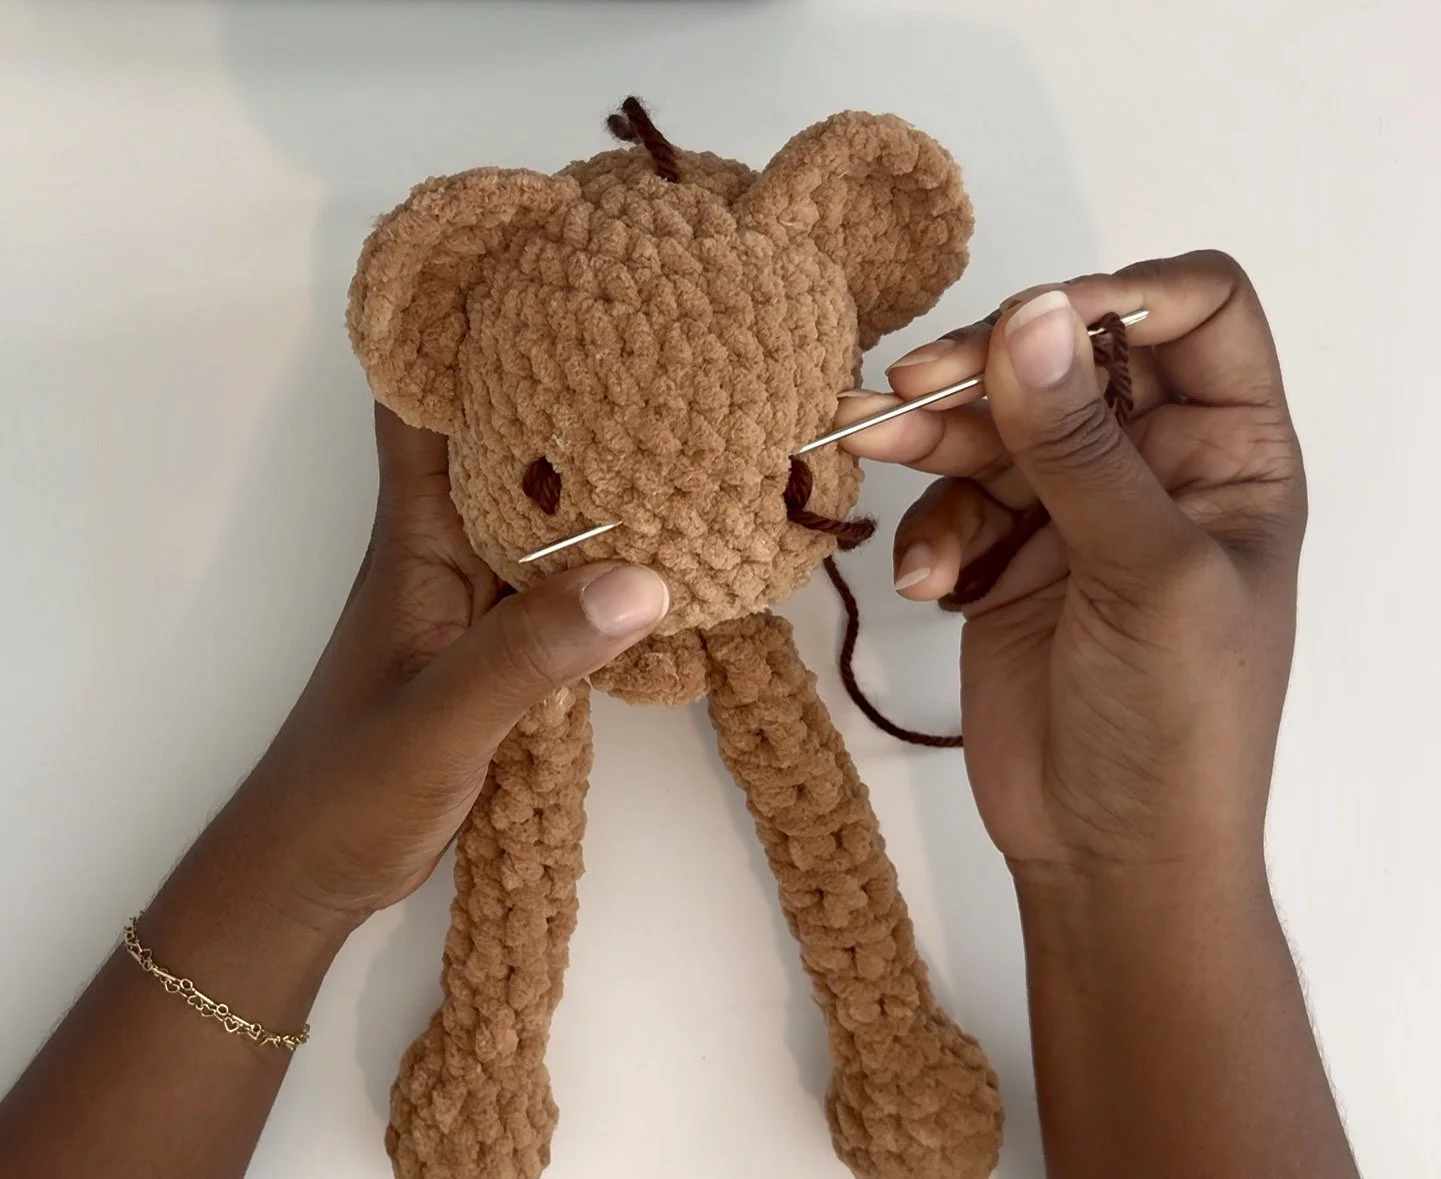
Image 3
Count over 2 stitches (or 2 stitches away from the opposite eye), and wrap the yarn for the nose 3 times.
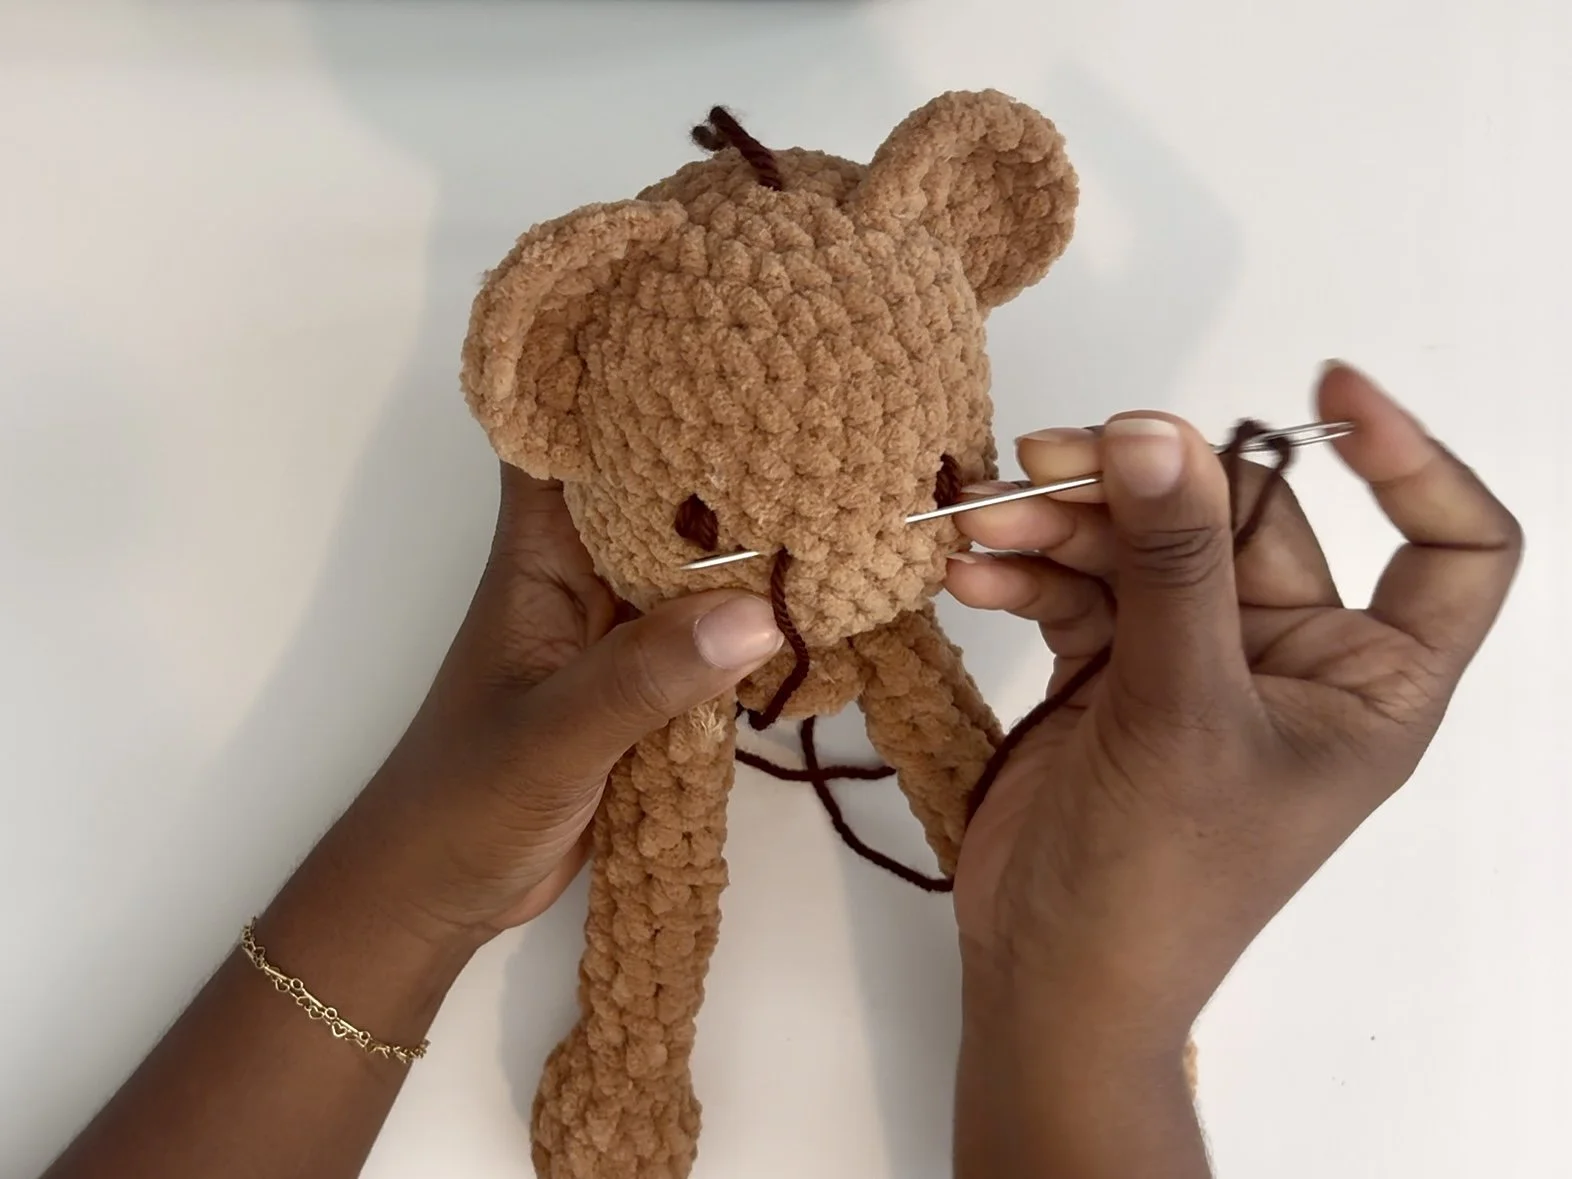
Image 4
On the last wrap, exit the yarn 2 stitches from the nose, straight down. Make sure the yarn is centered [see image 5-6].
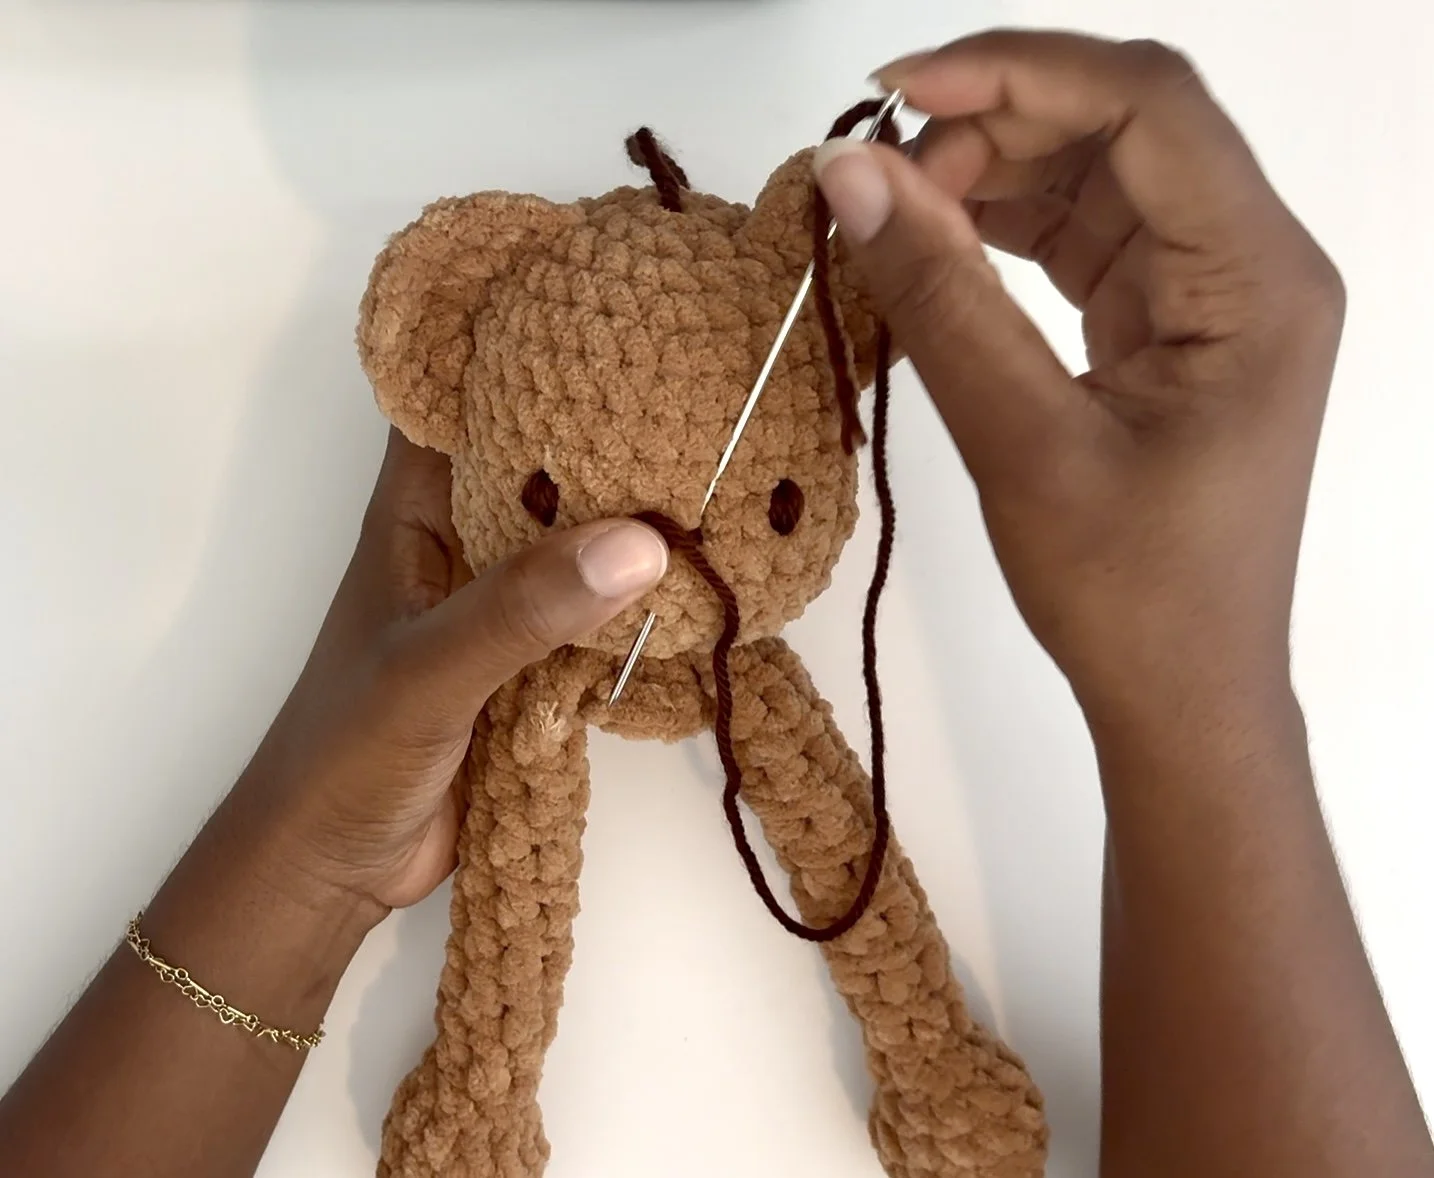
Image 5
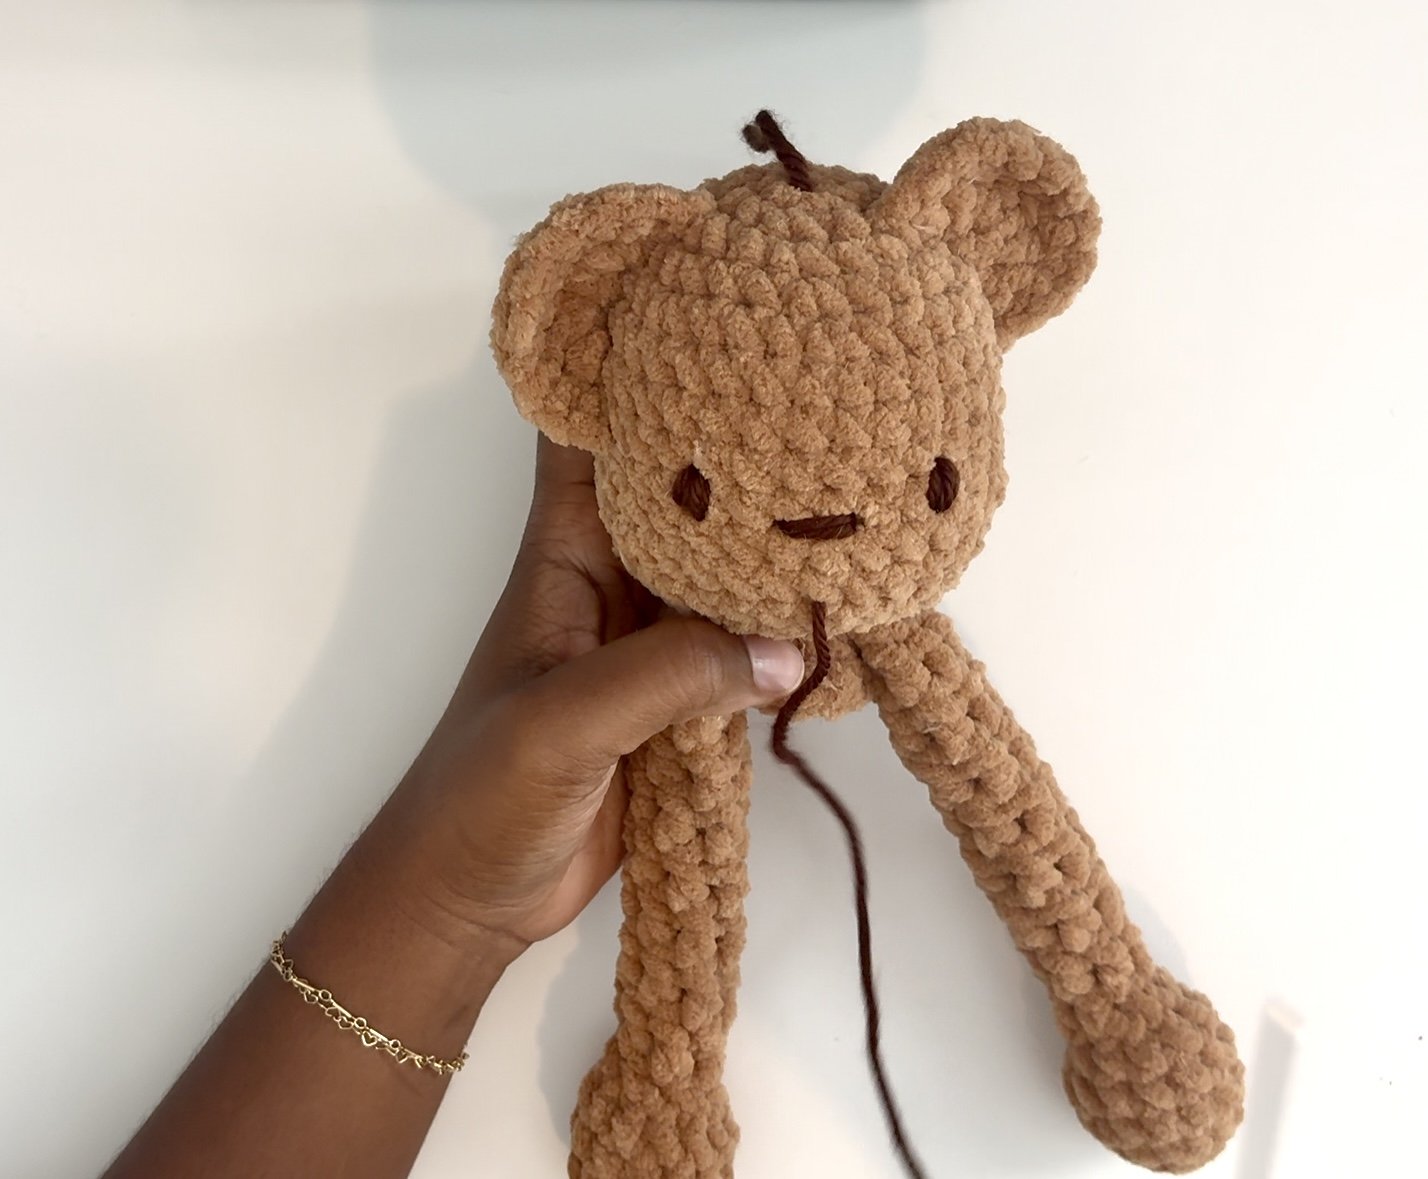
Image 6
Form the bottom of the nose by entering the needle through the center of the top of the nose and exit from the top of the head. The nose should form a “T” shape [see image 7-9].
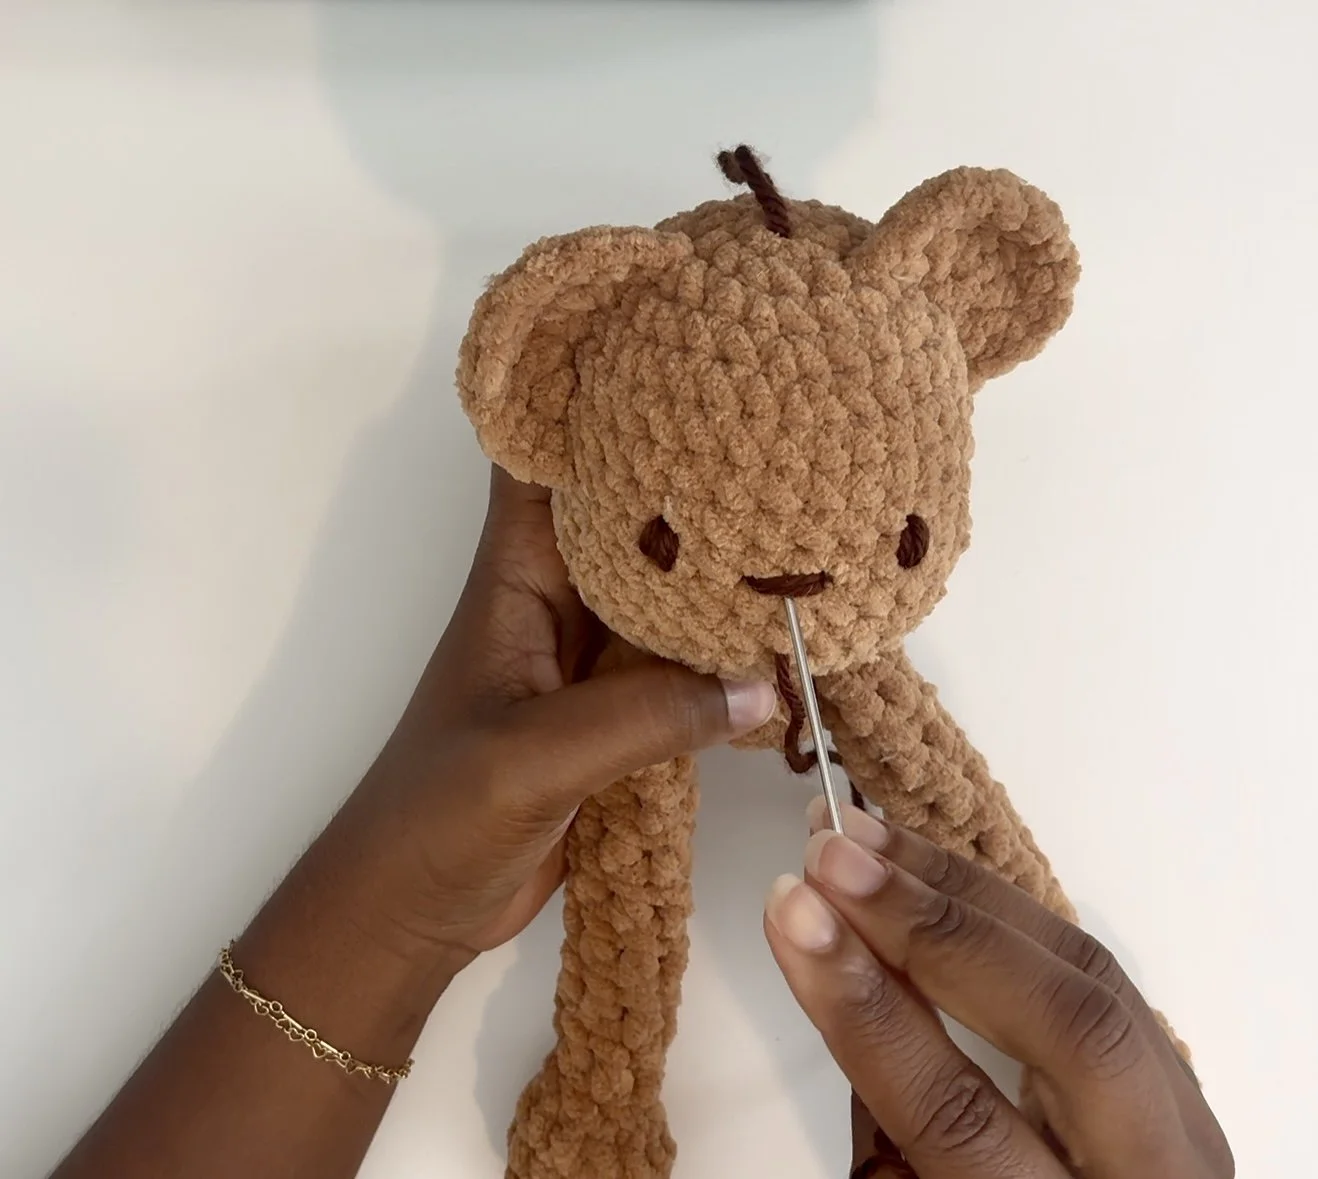
Image 7
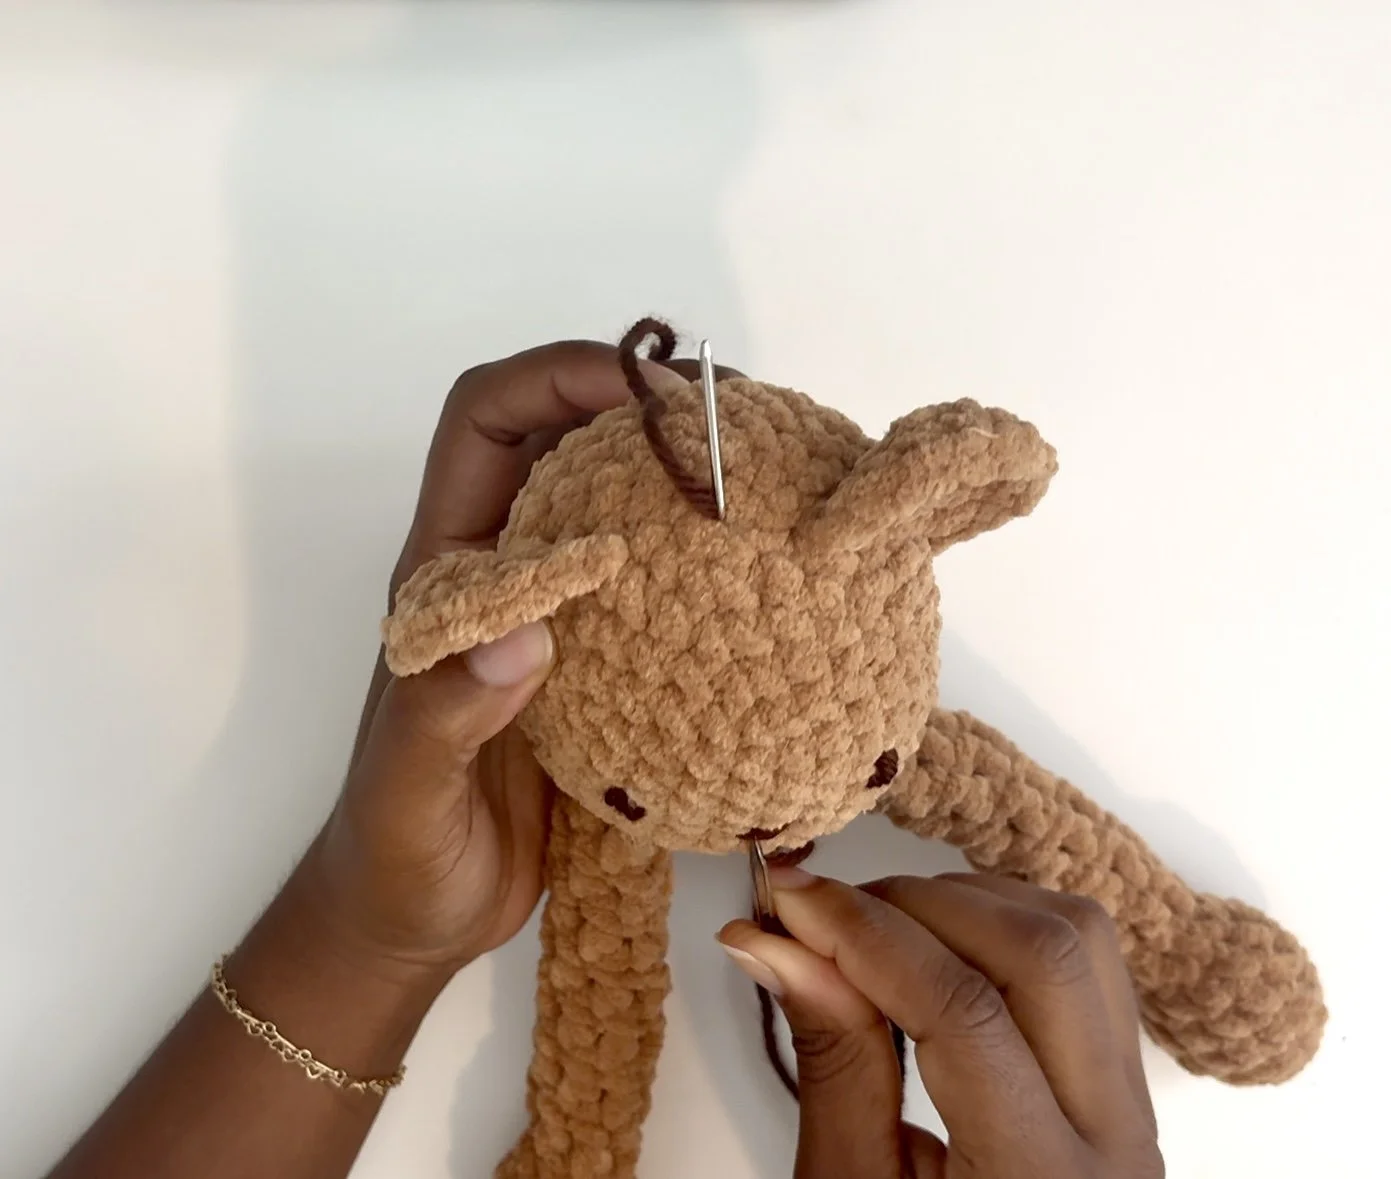
Image 8
The face embroidery is now complete! You can definitely leave the face like this, or you can continue to the next step to shape the face. Face shaping just adds a little bit of dimension to the plushie.
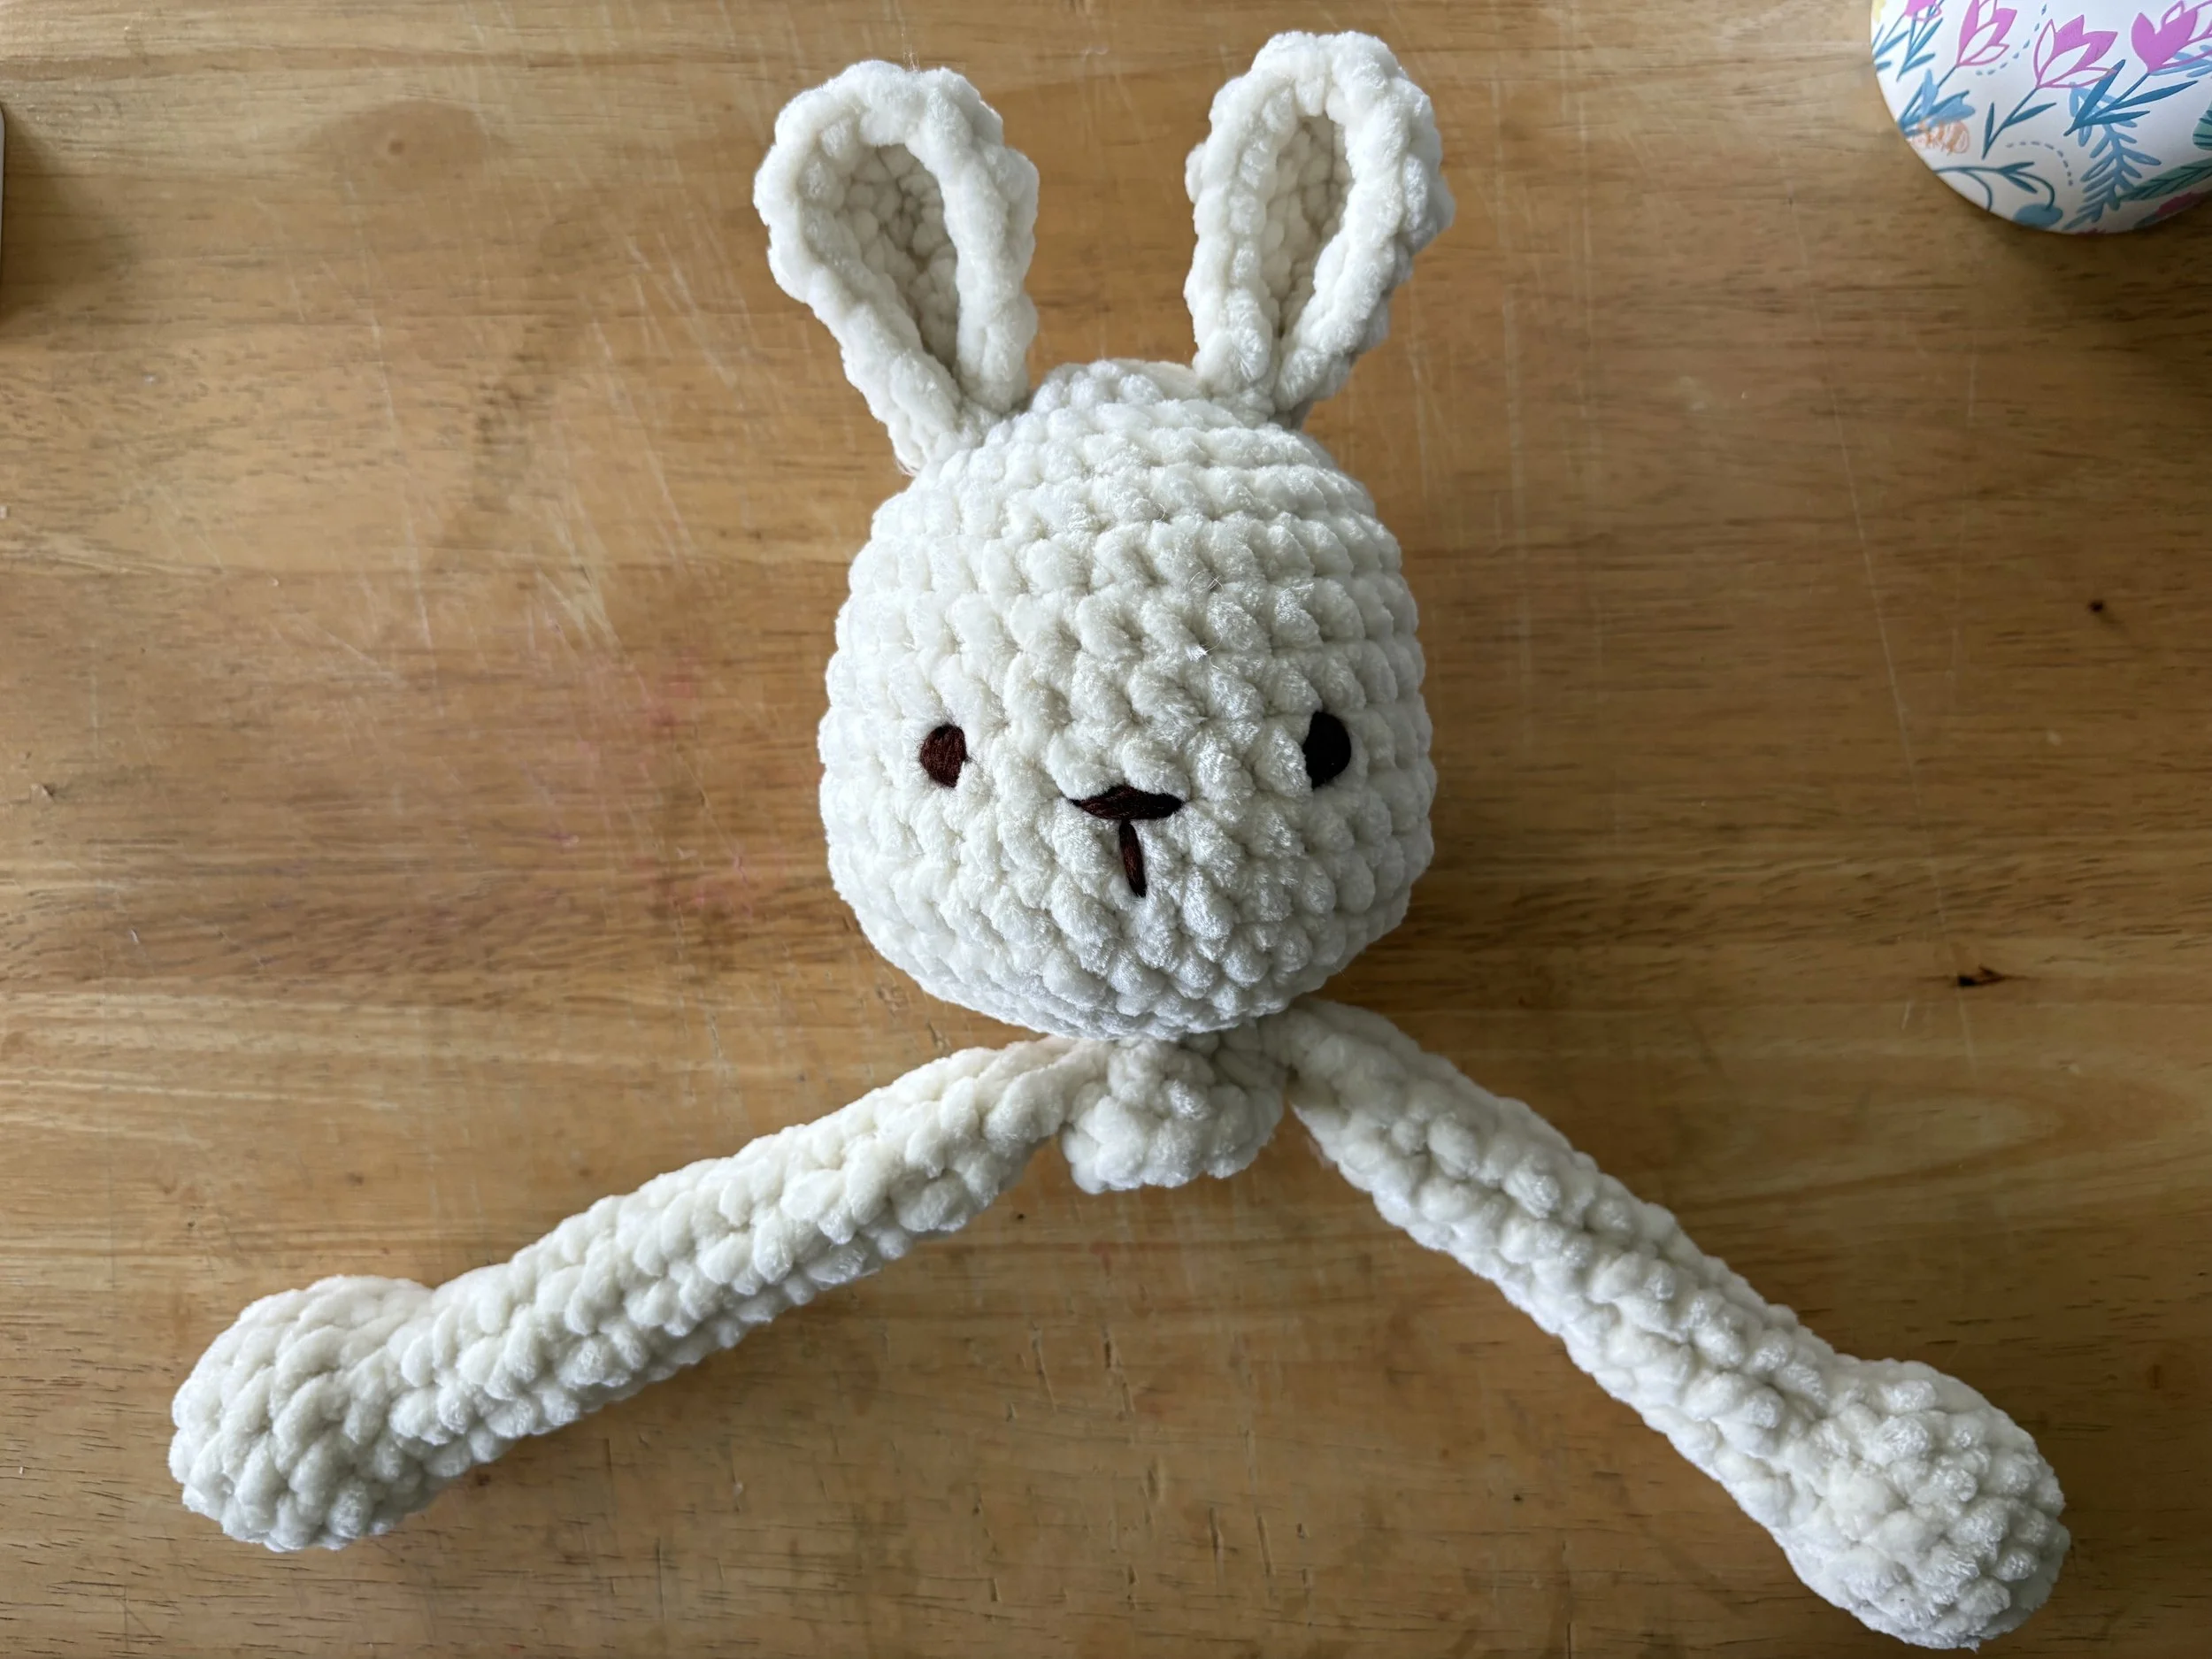
Image 9
Face Shaping
To shape the face, cut a length of the same yarn used to make the plushie head/arms/ears (about 6-8 inches).
Insert the yearn through the bottom of the head (about where the chin is), and exit from the inside corner of one of the eyes.
Cross the yarn over the face to the inside corner of the opposite eye.
Exit the yarn back through the bottom of the head/chin, in the same stitch that you inserted [see image 10-12].
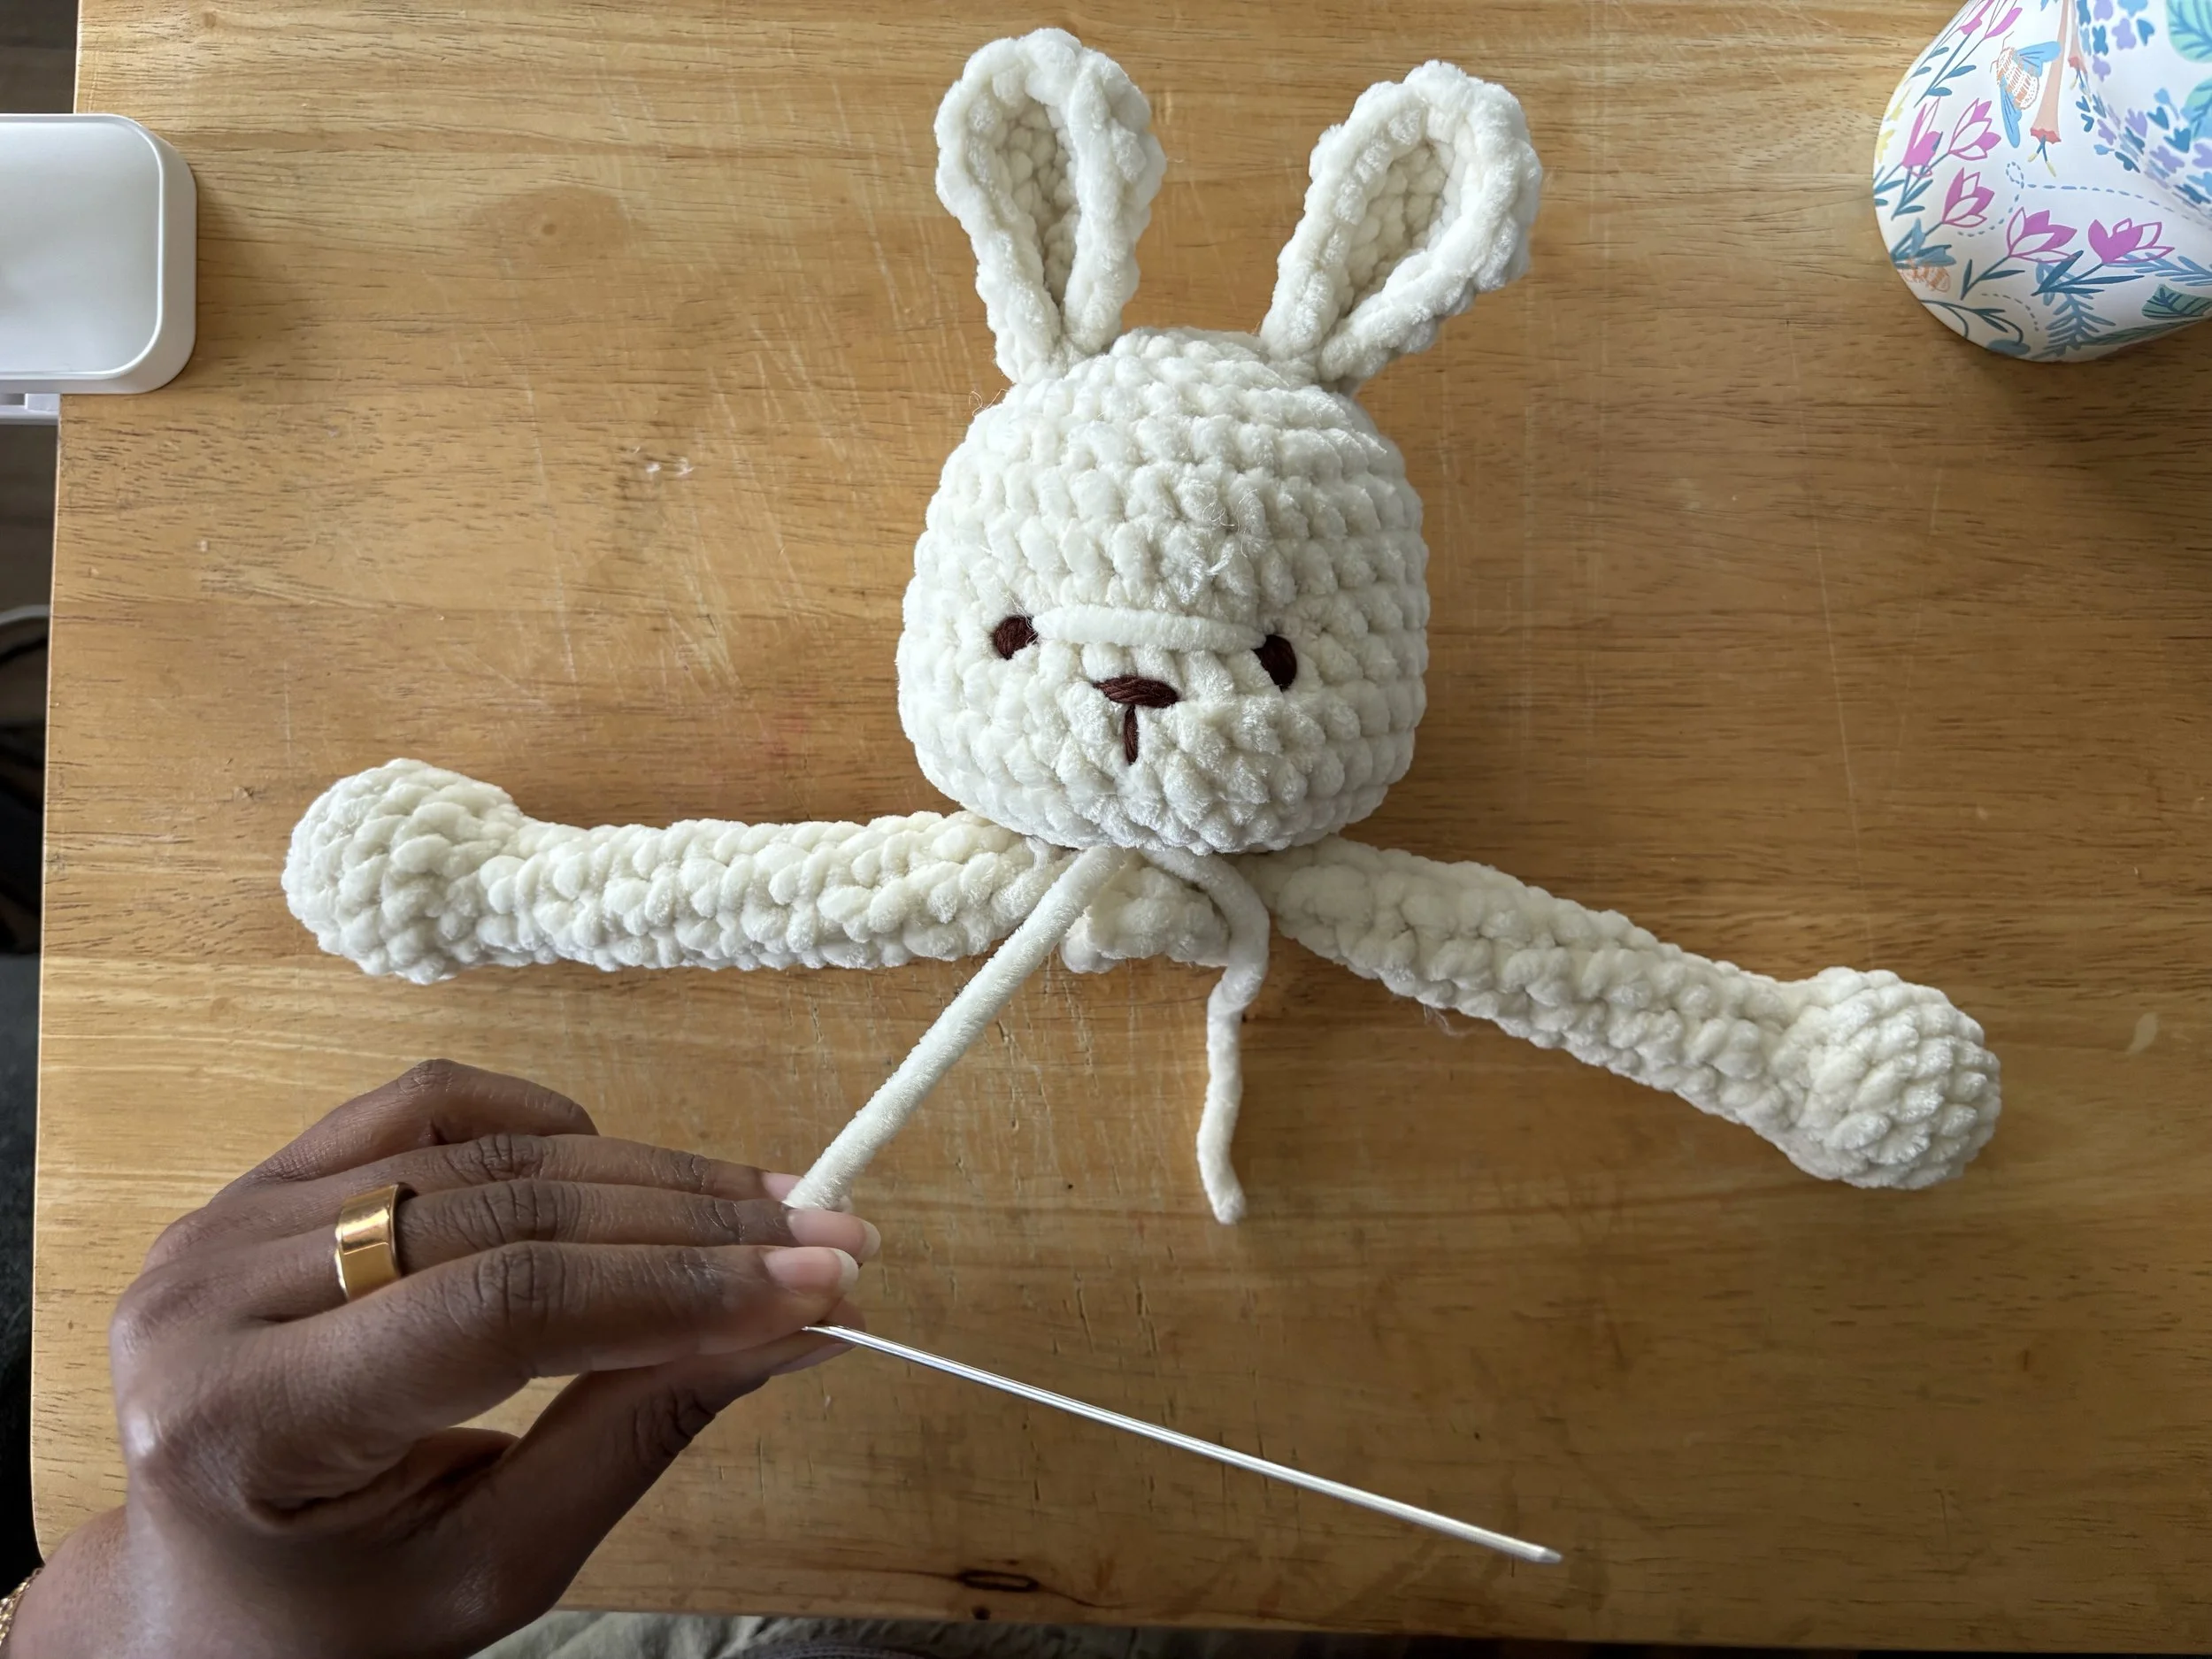
Image 10
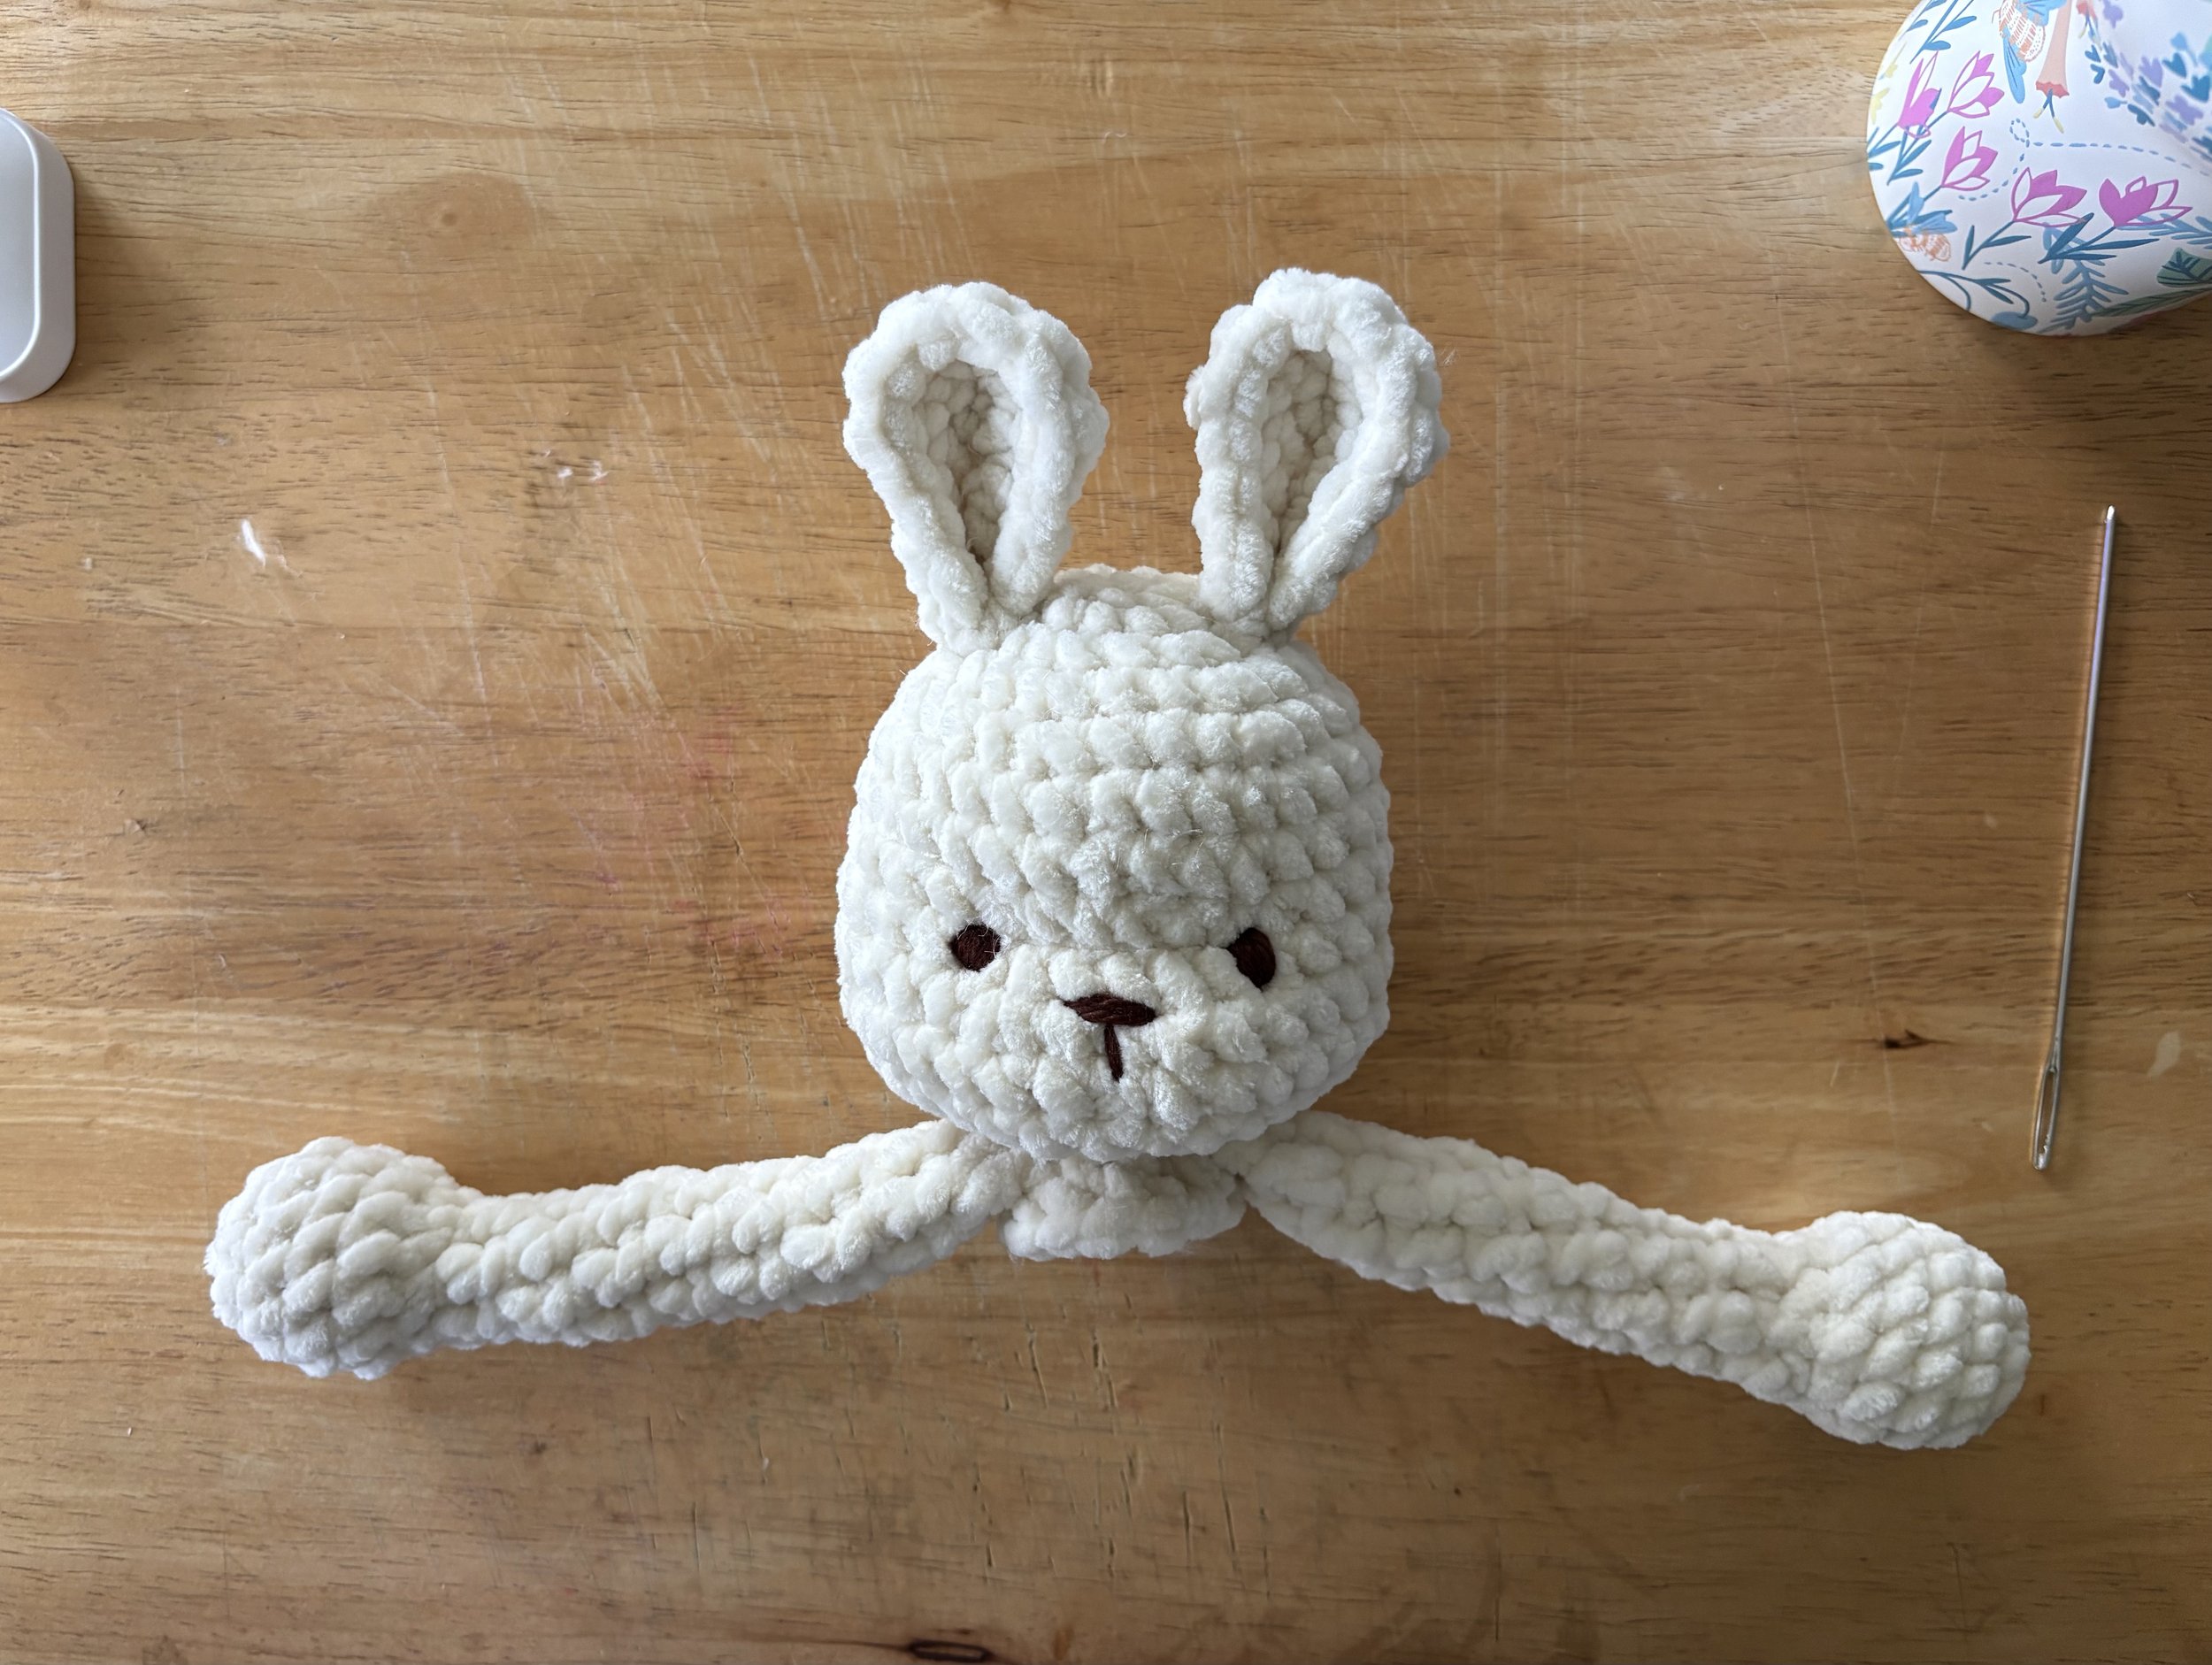
Image 11: Bunny version
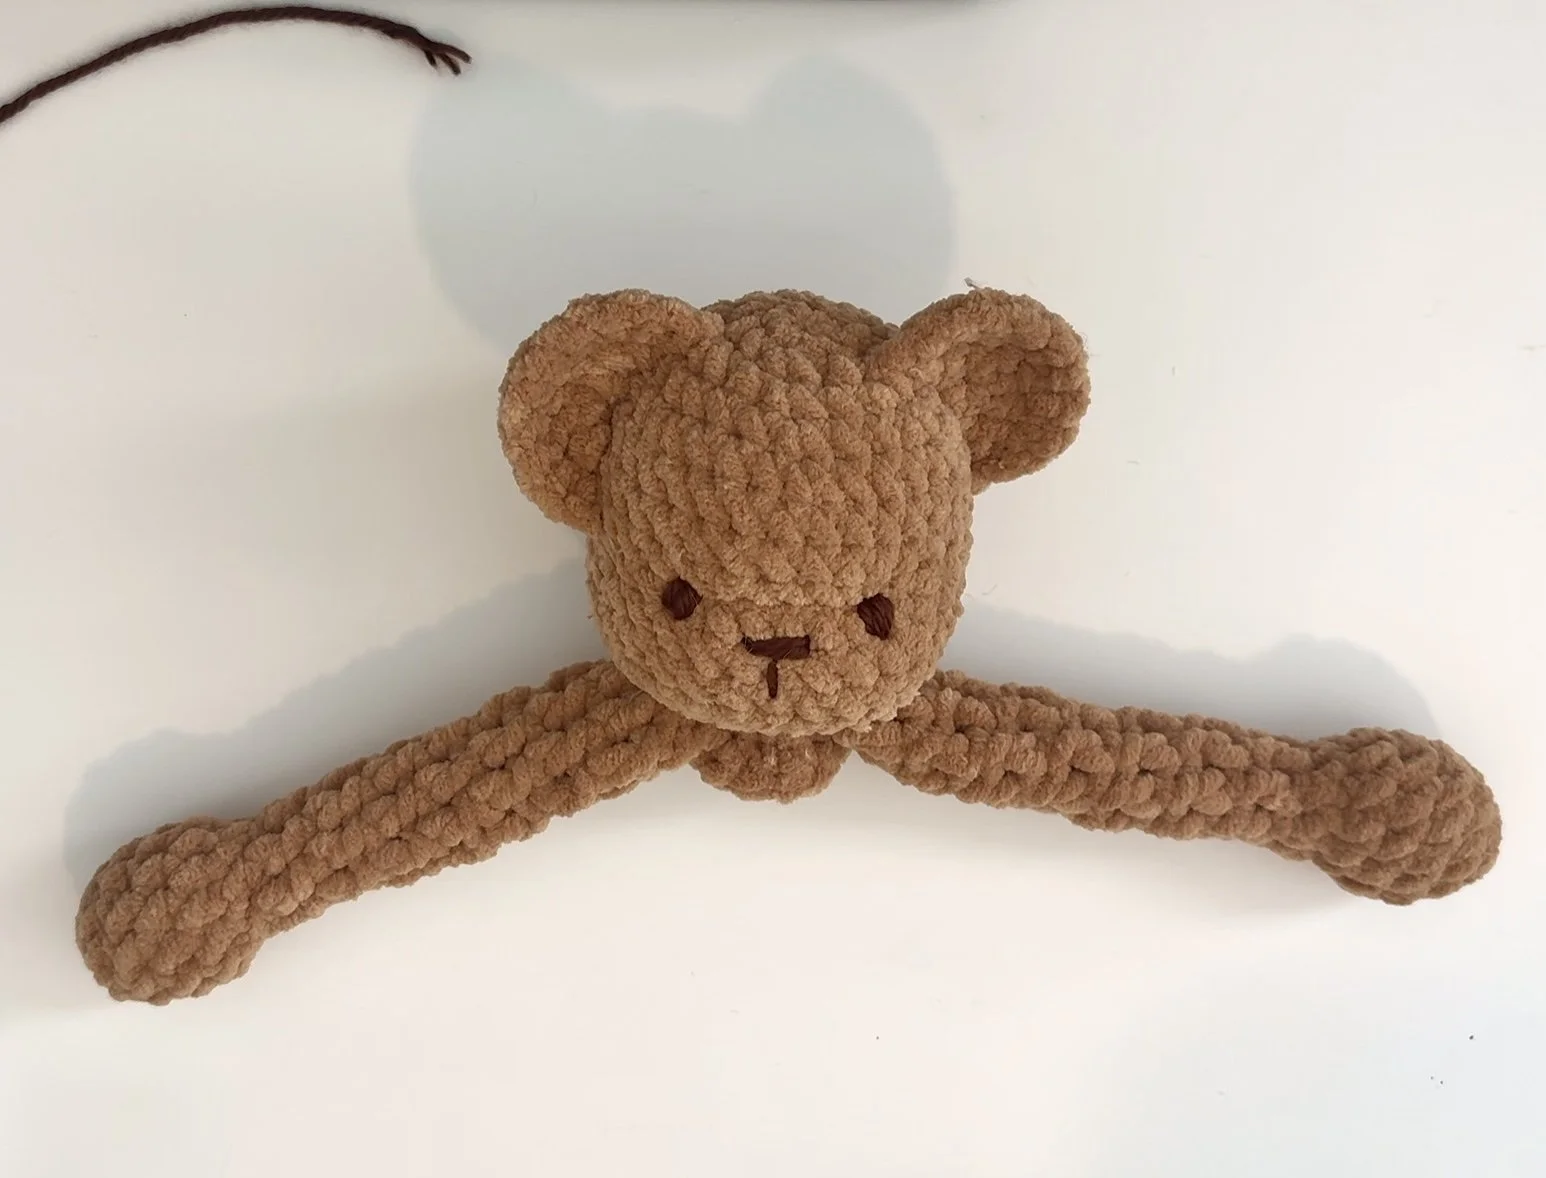
Image 12: Bear version
The plushie body is now complete! Move on to the next step to create the granny square lovey blanket!
Pattern - Granny Square Blanket
Start with a Magic Ring. If you don’t wish to start with a magic ring, start with the Chain 4 method to make a ring.
Chain 5
Round 1: (DC 3 into the MR, ch 3) x3, DC 2, sl st into the top of the chain 5.
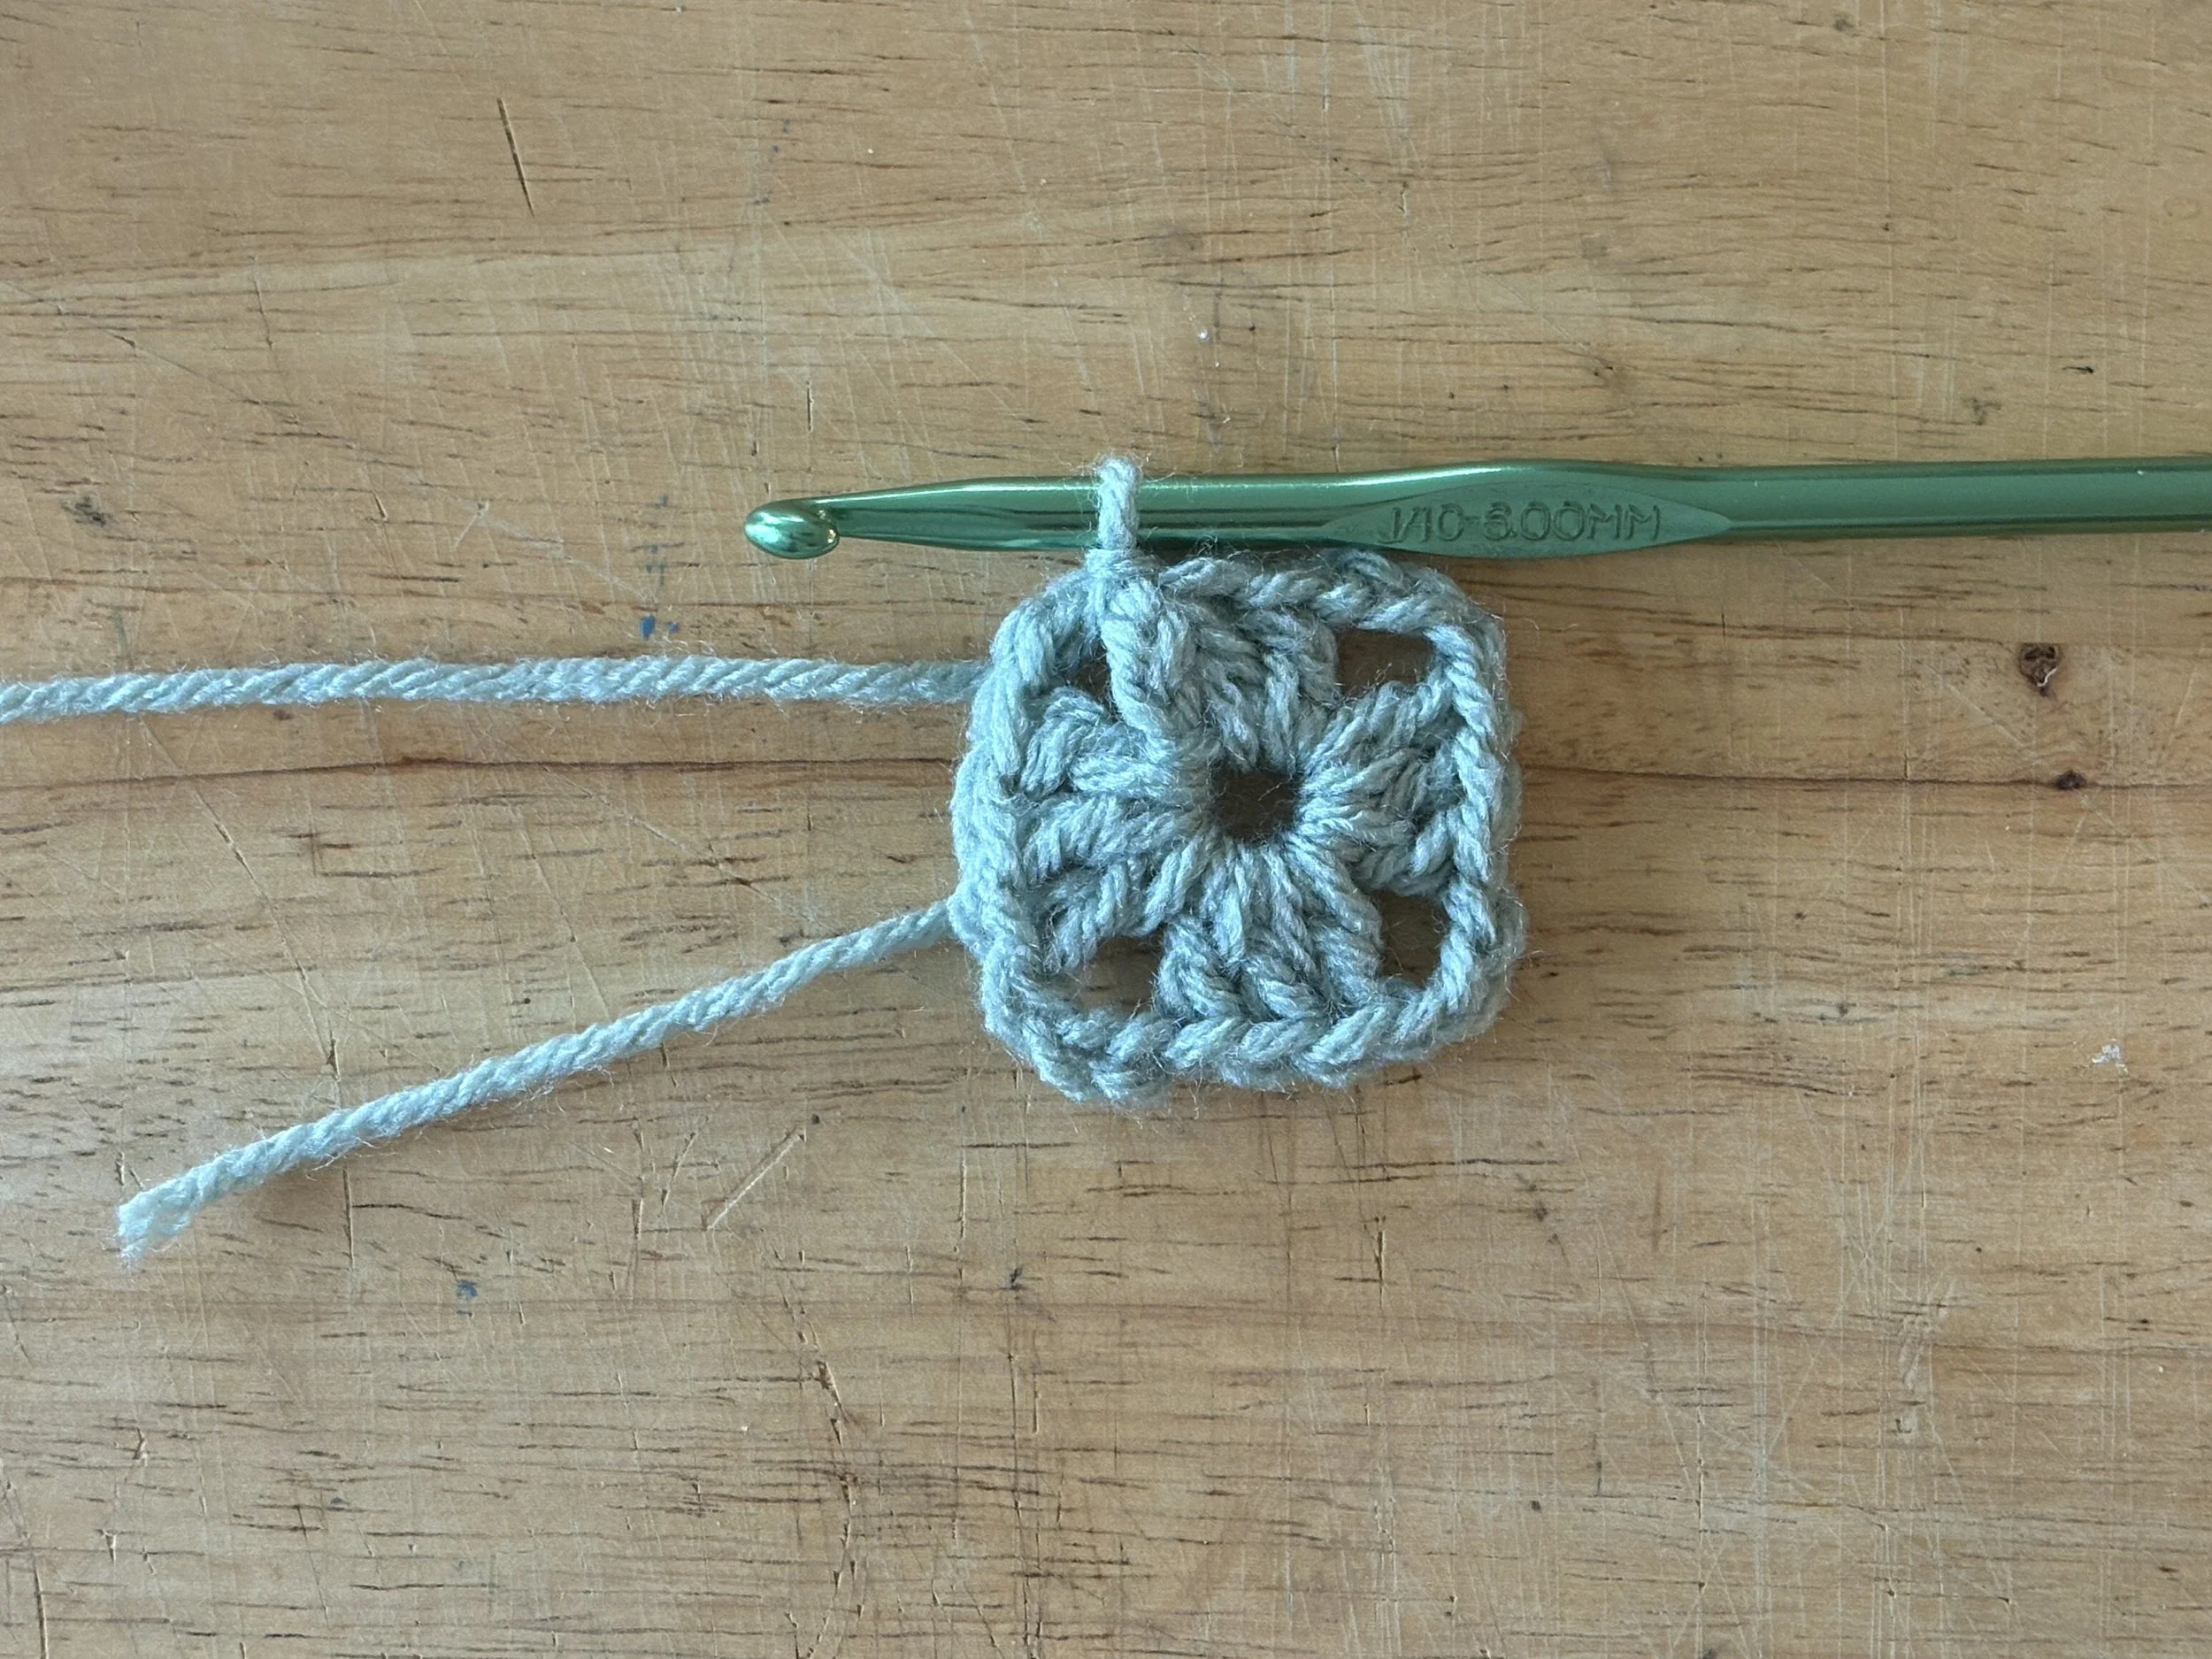
Round 2: Ch 1, sl st. (Each round will begin this way. This will position your yarn in the middle of the corner). Chain 4, DC 3 into the same corner. ***(DC 3, ch 2, DC 3)*** in the next corner. Repeat from *** to *** in the next 2 corners. DC 2 in the last corner. Sl st into the top of the ch 4.
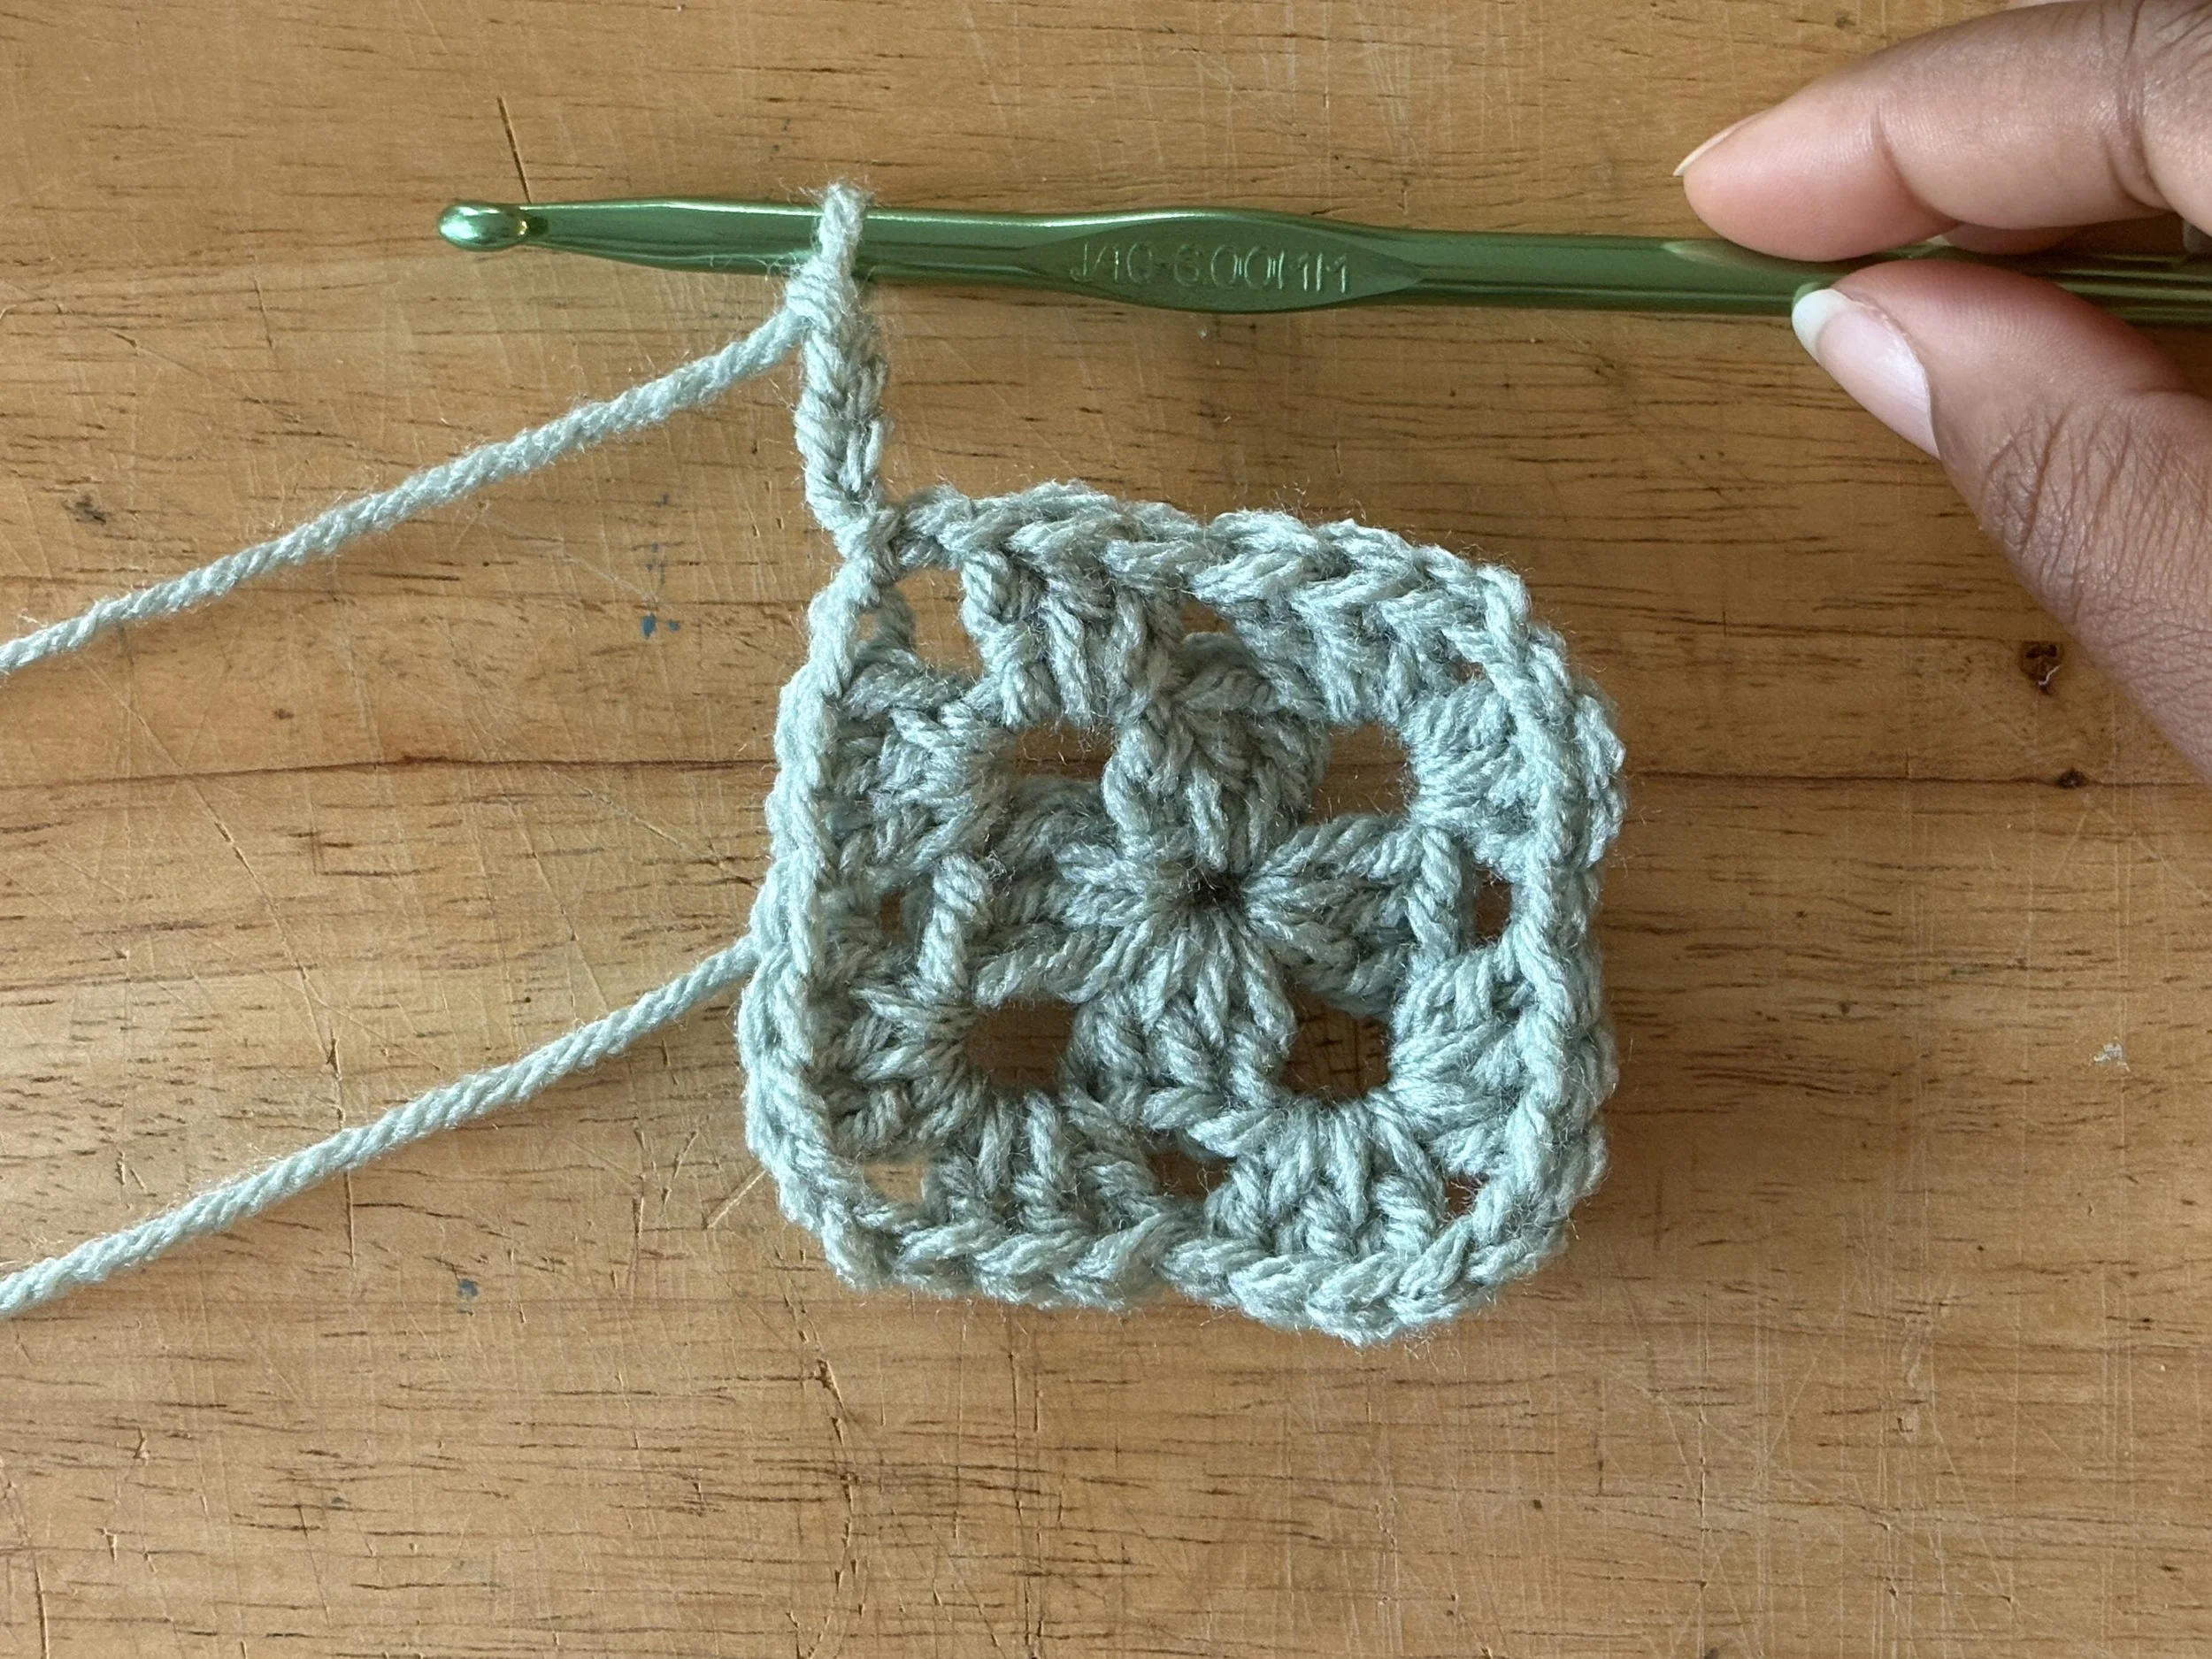
Round 3: Ch 1, sl st. Chain 4, DC 3 into the same corner. DC 3 in the side space. ***(DC 3, ch 2, DC 3) then DC 3 in the side space***. Repeat from *** to *** 2 times more. DC 2 in the last corner. Sl st into the top of the ch 4.
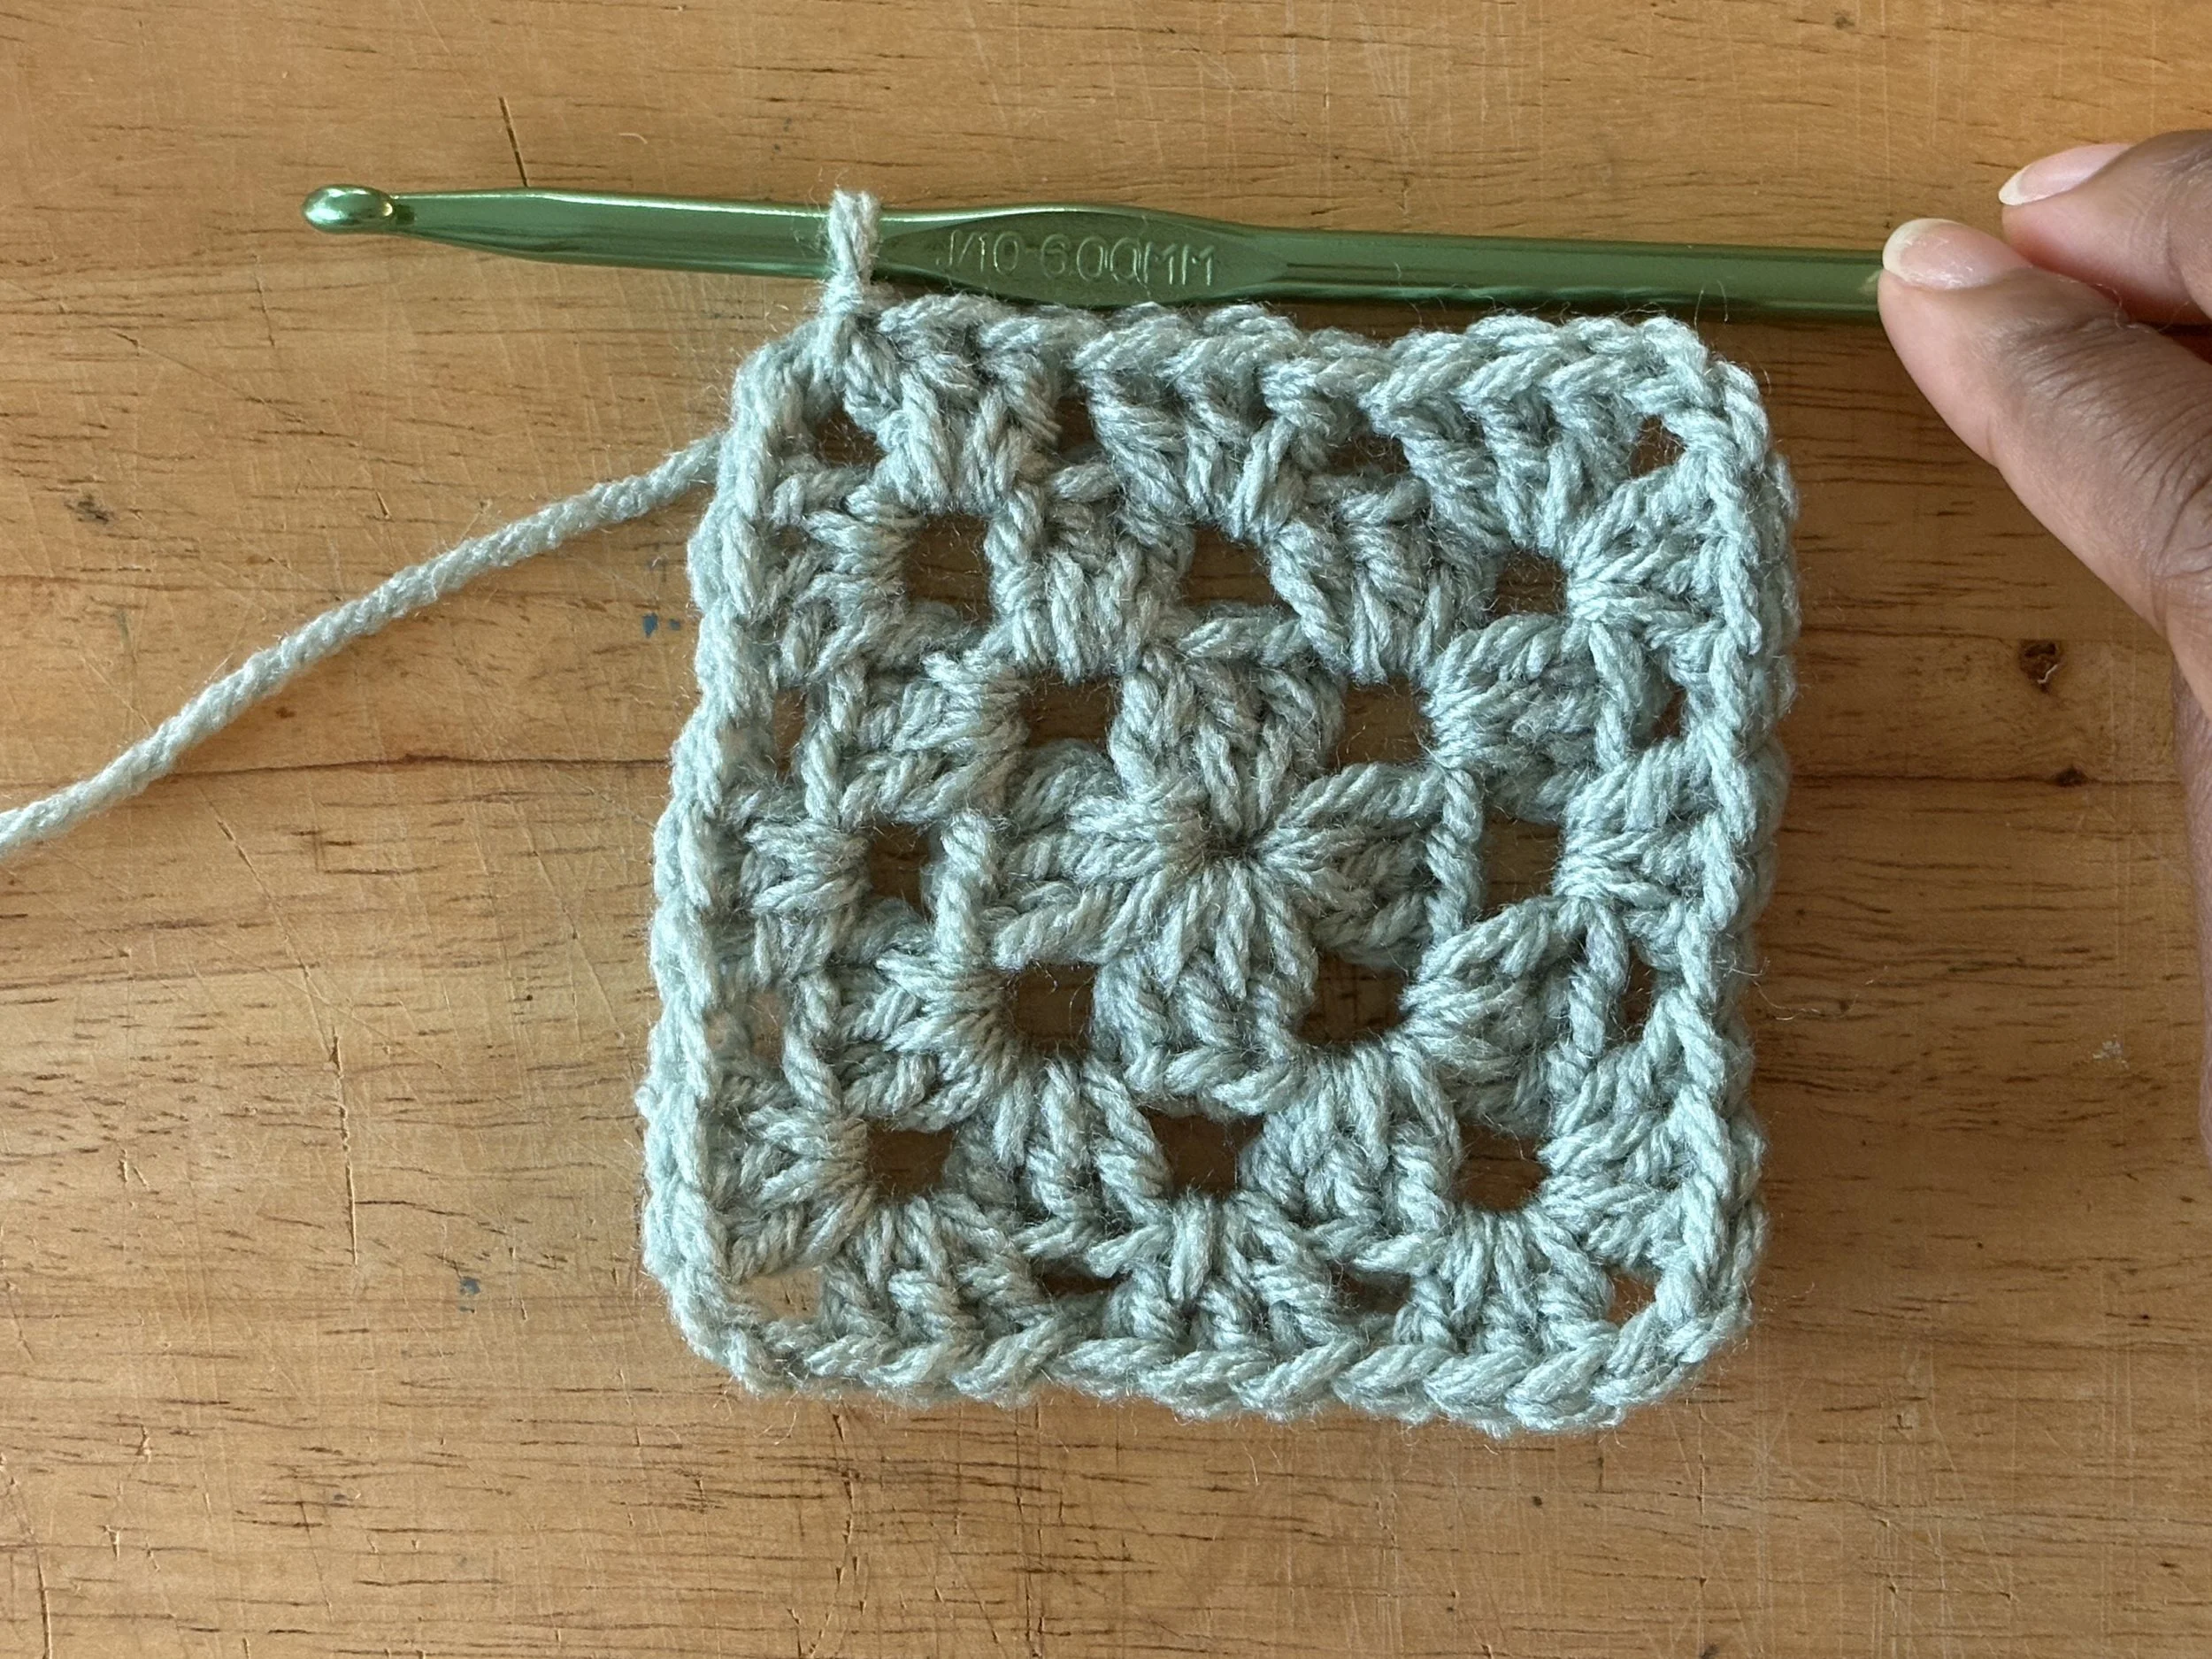
Round 4: Ch 1, sl st. Chain 4, DC 3 into the same corner. DC 3 in the side space(s). ***(DC 3, ch 2, DC 3) then DC 3 in the side space(s)***. Repeat from *** to *** 2 times more. DC 2 in the last corner. Sl st into the top of the ch 4.
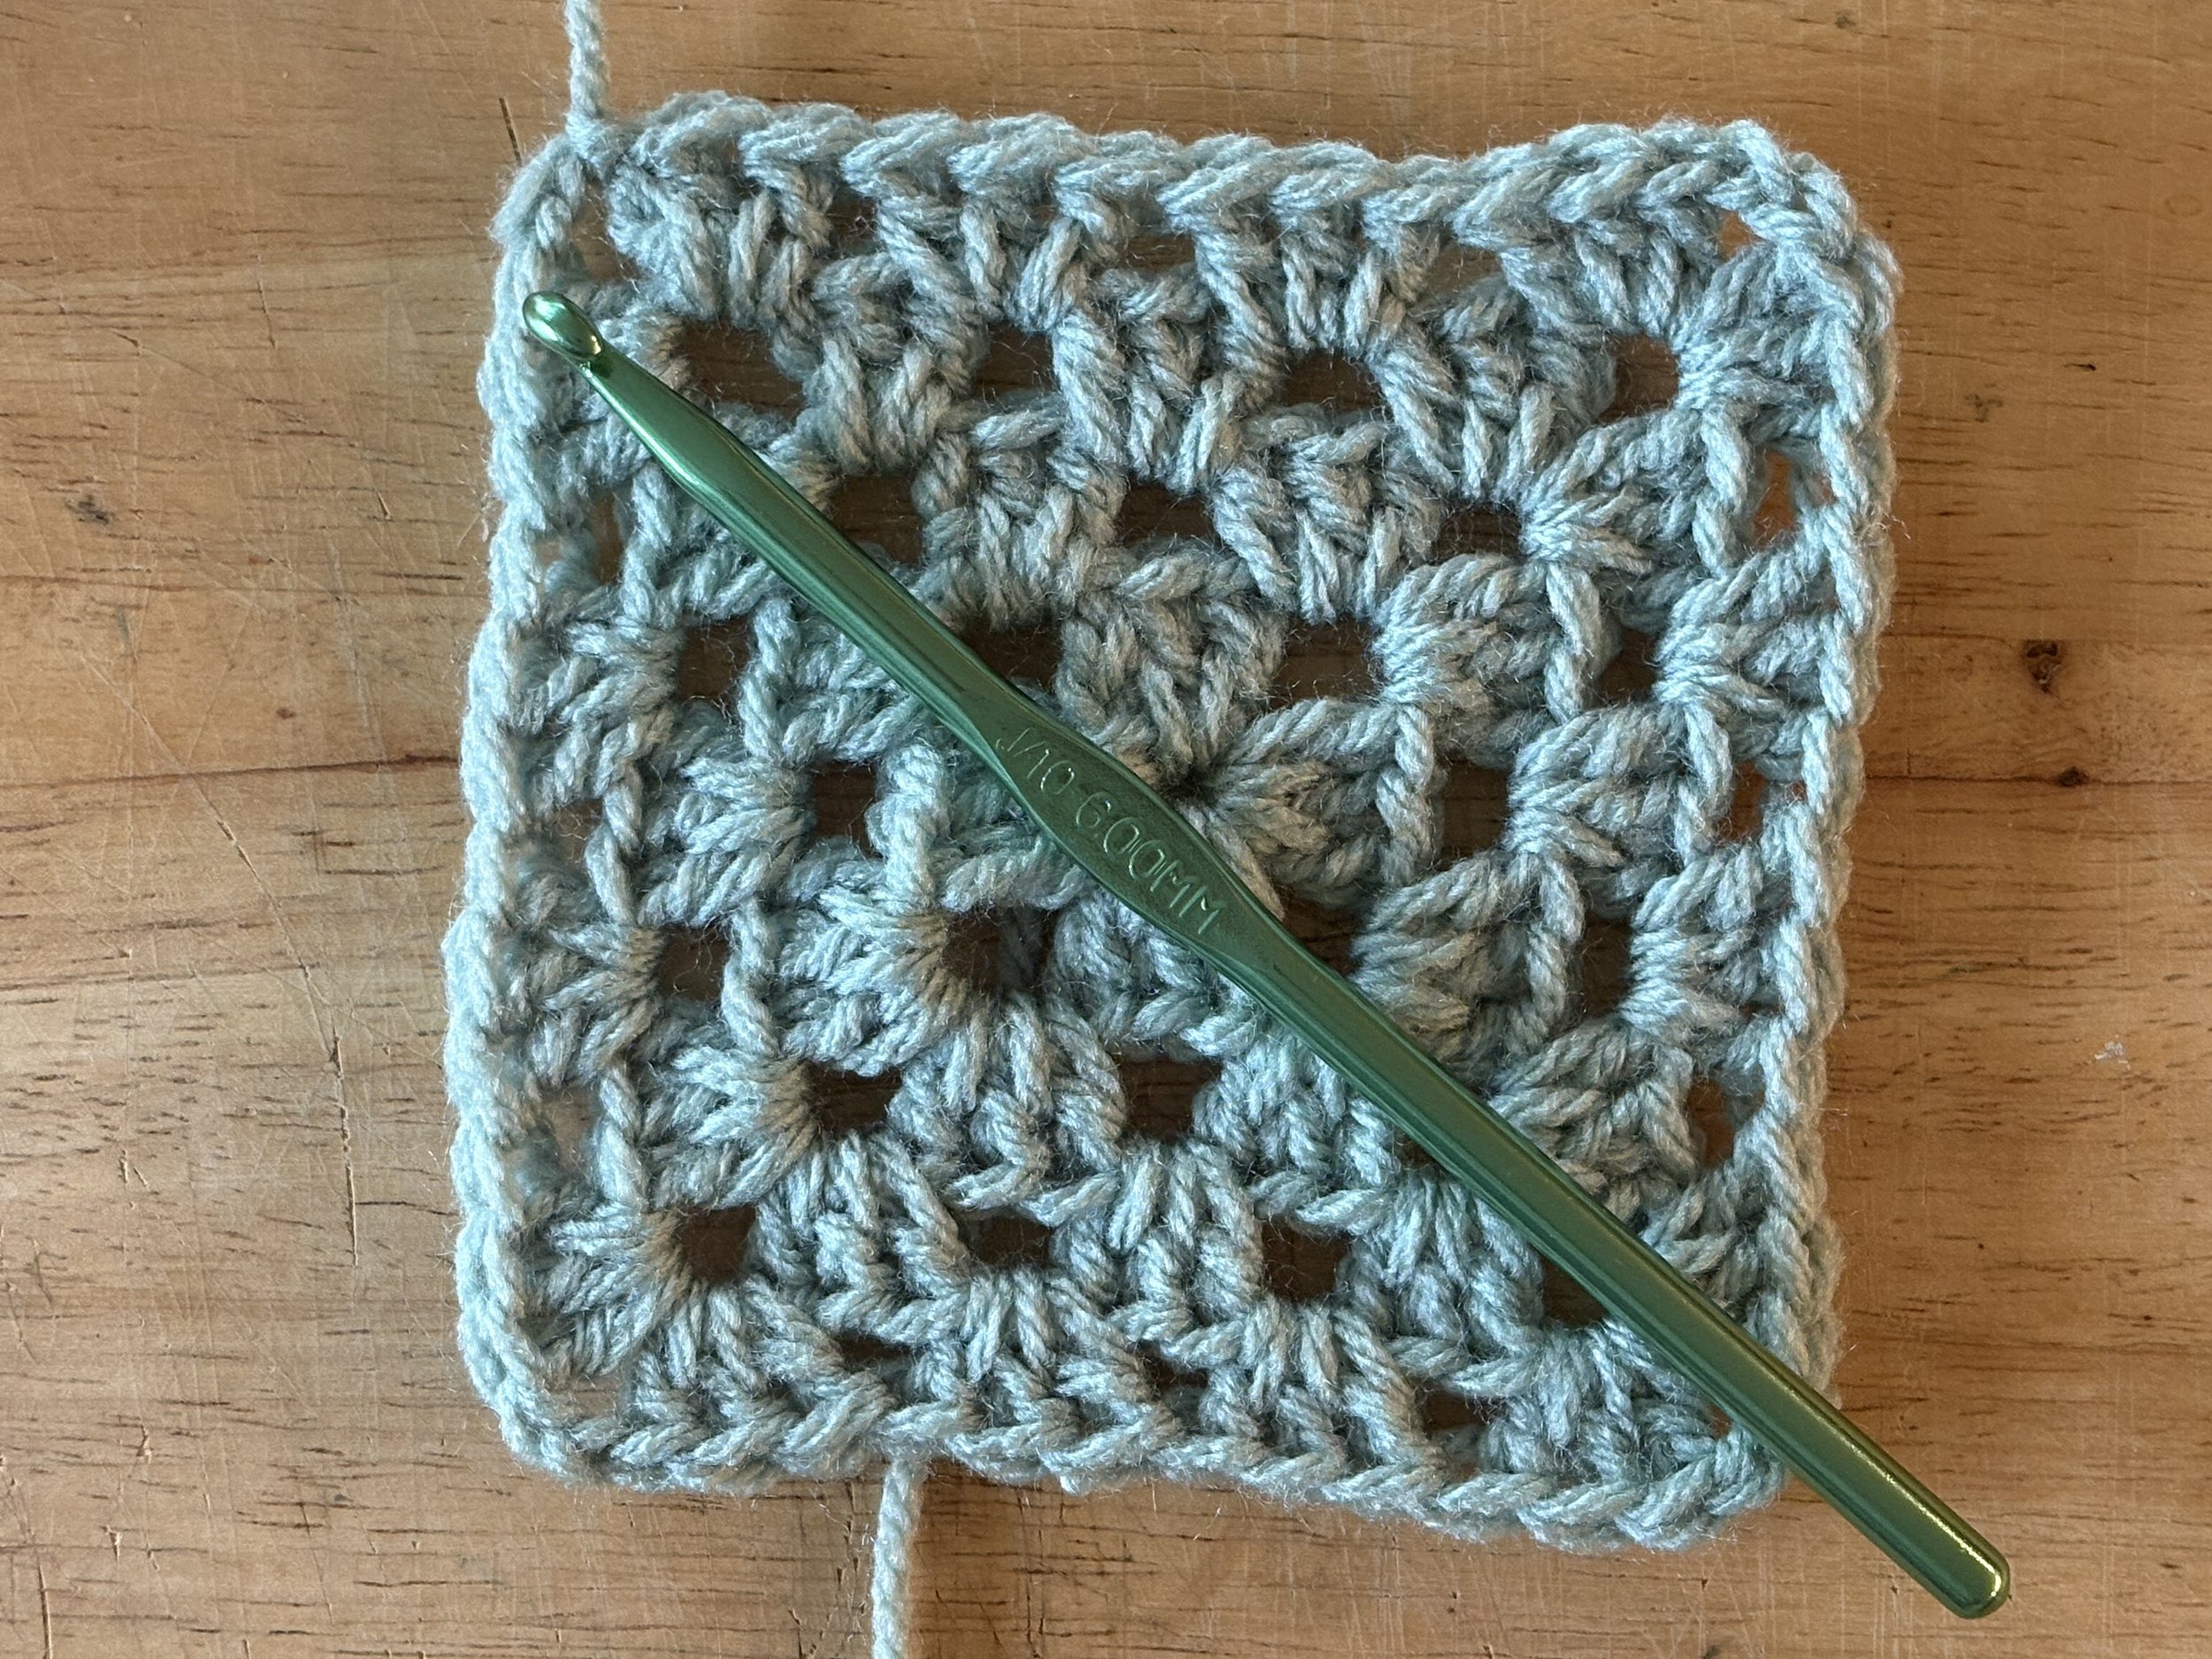
Round 5 and beyond: Repeat each round the same way as Round 4, just continue to make 3 DC in each space along the side of the granny square. Continue until you have 16 total rows on the granny square, or until the blanket is as long as you’d like it.
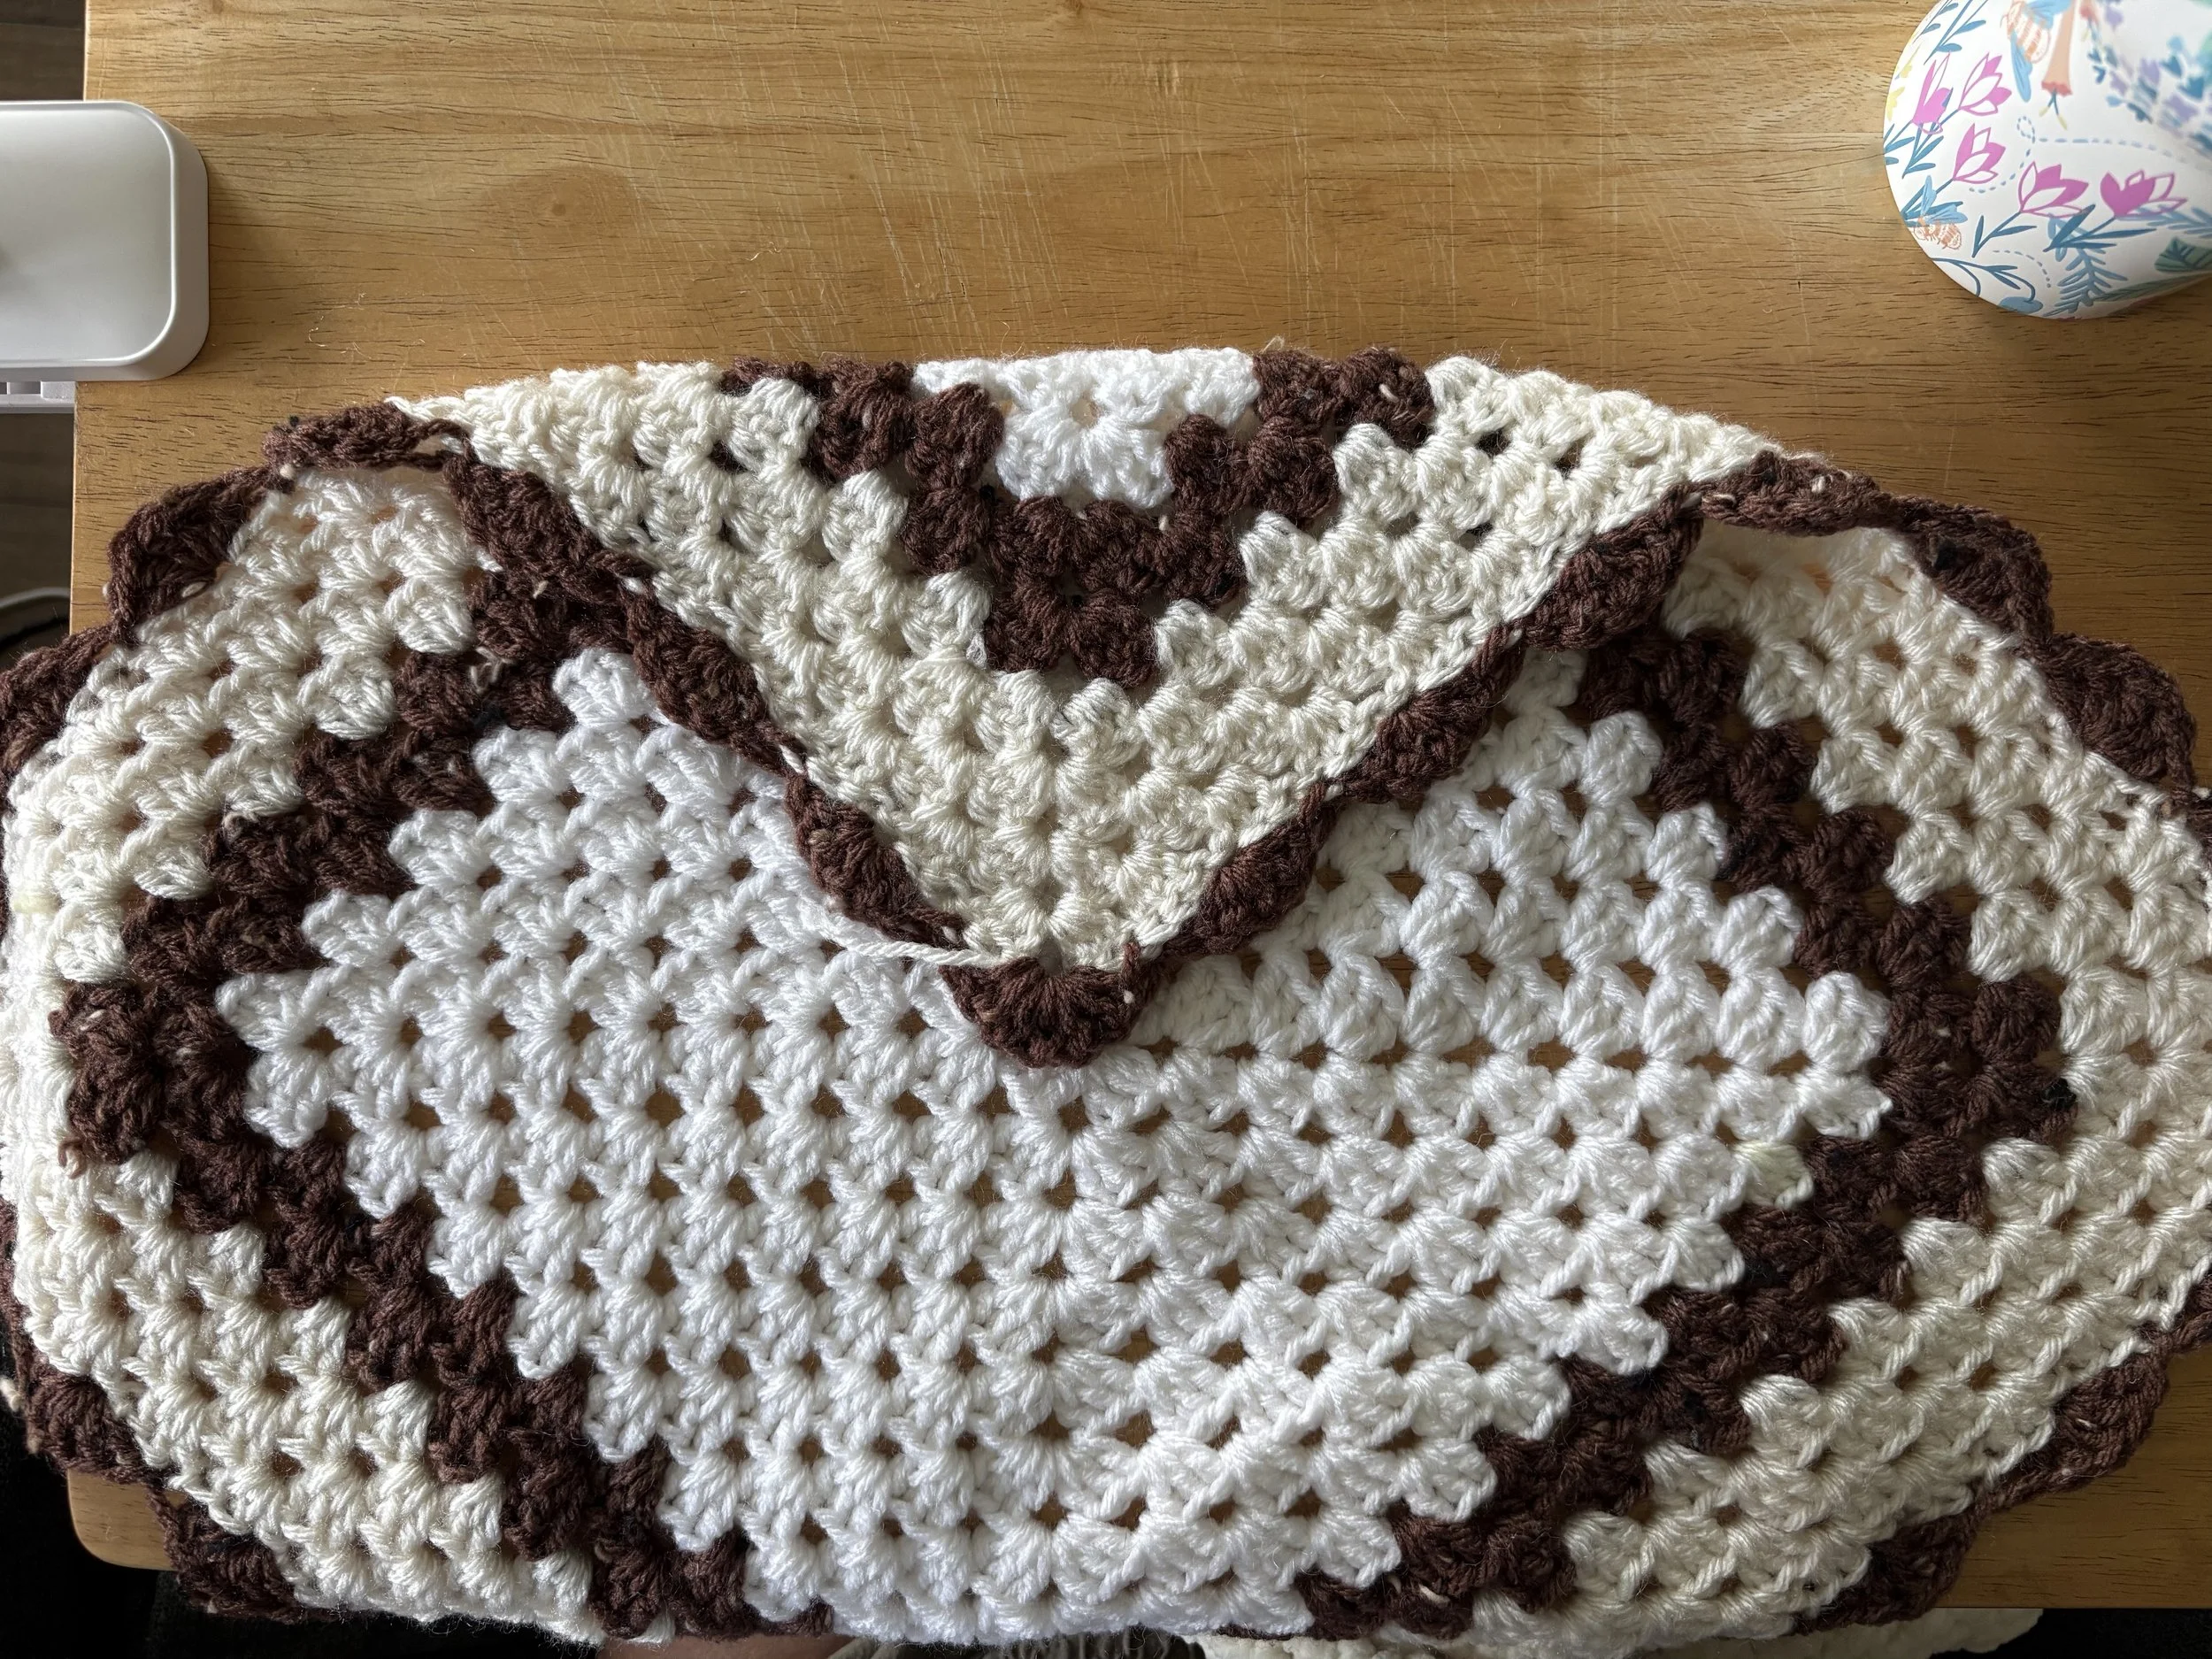
I made my lovey blankets with 17 rounds total. Feel free to experiment with Granny Square sizes, colors, and patterns!
Assembly
We will now attach the plushie head and arms to the lovey body.
Fold over one corner of the lovey until the corner touches the center of the blanket. We will attach the plushie along that side of the blanket.
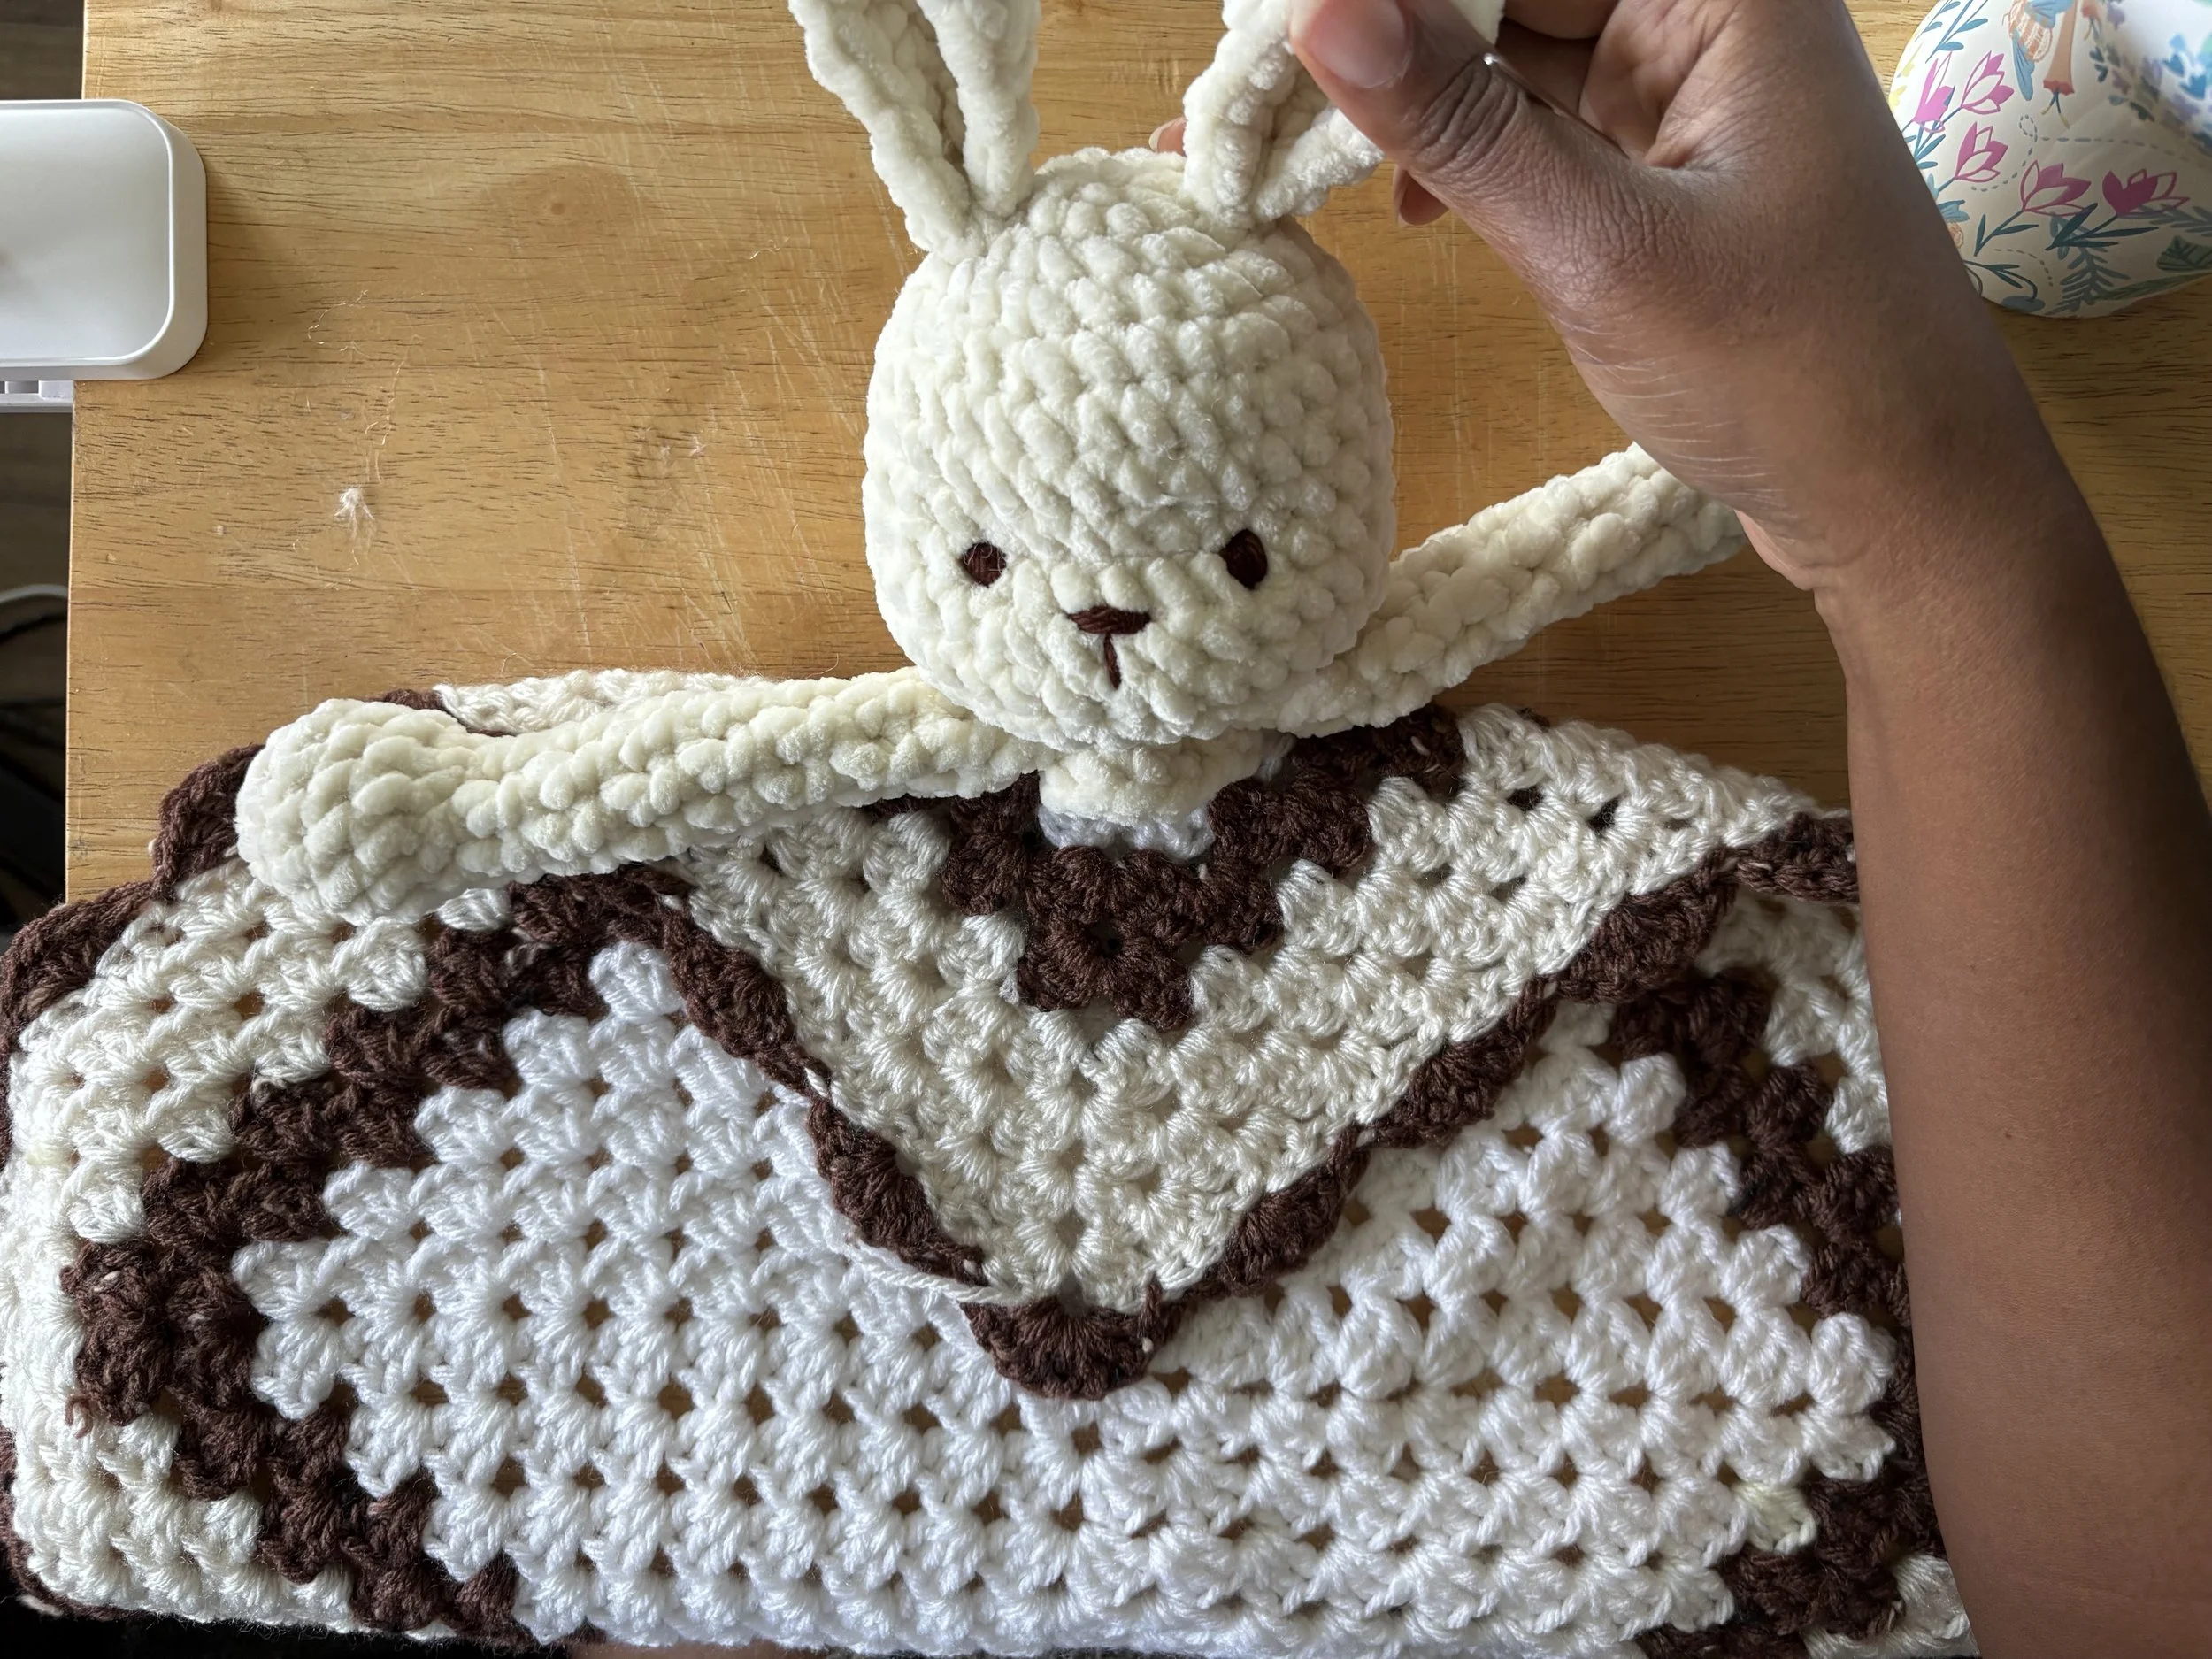
Image 13: Lovey is folded to the corner, attach plushie head along the folded side.
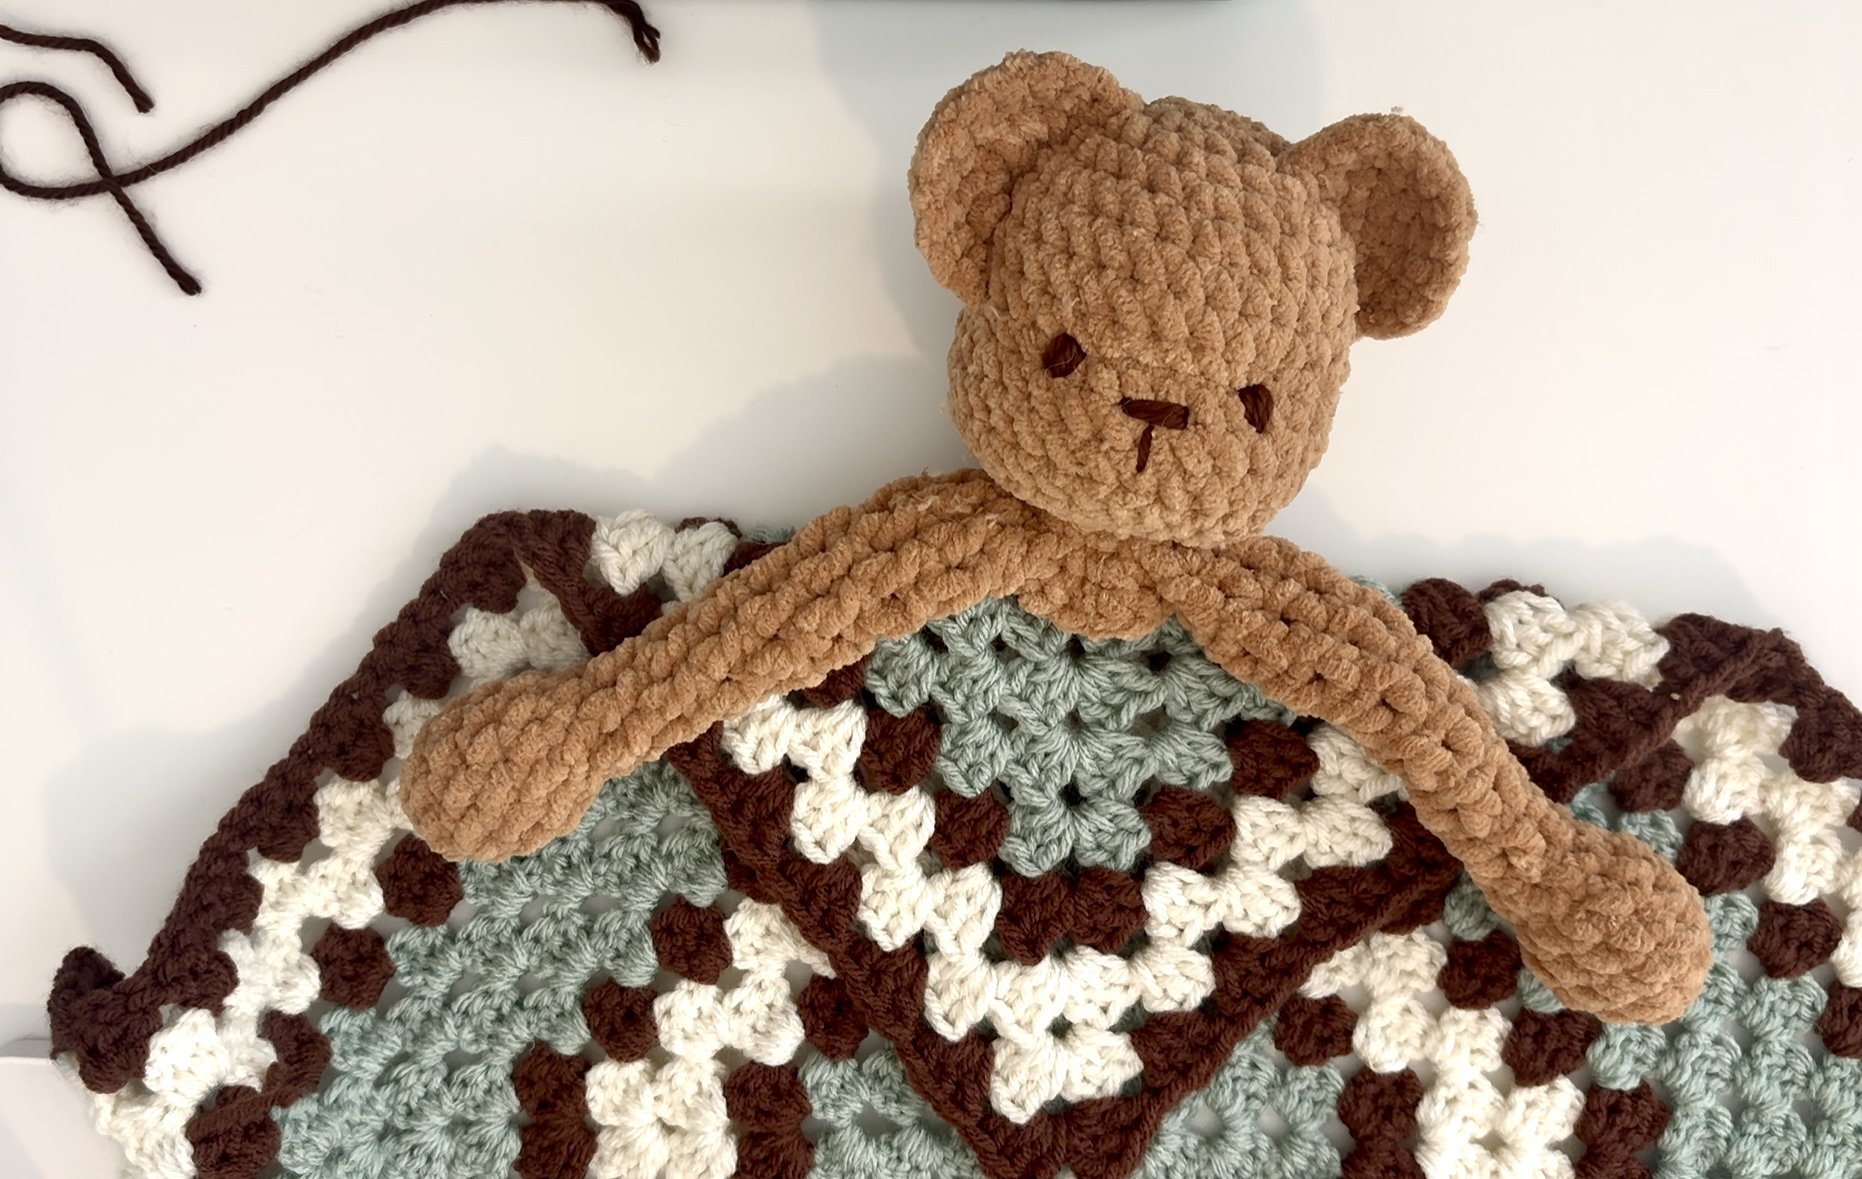
Image 14: Teddy bear version
Sew the plushie to the lovey blanket using a loop stitch. Make sure to sew all around the neck of the plushie [see image 15].
When you finish, tie off, cut the ends, and hide the ends in the head of the plushie.
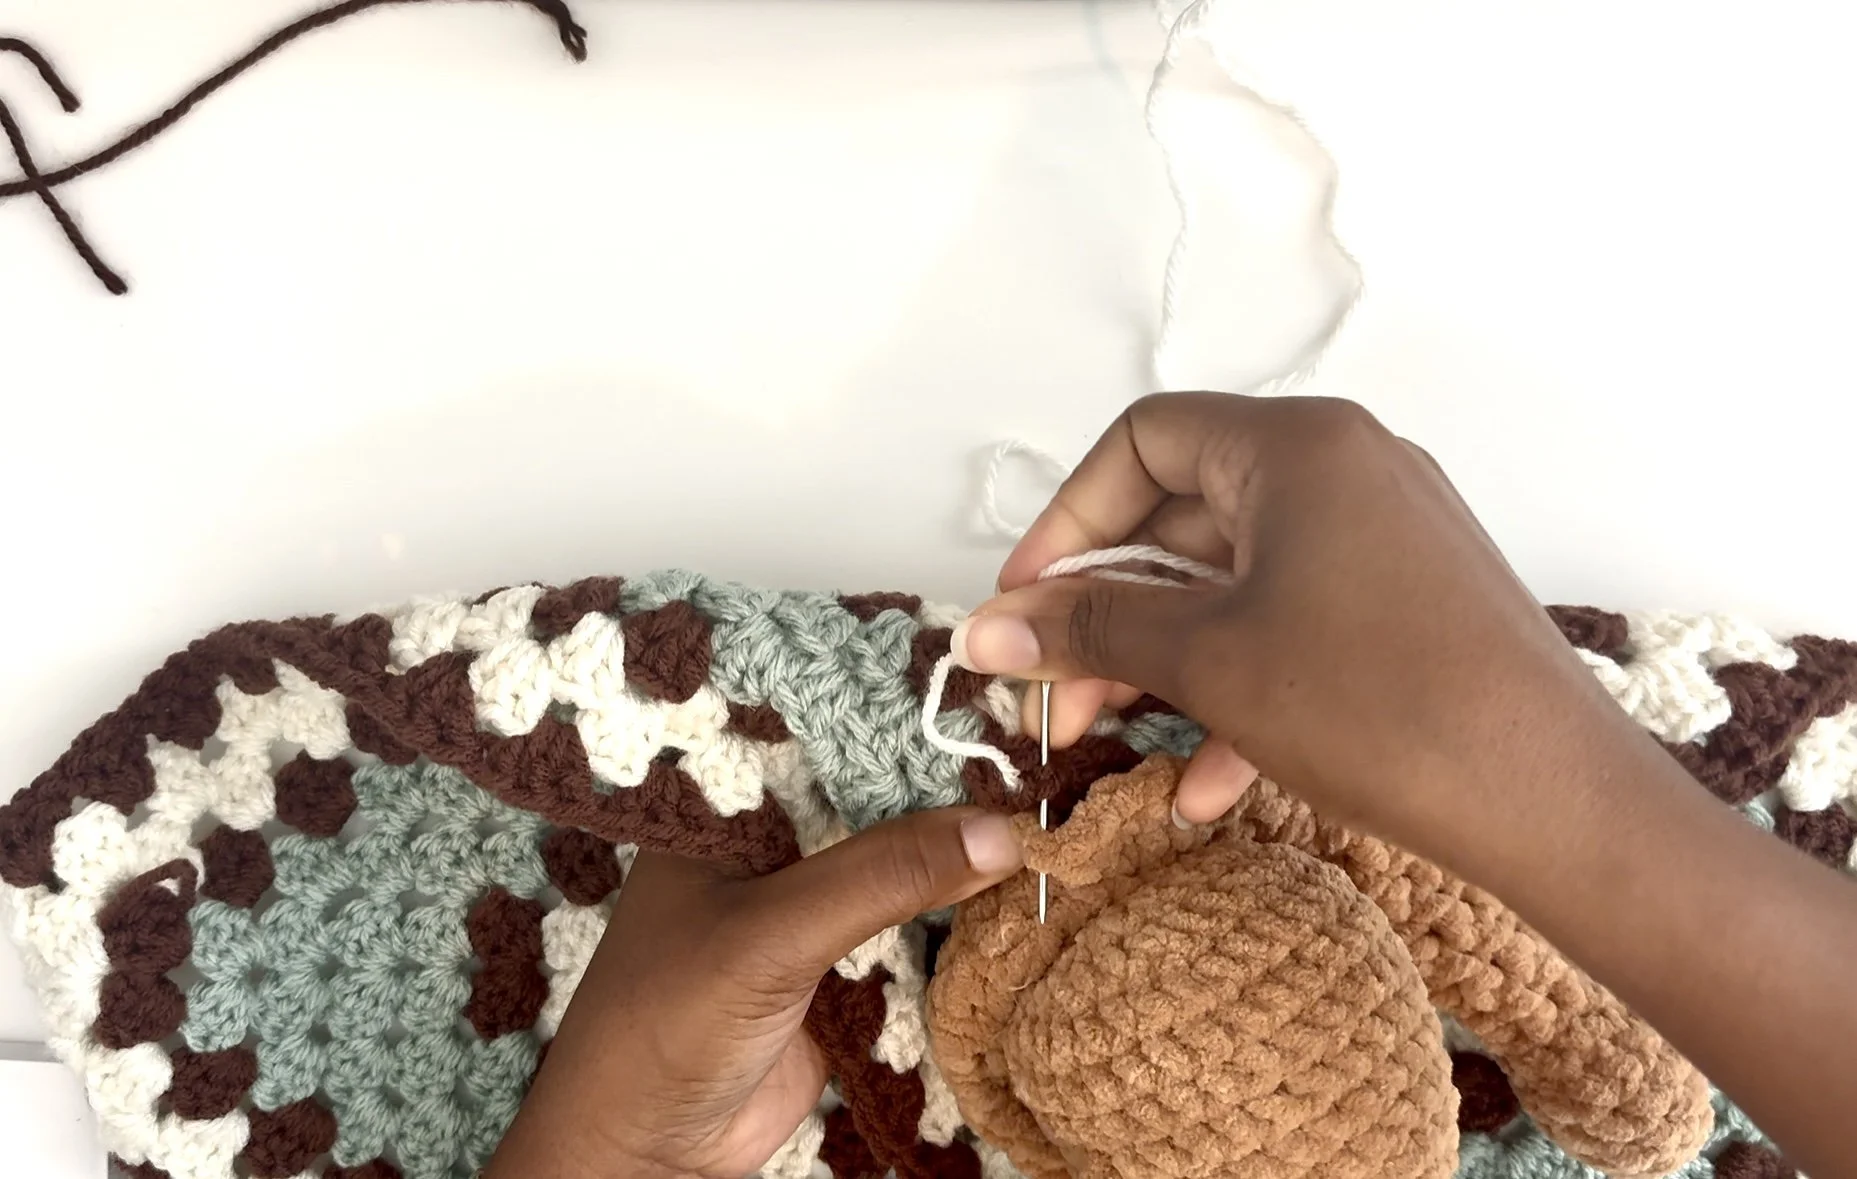
Image 15
Congratulations! You’ve completed your cozy Teddy Bear Lovey pattern. If you would like to follow along with the video version, click the link below!